Table of Contents
Advertisement
Quick Links
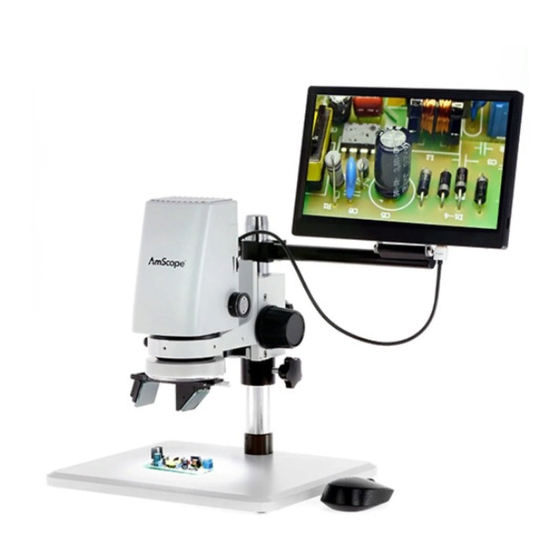
DM750-2MP Digital-Integrated Microscope
Introduction
This manual applies to the DM750-2MP digital-integrated microscope and accessories. The information in this manual is
provided to help you familiarize yourself with the assembly and use of the products. Please read thoroughly before using
the products, and keep this manual with the product for reference.
v0.9.20221026
Advertisement
Table of Contents

Subscribe to Our Youtube Channel
Related Manuals for AmScope DM750-2MP


Summary of Contents for AmScope DM750-2MP
- Page 1 DM750-2MP Digital-Integrated Microscope Introduction This manual applies to the DM750-2MP digital-integrated microscope and accessories. The information in this manual is provided to help you familiarize yourself with the assembly and use of the products. Please read thoroughly before using the products, and keep this manual with the product for reference.
- Page 2 Other indicators can be a loud buzzing sound or crackling. Contact AmScope to report such behavior. Do not use around flammable liquids or gases. Electric instruments can ignite flammable substances which could result in an explosion or fire.
-
Page 3: Table Of Contents
Contents Specifications ................................4 What’s In The Box ..............................6 Assembly ................................7 Attaching the Monitor ................................ 7 The Rear Panel ..............................8 USB Ports ................................... 8 Wireless Mouse ........................................8 Storage Devices ........................................8 HDMI Port ..................................8 Power Port ..................................8 The 3D Attachment............................... - Page 4 D M 7 5 0 - 2 M P U se r Gu ide Page 4...
-
Page 5: Specifications
D M 7 5 0 - 2 M P U se r Gu ide Microscope Specifications Model DM750-2MP Zoom Magnification 0.7X-5X Working Distance 100mm Camera Specifications Sensor IMX307 (color) Sensor Type CMOS Sensor Optical Format 1/2.8” Integrated Reduction 0.35X Active Pixels... -
Page 6: What's In The Box
D M 7 5 0 - 2 M P U se r Gu ide What’s In The Box The DM750-2MP standard outfit includes: • One microscope • One USB wireless mouse • One ring light adapter • One ring light •... -
Page 7: Assembly
Attaching the Monitor DM750-2MP-HDM11 models include a monitor which can be attached to the microscope’s stand. An arm is included which should be attached to the stand’s 1.25” pillar. Secure the arm in place by using the locking knob before attaching the monitor. -
Page 8: The Rear Panel
D M 7 5 0 - 2 M P U se r Gu ide The Rear Panel USB Ports The microscope has two USB ports on its rear panel. These can be used to attach USB devices such as the included mouse, a keyboard, and storage devices. -
Page 9: The 3D Attachment
D M 7 5 0 - 2 M P U se r Gu ide The 3D Attachment The optional 3D attachment is designed to mount to the objective lens’ housing. The 3D attachment’s mounting ring has female threads which will screw onto the objective housing’s male threads. Guide the 3D attachment’s mounting ring upward onto the objective housing, then rotate to the right using the knurled portion of the ring. -
Page 10: Operation
D M 7 5 0 - 2 M P U se r Gu ide Operation Focusing Each side of the microscope’s focusing block is equipped with a focusing knob. Rotating either knob will raise or lower the microscope’s head. Tension can be adjusted for the knobs by securing one in place, then rotating the other. Rotating clockwise will increase tension, and counter-clockwise will decrease tension. -
Page 11: Optical Magnification
D M 7 5 0 - 2 M P U se r Gu ide Optical Magnification This microscope uses a combination of a fixed-magnification 1X objective lens and zoom optics to provide its 0.7X-5X magnification range. This is the optical magnification range which is typically listed. An additional 0.4X magnification stage is used to compensate for the format of the digital image sensor. -
Page 12: Illumination
D M 7 5 0 - 2 M P U se r Gu ide Illumination This microscope is equipped with an LED ring light to provide illumination. The ring light can be removed to expose the objective lens housing by simultaneously pulling downward on the left and right sides. When reattaching, be sure to align the two electrical contact on the top of the ring light with the pins on the underside of the microscope head. -
Page 13: Software
D M 7 5 0 - 2 M P U se r Gu ide Software The DM750-2MP uses internal software to manage camera and display settings, as well as to perform image-capture and measuring functions. All of these functions are accessed from the on-screen console. - Page 14 D M 7 5 0 - 2 M P U se r Gu ide Panel Function Description Select the color of the on-screen guides. Display or hide on-screen guides. Options include Cross Line which creates a grid using a user-defined number of horizontal and vertical lines, and Cross Mark which displays a reticle with horizontal and vertical rulers.
-
Page 15: Measurement Tools
D M 7 5 0 - 2 M P U se r Gu ide Measurement Tools Panel Tool Description Arbitrary Line: draw a line with an arbitrary angle Horizontal Line: draw a horizontal line Vertical Line: draw a vertical line Rectangle: draw a rectangle Parallel Lines: draw a pair of lines, and the second will be parallel to the first... -
Page 16: Calibration
D M 7 5 0 - 2 M P U se r Gu ide Calibration The calibration section is used to create magnification profiles. A magnification profile defines the relationship between camera pixels and real units of measure such as millimeters. Once this relationship is defined, any shape drawn on the screen will provide accurate measurements by translating the number of pixels into the desired unit of measure.
Need help?
Do you have a question about the DM750-2MP and is the answer not in the manual?
Questions and answers