Table of Contents
Advertisement
Quick Links
Installation & Operating
Instructions
Covering Models:
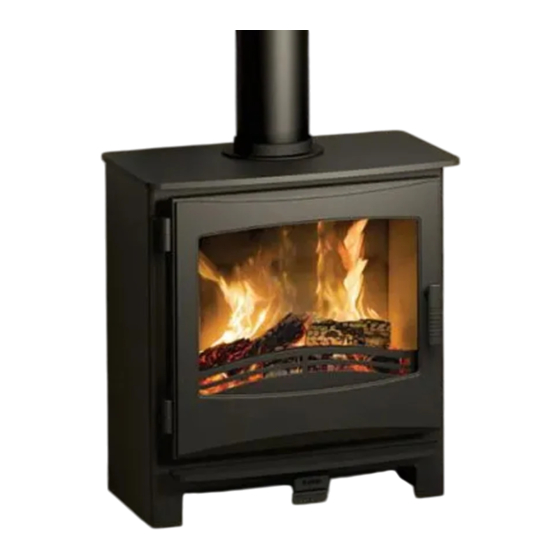
Ignite 5 Widescreen (EV-Q5-Widescreen CD1)
Desire 5 Widescreen (EV-Q5-Widescreen SD1)
Hereford 5 Widescreen (EV-Q5-Widescreen CD2)
Standard & Log Store Multifuel Stoves
Tested to EN 13240
These appliances must be installed and commissioned by a HETAS registered engineer
Desire, Ignite & Hereford 5 Widescreen Issue 2.0 June 2019
1
Advertisement
Table of Contents

Related Manuals for Broseley evolution Ignite 5 Widescreen


Summary of Contents for Broseley evolution Ignite 5 Widescreen
- Page 1 Installation & Operating Instructions Covering Models: Ignite 5 Widescreen (EV-Q5-Widescreen CD1) Desire 5 Widescreen (EV-Q5-Widescreen SD1) Hereford 5 Widescreen (EV-Q5-Widescreen CD2) Standard & Log Store Multifuel Stoves Tested to EN 13240 These appliances must be installed and commissioned by a HETAS registered engineer Desire, Ignite &...
-
Page 2: Table Of Contents
Contents Introduction Packing List Health & Safety Specifications Dimensions Hearth Requirements & Clearances Chimney Requirements Combustion Air Requirements Direct External Air Supply Requirements Assembly DEAS Kit Log Store Base Smoke Control Area Modification Internal Components Coal Hoppers Initial Testing Stove Operation Controls Layout Controls Explained Fuels... -
Page 3: Introduction
2007 + A1 2010 as an alternative means to achieve an equivalent level of performance to that obtained following the guidance given in Approved Document J. Please note that it is a requirement under the Broseley Fires warranty system that the installation of the stove is carried out by a Competent Person registered with a Government approved Competent Persons Scheme. -
Page 4: Health & Safety
Health & Safety Special care must be taken when installing the stove such that the requirements of the Health and Safety at Work Act are met. Installation This appliance MUST be installed and commissioned by a HETAS registered installer or competent engineer registered with a government recognised competent person scheme. -
Page 5: Specifications
Specifications In the UK these stoves have been approved by HETAS Ltd as intermittent heating appliances for burning coal suitable for a closed appliance and wood logs only. These products have been tested to meet the requirements of Ecodesign 2022 when burning wood. -
Page 6: Dimensions
Dimensions Desire and Ignite 5 Widescreen Desire and Ignite 5 Widescreen with Log Store Desire, Ignite & Hereford 5 Widescreen Issue 2.0 June 2019... - Page 7 Dimensions Hereford 5 Widescreen Desire, Ignite & Hereford 5 Widescreen Issue 2.0 June 2019...
-
Page 8: Hearth Requirements & Clearances
Hearth Requirements & Clearances The standard (without log store) appliances require a full constructional hearth with sub-hearth as laid out in building regulations approved document J. Log store versions are suitable for a minimum 12mm thick hearth. Your stove must be installed on a solid, level non-combustible hearth. The hearth protrusion in front of the stove to carpets or wooden floors must be at least 300mm. -
Page 9: Chimney Requirements
Chimney Requirements This appliance must not be fitted into a chimney serving another heating appliance. It is most important that there is no obstruction in the flue or chimney. Please ensure that any existing chimney is clear of obstruction and swept clean immediately before installation of the new stove. -
Page 10: Combustion Air Requirements
The DEAS will provide 100% of the operational combustion air. The appliance has been designed and tested for safety when using Broseley Fires supplied DEAS Kits. It is therefore essential that only the Broseley Fires DEAS Kits are used when an external air supply is required. -
Page 11: Direct External Air Supply Requirements
Air Box has been purchased and fitted to the appliance. The Air Box is included in the Broseley DEAS Kit. It is essential that only dedicated external air kits supplied by Broseley Fires are used, and which is installed in a way that meets all required provisions of the manufacturer’s instructions, local Building Regulations requirements and appropriate standards. - Page 12 Direct External Air Supply Requirements Age of property Refurbished Type of Ventilation Recommendation Firstly follow building regs recommendation on Air Permeability of the building. Special attention needs to Significantly reduced energy demand due to be made to any extractor in the same air tightness of the building.
- Page 13 Direct External Air Supply Requirements Risk Assessment To carry out a risk assessment it will be necessary to grade the risks associated with the property, including construction of property and ventilation. HETAS have designed a risk assessment template that should accompany the table above and be completed at all times.
-
Page 14: Deas Kit
Assembly – DEAS Kit Air Box In order to connect a Direct External Air Supply to the appliance you will first need to purchase the optional DEAS Kit. The DEAS Kit includes an Air Box which will need to be fitted to the base of the appliance as shown below. We recommend removing all loose components from inside the firebox first, the stove can then be laid on its back in order... - Page 15 Assembly – DEAS Kit Ducting and Wall Vent Once suitable risk assessments have been performed the DEAS can be fitted to the stove. Only Broseley Fires supplied kits should be used. Step 1. Using appropriate construction methods (for the building material of your property) mark and cut an 85mm diameter hole into the external wall.
- Page 16 Assembly – DEAS Kit Ducting and Wall Vent Step 3. Cut away any excess ducting. Feed the second Jubilee clip over the duct pipe (on the external facing end). Attach the back plate to the duct pipe and tighten to form a tight seal.
- Page 17 Assembly – DEAS Kit Ducting and Wall Vent Step 5. Finally screw the louvre ventilator to the back plate using the 4 x screws supplied. As mentioned previously it is important to ensure the air duct ventilator does not become blocked from snow or debris and to prevent water and vermin ingress.
-
Page 18: Log Store Base
Assembly – Log Store Desire & Ignite Only It is possible to add (or remove) a log store base to your appliance. The diagram below shows the locations of the fixings (4x bolts labelled 1) which hold the stove to the log store base. -
Page 19: Smoke Control Area Modification
Assembly – Smoke Control Area Modification In smoke control areas your appliance will require a small modification in the form of a mechanical stop on the secondary (wood) air supply (this ensures that the air intake cannot close beyond the required minimum position). Fitting the smoke control stop 1) Pull out the Secondary (Wood) slider from the front of the stove. -
Page 20: Internal Components
Assembly – Internal Components The diagram below shows the stove with all internals taken out. To take internals out of the stove follow the numbered sequence backwards from 7 down to 1. m 6 down to 1. To refit the internals follow the numbered sequence from 1 – 7. The rear firebrick should be fitted with the fibre paper. -
Page 21: Coal Hoppers
Assembly – Coal Hoppers When burning coal it is essential that the two coal hoppers are fitted into the appliance as shown below. The hoppers locate into the grate. Desire, Ignite & Hereford 5 Widescreen Issue 2.0 June 2019... -
Page 22: Initial Testing
Initial Testing Commissioning Testing Once a suitable flue draught has been established, and to ensure that during start-up operation and refuel that spillage does not occur, it is advised to carry out the following 3 step spillage test procedures and record the results using the On Site Verification of HETAS Spillage Test Procedure Form. - Page 23 Initial Testing 5. If applicable, correct any highlighted issues and re-test using steps 1-4 above. If smoke continues to spill after opening a window, this indicates a more serious problem (i.e. flue blockage) which much be addressed and then this commissioning process repeated.
- Page 24 Broseley Fires do not guarantee the appliance will pass its spillage test in such cases. Desire, Ignite & Hereford 5 Widescreen Issue 2.0 June 2019...
-
Page 25: Controls Layout
Controls Layout The stove is fitted with two air controls which need to be correctly operated in order to light and maintain a fire. Both controls are situated below the ash lip of the stove (as indicated on the diagram below) and are in the form of push/pull sliders. Multi Function Tool You can use the provided tool to operate both controls (using the flat hook end). -
Page 26: Controls Explained
Controls Explained Primary Air Intake The primary air intake is the bottom slider situated below the ash lip at the front of the stove. Having the slider pushed fully inwards would indicate the intake is closed. When the slider is fully pulled outwards the intake is completely open. This particular air intake is adjustable throughout the area of travel in to out to control the total amount of air required for suitable combustion. -
Page 27: Fuels
Fuels This appliance has obtained approval from HETAS Ltd., for burning – * HETAS approved coal suitable for a closed appliance. * Split Wood logs (not exceeding 350mm in length and 100mm in diameter) not exceeding 20% moisture content. Approval does not cover the use of other fuels either alone or mixed with the suitable fuels listed above. -
Page 28: Kindling Stage
Lighting the Stove Curing On initial firing you will notice a very pungent odour, this is caused through the curing of the paint, we recommend starting with short burning sessions (with smaller quantities of fuel) and build up gradually to allow the components of the stove to settle. Opening doors and windows will allow the paint curing odour to dissipate and to allow ventilation into the room. -
Page 29: Burning Wood & Burning Coal
Burning Wood Once you have kindled your stove (see previous page) and your chimney/flue is sufficiently heated, you are ready to start adding you logs. Stage 4 Place 1-3 small logs onto the bed of hot embers using the gloves provided, close the door and reduce the Primary Air Control to approximately half way. -
Page 30: Smoke Control Areas
Smoke Control Areas The Clean Air Act 1993 and Smoke Control Areas Under the Clean Air Act local authorities may declare the whole or part of the district of the authority to be a smoke control area. It is an offence to emit smoke from a chimney of a building, from a furnace or from any fixed boiler if located in a designated smoke control area. -
Page 31: Warning Notes
Warning Notes Over-Firing It is extremely important that you do NOT leave both of the air controls in the fully open position for extended periods or run the appliance with the door open. Leaving the air controls fully open (or running with the doors open) will lead to “over-firing”. Over-firing is caused when too much heat is generated within the fire chamber, this will lead to warping, buckling and general damage to the stove and its internal components. -
Page 32: Maintenance
Maintenance Door adjustment (Desire & Ignite Only) In the case of the door rope not providing an adequate seal to the room, products of combustion may enter the room (see warning notes), to ensure an adequate seal the door may need to be periodically adjusted as the rope seal wears with use. Hinge Adjustment (seal on Left hand side is not compressed): ... -
Page 33: Ash Removal
Maintenance Ash Removal The ash pans can be removed by using the ash tool to hook it forward so that you can grasp the pan using the gloves provided. We would recommend emptying the ash into a metal bucket for transportation. You should only empty the ash when the appliance and ashes are completely cool and can be disposed of in your normal household refuse. -
Page 34: Trouble-Shooting
Trouble-shooting Smoke comes out of the stove when the loading door is opened. The installed flue system has a diameter below the minimum 125mm requirement. The overall vertical height of the flue system is below the required 5 metres. ... -
Page 35: Commissioning Form
Commissioning Form Commissioning Statement and Check-list Stove Purchased From:_________________________________________________________________ Address:_______________________________________________________________ Telephone Inc area code:_________________________________________________ Installation Date:_____/_____/__________ Stove Name:________________________ year service is due 1 year from this date Product Serial Number:________________ Invoice Number:_____________________ Stove installed by:_______________________________________________________ Address:_______________________________________________________________ Telephone Inc area code:_________________________________________________ HETAS Registration Number:______________________________________________ Check-list (please indicate Yes or No by circling or ticking appropriately) Is the flue system the correct length and diameter for stove:... -
Page 36: Spare Parts
Spare Parts 1: Stove Body. 2: LHS and RHS fire bricks, 3: Rear fire brick, 4: Baffle, 5: Grate, 6: Log retainer, 7: Ash pan, 8: Handle Latch, 9: Optional Air box, 10: Coal Slider 11: Wood Slider, 12: Door Handle, 13: Door, 14: Glass, 15: Glass Clip Top, 16: Glass Clip Bottom 17: Door Hinge The following parts are not pictured above but are available upon request: Gloves... -
Page 37: Annual Service Record
Annual Service Record 1ST YEAR SERVICE completion date: SERVICE ENGINEER: REG. No. COMPANY NAME: . COMPANY ADDRESS: . POSTCODE: CONTACT NUMBER 2ND YEAR SERVICE completion date: SERVICE ENGINEER: REG. No. COMPANY NAME: . COMPANY ADDRESS: . POSTCODE: CONTACT NUMBER 3RD YEAR SERVICE completion date: SERVICE ENGINEER: REG. -
Page 38: Warranty
Should you wish to claim under the warranty, please contact the supplier / dealer from whom you purchased the appliance. Do not claim directly to Broseley Fires, as they are unable to process any direct claim from an end user. -
Page 39: Product Fiche
Energy Labelling Directive - (EU) 2015/1187 for Solid Fuel Boilers and Packages of Solid Fuel Boilers, Supplementary Heaters. Temperature Controls and Solar Devices. Manufacturer Name: Broseley Fires Ltd Ignite 5 Widescreen & Log Store Desire 5 Widescreen & Log Store Hereford 5 Widescreen... -
Page 40: Energy Labels
Energy Labels Desire, Ignite & Hereford 5 Widescreen Issue 2.0 June 2019...
Need help?
Do you have a question about the evolution Ignite 5 Widescreen and is the answer not in the manual?
Questions and answers