Table of Contents
Advertisement
Quick Links
Homeowner's Manual
G3 739
with
Canadian Patent 2,717,779 Issued October 24 2017
US Patent 10,060,624 Issued August 28 2018
US Patent 10,935,246 Issued March 2 2021
WARNING:
FIRE OR EXPLOSION HAZARD
Failure to follow safety warnings
exactly could result in serious
injury, death, or property damage.
Do not store or use gasoline or other
fl ammable vapors and liquids in the
vicinity of this or any other appliance.
WHAT TO DO IF YOU SMELL GAS
Do not try to light any appliance.
▪
DANGER
4008731-01
▪
▪
▪
▪
Installation and service must be
performed by a qualifi ed installer, service
agency or the gas supplier.
Hot glass
will cause burns.
Do not touch glass
until cooled.
Never allow children
to touch glass.
Direct Vent
Insert Gas Fireplaces
natural gas 739MN / 739VN
propane gas 739MP / 739VP
Do not touch any electrical switch; do
not use any phone in your building.
Leave the building immediately.
Immediately call your gas supplier from
a neighbor's phone. Follow the gas
supplier's instructions.
If you cannot reach your gas supplier,
call the fi re department.
A barrier designed to reduce
the risk of burns from the hot
viewing glass is provided with this
appliance and must be installed for
the protection of children and
other at-risk individuals.
Advertisement
Table of Contents

Related Manuals for Valor G3 739


Summary of Contents for Valor G3 739
- Page 1 Homeowner’s Manual G3 739 Direct Vent Insert Gas Fireplaces natural gas 739MN / 739VN propane gas 739MP / 739VP with Canadian Patent 2,717,779 Issued October 24 2017 US Patent 10,060,624 Issued August 28 2018 US Patent 10,935,246 Issued March 2 2021 Do not touch any electrical switch;...
- Page 2 Ltd. reserves the right to change or modify any information or specifi cations without notice. Miles Industries Ltd. grants no warranty, implied or stated, for the installation or maintenance of your heater, Valor Fireplaces and assumes no responsibility for any consequential 190–2255 Dollarton Highway damage(s).
-
Page 3: Table Of Contents
fi replace, do not try to repair the unit yourself. Contents Your Valor Fireplace Safety and your fi replace .......... 4 Here are some important details about your Valor Child safety and your fi replace ......... 6 fi replace, should you need to contact your dealer. Model: _________________________________________ Getting started ............ -
Page 4: Safety And Your Fireplace
Read and understand all instructions carefully before operating your fi replace. Failure to follow these instructions may result in possible fi re hazard and will void the warranty. Replacement manuals are available by contacting Valor Customer Service at 1-800-468-2567, or by visiting valorfi... - Page 5 Safety and your fireplace Glass window Intended use • This appliance is designed and approved as a supple- WARNING mental heater and provides the potential for most energy conservation when used while attended. The Do not operate this appliance with the use of an alternate primary heat source is advisable.
-
Page 6: Child Safety And Your Fireplace
Read and carefully follow all safety warnings and operating instructions contained in this manual, and follow these important child safety precautions and recommendations: • Parts of your Valor Fireplace become extremely A physical barrier is recommended if there are hot while in operation. The glass window tempera- at-risk individuals in the house. -
Page 7: Getting Started
fl ames will be at their normal height. Valor safety gas shut-off For your safety, Valor fi replaces are fi tted with a fl ame supervision device which will shut-off the gas supply if, for any reason, the pilot fl ame goes out. -
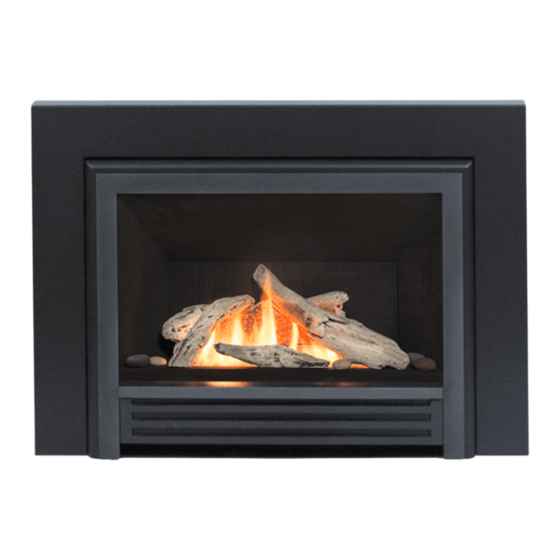
Page 8: Parts Of Your Fireplace
Parts of your fireplace Here are the major components of your installed fireplace, with the protective barrier installed. Your individual fireplace may appear differently depending on your model and installed options. Barrier Screen Window Front/Trim Liners Fuel Bed Logs, embers, pebbles Fret or Access Panel Bolts—Top of Window Window Frame... -
Page 9: Operating Your Fireplace
fi replace - see page 7 to learn how to access it. Control such as temperature or program Also, a copy of this card is reproduced in Appendix A settings, see Appendix A-Remote Control of the Installation Manual. Operation on page 22 of this manual or visit valorfi replaces.com/remotes... -
Page 10: Preventing Inadvertent Ignition
fi replace will not turn on automatic shut-off mechanism which is activated unexpectedly. in certain conditions. See Remote Control Operation at Appendix A or valorfi replaces.com/remotes for a description of this feature. WARNING Risk of severe burns! Surface of the fi... -
Page 11: Replacing Batteries
Replacing batteries To replace the batteries in the battery holder: WARNING 1. Unhook the barrier screen. Do not attempt to access the batteries 2. Unhook the fret or open bottom access panel. The while the fi replace is hot! Let the battery holder is at right or left of the gas valve. -
Page 12: Annual Service And Maintenance
Annual service and maintenance We recommend having your fi replace serviced before initial use, and at least once per year by a qualifi ed service technician. Contact your dealer quoting the model serial number, if possible. It will be helpful if the fi replace’s serial number can also be quoted. -
Page 13: Cleaning Your Fireplace
Cleaning your fireplace WARNING Risk of severe burns! Surfaces of the fi replace are very hot during operation. Ensure fi replace has cooled off before touching it. Remove the window for cleaning 1. Unhook the trim with barrier screen. 2. Locate the four spring-loaded bolts at the top and bottom of the window. - Page 14 Follow all instructions on the bottle/container. Log position is important in your Valor fi replace because it can optimize the beauty of the fl ame and • Our dealers have experienced good results from the the combustion effi...
- Page 15 Damage caused by incorrect window reinstall it by sliding it between the glass and the installation is not covered by the Valor frame as indicated below. Warranty. Hot Glass Plate WARNING...
-
Page 16: Checking Pilot And Burner Flames
Checking pilot and burner flames Typical fl ame appearance—739M The pilot light and burner fl ames should be checked periodically. Check after the fi re has been on for at least 30 minutes. The pilot fl ame must cover the tip of the thermocouple probe. - Page 17 Checking pilot and burner flames Typical fl ame appearance—739V Thermocouple probe must be in Pilot fl ame fl ame Pilot light 739V Pilot 739VBLK Birch Logs Note The height and color of your flames can vary Pilot light depending on fuel type, fuel quality and mixture, altitude, and aeration adjustment at or after installation.
-
Page 18: Frequently Asked Questions
If the fi replace still won't turn on after that, call your dealer for further information. Your fi replace may require service by a qualifi ed service technician. Visit valorfi replaces.com/contact for a list of dealers near you. I've just started my fi replace When operating your fi... - Page 19 Where can I purchase parts Any of our Valor dealers are able to order parts or provide fi eld service. for my fi replace? Please contact your dealer - see page 3 - or visit valorfi...
-
Page 20: Valor ® Warranty
Installation and maintenance must be performed by 5. No Other Warranty an authorized and trained dealer in accordance with All obligations to repair this unit are de ned in this warranty. -
Page 21: Valor ® Outdoor Installation Warranty
The Company does not allow anyone to extend, b) Installation and maintenance must be performed alter or modify this warranty and assumes no... -
Page 22: Appendix A-Remote Control Operation
Appendix A-Remote Control Operation Radio Frequency Turn Fireplace ON 315 MHz for USA and Canada. Press buttons until you hear a short beep; release buttons. This device complies with Part 15 of the FCC Rules and with Industry Canada license-exempt RSS standard(s). Beeping continues until pilot is lit. - Page 23 Appendix A-Remote Control Operation Setting ºC/24-hr or ºF/12-hr clock Manual Mode M A N In MAN mode, press and hold Manual ame height adjustment. buttons until temperature / clock display changes from Daytime Temperature Mode TEMP When pilot is lit, room temperature °F / 12-hour °C / 24-hour is measured and compared to set...
- Page 24 Appendix A-Remote Control Operation Setting high / low Temperatures Setting Program Timers Setting “DAYTIME” high temperature. You can program two periods of time between 12 am and 11:50 pm in each 24-hour cycle. Default Settings: 23 °C/74 °F TEMP Programs P1 and P2 must be set in the following order Press SET to scroll to TEMP during a 24-hour cycle:...
- Page 25 Appendix A-Remote Control Operation Setting P2 high and low temperature times. Repeat same steps as Setting P1. When all settings are complete, press to save them. Timer Programming Example (default temperatures shown) 6:00 am 8:00 am 4:00 pm 10:00 pm 6:00 am high temp low temp...
- Page 26 Notes...
Need help?
Do you have a question about the G3 739 and is the answer not in the manual?
Questions and answers