Table of Contents
Advertisement
Quick Links
31/07/2019
Door / Windows Sensor 7 user guide
Modified on: Mon, 15 Jul, 2019 at 12:56 AM
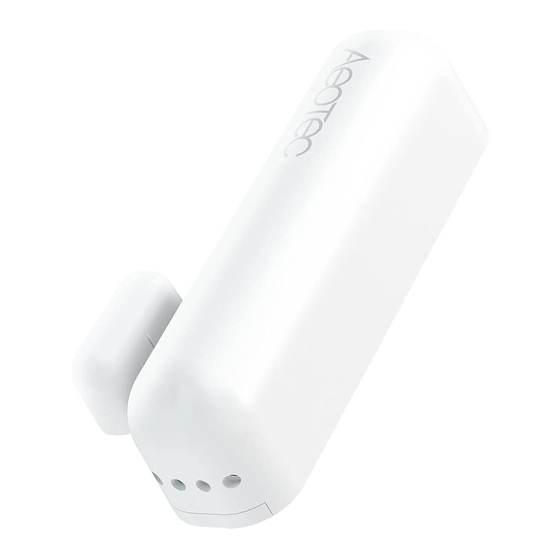
Aeotec Door / Window Sensor 7.
Aeotec Door / Window Sensor 7 has been crafted to power connected lighting using Z-Wave Plus
. It is powered by Aeotec's Gen5
wave-plus)
more about Door / Window Sensor 7
To see whether Door / Window Sensor 7 is known to be compatible with your Z-Wave system or not, please reference our
Z-Wave gateway comparison
Window Sensor
(https://aeotec.freshdesk.com/a/solutions/articles/6000218908-door-window-sensor-7-technical-
7 can be viewed at that link.
specifications-)
Familiarize yourself with your Door / Window Sensor 7.
Package contents:
1. Sensor Unit.
2. Cover
3. Big Magnet.
4. Small Magnet.
5. Double-Sided Tape large (×2).
6. Double-Sided Tape small (x2).
7. Screws (×4).
8. Dowels( x4).
https://aeotec.freshdesk.com/support/solutions/articles/6000218764-door-windows-sensor-7-user-guide
Door / Window 7 user guide : Aeotec Group
(http://aeotec.com/z-wave-gen5)
(https://aeotec.com/z-wave-door-window-sensor)
(http://aeotec.com/z-wave-gateways)
technology and S2 framework. You can find out
by following that link.
listing. The technical specifications of Door /
(http://aeotec.com/z-
1/10
Advertisement
Table of Contents

Related Manuals for Aeotec AEO ZWA008-C


Summary of Contents for Aeotec AEO ZWA008-C
- Page 1 31/07/2019 Door / Window 7 user guide : Aeotec Group Door / Windows Sensor 7 user guide Modified on: Mon, 15 Jul, 2019 at 12:56 AM Aeotec Door / Window Sensor 7. Aeotec Door / Window Sensor 7 has been crafted to power connected lighting using Z-Wave Plus (http://aeotec.com/z- . It is powered by Aeotec’s Gen5 technology and S2 framework. You can find out wave-plus) (http://aeotec.com/z-wave-gen5) more about Door / Window Sensor 7 by following that link. (https://aeotec.com/z-wave-door-window-sensor) To see whether Door / Window Sensor 7 is known to be compatible with your Z-Wave system or not, please reference our Z-Wave gateway comparison listing. The technical specifications of Door / (http://aeotec.com/z-wave-gateways) Window Sensor (https://aeotec.freshdesk.com/a/solutions/articles/6000218908-door-window-sensor-7-technical-...
-
Page 2: Quick Start
31/07/2019 Door / Window 7 user guide : Aeotec Group Important safety information. Please read this and other device guides carefully. Failure to follow the recommendations set forth by Aeotec Limited may be dangerous or cause a violation of the law. The manufacturer, importer, distributor, and/or reseller will not be held responsible for any loss or damage resulting from not following any instructions in this guide or in other materials. Keep product and batteries away from open flames and extreme heat. Avoid direct sunlight or heat exposure. Always remove all batteries from products that are being stored and not used. Batteries may damage the appliance if they leak. Do not use rechargeable batteries. Ensure correct polarity when inserting the batteries. Improper battery use may damage the product. Door / Window Sensor 7 is intended for indoor use in dry locations only. Do not use in damp, moist, and/or wet locations. It contains small parts; keep away from children. Quick Start Pre-Installation of Door / Window Sensor 7. https://aeotec.freshdesk.com/support/solutions/articles/6000218764-door-windows-sensor-7-user-guide 2/10... - Page 3 31/07/2019 Door / Window 7 user guide : Aeotec Group Open the cover by pressing the clip on the side and pulling the cover upwards. Insert a fresh 1 * 1/2 AA battery, but pay attention to the polarity Install your Door / Window Sensor 7. The sensor can be mounted either on the moving part or on the fixed part of a door or a window. Mounting can be accomplished either using the tape by peeling off the protection foil or using two screws with the holes inside the battery compartment. If the tilt detection on a window (only normal windows, no roof windows) shall be used the sensor device must be placed on the moving part of the window and the magnet on the window frame. The sensor comes with two types of magnets: The standard magnet covered by plastic part, mountable beside the sensor. Make sure the two indicating lines on sensor enclosure and magnet are opposite to each other. The image on the right-hand-side shows the position of magnet and sensor body. A slim "naked" magnet to be mounted behind the sensor in case the sensor body is placed on the side of a window. To use the tilting function, the opening angle of the window must be at least 5° or greater. https://aeotec.freshdesk.com/support/solutions/articles/6000218764-door-windows-sensor-7-user-guide 3/10...
- Page 4 31/07/2019 Door / Window 7 user guide : Aeotec Group For German style windows there the window sits on top of the window frame mounting on the side of the window is highly recommended. If no tilting detection is used, the sensor can be placed on any position of the door or the window. In case tilting detection is desired the sensor should be placed on the upper side of the window. Installation of the flat magnet When installing the flat magnet in a hidden location, make sure that it is on the longer side as seen from the mark on the Door / Windows Sensor 7. Adding your Door / Windows Sensor 7 to Z-Wave network. 1. Set your Z-Wave controller into pairing mode. 2. Triple-click the tamper switch on Door / Window Sensor 7 - this begins to blink five times https://aeotec.freshdesk.com/support/solutions/articles/6000218764-door-windows-sensor-7-user-guide 4/10...
-
Page 5: Screw Terminal
31/07/2019 Door / Window 7 user guide : Aeotec Group 3. After completion of the inclusion, it lights up once before it goes out. 4. Close the cover Functions of Door / Window Sensor 7. Open/Close Once installed the sensor will report "open" and "close" status changes to a central Z-Wave controller using notification commands. Tilt detection The tilt detection allows reporting the way a window is opened. This is accomplished using the command class "binary sensor - tilt-type". In case the window is closed or opened without tilting the tilt sensor will report "Off". In case the window is tilted an "On" is reported. The angle of inclination of the window must be at least 5°. Advances functions. Screw Terminal. With parameter #1 you can choose between the internal magnet or the external connections such as push buttons or dry contact sensors. #1: Not used. #2: Not used. https://aeotec.freshdesk.com/support/solutions/articles/6000218764-door-windows-sensor-7-user-guide 5/10... -
Page 6: Scene Controller
31/07/2019 Door / Window 7 user guide : Aeotec Group #3: Digital Input #4: Ground Digital + Ground is used to connect an external dry contact mechanism to control scenes. Push button Water sensor probes External magnet detection etc. Note: Please note that the contact Digital Input (#3) and Ground (#4) is a normally open (NO) contact. Closing the contact sends out a command (Open or Close). You must use a NO dry contact device with these terminals. Door / Window Sensor 7 as Dry Contact Sensor. Using configuration commands the source of "open" and "close" events can be chosen between the internal magnet detector or external dry contact connected on terminal #3 and #4. -
Page 7: Firmware-Update Over The Air
31/07/2019 Door / Window 7 user guide : Aeotec Group Firmware-Update over the Air. This device is capable of receiving a new firmware 'over the air'. The update function needs to be supported by the central controller. Once the controller starts the update process, perform the following action to confirm the firmware update: 1. Wake Up the device by removing the cover. 2. The hit the tamper switch once. Send a wake up notification. In order to send your sensors new configuration commands from your Z-Wave controller or gateway, it will need to be woken up. 1. Wake Up the device by removing the cover. 2. The hit the tamper switch once. Note: Door / Window Sensor 7 remains awake until the housing is closed again. Remove your Door / Window Sensor 7 from Z-Wave network. Your sensor can be removed from your Z-Wave network at any time. You'll need to use your Z-Wave network's main controller/gateway. To do this, please refer to the part of your gateways respective manual that tells you how to remove devices from your network. 1. Set your Z-Wave controller into unpair mode. 2. Triple-click the tamper switch on Door / Window Sensor 7 within 1.5 seconds - this will cause the LED to blink five times. 3. After a successful exclusion, it will light up its LED for 2 seconds then deactivate. Reset your Door / Windows Sensor 7. This device also allows being reset without any involvement of a Z-Wave controller. This procedure should only be used when the primary controller is inoperable. - Page 8 31/07/2019 Door / Window 7 user guide : Aeotec Group Parameter 1: Operation Mode. This parameter allows switching between internal sensor and external sensor. Size: 1 Byte, Default Value: 0 Setting Description the internal hall sensor is enabled (external input disabled) the external input is enabled (internal hall sensor disabled) Parameter 2: Door/Window State. This parameter allows setting Door / Window Sensor 7 state when the magnet is close to the sensor. Size: 1 Byte, Default Value: 0 Setting Description closed when the magnet is near opened when the magnet is near Parameter 3: Visual LED Indications. This parameter defines events indicated by the visual LED indicator. Disabling events might extend battery life. Size: 1 Byte, Default Value: 7, Range: 0 - 7 Setting Description no indications indication of opening/closing status change indication of wake up (1 x click or periodical) indication of device tampering Parameter 4: Range test after double click. Allows enabling the activation of Z-Wave range test with double click of a Tamper Switch 2. Size: 1 Byte, Default Value: 0...
- Page 9 31/07/2019 Door / Window 7 user guide : Aeotec Group On and Off Parameter 7: Values of ON command frame sent to Group 2 Association. The value of 0 turns OFF the device, 255 turns it On. In the case of associating the Dimmer or Roller Shutter module, values Size: 1 Byte, Default Value: 255 Setting Description allow setting an Associated device to a 0 - 99 specified level (0 is OFF) Parameter 8: Value of OFF command frame sent to Group 2 Association. 8 1 0-99,255 0 Value of OFF command frame sent to 2nd Association Group The value of 0 turns OFF the device, 255 turns it On. In the case of associating the Dimmer or Roller Shutter module, values. Size: 1 Byte, Default Value: 0 Setting Description allow setting an associated device to a 0 - 99 specified level. (0 is OFF) Parameter 9: Time Delay of ON command from Group #2. The time period after which On command frame will be sent. Size: 1 Byte, Default Value: 0 Setting Description Time set in seconds 32400 Parameter 10: Time Delay of OFF command from Group #2. The time period after which the OFF command frame will be sent. Size: 1 Byte, Default Value: 0...
- Page 10 31/07/2019 Door / Window 7 user guide : Aeotec Group Setting Description Contact Scene Events disabled Contact Scene Events enabled Parameter 14: Tilt Sensor Functionality enable/disable. Tilt Sensor functionality enable/disable. Size: 1 Byte, Default Value: 1 Setting Description Tilt Sensor disabled Tilt Sensor Enabled Parameter 15: Tilt sensitivity from V1.02 and higher You can use this parameter to adjust the tilt sensitivity if the tilt is too low or too high. Size: 1 Byte, Default Value: 50 Setting Description 1 - 100 Tilt sensitivity https://aeotec.freshdesk.com/support/solutions/articles/6000218764-door-windows-sensor-7-user-guide 10/10...
Need help?
Do you have a question about the AEO ZWA008-C and is the answer not in the manual?
Questions and answers