Table of Contents
Advertisement
Quick Links
Advertisement
Table of Contents

Related Manuals for Mirion Technologies RDS-30


Summary of Contents for Mirion Technologies RDS-30
- Page 1 RDS-30 Survey Meter User Manual Doc. No 2096 5600 Ver. 1.13...
- Page 2 2(21)
- Page 4 If you have any comments or suggestions for additions concerning either the products or this document please send them to the address on the back cover. There is a feedback form at the end of this document. ATTENTION! The RDS-30 Survey Meter does not contain any hazardous or dangerous substances and can be recycled accordingly.
-
Page 5: Table Of Contents
Battery and display test (diAG)* ................... 16 Histogram (HiSto)* ......................16 Indication unit ........................17 Maintenance and Decontamination ............17 RDS-30 specifications ................18 Physical characteristics ....................18 Electrical characteristics ....................18 Mechanical characteristics ....................18 Environmental characteristics ..................18 Connection ......................... -
Page 6: Introduction
LCD and a buzzer (dose rate 1, dose rate 2, low battery, defect, dose rate overflow). The RDS-30 is ready for use after the batteries (2 x IEC LR06/AA) have been installed. RDS-30 Front view... -
Page 7: Taking The Instrument Into Use For The First Time
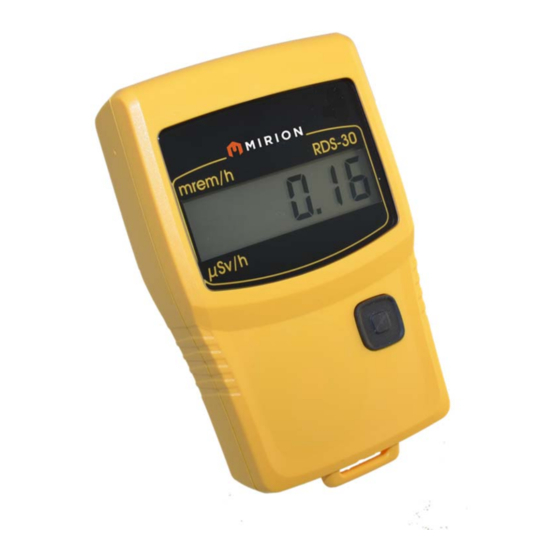
2.1 Indication of the display unit The RDS-30 has two optional dose rate units available; µSv/h and mrem/h. The selected unit is indicated by a blinking segment on the left side of the display. The selected unit in the picture on the right is µSv/h in the upper frame and mrem/h in the... - Page 8 5(21)
-
Page 9: Display Illumination
2.3 Display illumination To switch the illumination on, press the push button once. The display backlight is lit for 10 seconds. 2.4 Operating the instrument The instrument has one push button. In order to change the operational parameters of the instrument, the menu has to be activated (see also the menu flow chart on pages 11-12). -
Page 10: Chirp On/Off And High/Low (Chirp)
The display shows the cumulative dose. The same basic unit for the dose is used as for the dose rate. To reset the cumulative dose: While the cumulative dose is displayed, press the push button again until a long beep is audible and the display shows the zero dose. -
Page 11: Multilevel Dose Rate Alarm
To see the current dose rate alarm level: Activate the menu and scroll it until The display changes to drAL. Press the push button until a long beep is audible. The current alarm level is displayed. To change the current dose rate alarm level: While the current dose rate alarm level is displayed, press the push button until a long beep is audible. -
Page 12: Single Dose Alarm Level
2.5.5.1 Single dose alarm level: There are 8 different levels for the dose alarm: µSv or mrem: disabled, 100, 500, 1 000, 5 000, 10 000, 50 000, 100 000, 500 000. The user may select any of these to be the alarm level. Note: All the dose alarm level values can be changed and the new values stored into the instrument’s internal memory with the CSW software. -
Page 13: Dose Alarm Level When Time To Dose Display Is Enabled
Scroll to check all the valid alarm levels in the instrument. Validating any other value than the diSAbL (with a long press) will enable the multilevel dose rate alarm function. A long beep is audible and the display returns to the menu item doSEAL. 2.5.5.3 Dose alarm level when Time to Dose display is enabled: When the Time to Dose display (see section 2.6.1) is enabled, the valid dose alarm level is used to calculate the time to dose alarm. -
Page 14: Irda Communication (Irda)
2.5.7 IrDA communication (irdA) There is an infrared communication (IrDA) port in the instrument. It is possible to change the configuration of the instrument with the CSW software and download the histogram from the instrument to the PC via the communication port. Activate the menu and scroll it until Display changes to irdA. -
Page 15: Other Displayed Messages
2.6 Other displayed messages 2.6.1 Time to Dose display Pressing the push button twice shortly (within 1- 5 seconds) will activate the Time to Dose display. The display indicates the time required to reach the current valid dose alarm level at the prevailing dose rate. -
Page 16: Error (Def/Err)
2.6.7 Error (dEF/Err) The display alternates between the texts "dEF" (defective) and "Err+number". The continuous audible alarm is on. _____________ Error alarm: (continuous beep). The dose rate measurement is prevented. If the "Err+number"-text alone is alternating with the dose rate display, the dose rate measurement is continued. Only a visual alarm is given, no audible alarm. -
Page 17: Menu Functions
Menu Functions to be continued on page 12 14(21) -
Page 18: Configurable Parameters
Configurable Parameters Most of the menu items (marked with *) can be disabled from the menu with the CSW software. When a menu item is disabled, it is not visible in the menu list. 4.1 Display illumination There are three configuration options: Configuration 1: When the push button is pressed, the display backlight is lit for 10 seconds (timeout mode). -
Page 19: Chirp On/Off And Chirp Rate (Chirp)
4.3 Chirp on/off and chirp rate (cHirP)* The cHirP function can be enabled or disabled. When disabled, it will not be displayed in the menu of the instrument. This is a configurable function with 3 options: Configuration 1: Configuration 2: High sensitivity Configuration 3: Low sensitivity... -
Page 20: Maintenance And Decontamination
4.8 Indication unit Configuration 1: µSv/h Configuration 2: mrem/h Maintenance and Decontamination No specific maintenance is required except for a periodic check of the calibration. Cleaning and decontamination may be carried out by using decontamination solutions suitable for use with ABS polymer and polycarbonate materials. Replacement of the batteries: Open the battery compartment cover with a suitable screwdriver. -
Page 21: Rds-30 Specifications
RDS-30 specifications Order number RDS-30 µSv/h: 1233-244 Order number RDS-30 mrem/h: 1233-250 6.1 Physical characteristics radiation detected: gamma and x-rays, 48 keV...1.3 MeV detector: energy-compensated GM tube. Energy response according to ambient dose equivalent H*(10) measurement range: dose rate 0.01 – 100 000 µSv/h or 0,001 – 10 000 mrem/h dose 0.01 –... -
Page 22: Detector Position
7.1 Configuration software Order number: 1233-246 The Configuration Software (CSW) is used to check the status of the instrument, to change its operational parameters and to set-up the histogram operation (for details see the CSW Configuration Software for RDS-30 User’s Manual) 19(21) - Page 23 As standards, specifications and design are subject to change over a period of time, please request for the confirmation of the information given in this publication. Lamanon – France Tel +33 (0)4 90 59 59 59 Smyrna (GA) – USA Tel +1 (770) 432 2744 Turku –...
- Page 24 If you have noted mistakes, or if there are parts that are unclear, please let us know. Take a copy of this page, describe the problem and send the copy to us here in RADOS. Mirion Technologies (RADOS) Oy/ Technical Documents P.O. Box 506, FIN-20101 Turku, Finland Fax: +358-2-468 4601 E-mail: info-fi@mirion.com...
Need help?
Do you have a question about the RDS-30 and is the answer not in the manual?
Questions and answers