
Related Manuals for Clarke AIR CTG8


Summary of Contents for Clarke AIR CTG8
- Page 1 AIR TEXTURE GUN Model No CTG8 Part No 5091120 OPERATING & MAINTENANCE INSTRUCTIONS GC0410...
-
Page 2: Environmental Protection
TECHNICAL SPECIFICATION t i l & Please note that the details and specifications contained herein, are correct at the time of going to print. However, CLARKE International reserve the right to change specifications at any time without prior notice. -
Page 3: General Safety Precautions
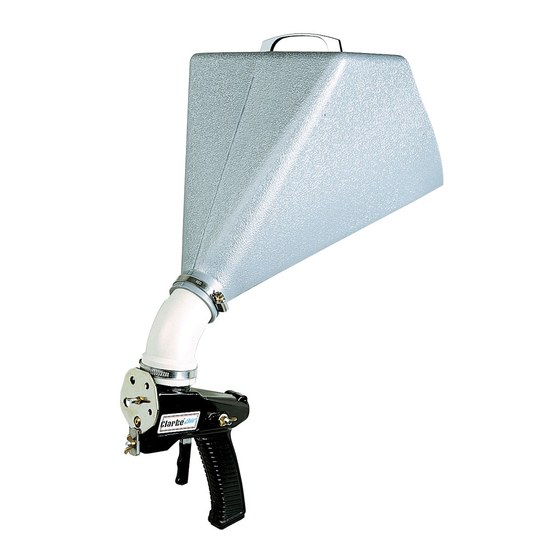
12. NEVER attempt any repairs yourself. If you have a problem with this product contact your local CLARKE dealer. Your CLARKE product has been designed to give long and trouble free service. If, however, having followed the instructions in this booklet carefully, you encounter problems, take the unit to your local CLARKE dealer. - Page 4 INTRODUCTION The CTG8 Air Texture Gun is a high capacity unit designed for large surface coverage, handling most textured wall and ceiling finishes. It can spray most liquid dry wall materials from joint cement, ceiling acoustics, wall texture, splatter, semi-fog or any such material that will feed through the hopper.
-
Page 5: Preparation For Use
A full range of air compressors, airline hoses, filters, regulators and gaugesare available from your Clarke dealer. Typical Airline Connection Connect the air supply to the spray gun using a suitable 1/4” BSP fitting. If an... -
Page 6: Operation
OPERATION Assemble the texture spray gun as follows. The numbers in brackets refer to the Parts List & Parts Diagram on pages 10/11. 1. With the jubilee clip (5) around the hopper base loosened off, fit the hopper (1) to the gun body, pushing the hopper onto body neck, (the handle on hopper should be in line with the gun body). - Page 7 manufacturer’s instructions. (DO NOT OVERFILL - the more paint the heavier the spray gun). 4. Hold the gun approximately 12” from wall to be covered, supporting the gun using the handle on the hopper. 5. Gently squeeze the trigger until resistance is felt whilst moving the gun from side to side.
-
Page 8: Maintenance
e The air texture gun can also spray glitter if the material and gun are both kept dry. Approx 15 psi is recommended to apply glitter to panelling and 25-30 psi to cement and stucco surfaces. The glitter should be sprayed on while the underlying material is still tacky enough to receive it and to form an effective bond. - Page 9 The wear on certain parts depends on the abrasive nature of the materials being sprayed. More abrasive materials such as latex paint (emulsions) will cause these parts to wear much faster. Use only Clarke replacement parts, available from your nearest Clarke International dealer.
-
Page 10: Parts List
I ) t f l n I f i r l n I z i s IMPORTANT: The use of parts other than genuine CLARKE replacement parts may result in safety hazards, decreased performance, and will invalidate your warranty. -
Page 11: Parts Diagram
PARTS DIAGRAM PARTS LIST...