
Related Manuals for Clarke CAB3B


Summary of Contents for Clarke CAB3B
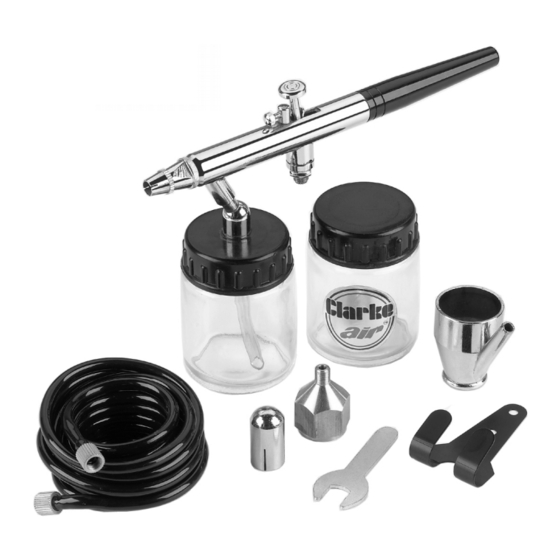
- Page 1 AIRBRUSH KIT MODEL NO: CAB3B PART NO: 3110320 OPERATION & MAINTENANCE INSTRUCTIONS ORIGINAL INSTRUCTIONS GC0720 - ISS 3...
-
Page 2: Specification
INTRODUCTION Thank you for purchasing this CLARKE Airbrush kit. Before attempting to use this product, please read this manual thoroughly and follow the instructions carefully. In doing so you will ensure the safety of yourself and that of others around you, and you can look forward to your purchase giving you long and satisfactory service. -
Page 3: General Safety Rules
GENERAL SAFETY RULES Before using this equipment it is in your own interest to read and pay attention to the following safety rules. COMPRESSED AIR EQUIPMENT 1. Compressed air can be dangerous. Ensure that you are familiar with all precautions relating to the use of compressors and compressed air. 2. -
Page 4: Air Supply
(supplied). Set the air pressure at the compressor to approx. 2 bar. Alternatively, for smaller jobs, your airbrush can be used with CLARKE airbrush propellant cans by screwing the air hose connector onto the air can. -
Page 5: Paint Thinning
WARNING: NEVER SPRAY PAINT UNLESS YOU ARE WEARING SUITABLE, APPROVED RESPIRATORY AND EYE PROTECTION. Ensure that the area in which you will be spraying is clean and dust free. To obtain best results, it is vital that the surface to be sprayed is well prepared. It must be clean and dry, and free from dust, dirt oil or grease. -
Page 6: Operation
OPERATION After mixing and thinning the paint, fill the paint jar no more than about 2/3 full. Attach the jar to the airbrush, turn the compressed air on, and depress the trigger. Test on an old newspaper or similar and make any necessary spray adjustments before spraying the workpiece. -
Page 7: Spraying Techniques
4. Always test on a practice piece first to ensure the airbrush is working correctly. SPRAYING TECHNIQUES Practice spraying on a piece of material with the same type of surface as the article you wish to spray, eg. metal for a car body panel, wood for a piece of furniture etc. - Page 8 To obtain the best results, keep your airbrush level and parallel to the surface at all times. Keep the nozzle 23 - 30 cm from the surface and spray evenly from side to side or up and down. The airbrush should be perpendicular to the surface being covered and moved parallel to it.
-
Page 9: Troubleshooting
TROUBLESHOOTING The following are typical faults encountered during airbrush work: 1. Grainy Spray: Caused by the paint being too thick. Dilute the paint as appropriate, check the needle for dried up paint etc, check the air supply pressure etc. 2. Buckling Paper: The paint may be too thin. Add paint to thicken the mixture. -
Page 10: Maintenance
MAINTENANCE ROUTINE CLEANING The airbrush is a precision tool, so taking good care of your airbrush will result in a longer service life. Keep the airbrush and paint cup / jar clean at all times and do not leave the airbrush standing with paint in the paint cup for long periods. - Page 11 3. Loosen the needle locknut and gently withdraw the needle from the airbrush assembly. Do not fully remove the locknut. WARNING: THE NEEDLE IS VERY SHARP; ALSO, TAKE CARE NOT TO BEND OR BREAK IT. 4. Remove the airbrush end cap. 5.
-
Page 12: Airline Accessories And Equipment
Airbrush Propellant etc. Contact your CLARKE dealer for further information, or CLARKE International Sales Department on 01992 565300. Parts & Service: 020 8988 7400 / E-mail: Parts@clarkeinternational.com or Service@clarkeinternational.com... -
Page 13: Declaration Of Conformity
DECLARATION OF CONFORMITY Parts & Service: 020 8988 7400 / E-mail: Parts@clarkeinternational.com or Service@clarkeinternational.com... -
Page 14: Parts Diagram
PARTS DIAGRAM Parts & Service: 020 8988 7400 / E-mail: Parts@clarkeinternational.com or Service@clarkeinternational.com... -
Page 15: Parts List
PARTS LIST DESCRIPTION DESCRIPTION Airbrush End Cap 19 Needle Spring Air Cap 20 Needle Sleeve Spray Nozzle 21 Paint Jar Lid (1) Spray Nozzle Seat 22 Paint Jar Lid (2) O-ring 23 Glass Paint Jar Direction Screw 24 O-Ring Sealing Washer 25 Air Inlet Valve Body Airbrush Body 26 O-ring...
Need help?
Do you have a question about the CAB3B and is the answer not in the manual?
Questions and answers