Abus PPIC46520 Instruction Manual
Hide thumbs
Also See for PPIC46520:
- Quick manual (18 pages) ,
- Quick manual (18 pages) ,
- Quick manual (18 pages)
Table of Contents

Subscribe to Our Youtube Channel
Related Manuals for Abus PPIC46520


Summary of Contents for Abus PPIC46520
- Page 1 PPIC46520 Instruction manual Important notes and FAQs about this product and other products can be found on the website http://www.abus.com/ Version 1.0 Original operating instructions in German language. Keep for future use!
- Page 2 Dear Customer, Thank you for purchasing this product. Hereby ABUS Security Center declares that the camera PPIC46520 complies with the RED Directive 2014/53/EU. The equipment also complies with the requirements of the following EU Directives: EMC Directive 2014/30/EU, LVD Directive 2014/35/EU and RoHS Directive 2011/65/EU.
- Page 3 ABUS Security Center shall not be liable or responsible for any direct or indirect consequential damages arising in connection with the equipment, performance, and use of this product. No warranty of any kind is made with respect to the contents of this document.
-
Page 4: Table Of Contents
English Content 1. Scope of delivery ..........................6 2. Description of the hardware ......................7 3. Assembly / Installation ........................10 3.1. meramontag ..........................10 3.1. Temporary power supply ......................10 3.2. Installation ..........................11 4. Set the viewing direction of the camera ..................14 5. - Page 5 English 9.8.7. Privacy zone masking ......................44 9.8.8. Security settings ........................44 9.8.9. Wi-Fi settings ........................46 9.8.10. Video settings ........................47 9.8.11. Siren settings ........................49 9.8.12. Light control ........................50 9.8.13. Memory settings ......................... 51 9.8.14. Notification settings ......................52 9.8.15.
-
Page 6: Scope Of Delivery
English 1. Scope of delivery PPIC46520 • • Wi-Fi Light Outdoor Camera (1) microSD card (preinstalled) (8) • • Camera foot (2) Allen key (9) • • Antenna (3) USB A to USB C cable (10) • Drilling template (4) •... -
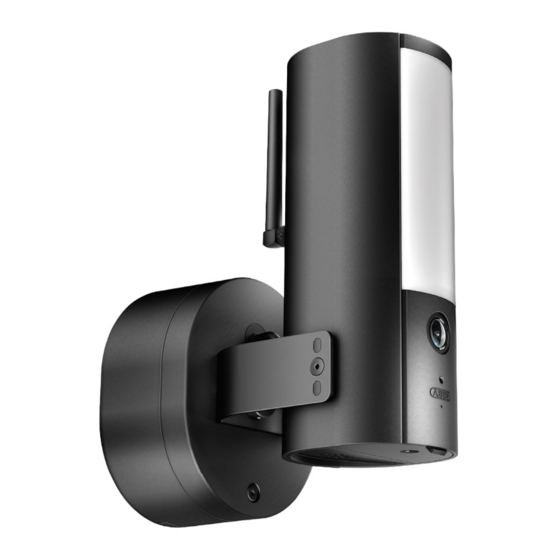
Page 7: Description Of The Hardware
English 2. Description of the hardware... - Page 8 English...
- Page 9 English...
-
Page 10: Assembly / Installation
English 3. Assembly / Installation ATTENTION! During installation, the camera must be disconnected from the mains voltage. Site The camera is suitable for outdoor use. Do not place the camera in the direct vicinity of heaters, ovens, other heat sources or under direct sunlight. -
Page 11: Installation
English 3.2. Installation ATTENTION! The installation of the device involves work on the mains voltage. It must therefore be carried out by a specialist in accordance with the usual national installation regulations and connection conditions. During installation, the electrical line to be connected must be de-energized. - Page 12 English The base of the mount has a so-called parking position for the camera. Place the camera in the parking position for subsequent cabling. Important! Connect the (green-yellow) protective earth conductor, which is already connected to the cover of the foot at the factory, to the luster terminal in the camera foot.
- Page 13 English The camera is now fully operational. Make sure that no one is handling other open power conductors in the house and then switch on the power supply for the camera. After approx. 60 seconds, the live image can be accessed again if the start-up via app has already been carried out.
-
Page 14: Set The Viewing Direction Of The Camera
English 4. Set the viewing direction of the camera To adjust the exact viewing direction of the camera: Slightly loosen the locking screw in the middle of the bracket using the Allen key and the two screws on the bracket to pan and/or tilt the camera. Tip: Use the live image in the app for fine adjustment. -
Page 15: Restore Factory Settings
Note Information about compatible Wi-Fi repeaters can be obtained from your network operator or the manufacturer of your router. ABUS Security Center GmbH & Co. KG will not make any recommendations for Wi-Fi repeaters. Pay close attention to the installation recommendations of the Wi-Fi repeater. The... -
Page 16: Camera Coverage Area
English 7. Camera coverage area With intelligent object detection, the detection range of the camera is based on the selected object. If the object is outside this area, it can be "seen" by the camera and displayed on the live image, but it does not trigger an exposure. -
Page 17: Installation Location
English The detection area of the camera must be aligned as shown above so that the Intelligent Object Detection works smoothly. If the camera is installed at a steep angle to the ground, some objects will be detected too late or not at all. The reason for this is that the detection is not sufficient to specify the object more precisely. - Page 18 English If several objects are detected simultaneously in the image, the object detected first is always displayed in the event list. For example, when a vehicle enters the driveway, the event list shows the vehicle as the trigger, even if a person exits the car in the video sequence. The person is nevertheless marked with a colored recognition frame in the video.
- Page 19 English The following settings are recommended for the various objects: Person: Medium Animal: Medium Vehicle: Medium Note The reliability of object detection depends on local factors. In various situations, false alarms can occur. In particular, environmental influences such as rain, snow, insects, dirt and difficult lighting conditions can have a negative effect on the results.
-
Page 20: App2Cam Plus: First Access
English 9. App2Cam Plus: First access 9.1. System requirements Please note the following points to ensure easy setup: • 2.4 or 5GHz Wi-Fi network with password and encryption. • The location service of the mobile terminal must be activated for network integration. •... -
Page 21: Set Up Camera
English 9.3. Set up camera 9.3.1. Bluetooth setup Launch the App2Cam Plus and select "Add new device" to start the setup process. Option 1: Scan the QR code; located in the camera foot. Option 2: Tap the "Add camera manually" button and then select your camera model from the list. Note For optimal startup, the camera and the smartphone/tablet must be as close to each other as possible, at a maximum distance of 3 meters. - Page 22 English Select "setup via Bluetooth". If you have not already done so: Activate Bluetooth in the settings of your mobile device. Then tap on "Next". Now supply the camera with power, if not already done, and wait 2 minutes until the status LED of the camera (behind lower cover) flashes 2x short and 1x long.
- Page 23 English Select your camera based on the identification number. You will find the identification number (DID) enclosed in the packaging. Alternatively, in the camera foot, below the QR code. Then tap on "Next". Select your home network/Wi-Fi in which you want to operate the camera permanently. Then tap on "Next".
- Page 24 English 10. Now assign a security code or admin password. These must be identical for the setup via Bluetooth. Then tap on "Next". The admin password can be changed in the camera settings after installation. 11. The camera will now restart. This can take up to 60 seconds. 12.
-
Page 25: Setup Via Network Cable (Optional)
English 9.3.2. Setup via network cable (optional) Launch the App2Cam Plus and select "Add new camera" to start the setup process. Option 1: Scan the QR code; located in the camera foot. Option 2: Tap the "Add camera manually" button and then select your camera model from the list. Select "setup via LAN". - Page 26 English PPIC46520 Select your camera based on the identification number. You will find the identification number (DID) enclosed in the packaging. Alternatively, in the camera foot, below the QR code. Then tap on "Next". Assign a camera name. Now assign a security code or admin password. These must not be identical. Then tap on "Next".
- Page 27 English Note For the best possible camera experience, we recommend that you always operate the camera with the latest firmware. You can find the current firmware version and available updates under "Camera settings" > "Device settings" -> Search firmware update setup via the app is now complete.
-
Page 28: Add Cameras Already Set Up
English 9.3.3. Add cameras already set up To set up a camera that is already connected to the network, please proceed as follows. CGAJ-0000-XXXXX CGAJ-0000-XXXXX Open the app and click "+ Add New Camera" to add a camera, then click "Add Connected Camera". Enter a name for your camera. -
Page 29: App2Cam Plus: Overview
English 9.4. App2Cam Plus: Overview Note Please note that some explained or shown functions in this manual may not be compatible with cameras of older generations or the functionalities of the cameras may differ due to hardware differences. Note The screenshots and icons shown were taken from the iOS app. There may be slight differences to the Android app in the labeling, arrangement or functionality. -
Page 30: Camera Overview
English 9.4.1. Camera overview Set up new camera / Add camera Camera activated (motion detection active) Activation of the 4-fold view Connection update Updating the connections to the cameras 9.4.2. Recording menu Delete displayed recordings Camera selection Select period Display of the bar chart Filter... -
Page 31: Info / App Settings
Rate our app and send us your suggestions for improvement. For more info on the app and your device, see the Quick Guide, Instructions support.abus-sc.com, the ABUS YouTube channel or abus.com. Enable/disable hardware decoding For Android, the use of hardware decoding is available. Some Android... -
Page 32: App2Cam Plus: Live View
English 9.5. App2Cam Plus: Live View Various functions are available in the live view depending on the camera model. The functions are additionally available in landscape mode. Click on the preview image of the camera to access the live view. Tap the gear icon in the camera overview to make settings that affect the app. -
Page 33: Live View Functions
English 9.5.1. Live view functions Here you set the light intensity. The "Auto" function controls the light behavior depending on the "Motion alarm" function. In addition, the light comes on when it is dark on site and you are watching the live stream in the live view. -
Page 34: Camera Indicators
English 9.5.2. Camera indicators Camera name You can change the name of the camera in the advanced settings. 9.5.3. Stream indicators Display of the resolution of the current stream Full HD Display of the current connection status Direct: The Peer2Peer server was able to establish a direct connection between your Direct end device and the camera. -
Page 35: App2Cam Plus: Recording Menu
English 9.6. App2Cam Plus: Recording menu 9.6.1. Recording menu Tap the recordings icon in the camera overview to call up the event list. In the event list you can set a start and end time, click on the date selection for this. For this filter the app will show you all recorded events in this time. -
Page 36: Recording Menu Functions
English 9.6.2. Recording menu functions Delete displayed recordings Camera selection Select period Display of the bar chart Filter *Note During a recording, the recordings cannot be accessed. -
Page 37: Playback
English 9.7. Playback In the playback of the events, different functions are available depending on the camera model. In Landscape mode (= landscape format), a full view without functions is shown. The events usually need a short buffer time until the event can be played. Note When playing back events, the event is automatically downloaded to your end device. -
Page 38: Download & Forwarding
English 9.7.2. Download & Forwarding To download a file to your smartphone, click on the download icon. The file will now be downloaded and will be displayed in red in the recording list. You have the possibility to share the file by clicking on the Share icon. Note The downloaded data is stored differently on the iOS and Android operating systems. -
Page 39: Camera Settings
English 9.8. Camera settings 9.8.1. Open camera settings To open the camera settings, click the lower button in the live view. Use the admin password you assigned during the initial installation. Note The admin password is a purpose password, not a security password, and is intended to help you allow other people to see the live view and notifications of the camera, but deny the advanced settings. -
Page 40: Automatic Login
English 9.8.3. Automatic login When entering the admin password, you can use the "Save admin password" button to save the admin password on your end device so that you do not have to enter it the next time you call up the advanced settings on your end device. -
Page 41: Motion Detection Settings
English 9.8.5. Motion detection settings Motion detection settings Click the Motion Detection button to make settings for it. Click Intelligent Image Analysis for further settings. If you select "Off", there will be no motion detection. The changes in the settings are only applied after leaving the menu. - Page 42 English The reliability of object detection depends on local factors. Nevertheless, false alarms may occur in various situations. Environmental influences such as rain, snow, insects or dirt can have a negative effect on the results. Areas with detection The areas with recognition describe the areas in which the Intelligent Object Recognition searches for persons, vehicles or animals.
-
Page 43: Schedule Settings
English 9.8.6. Schedule settings Activation / deactivation Click the Schedule for motion detection schedule button to set schedules. Schedule settings Press the plus symbol to add a schedule. Separate activations are created for the start time and the end time. Select the start time and assign a schedule name for it. -
Page 44: Privacy Zone Masking
English 9.8.7. Privacy zone masking Privacy zones masking Click the Privacy Zone Masking button to make settings for it. A preview of the live image and the privacy zone set up is displayed here. Drawing privacy zones is done directly in the preview area. You can activate up to 3 areas and place and customize them individually using drag and drop. - Page 45 English Change security code The security code is used to set up the light camera in the app. The default code is "123456" and must be changed during the initial installation. If you forget your security code, you can reset the light camera by pressing the reset button for about 5 seconds.
-
Page 46: Wi-Fi Settings
English 9.8.9. Wi-Fi settings Wi-Fi settings Under the Wi-Fi settings, you can select the desired network to which the camera should be connected. When you select the menu item, all networks in the vicinity are displayed. Select your network and enter your in- house Wi-Fi password. -
Page 47: Video Settings
English 9.8.10. Video settings Video settings Make the video settings for your camera here. The changes in the settings are only applied after leaving the menu. Video quality Here you have the possibility to change the resolution for the live view. At a lower resolution, you can get a smoother image when accessing externally, but less image detail is... - Page 48 English Improve night image Here you can adjust the brightness of the night image. A higher level brightens the image more, a lower level less. As soon as there are objects in the immediate vicinity of the camera, it is recommended to set the intensity to a lower level to avoid reflections in the image, but this will reduce the...
-
Page 49: Siren Settings
English 9.8.11. Siren settings Siren settings Make the siren settings here. The changes in the settings are only applied after leaving the menu. Volume Change the volume of the integrated siren here. Duration Change the duration of the integrated siren. -
Page 50: Light Control
English 9.8.12. Light control Lighting control Make the settings for the light control here. The changes in the settings are only applied after leaving the menu. Manual schedule Here you can set a fixed period for the control of the lighting. During this time, the lighting is permanently on and does not activate in case of an event outside this period. -
Page 51: Memory Settings
English 9.8.13. Memory settings Memory settings Make settings for saving here. Recording without audio Activate function save recordings without audio. During the live view it is possible to activate audio. Ring memory function There are several ways to overwrite the events on the SD card. -
Page 52: Notification Settings
English 9.8.14. Notification settings Enable PUSH notification / Enable notifications to receive PUSH messages to their smartphone when Notification language motion is detected. You have the possibility to change the language of the notification under Notification language. Please note that only the language of PUSH notifications will be changed. -
Page 53: Devices Settings
English Username: Enter the sender e-mail address here. e.g. xxx@test.com Password: Enter the password of the sender e-mail here. Recipient: Enter the recipient's e-mail address here. e.g. xxxx123@test.com Save the settings by pressing OK. When leaving the advanced settings, press "Confirm". - Page 54 English Camera name Change the camera name here. The name is displayed in the live view as well as in the push notifications. Time zone / Daylight The world time zones are listed in the saving time selection list. Select the time zone where the camera will be installed.
-
Page 55: Device Information
English 9.8.16. Device information Device information The device information tells you the current firmware version of the camera, the total available memory and the free memory on the SD card. -
Page 56: Update Firmware
English 10. Update firmware You can update your camera's firmware in two different ways. Please note that both methods still preserve the camera's settings, so you don't have to set them again. Please note that a microSD card is required for both variants. The update of the camera takes approx. -
Page 57: Current Firmware Version
English Option 2: If you do not want to wait for the 6-hour interval, you can also have the camera actively search for a newer firmware. To do this, press the menu item "Check for firmware updates now" in the advanced settings if a firmware has not already been downloaded, the camera will now actively search for a newer version and then save it to the SD card, this can take up to 5 minutes, exit the camera settings for this. -
Page 58: Troubleshooting Tips
English 11. Troubleshooting tips Camera image is not displayed Check the signal strength in the Wi-Fi settings. Is the camera connected? Is there an Internet connection? Is the camera supplied with voltage? Push messages are not received Is the camera disabled? Also check the schedules. Are the push messages disabled? Is there an Internet connection? How can I set my camera to factory settings? -
Page 59: Open Source License Notes
The Open Source Licenses take precedence over all other license terms and contractual agreements with ABUS with respect to the corresponding OSS software components included in the Product. In general, license information for ABUS products can be found at www.abus.com...
Need help?
Do you have a question about the PPIC46520 and is the answer not in the manual?
Questions and answers