Table of Contents
Advertisement
Quick Links
Advertisement
Table of Contents

Related Manuals for Milesight VS133


Summary of Contents for Milesight VS133
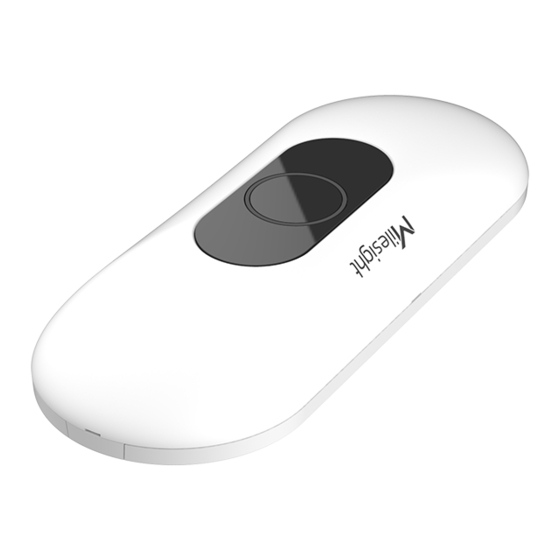
- Page 1 AI ToF People Counting Sensor VS133 User Guide...
- Page 2 Use a soft, dry cloth to clean the lens of the device. Declaration of Conformity VS133 is in conformity with the essential requirements and other relevant provisions of the CE, FCC, and RoHS. Copyright © 2011-2023 Milesight. All rights reserved.
- Page 3 Revision History Date Doc Version Description May 24, 2023 V 1.0 Initial version...
-
Page 4: Table Of Contents
Contents 1. Product Introduction ......................... 5 1.1 Overview ...........................5 1.2 Key Features ..........................5 2. Hardware Introduction ........................5 2.1 Packing List ..........................5 2.2 Hardware Overview ......................... 6 2.3 Button and LED Indicators ...................... 7 2.4 Dimensions (mm) ........................7 3. -
Page 5: Product Introduction
The advanced ToF technology combined with an AI algorithm enables the sensor to handle complex scenes and distinguish non-human objects with up to 99.8% accuracy. The VS133 sensor can be used in conjunction with the Milesight LoRaWAN gateways and the Milesight IoT Cloud, as well as with the PoE version VS133-P, ®... -
Page 6: Hardware Overview
1 × VS133 Device 4 × Ceiling Mounting 1 × Mounting 8 × Staff Kits Sticker Tags 1 × Power Adapter 1 × Multi-interface 1 × 1 × (LoRaWAN Version ® (PoE Version Only) Warranty Card Quick Guide Only) 1 × VB01 Multifunctional Bracket Kit(Optional) If any of the above items is missing or damaged, please contact your sales representative. -
Page 7: Button And Led Indicators
Version Only) Wi-Fi off: Green on Reset to Factory Press and hold the reset button for more than 10 Green Blinks. Default seconds. 2.4 Dimensions (mm) 3. Power Supply LoRaWAN Version: ® VS133 can be powered by power adapter (12VDC, 2A). -
Page 8: Access The Sensor
Powered by a PoE Injector 4. Access the Sensor VS133 sensor provides user-friendly web GUI for configuration and users can access it via Wi-Fi connection or Ethernet port. The recommended browsers are Internet Explorer, Firefox, Chrome, Microsoft Edge, and Safari. The default IP of Ethernet port is 192.168.5.220, the default IP of Wi-Fi is 192.168.1.1, and default SSID is People Counter_XXXXXX. -
Page 9: Access With Ethernet (Poe Version)
4.2 Access with Ethernet (PoE Version) Step 1: Power on the device and connect the Ethernet port to a PC. Step 2: Change the IP address of computer to 192.168.5.0 segment as below: Go to Start Control Panel Network and Internet Network and Sharing Center... -
Page 10: Operation Guide
Enter an IP address that in the same segment with sensor ( e.g. 192.168.5.61, but please note that this IP address shall not conflict with the IP address on the existing network); Step 3: Open the Browser and type 192.168.5.220 to access the web GUI. After logging on web GUI successfully, user is allowed to view configuration page. -
Page 11: Rule
Parameters Description Reset Count Clear accumulated entrance and exit people counting values. Output Click to output a 5s high level signal from alarm out interface. (PoE Version) Alarm Output: dry contact, output=tow contacts closure Track When enabled, there is tracking line when people pass the detection area. 5.2 Rule Draw Detection Lines Users can draw detection lines to record the people count values which indicate the number of... - Page 12 Note: 1) The arrow direction of the detection line depends on your drawing direction. 2) Ensure that the detected target can pass through the detection line completely. It’s recommended that the detection line is perpendicular to the In/Out direction and on the center of the detection area without other objects around.
- Page 13 Rule Configuration Users can set the rules to ensure accurate counting. Parameters Description Installation Height Set the device installation height. Set the maximum target height, then the device will ignore the objects higher Max Target Height than this setting. Set the minimum target height, then the device will ignore the object shorter Min Target Height than this setting.
-
Page 14: Communication
Set the period of reporting periodic report. Period Range: 1-1080 mins, default: 10 mins 5.3 Communication ® 5.3.1 WLAN (LoRaWAN Version) VS133 supports wlan feature to work as AP mode to configure device and it can not connect to other access point. -
Page 15: Lora (Lorawan ® Version)
Parameters Description Enable Wi-Fi feature. If disabled, users can use button or LoRaWAN ® downlink Enable WLAN command to enable it. Wi-Fi SSID The unique name for this device Wi-Fi access point. Protocol 802.11b (2.4 GHz), 802.11g (2.4 GHz), 802.11n (2.4 GHz) are optional. Bandwidth 20 MHz or 40 MHz are optional. - Page 16 Parameters Description LoRa Status LoRaWAN ® network joining status of this device. Device EUI Unique ID of the device, which can also be found on the label. App EUI The Default App EUI is 24E124C0002A0001. Application Port The port used for sending and receiving data, default port is 85.
- Page 17 Join Type OTAA and ABP mode are available. Appkey for OTAA mode, the default key is Application Key 5572404C696E6B4C6F52613230313823. Device Address DevAddr for ABP mode, the default address is the 5 to 12 digits of SN. Network Session Nwkskey for ABP mode, the default key is 5572404C696E6B4C6F52613230313823.
-
Page 18: Ethernet (Poe Version)
4) Select OTAA mode when you connect device to Milesight IoT Cloud. 5.3.3 Ethernet (PoE Version) VS133 provides a Ethernet port for wired access. Besides, users can get the people counting data or configure the device via CGI. For CGI document, please contact with Milesight IoT support: iot.support@milesight.com. -
Page 19: Report
5.4 Report VS133 supports to generate visual line chart or bar chart to display the people traffic and supports to export the report. Before using this feature, ensure that the device time is correct on... -
Page 20: System
Parameters Description Time Unit Select the unit to generate the graph or export the data. Time Range Select the time range to generate the graph. Select the line to display the graph. Search Click to generate the graph according to the time range and line option. Export the historical traffic data as CSV file according to the selected time Export unit. -
Page 21: User
Note: VS133-P supports to customize device ID and site ID for large amounts of devices management. 5.5.2 User Parameters Description Click the admin on the user list, then you can click Modify to change the login password of this device. -
Page 22: Time Configuration
questions correctly. 5.5.3 Time Configuration Parameters Description Time Zone Choose the time zone for your location. Synchronize Mode NTP Timing or Manual Timing is optional. (PoE Version) Server Address NTP server address to sync the time. (PoE Version) Time Interval Set the interval to sync time with NTP server. -
Page 23: Remote Management (Poe Version)
Synchronize the time with your computer. computer time 5.5.4 Remote Management (PoE Version) Users can connect the device to the Milesight DeviceHub management platform on this page so DeviceHub as to manage the device centrally and remotely. For more details, please refer to... -
Page 24: Installation Instruction
Import button to import configuration file. 6. Installation Instruction Parameter definition: Parameters Explanation Value Installation height ≤3.5 m Minimum detection distance of VS133 0.5 m Δd Distance measurement error of VS133 0.035 m Maximum pedestrian height Example 1.8 m Minimum pedestrian height Example 1.7 m... -
Page 25: Installation Height
6.1 Installation Height The maximum installation height is 3.5 m and the minimum installation height is h +d+Δd. For example, when the maximum pedestrian height is 1.8 m, then the minimum installation height is 1.8+0.5+0.035=2.335 m. 6.2 Covered Detection Area The detection area covered by the device is related to the field of view angle of the device, the installation height and the target height. -
Page 26: Installation
(Note: if the alarm I/O of VS133-P is going to be used, please connect a multi-interface cable to the device) Step 4: Fix the device to the wall plugs via mounting screws;... - Page 27 Step 5: Remove the cover on the device, and then connect all required wires and pass them through the inside of pole. (Note: if the alarm I/O of VS133-P is going to be used, please connect a multi-interface cable to the device)
- Page 28 Note: Tilt installation should be avoided. Ensure that the front of the device and the ground plane are paralleled. Avoid installing the device against the wall and ensure that the device keeps away from the wall at least 30 cm on the short side and 50 cm on the long side. Ensure that there are no other objects blocking the ToF light within a 30 cm radius of the ...
-
Page 29: Factors Affecting Accuracy
7. Communication Protocol 7.1 LoRaWAN Version ® Uplink Data VS133 reports basic information of sensor whenever joining the network and the number of people periodically. decoder examples please find files https://github.com/Milesight-IoT/SensorDecoders. - Page 30 Line 2: cc (Periodic counter) Byte 1-2: in counter during the report interval Byte 3-4: out counter during the report interval d2 (Accumulated counter) Line 3 accumulated in counter, 4 bytes d2 (Accumulated counter) Line 3 accumulated out counter, 4 bytes Line 3: cc (Periodic Counter) Byte 1-2: in counter during the report interval...
- Page 31 01 =1 Downlink Command VS133 supports to configure the device via downlink commands. Application port is 85 by default. Channel Type Description 10 (Reboot) ff (Reserved) 03 (Reporting Interval) 2 Bytes, unit: s 04 (Confirm Mode) 00: disable, 01: enable...
-
Page 32: Poe Version
03(Set Reporting b0 04 => 04 b0 = 1200s Interval) =20 minutes 7.2 PoE Version VS133-P will post the people counting data in json format to HTTP URL or MQTT broker. Periodic Report "event":"People Counting", "report_type": "period", "device_info":{ "device_name":"People Counter", "device_sn":"369362028335",... - Page 33 "line":2, "in":10, "out":10, "staff_in":1, "staff_out":1, "children_in":1, "children_out":1 "total_data":[ "line":1, "in_counted":10, //accumulated in counter "out_counted":10, //accumulated out counter "capacity_counted":0, //=in_counted-out_counted "staff_in_counted":1, "staff_out_counted":1, "children_in_counted":1, "children_out_counted":1 "line":2, "in_counted":10, "out_counted":10, "capacity_counted":0, "staff_in_counted":1, "staff_out_counted":1, "children_in_counted":1, "children_out_counted":1 Trigger Report "event":"People Counting", "time":"2022-12-20T18:15:52+03:00", "report_type": "trigger", "device_info":{ "device_name":"People Counter", "device_sn":"369362028335", "device_mac":"00:16:28:FA:8E:68",...
- Page 34 "trigger_data":[ "line":1, "in":1, //One person in "out":0, "staff_in":1, //The person is staff "staff_out":0, "children_in":0, "children_out":0 "line":2, "in":1, "out":0, "staff_in":1, "staff_out":0, "children_in":0, "children_out":0 -END-...
Need help?
Do you have a question about the VS133 and is the answer not in the manual?
Questions and answers