
Related Manuals for SHOWTEC 40072


Summary of Contents for SHOWTEC 40072
- Page 1 MANUAL ENGLISH Phantom 130 Spot Ordercode: 40072 Highlite International B.V. – Vestastraat 2 – 6468 EX – Kerkrade – the Netherlands...
-
Page 2: Table Of Contents
Replacing a Gobo From the Rotating Gobo Wheel ...................24 Glass Gobo Orientation .............................25 Rotating Gobo Wheel + Static Gobo Wheel + Color Wheel ................26 Troubleshooting ................................27 No Light ..................................27 No Response to DMX..............................27 Product Specifications ..............................29 Dimensions ..................................30 Ordercode: 40072... -
Page 3: Warning
Save the carton and all packing materials. In the event that a fixture must be returned to the factory, it is important that the fixture be returned in the original factory box and packing. Your shipment includes: ● Showtec Phantom 130 Spot ● Pro power cable (1,5 m) ●... - Page 4 ● If your Showtec device fails to work properly, discontinue the use immediately. Pack the unit securely (preferably in the original packing material), and return it to your Showtec dealer for service.
-
Page 5: Operating Determinations
The installation must always be secured with a safety attachment, e.g. an appropriate safety net or safety cable. ● When rigging, derigging or servicing the Phantom, always make sure, that the area below the installation site is secured and that there are not any unauthorized people around. Ordercode: 40072... -
Page 6: Connection With The Mains
UK Cable US Cable BROWN YELLOW/COPPER PHASE BLUE BLACK SILVER NEUTRAL YELLOW/GREEN GREEN GREEN PROTECTIVE GROUND Make sure that the device is always properly connected to the earth! Improper installation can cause serious injuries and/or damage of property! Ordercode: 40072... -
Page 7: Return Procedure
After this period complaints will not be handled anymore. Complaints will only then be considered if the client has so far complied with all parts of the agreement, regardless of the agreement from which the obligation is resulting. Ordercode: 40072... -
Page 8: Description Of The Device
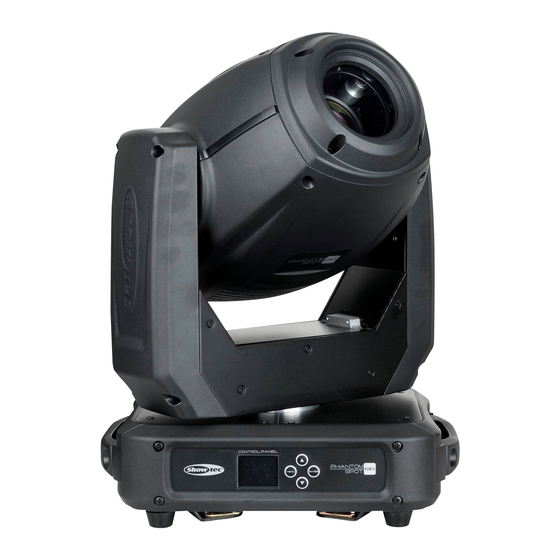
Connection: 3-pin XLR IN/OUT, Pro power connector IN/OUT ● Fuse: F5AL/250V ● Dimensions: 330 x 210 x 460 mm (LxWxH) ● Weight: 13,1 kg Frontside Fig. 01 01) 1 x 130W White LED 02) LCD display + control buttons Ordercode: 40072... -
Page 9: Backside
Before plugging the unit in, always make sure that the power supply matches the product specification voltage. Do not attempt to operate a 120V specification product on 230V power, or vice versa. Connect the device to the main power supply. Ordercode: 40072... -
Page 10: Control Modes
You can use the same functions on the master device as described on page 15-16 (Auto mode, Manual mode or Sound-controlled mode). This means that you can set your desired operation mode on the master device and all slave devices will react the same as the master device. Multiple Phantoms (Master/Slave control) Fig. 03 Ordercode: 40072... -
Page 11: Multiple Phantoms (Dmx Control)
Do not supply power before the whole system is set up and connected properly. Multiple Phantoms DMX Set Up Fig. 04 Note : Link all cables before connecting electric power Ordercode: 40072... -
Page 12: Fixture Linking
FL083 (3 m), FL086 (6 m), FL0810 (10 m), FL0820 (20 m). ● DAP Audio DMX adapter: 5-pin/3-pin. Ordercode FLA29. ● DAP Audio DMX adapter: 3-pin/5-pin. Ordercode FLA30. The Phantom 130 Spot can be operated with a controller in control mode or without the controller in stand-alone mode. Ordercode: 40072... -
Page 13: Control Panel
When no button is pressed for 35 seconds, the display will turn off. To light up the display, you have to press the MENU or ENTER button. Once you have pressed the button, the display will light up. Ordercode: 40072... -
Page 14: Menu Overview
Phantom 130 Spot Menu Overview Ordercode: 40072... -
Page 15: Main Menu Options
01) Press the UP/DOWN buttons, until the display shows 02) Press the ENTER button to confirm. You can choose 512 different DMX addresses. 03) Press the UP/DOWN buttons to select the required address from 001-512. 04) Press the ENTER button to confirm the address. Ordercode: 40072... -
Page 16: Built-In Programs Mode
01) Press the UP/DOWN buttons until the display shows SOUND. 02) Press the ENTER button to activate the Sound-controlled mode. 03) The device will now react to the beat of the background music by means of the built-in microphone. Ordercode: 40072... -
Page 17: Manual Mode
The adjustment range for each option is between 0-255 except the options Pan and Tilt. 06) Press the UP/DOWN buttons to set the value. 07) Press the ENTER button to save changes. 08) The options correspond with the functions described in the DMX charts, pages 18-23. Ordercode: 40072... -
Page 18: Advanced Settings
In this menu you can see the currently active mode, the DMX starting address, the current software version and the temperature of the device. 01) While in the main menu, press the UP/DOWN buttons until the display shows 02) Press the ENTER button to open the menu and view the parameters. Ordercode: 40072... -
Page 19: Dmx Channels
Gradual split color Pink/Light Green 162-177 Gradual split color Light Green/Light Blue 178-189 Gradual split color Light Blue/White 190-221 Clockwise rotation (CW) rainbow effect from fast to slow 222-223 Stop 224-255 Counterclockwise rotation (CCW) rainbow effect from slow to fast Ordercode: 40072... - Page 20 Gobo Shake 2 from slow to fast 112-119 Gobo Shake 1 from slow to fast 120-127 Open / White 128-189 Counterclockwise rotation (CCW) rainbow effect from slow to fast 190-193 Stop 194-255 Clockwise rotation (CW) rainbow effect from slow to fast Ordercode: 40072...
-
Page 21: Channels
The head can be turned by 270° and stopped at any position you wish. Channel 3 – Pan fine 16 bit Channel 4 – Tilt fine 16 bit Channel 5 – PAN/TILT Speed 0-255 From Max Speed (0) to Min. Speed (255) Ordercode: 40072... - Page 22 Gobo Shake 2 from slow to fast 112-119 Gobo Shake 1 from slow to fast 120-127 Open / White 128-189 Clockwise rotation (CW) rainbow effect from slow to fast 190-193 Stop 194-255 Counterclockwise rotation (CCW) rainbow effect from slow to fast Ordercode: 40072...
- Page 23 Prism 2 clockwise rotation (CW) prism effect from slow to fast 194-251 Prism 2 counterclockwise rotation (CCW) prism effect from slow to fast 252-255 Prism 2 Channel 13 – Focus 0-255 Continuous adjustment from far to near Channel 14 – Zoom 0-255 Continuous adjustment from small to big Ordercode: 40072...
- Page 24 Built-in Program 7 120-135 Built-in Program 8 136-151 Sound-controlled Program 1 152-167 Sound-controlled Program 2 168-183 Sound-controlled Program 3 184-199 Sound-controlled Program 4 200-215 Sound-controlled Program 5 216-231 Sound-controlled Program 6 232-247 Sound-controlled Program 7 248-255 Sound-controlled Program 8 Ordercode: 40072...
-
Page 25: Maintenance
Replacing a Gobo From the Rotating Gobo Wheel 01) Disconnect mains power supply and set the switch to OFF. 02) Make sure that the gobo you want to insert has the same size. For the right size, see below. Fig. 06 Ordercode: 40072... -
Page 26: Glass Gobo Orientation
The back edge of the gobo cannot its reflection. The back edge of the gobo can be seen when looking through the coated side. be seen when looking through the uncoated side. Ordercode: 40072... -
Page 27: Rotating Gobo Wheel + Static Gobo Wheel + Color Wheel
Phantom 130 Spot Rotating Gobo Wheel + Static Gobo Wheel + Color Wheel Rotating gobo wheel Static gobo wheel Color wheel Fig. 09 Ordercode: 40072... -
Page 28: Troubleshooting
Suspect three potential problem areas as: the power supply, the LED, the fuse. 01) Power supply. Check if the unit is plugged into an appropriate power supply. 02) The LED. Return the Phantom to your Showtec dealer. 03) The fuse. Replace the fuse. See page 24 for replacing the fuse. - Page 29 No light or LED cut LED damaged Disconnect fixture and return to your out intermittently dealer. The power supply settings do not Disconnect fixture. Check settings and match local AC voltage and correct if necessary. frequency. Ordercode: 40072...
-
Page 30: Product Specifications
Phantom 130 Spot Product Specifications Model: Showtec Phantom 130 Spot Input voltage: 100-240V AC, 50/60Hz Power consumption: 270W (full output) DMX linking: 30pcs Fuse: F5AL/250V Dimensions: 330 x 210 x 460 mm (LxWxH) Weight: 13,1 kg Operating and Programming: Signal pin OUT:... -
Page 31: Dimensions
Phantom 130 Spot Dimensions Ordercode: 40072... - Page 32 ©2018 Showtec...
Need help?
Do you have a question about the 40072 and is the answer not in the manual?
Questions and answers