
Related Manuals for Modena SX 9502 V


Summary of Contents for Modena SX 9502 V
- Page 1 User Manual Book Slim Hood Fresco Series SX 9502 V, SX 9502 S, SX 6501 V SX 6501 S, SX 9512 L, SX 7511 L SX 9412 L, SX 9412 S SX 7412 L, SX 7412 S Forte Series SX 9122 L, SX 9002 S, SX 7121 L,...
-
Page 2: Table Of Contents
Part 4: How to Use Part 5: Maintenance Part 6: Troubleshooting Part 7: Precaution Part 8: Specification This guide book explains everything you need to know about your new product. Please contact our Customer Care should you need further assistance through www.modena.com... -
Page 3: Part 1: Safety Warnings
Before connecting the unit to a power source, make sure the power cord is in good shape. If there is damage to the power cord, the replacement must be performed by qualified personnel or contact the MODENA Service Center for replacement process. -
Page 4: Part 2: Name Of Parts
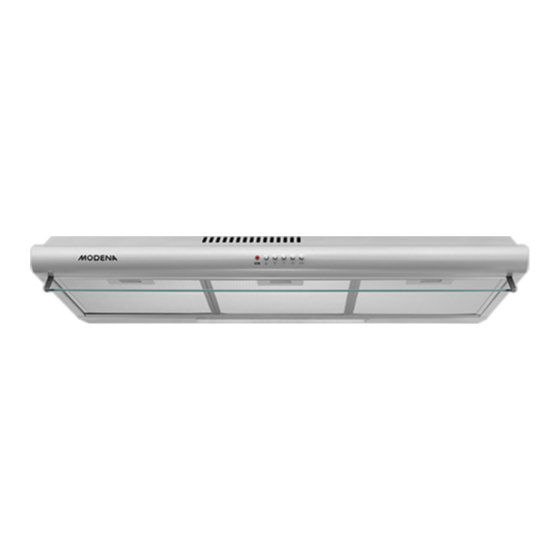
PART 2: NAME OF PARTS SX 6501 S, SX 6501 V, SX 9502 S, and SX 9502 V 1 Carbon Filter 2 Directional Knob 3 Grid 4 Aluminum Filter 5 Lamp 6 Control Panel 7 Air Flow Direction Glass SX 9512 L,SX 7511 L, SX 9412 L, SX 9412 S,SX 7412 L, & SX 7412 S 1. -
Page 5: Part 3: Installation
PART 3: INSTALLATION Exhaust hood is equipment which sucks smoke and cooking fragrance. With a vent hood, your kitchen will be free from oil particles that may produce bad odor. Check the strength of wall on which the exhaust hood is to be installed. Make sure the wall can sustain the weight / load of the vent hood. - Page 6 4. Cover the grid 5. The exhaust hood has two holes on it: Hole D and Hole E (look at the picture). To install the spigot/flange and hole cover, follow these instructions: • For ducting / exhaust system: Install the spigot / flange G on one of the air holes, either D or E.
- Page 7 ATTENTION: Before drilling, make sure that there is no cable installation, water pipe and installation inside the wall. 4. Install the screw on both upper holes and set aside 1 cm between the head of the screw and the wall surface (5). 5.
- Page 8 Operating Procedure MODENA Exhaust Hood has 2 (two) work methods as follows: Ducting / Exhaust System: • In this mode, the exhaust hood operates by sucking the smoke / cooking odor and then discharging it out of the vent. •...
- Page 9 Electricity Connection MODENA Exhaust Hood is designed for 220 volt electricity input, single phase with 50 Hz of frequency. This appliance uses a double-insulated power cord (2 parallel cords) and should not be connected to a grounding wire.
-
Page 10: Part 4: How To Use
PART 4: HOW TO USE • Connect the power cord with an electrical outlet. • Slide or press the motor speed regulator button and light switch to turn vent hood on or off as shown in the following picture. NOTES: Adjust the motor speed of the vent hood according to the thickness of smoke / steam generated by the cooking process. - Page 11 SX 9512 L and SX 7511 L Push Button To turn off the hood Use motor at low speed Use motor at medium speed Use motor at high speed To turn off/on the light Will be activated when operating the hood motor CAUTION: Avoid direct contact of an active stove with the •...
-
Page 12: Part 5: Maintenance
PART 5: MAINTENANCE MODENA Exhaust Hood is specifically designed for long-term usage and does not require complicated maintenance. However, there are several things you can do to maintain its quality as follows: Cleaning the Cabinet: To clean the surface of exhaust hood cabinet from sticky oil particles, use cloth / sponge and soap water and dry it. -
Page 13: Part 6: Troubleshooting
Remove the power cord from the electrical outlet. Open the exhaust hood grid. Rotate the carbon filter counterclockwise and remove the carbon filter Install the new carbon filter by putting it in position rotating it clockwise. ATTENTION: Carbon filter cannot be washed and must be replaced with a new one in accordance with the above description. -
Page 14: Part 7: Precaution
MODENA Service Center. • Perform a routine service on your stove every 3 (three) months, because if there are problems / problems with your exhaust hood, it can be immediately identified and repaired. Contact MODENA Service Center... -
Page 15: Part 8: Specification
PART 8: SPECIFICATION TYPE SX 9502 V SX 6501 S SX 6501 V Hood type Slim Slim Slim Cabinet’s color Silver (V) Stainless (S) Silver (V) Cabinet Material Metal Stainless Metal Front panel’s color Silver (V) Stainless (S) Silver (V) - Page 16 TYPE SX 9512 L SX 7511 L SX 9502 S Hood type Slim Slim Slim Cabinet’s color Black Black Stainless (S) Cabinet Metal Metal Stainless Material Front panel’s Black Black Stainless (S) color Motor Lamp 2 bulb 2 bulb Control panel Push Button Push Button Push Button...
- Page 17 TYPE SX 9412 L SX 9412 S SX 7412 L SX 7412 S Hood type Slim Slim Slim Slim Cabinet’s color Black Stainless Black Stainless Cabinet Metal Stainless Metal Stainless Material Front panel’s Black Stainless Black Stainless color Motor Lamp Control panel Push Button Push Button...
- Page 18 06/21 PT MODENA INDONESIA Jl. Industri Raya I Blok D-8, Jatiuwung, Tangerang 15135...
Need help?
Do you have a question about the SX 9502 V and is the answer not in the manual?
Questions and answers