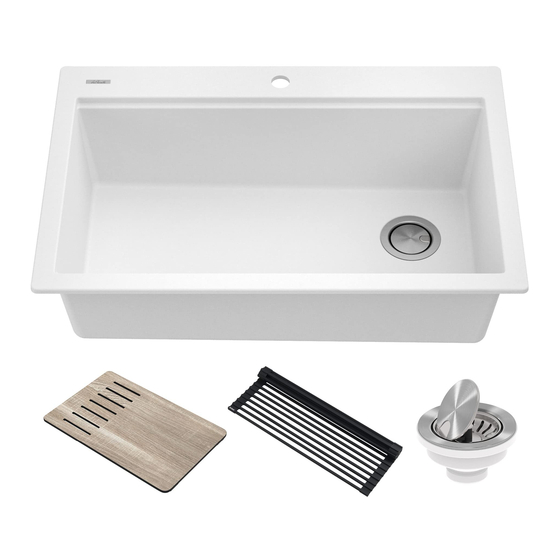
Kraus Bellucci Series Installation Manual
Undermount kitchen sinks
Hide thumbs
Also See for Bellucci Series:
- Installation manual (16 pages) ,
- Installation manual ,
- Installation manual (17 pages)

Subscribe to Our Youtube Channel
Related Manuals for Kraus Bellucci Series


Summary of Contents for Kraus Bellucci Series
- Page 1 INSTALLATION MANUAL Bellucci Series Undermount Kitchen Sinks KGUW1-30 / KGUW1-33 KGUW2-30 / KGUW2-33 www.kraususa.com I Toll Free: 1.800.775.0703 I © 2023 Kraus USA Plumbing LLC I REV. May 10, 2023...
- Page 2 Congratulations on the purchase of your new Kraus plumbing fixture! Please keep the box and packaging materials until your product is completely installed. If you have any questions, require technical assistance or have any problems with your product: STOP DO NOT RETURN TO STORE Please contact our Customer Service Team 1-800-775-0703 / customerservice@kraususa.com...
-
Page 3: Cleaning And Maintenance
Toll-Free: 800-775-0703 or customerservice@kraususa.com While these step-by-step instructions are intended to assist in the safe installation of a Kraus sink, this product is likely to perform best when installed by a licensed professional. The failure to follow these instructions or to hire a professional when needed may result in personal injury or property damage and may void the warranty. -
Page 4: Tools You Will Need
Tape Measure Phillips Screwdriver Pencil Masking Tape Hole Saw Closed Toe Shoes NOTE: Specialized tools may be necessary to install Kraus Granite Kitchen sinks with countertop materials other than wood, marble or granite. Parts List KGUW1-30 KGUW2-30 · Cut-Out Template ·... -
Page 5: Hardware Included
Hardware (Included) Kit for Undermount Installation Replacement parts list KP31003 - Undermount Clips (10 hooks) Important · Instructions may vary depending on countertop material. Read all instructions carefully, and ensure that counters are compatible with sink installation before proceeding. · Follow the plumber’s code and builder’s code effective in your area. - Page 6 Dimensions R5/8" R5/8" (15mm) (15mm) 5 7/8" 5" (148.9mm) (125.5mm) 1" 1" (25.4mm) (25.4mm) 1" 1" (25.4mm) (25.4mm) 30" (762mm) 27" (686mm) 32" (812.8mm) 29" (737mm) 28 5/8" (726mm) 25 5/8" (649.8mm) R1" R1" 3 5/8" 3 5/8" (24mm) (24mm) (93.7mm) (93.7mm) Model #: KGUW1-30...
- Page 7 Step 1. Determine Reveal Type · Use scissors to cut along the line of the paper template for your desired reveal type (Negative, Positive, or Flushed Reveal) KRAUS Recommended Installation Type 3/8” Positive Reveal Flushed/Zero Reveal 3/8” POSITIVE FLUSHED/ZERO Centerline...
- Page 8 Step 2. Position Template Check the cut-out template against the actual sink to ensure a proper sized cut-out. · · Place the cut-out template in the desired location on the countertop. NOTE: Make sure clearance is suitable for backsplash, faucet and plumbing for the sink.
- Page 9 Step 3. Trace Template · Trace template on countertop with a pencil.
- Page 10 Step 4. Cut Countertop · Cut the opening in the countertop by carefully following the traced line. ! CAUTION - To avoid the risk of personal injury, wear safety glasses and cut resistant gloves with non-slip grip when cutting. NOTE: Please use the appropriate saw that best fits your countertop material.
- Page 11 Step 5. Set up Mounting Brackets • Turn countertop over and align sink with countertop. Decide location for mounting brackets around the frame at a distance of about 1/4” (6.4mm) from the edge. • Mounting holes should be 1/4" from the edge of the sink. 1/4"...
- Page 12 Step 7. Install Anchors • Add adhesive (optional) in the holes and then insert anchors into drilled holes and lightly tap with a hammer until flush. Step 8. Secure Sink to Countertop · Use a bead of silicone (or preferred adhesive) around the rim of the sink. Check the alignment of the sink to the cutout in the countertop.
-
Page 13: Step 9. Attach Mounting Hardware
Step 9. Attach Mounting Hardware • Attach mounting hardware to secure bowl. Remove excess sealant from inside lip. • Allow sealant to set for 30 - 60 minutes. NOTE: Use rubbing alcohol to remove any excess sealant. SEALANT BRASS INSERT SUPPORT METAL SCREW Step 10. - Page 14 Kraus warrants the structure and finish of the Kitchen Sink to be free from defects in material and workmanship under normal usage for as long as the original purchaser resides in the residence in which the sink was Kitchen Sink was first installed.
- Page 15 TO THE MAXIMUM EXTENT PERMITTED BY APPLICABLE LAW, THIS WARRANTY DOES NOT COVER, AND KRAUS USA PLUMBING, LLC SHALL NOT BE LIABLE FOR, ANY SPECIAL, INCIDENTAL OR CONSEQUENTIAL DAMAGES (INCLUDING LABOR CHARGES TO REPAIR, REPLACE, INSTALL OR REMOVE THIS PRODUCT), WHETHER ARISING OUT OF BREACH OF ANY EXPRESS OR IMPLIED WARRANTY, BREACH OF CONTRACT, TORT, OR OTHERWISE.
- Page 16 IMPORTANT Register Your Kraus Product Activate Your Warranty Access Premium Customer Support Get Product Information REGISTER TODAY http://www.kraususa.com/registration www.kraususa.com...
Need help?
Do you have a question about the Bellucci Series and is the answer not in the manual?
Questions and answers