Table of Contents
Advertisement
Available languages
Available languages
Quick Links
Advertisement
Table of Contents

Related Manuals for Tekno Point COROLLA SRV-09H


Summary of Contents for Tekno Point COROLLA SRV-09H
- Page 1 CONDIZIONATORE SPLIT INVERTER-MULTIINVERTER WALL MOUNTED INVERTER-MULTIINVERTER TYPE OF AIR CONDITIONER INVERTER-MULTIINVERTER SPLIT LÉGKONDICIONÁLÓ BERENDEZÉS COROLLA SRV-09H, SRV-12H, SROV2-18H, SROV3-27H...
-
Page 2: Table Of Contents
INDICE: Nome delle parti e le loro funzioni Condizioni di operazione Regolazione della direzione di flusso Precauzioni Fenomeni non derivanti da malfunzionamento Anomalie e controlli Pulizia / Manutenzione / Installazione Dati tecnici Telecomando Identificazione delle parti Pannello controllo Funzioni Regolazione timer CONTENTS: Parts names and their functions Air conditioner operation and performance... -
Page 3: Nome Delle Parti E Le Loro Funzioni
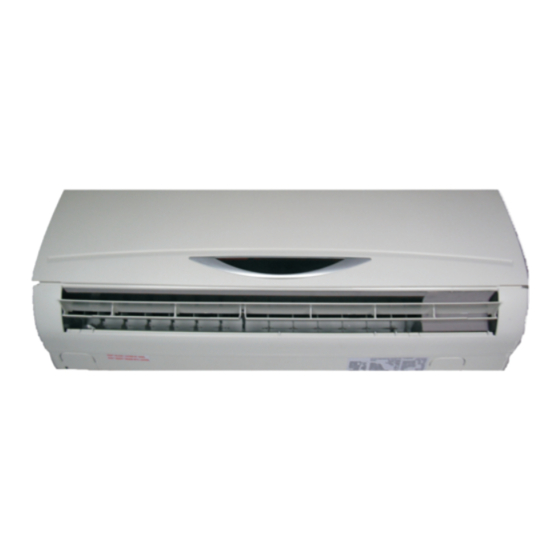
NOME DELLE PARTI E LE LORO FUNZIONI UNITÁ INTERNA Panello frontale Ingresso d’aria Filtro d’aria Uscita d’aria Griglia orizzontale UNITÁ INTERNA Lamelle verticali Pannello display Ricevitore di segnale Telecomando Interruttore UNITÁ ESTERNA Tubo collegamento, tubo di drenaggio Ingresso d’aria Uscita d’aria L'indicatore di operazione lampeggia frequentemente (5 volte/sec) se le funzioni di protezioni sono state attivate. -
Page 4: Regolazione Della Direzione Di Flusso
FUNZIONAMENTO TEMPORANEO Questa funzione serve per far fuzionare il condizionatore se il telecomando é stato smarrito o non funziona per mancanza di pile. 1. Aprire il frontale dell’ apparecchio, alzarlo fino al punto di bloccarlo. Non alzare il frontale piú sopra del punto in cui fermandosi si sente un leggero “click”. -
Page 5: Precauzioni
PRECAUZIONI Si prega di leggere attentamente questo manuale prima di mettere in funzione l’apparecchio e seguire rigorosamente le instruzioni, altrimenti il condizionatore potrebbe subire gravi danni o causarli a persone e cose. DA CONTROLLARE PRIMA DELL’AVVIAMENTO Controllare che la messa a terra sia fatta correttamente. Controllare che il filtro sia inserito correttamente. -
Page 6: Fenomeni Non Derivanti Da Malfunzionamento
PERICOLI Non introdurre mai le mani o altri corpi estranei nelle bocche di entrata o uscita aria. Il condizionatore contiene un ventilatore che gira ad alta velocitá, toccarlo provoca seri danni. Non toccare i deflettori durante il loro movimento, ció puó causare ferite alle mani. Non togliere la cassa del ventilatore dell’unitá... -
Page 7: Anomalie E Controlli
Ad un certo punto del riscaldamento il condizionatore ritorna alla funzione di ventilazione. Quando la temperatura interna raggiunge quella preimpostata, il compressore si ferma per dare inizio alla funzione di ventilazione, e riparte quando la temperatura nuovamente riscende. Se l’umiditá relativa é piú alta del 85%, sulla superficie si possono verificare fenomeni di condensazione. - Page 8 Disturbo Soluzione Causa La corrente elettrica é interatta Aspettare il ripristino, il condizionatore automaticamente riparte Il condozio- La spina elettrica non é collegata Collegare la spina elettrica natore non Cambiare le pile funziona Le pile del telecomando sono scariche Aspettare o cancellare la funzione preimpostata É...
- Page 9 PULIZIA Scollegare l’apparecchio dalla rete elettrica prima di iniziare qualsiasi lavoro di pulizia. 1. Usare un panno asciutto per la pulizia dell’unitá interna e del telecomando. 2. Se l’unitá interna é troppo sporca si puó usare un panno leggermente bagnato. ATTENZIONE: Non usare panni trattati con agenti chimici.
- Page 10 MANUALE D'USO TELECOMANDO INDICE Specificazioni del telecomando Prestazioni Identificazione dei pulsanti di funzionamento Denominazioni e funzioni delle finestre del pannello display Uso del telecomando Precauzioni ATTENZIONE Il condizionatore d'aria non puó funzionare se la trasmissione dei segnali é ostacolata da alcun oggetto o materiale.
- Page 11 Specificazioni del telecomando Modello: R71A/E Voltaggio: 3,0 V Voltaggio dell'Emettitore di Segnale del Panello di Controllo: 2,0 V Portata: 8m (11m usando 3,0 V) Raggio della temperatura ambiente: -5 ~ 60 °C Prestazioni 1. Modalitá di funzionamento: FREDDO, CALDO, DEUMIDIFICATORE, VENTOLA, AUTOMATICO 2.
- Page 12 DENOMINAZIONI E FUNZIONI DELLE FINESTRE DEL PANNELLO DISPLAY DEL TELECOMANDO 1 - Indicatore TRASMISSIONE (TRANSMISSION): Si illumina quando il telecomando trasmette segnali all'unitá interna 2- Indicatore MODALITÁ (MODE): Indica l'attuale modalitá d'operazione: AUTO FREDDO DEUMIDIFICATORE CALDO VENTOLA 3- Indicatore TEMPERATURA (TEMPERATURE): Visualizza la temperatura regolata (da 17 a 30 gradi) 4 - Indicatore VELOCITÁ...
- Page 13 Modalitá FREDDO, CALDO, VENTOLA Nel caso in cui la modalitá AUTO non é conveniente, é possibile cambiare la modalitá adoperando i pulsanti, FREDDO, CALDO (solo modelli in pompa di calore), DEUMIDIFICATORE, VENTOLA. Premere il pulsante V o A per impostare la temperatura desiderata. Nella modalitá FREDDO la temperatura consigliata da impostare é...
-
Page 14: Dati Tecnici
DATI TECNICI -15-... -
Page 15: Parts Names And Their Functions
PARTS NAMES AND THEIR FUNCTIONS INDOOR UNIT Front panel Air inlet Air filter Air outlet Horizontal air flow grille Vertical air flow louver Display panel Infrared signal receiver Remote controller Manual controll button OUTDOOR UNIT Drain hose, refrigerant connecting pipe Air inlet (side and rear) Air outlet The operation indicator lights flash rapidly (five times per second.) -
Page 16: Adjusting Air Flow Direction
TEMPORARY OPERATION This function is used to operate the unit temporarily in case you misplace the remote controller or its batteries are exhausted. 1. Open the pane land, lift the panel up to an angle where it remains fixed. Do not lift the panel any further when it stops with a clicking sound. -
Page 17: Precaution
PRECAUTION Please read this User’s Manual carefully before operation and strictly follow the operation method, or the unit may be seriously damaged and cause injury or property damage. CHECKS BEFORE OPERATION Check that the ground wiring is not broken off and is connected well. Check that the air filter is installed well. -
Page 18: Phenomenia Not Concerning Malfunctions
DANGER Never put hands or objects into the air outlet of indoor and outdoor units. These units contain a fan running at high speed. Touching the moving fan will cause serious injury. Do not touch the grill while the airflow louver is running. Or your finger or machine parts may be hurt. - Page 19 Turn to FAN ONLY while HEATING. When the room temperature reaches to the set one, the compressor will stop to turn to FAN ONLY, and start again until room temperature drop to the set one. When room relative humidity is more than 85%, the surface of the air conditioner may attract condensation.
-
Page 20: Care And Maintenance
CARE AND MAINTENANCE TROUBLES AND CAUSES ABOUT THE AIR CONDITIONER If any of the following conditions occur, stop the air conditioner immediately, set off the power switch, and contact the dealer: The indicator lamps flash rapidly (five times per second), you disconnect the unit with the power and then connect the unit with the power again after two or three minutes but the lamps still flash. - Page 21 CLEANING It is necessary to stop the air conditioner and disconnect the power supply plug before cleaning. 1. Use a dry cloth to wipe the indoor unit and remote controller. 2. A cloth dampened with cold water may be used on the indoor unit if it is very dirty. CAUTION: Do not use a chemical-treated duster for wiping or leave such material on the unit for long.
-
Page 22: Remote Controller
OWNERS M ANUAL REMOTE CONTROLLER CONTENTS - Remote Controller Specifications - Performance Features - Introduction of Function Buttons on the Remote Controller - Names and Functions of indicators on Remote Controller - Operating the Remote Controller Warning 1. Be sure there are no barriers between the remote controller and the receiver of indoor unit otherwise the air conditioner will not work. -
Page 23: Timer Setting
Remote Controller Specifications Model: R71A/E Rated Voltage: 3.0V Lowest Voltage of CPU Emitting Signal: 2.0V Reaching Distance: 8m (when using 3.0 voltage, it Gets 11m) Environment Temperature Range: -5°C ~ 60°C Performance Features 1. Operating Mode: COOL HEAT DRY FAN only and AUTO . 2. - Page 24 Names and Functions of indicators on Remote Controller Display Panel 1 - TRANSMISSION Indicator: This indicator lights when remote controller transmits signals to indoor unit. 2 - MODE indicator: Displays the current operation modes. Including AUTO, COOL, DRY , HEAT or FAN. HEAT only available for heat pump model.
- Page 25 Operating the Remote Controller Install / Replace Batteries Use two alkaline dry batteries (R03/LR03X2). Do not use rechargeable batteries. (1) Remove the battery cover by pulling it according to the arrow direction. (2) Insert new batteries making sure that the (+) and (-) of battery are installed correctly. (3) Reattach the cover by sliding it back into position.
- Page 26 DRY OPERATION 1. Push the Mode button to select DRY. 2. Push the or button to set the desired temperature from 21 C to 2 8 C. 3. Push the On/off button. The operation lamp lights and the air conditioner starts to operate in the DRY mode.
- Page 27 SRV-09H SRV-12H 230V ~ 50 Hz 230V ~ 50 Hz Power supply Btu/h 9000(3500-11000) 12000(7000-15000) Cooling capacity 2,6 (0,8-3,0) 3,6(2,0-4,3) Cooling capacity Btu/h 10500(3500-14000) 14000(7000-19000) Heating capacity 3,0(1,0-4,1) 4,1(2,1-5,7) Heating capacity SRV-09H SRV-12H Indoor unit dB (A) Indoor noise level Dimensioni 10,5 Net weight...
-
Page 28: Részegységek És Szerepük
RÉSZEGYSÉGEK ÉS SZEREPÜK BELTÉRI EGYSÉG Elõlap Levegõ bemenet Szûrõ BELTÉRI EGYSÉG Levegõ kimenet Vízszintes légterelõ lap Függõleges légterelõ lap Kijelzõ panel Infravörös jel-vevõ Távirányító Manuális vezérlõ KÜLTÉRI EGYSÉG Kondenzvíz csõ, hûtõcsõ Levegõ bemenet Levegõ kimenet MEGJEGYZÉS: 1. A mûködést jelzõ lámpa gyorsan villog(másodpercenként 5-ször), ha a biztonsági rendszer mûködik. -
Page 29: A Légáram Beállítása
IDÕSZAKOS MÛKÖDTETÉS Akkor állítsa erre a funkcióra, ha elveszítette a távirányítót vagy az elemek le vannak merülve. Nyissa ki az elõlapot, és addig a dõlésszögig emelje, amíg az meg nem akad. Ne próbálja tovább emelni annál a pontnál, amelynél egy kattanó hangot adva meg nem akad. 2. -
Page 30: Óvintézkedések
ÓVINTÉZKEDÉSEK Kérem olvassa el a használati útmutatót, mielõtt üzembe helyezi és tartsa be az utasításokat, másképp a készülék meghibásodhat, kárt és sérüléseket okozhat. ÜZEMBE HELYEZÉS ELÕTT: Nézze meg a kábel nincs-e megszakadva, illetve jól van csatlakoztatva. Ellenõrizze, hogy a légszûrõ jól van beszerelve. Ha sokáig állt a készülék, tisztítsa ki a légszûrõt mielõtt használja. -
Page 31: Nem Meghibásodásból Eredõ Jelenségek
VESZÉLYES! Soha ne dugja az ujjait, vagy más tárgyakat a levegõ kimeneti rács nyílásaiba. Hívja fel a gyerekek figyelmét erre a veszélyre! A készülék nagy sebességû ventillátort tartalmaz, melynek a megérintése komoly sérüléseket okozhat. Ne nyúljon a rácshoz, ha a légterelõk mûködnek. Az ujjai, illetve a készülék részei megsérülhetnek. - Page 32 Ha a szoba relatív nedvességtartalma nagyobb, mint 85%, a légkondicionálón lecsapódhat a nedvesség Fagytalanítás Ha a kültéri egység elfagy fûtés közben, a fûtõteljesítménye jelentõsen csökken. Ekkor a fagytalanítás automatikusan megkezdõdik. Eközben a kompresszor tovább mûködik és a ventillátor leáll. Miután a fagytalanítás befelyezõdött, a fûtés folytatódik.
-
Page 33: Hibák És Megoldások
HIBÁK ÉS MEGOLDÁSOK A LÉGKONDICIONÁLÓ HIBÁI ÉS ENNEK OKAI Ha az alábbiakban felsoroltak közül bármelyik eset elõfordul, állítsa le a készüléket, áramtalanítsa és hívja a szervízt: A mûködést jelzõ lámpa gyorsan villog.(másodpercenként 5-ször)Miután kikapcsolta, áramtalanította, majd kis idõ múlva visszakapcsolta a készüléket és a lámpa még mindig villog. Hibák és A biztosíték gyakran kiég vagy a megszakító... - Page 34 TISZTÍTÁS Ki kell kapcsolni és áramtalanítani a berendezést, mielõtt elkezdi tisztítani. 1. Használjon egy száraz ruhadarabot a beltéri egység és a távirányító tisztításához. 2. Ha a beltéri egység nagyon szenyezett, nedves ruhával törölje le. FIGYELEM: Ne használjon vegyszeres ruhadarabot a tisztításhoz, és ne hagyjon a burkolaton vegyszereket. Ne használjon benzint, hígítót, súroló...
- Page 35 TÁVIRÁNYITÓ HASZNÁLATI UTASITÁS TARTALOM A távirányitó Funkció gombok Kijelzõk Mûködés Figyelem! 1. Bizonyosodjon meg arról, hogy a távirányító jelzését nem akadályozza semmilyen tárgy, ellenkezõ esetben a beltéri egység nem tudja venni a jelet. 2. Semmilyen folyadék nem kerülhet a távirányítóba. 3.
- Page 36 FUNKCIÓ GOMBOK 1 - On/Off: a készülék ki-bekapcsolása 2 - Mode: a gombot megnyomva válthat a felhasználási módok között a következõ sorrendben: AUTO, COOL, DRY, HEAT, FAN 3 - Gomb: a beltéri hõmérsékletet beállítását növeli (max 30 C°) 4 - Gomb: a beltéri hõmérsékletet beállítását csökkenti (min.
- Page 37 TÁVIRÁNYÍTÓ KIJELZÕ PANEL 1 - Átviteli kijelzõ: akkor jelenik meg, amikor a távirányitó jelet közvetit a beltéri egységnek. 2 - Mûködési mód kijelzõ: az aktuális mûködési módot jelzi: AUTO, COOL, DRY, HEAT (amennyiben készüléke rendelkezik ilyen funkcióval), FAN. 3 - Hõmérséklet kijelzõ. 4 -Ventilátor sebesség jelzõje: AUTO, LOW, MED, HIGH.
- Page 38 Automata mûködés Ha a légkondicionáló mûködésképes, helyezze áram alá, ekkor a mûködést jelzõ lámpa villogni kezd a kijelzõn. 1. A Mode gombbal válassza az AUTO üzemmódot. 2. A ¡ és ^ gombbal állítsa be a kívánt hõmérsékletet. A legmegfelelõbb 21 C° -28 C°. 3.
- Page 39 TIMER (idõkapcsoló) mûködése A Timer on/off gombbal be-ill. kikapcsolja a funkciót. Az effektív mûködési idõ 0.5-24 óra között állítható be. 1. A bekapcsolás idõpontjának beállítása: 1.1. Nyomja meg a Timer on gombot, ekkor a távirányítón megjelenik az ON TIMER felirat, az utolsó beállított idõ, és a Hr jelzés a kijelzõn. Ekkor beprogramozhatja a kívánt idõpontot, majd indítsa el (START) a mûködést.
- Page 40 Mûszaki adatok -43-...
- Page 41 TEKNO POINT www.teknopoint.com klima@teknopoint.com YTP UM 06 KLI SRV IEH...
Need help?
Do you have a question about the COROLLA SRV-09H and is the answer not in the manual?
Questions and answers