Tefal Pain Plaisir / Pain & Delices Manual
- Instructions for use manual (156 pages) ,
- Manual (142 pages) ,
- Manual (184 pages)
Advertisement
- 1 DESCRIPTION
- 2 PRIOR TO FIRST USE
- 3 QUICK START-UP
- 4 USING YOUR BREAD MAKER
- 5 OPERATION OF THE BREAD MAKER
- 6 DELAYED START PROGRAM
- 7 PRACTICAL ADVICE
- 8 INFORMATION ON THE INGREDIENTS
- 9 SPECIFIC INFORMATION REGARDING THE "PAIN & DÉLICES" BREAD MACHINE
- 10 CLEANING AND MAINTENANCE
- 11 TROUBLESHOOTING GUIDE TO IMPROVE YOUR RECIPES
- 12 TECHNICAL TROUBLESHOOTING GUIDE
- 13 Documents / Resources
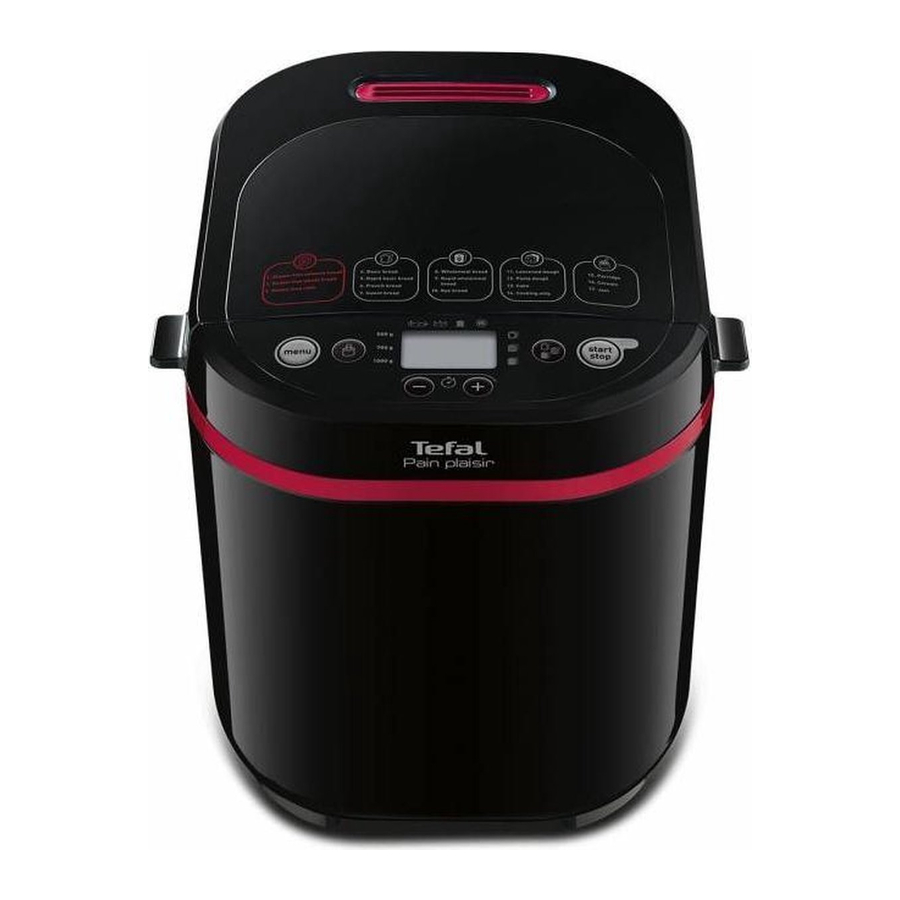
DESCRIPTION
- Lid
- Control panel
- Display screen
- Choice of programs
- Weight selection
- Buttons for setting delayed start and adjusting the time for programs 11
- Select crust colour
- On/off button
- Operating indicator light
- Bread pan
- Kneading paddle
- Graduated beaker
- Teaspoon measure/ tablespoon measure
- Hook accessory for lifting out kneading paddle
- Storage lid
- Cottage cheese pot
- Yoghurt pot
PRIOR TO FIRST USE
- Please read the instructions for use carefully before using your appliance for the first time and keep them in a safe place for future reference.
- Remove all packaging, stickers and various accessories both inside and outside the appliance
![]()
- Clean all components and the appliance using a damp cloth and dry thoroughly..

QUICK START-UP
- Place your appliance on a flat, stable, heat-resistant work surface away from water splashes.
- Unwind the cord and plug it into an earthed electrical power outlet. After the audio signal plays, program 1 is displayed by default -
![]()
- A slight odour may be given off when the appliance is first used.
- Remove the bread pan by lifting the handle. Next install the kneading paddle -
![]()
- Add the ingredients in the pan in the recommended order (see the paragraph PRACTICAL ADVICE). Make sure that all ingredients are weighed accurately -
![]() .
. - Insert the bread pan -
![]() .
. - Close the lid.
- Select the desired program using the
![]() key.
key. - Press the
![]() key. The 2 points of the timer flash. The operating indicator light lights up -
key. The 2 points of the timer flash. The operating indicator light lights up - ![]() .
.


- At the end of the cooking cycle, press
![]() and unplug the bread maker.
and unplug the bread maker.
Remove the bread pan. Always use oven mitts, because both the pan's handle and the inside of the lid are hot. Turn out the bread while hot and place it on a rack for 1 hr. to allow it to cool -![]() .
.

To get acquainted with the operation of your bread maker, we suggest trying the CLASSIC BREAD recipe as your first bread.
| CLASSIC BREAD (program 4) | INGREDIENTS - tsp = teaspoon - tbsp = tablespoon |
| CRUST COLOUR = MEDIUM |
|
| WEIGHT = 1000 g |
USING YOUR BREAD MAKER
Selection of a program
 Use the menu key to select the desired program. Each time that you press the
 ![]() key, the number on the display screen goes to the next program.
key, the number on the display screen goes to the next program.
- Savoury gluten-free bread. Program used to make recipes low in sugar and fat. We recommend the use of a ready-to-use mix (see warnings for the use of gluten-free programs).
- Sweet gluten-free bread. Program used to make recipes containing sugar and fat (e.g. brioche). We recommend using a ready-to-use mix.
- Gluten-free cake. Program used to make gluten-free cakes with baking powder. We recommend using a ready-to-use mix.
- Classic bread. Use this program to make a sandwich loaf type white bread recipe.
- Quick classic bread. Use this program to more quickly make a loaftype white bread recipe.
- French Bread. Use this program to make a traditional French white bread recipe with a thicker crust.
- Sweet Bread. This program is suitable for brioche type recipes that contain more fat and sugar. If you use ready-to-use preparations, do not exceed 750 g of dough in total.
- Whole grain bread. Select this program when making recipes based on whole grain flour.
- Quick whole grain bread. Use this program to more quickly make a recipe based on whole grain flour.
- Rye bread. Select this program when using a large quantity of rye flour or other cereals of this type (e.g. buckwheat, spelt).
- Leavened doughs. Use this program to make recipes for pizza dough, bread dough and waffle dough. This program does not cook food.
- Pasta. Use this program to make recipes for Italian type pasta or pie crust dough.
- Cake. Use this program to make cakes using baking powder. Only the 1000 g setting is accessible for this program.
- Cooking. Use this program to cook for 10 to 70 min. It can be selected on its own and be used:
- after completion of the Leavened Dough program,
- to reheat or crisp the surface of already cooked breads that have cooled,
- to finish cooking in the event of a prolonged power outage during a bread cycle.
- Porridge. Use this program to make porridge and rice pudding recipes.
- Cereals. Use this program to make recipes for rice pudding, semolina pudding and buckwheat pudding.
- Jam. Use this program to make home-made jams. When using programs 15, 16 and 17, be careful of steam jets and the release of hot air when opening the lid.
Programs specific to the "Pain & Délices" bread machine:
- Yoghurt. Used to make yoghurt based on pasteurised cow's milk, goat's milk or soya milk. Place the yoghurt pot in the pan (without the lid or cottage cheese filter). Once prepared, keep in a cool place and consume within 7 days.
- Drinkable yoghurt. Used to make drinkable yoghurt based on pasteurised milk. Place the yoghurt pot in the pan (without the lid). Shake well before drinking. Once prepared, keep in a cool place and consume within 7 days.
- Soft white cheese. Used to make soft white cheese from curdled cow's milk or goat's milk. Place the cottage cheese pot in the yoghurt pot (without the lid) and install it in the pan. A draining phase is necessary. Once prepared, keep in a cool place and consume within 2 days.
Selecting the bread weight
Press the ![]() key to set the weight selected - 500 g, 750 g or 1000 g. The indicator light lights up opposite the selected setting. The weight is provided for information purposes only. For some programs, it is not possible to select the weight. Please refer to the cycle chart at the end of the instruction manual.
key to set the weight selected - 500 g, 750 g or 1000 g. The indicator light lights up opposite the selected setting. The weight is provided for information purposes only. For some programs, it is not possible to select the weight. Please refer to the cycle chart at the end of the instruction manual.
Selecting the crust colour
Three choices are available: light / medium / dark. If you wish to modify the default setting, press the ![]() key until the indicator light lights up opposite the selected setting. For some programs, it is not possible to select the crust colour. Please refer to the cycle chart at the end of the instruction manual.
key until the indicator light lights up opposite the selected setting. For some programs, it is not possible to select the crust colour. Please refer to the cycle chart at the end of the instruction manual.
Start / Stop
Press the ![]() key to turn on the appliance. The countdown starts. To stop the program or cancel the programmed delayed start, press the
key to turn on the appliance. The countdown starts. To stop the program or cancel the programmed delayed start, press the ![]() key for 3 seconds.
key for 3 seconds.
OPERATION OF THE BREAD MAKER
The cycle chart (see the end of the instruction manual) indicates the breakdown of the various steps, according to the selected program. An indicator light indicates which step is currently under way.
Kneading

Use this program to form the structure of the dough and its ability to rise properly.
During this cycle, you may add ingredients: dried fruits.
Rest
![]()
Allows the dough to expand to improve the quality of the kneading.
Rise
![]()
Time during which the yeast works to leaven the bread and develop its aroma.
Cooking
![]()
Transforms the dough into a loaf and ensures the desired crust colour and crispness level.
Keep warm
![]()
Keeps the bread warm for 1 hour after cooking. It is nonetheless recommended to turn out the bread once cooking is done.
The display screen continues to display "0:00" during the hour-long "Keep warm" cycle. At the end of the cycle, the appliance stops automatically after producing several audio signals.
DELAYED START PROGRAM
You may program the appliance to ensure that your preparation is ready at the time of your choice, up to 15 hrs. in advance. The delayed start program is not available for: Programs 5,11, 12, 13, 14, 15, 16 and 17 (for "Pain Plaisir" model). Programs 5, 11, 12, 13, 14, 15, 16, 17, 18, 19 and 20 (for "Pain & Délices" model).
This step occurs after having selected the program, the crust colour and the weight. The program time is displayed. Calculate the time difference between the moment you start the programme and the time at which you want your recipe to be ready. The machine automatically includes the programme cycle duration. To access the delayed start, press the button and the ![]() image will appear on the display as well as the default time (15:00). To set the time, press the
image will appear on the display as well as the default time (15:00). To set the time, press the ![]() button. The
button. The ![]() lights up. Press
lights up. Press ![]() to launch the delayed start program.
to launch the delayed start program.
If you make a mistake or wish to modify the time setting, hold down the ![]() key until it emits an audio signal. The default time is displayed. Start the operation again.
key until it emits an audio signal. The default time is displayed. Start the operation again.
Some ingredients are perishable. Don't use the delayed start program for recipes containing: raw milk, eggs, yoghurt, cheese, fresh fruit.
PRACTICAL ADVICE
- All ingredients used must be at room temperature (unless otherwise indicated), and must be weighed accurately. Measure the liquids using the graduated cup provided. Use the spoon provided to measure tablespoons on one side and teaspoons on the other. Inaccurate measurements will yield bad results. Bread preparation is very sensitive to temperature and humidity conditions. During hot weather, it is recommended to use cooler liquids than usual. Likewise, during cold weather, it may be necessary to warm the water or milk (never exceed 35°C).
![]()

- Use ingredients prior to their best-before date and keep them in a cool, dry place.
- The flour must be weighed accurately using a kitchen scale. Use active dry baker's yeast (in pouches).
- Avoid opening the lid during use (unless otherwise indicated).
- Follow the exact order of the ingredients and the quantities indicated in the recipes. First the liquids, and then the solids. The yeast must not come into contact with the liquids or with the salt. Too much yeast weakens the dough structure, which will rise a lot and will subsequently sag during cooking.
General order to follow:
- Liquids (softened butter, oil, eggs, water, milk)
- Salt
- Sugar
- First half of the flour
- Powdered milk
- Specific solid ingredients
- Second half of the flour
- Yeast
- During a power outage under 7 minutes, the machine will save its status and will resume its operation once the power comes online.
- If you wish to have one bread cycle directly follow another, wait for approximately 1 hr. between both cycles to allow the machine to cool and prevent any potential impact on bread making.
- When turning out your bread, the kneading paddle may remain stuck inside it. In this case, use the hook to gently remove it. To do so, insert the hook in the kneading paddle's shaft, and then lift to remove it.
![]()

Warnings for the use of gluten-free programs
Menus 1, 2 and 3 must be used to make gluten-free breads or cakes. For each program, a single weight is available.
Gluten-free breads and cakes are suitable for those who have an intolerance to the gluten (celiac disease sufferers) present in several cereals (wheat, barley, rye, oat, kamut, spelt, etc.).
It is important to avoid cross-contamination with flours containing gluten. Exercise special care cleaning the pan and the kneading paddle, as well as all utensils being used to make gluten-free breads and cakes. You must also ensure that the yeast used contains no gluten.
Gluten-free recipes have been developed based on the use of preparations (also called ready-to-use mixes) for gluten-free bread that are either Schär or Valpiform type.
- Blends of flour types must be sifted with the yeast to prevent lumps.
- When the program is launched, it is necessary to assist the kneading process: scrape down any unmixed ingredients on the sides towards the centre of the pan using a non-metallic spatula.
- Gluten-free bread cannot rise as much as a traditional bread. It will be of a denser consistency and lighter colour than normal bread.
- All premix brands do not yield the same results: the recipes may have to be adjusted. It is therefore recommended to conduct some tests (see example below).
Example: adjust the quantity of liquid.

Exception: cake batter must remain quite liquid.
INFORMATION ON THE INGREDIENTS
Yeast: Bread is made using baker's yeast. This type of yeast is sold in several forms: small cubes of compressed yeast, active dry yeast to be rehydrated or instant dry yeast. Yeast is sold in supermarkets (bakery or fresh foods departments), but you can also buy compressed yeast from your baker.
The yeast must be directly incorporated in your machine's pan with the other ingredients. Nonetheless consider thoroughly crumbling the compressed yeast between your fingers to facilitate its dispersion.
Follow the recommended amounts (see the equivalences chart below).
Quantity/weight equivalences between dry yeast and compressed yeast:
| Dry yeast (in tsp) | 1 | 1.5 | 2 | 2.5 | 3 | 3.5 | 4 | 4.5 | 5 |
| Compressed yeast (in g) | 9 | 13 | 18 | 22 | 25 | 31 | 36 | 40 | 45 |
Flours: Using T55 flour is recommended, unless otherwise indicated in the recipes. When using mixes of special flour types for bread, brioche or milk bread, do not exceed 750 g of dough in total (flour + water).
Depending on the quality of the flour, the bread making results may also vary.
- Keep flour in a hermetically sealed container, since flour reacts to fluctuations in climate conditions (humidity). Adding oats, bran, wheat germ, rye or whole grains to the bread dough, will produce a bread that is denser and less fluffy.
- The more a flour is based on whole grains, that is, containing a part of the outer layers of a wheat grain (T>55), the less the dough will rise and the denser the bread will be.
- You will also find commercially available ready-to-use preparations for breads. Please refer to the manufacturer's recommendations for the use of these preparations.
Gluten-free flour: Using large quantities of these flour types to make bread calls for the use of the gluten-free bread program. There is a large number of flour types that do not contain any gluten. The best known are buckwheat flour, rice flour (either white or whole grain), quinoa flour, corn flour, chestnut flour, millet flour and sorghum flour.
For gluten-free breads, in order to try to recreate the elasticity of gluten, it is essential to mix several types of non bread making flours and to add thickening agents.
Thickening agents for gluten-free breads: To obtain a proper consistency and to attempt to imitate the elasticity of gluten, you may add some xanthan gum and/or guar gum to your preparations.
Ready-to-use gluten-free preparations: They make it easier to make gluten-free bread since they contain thickeners and have the advantage of being completely guaranteed to be gluten-free — some are also organic.
All brands of ready-to-use gluten-free preparations do not yield the same results.
Sugar: Don't use sugar lumps. Sugar feeds the yeast, gives a good flavour to the bread and improves the crust colour.
Salt: It regulates the activity of the yeast and gives flavour to bread.
It must not come into contact with the yeast prior to the start of the preparation.
It also improve the structure of the dough.
Water: Water rehydrates and activates the yeast. It also hydrates the flour's starch and enables the loaf to be formed. Water may be replaced, in whole or in part, by milk or other liquids. Use liquids at room temperature, except for gluten-free breads, which require the use of warm water (approximately 35°C).
Fats and oils: Fats make the bread fluffier. It will also keep better and longer. Too much fat slows the rise of the dough. If you use butter, crumble it into small pieces or soften it. Do not incorporate melted butter. Prevent the fat from coming into contact with the yeast, since the fat could prevent the yeast from rehydrating.
Eggs: They improve the bread's colour and favour good development of the loaf. If you use eggs, reduce the quantity of liquid accordingly. Break the egg and add the necessary liquid until you obtain the quantity of liquid indicated in the recipe.
The recipes have been designed for a medium-sized egg of 50 g, if the eggs are larger, add some flour; if the eggs are smaller, add a little less flour.
Milk: Milk has an emulsifying effect that leads to the creation of more regular cells, and therefore an attractive loaf appearance. You may use fresh milk or powdered milk. If you use powdered milk, add the quantity of water initially reserved for milk: the total volume must be equal to the volume indicated in the recipe.
SPECIFIC INFORMATION REGARDING THE "PAIN & DÉLICES" BREAD MACHINE
CHOICE OF INGREDIENTS FOR YOGHURT
Milk
Which type of milk may I use?
You may use all types of milk (for example, cow's milk, goat's milk, sheep's milk, soya milk or other plant-based milks). The consistency of the yoghurt may vary according to the milk used. Raw milk, long shelf life milks and all milks described below are suitable for use in the appliance:
- Sterilised long shelf life milk: Whole UHT milk produces a firmer yoghurt. Partly skimmed milk produces a less firm yoghurt. Alternatively, you may use partly skimmed milk and add 1 or 2 tablespoons of powdered milk.
- Whole milk: this milk produces a creamier yoghurt, with a thin "skin" layer on top.
- Raw milk (farm milk): this type of milk must be boiled beforehand. We recommend boiling it for a sufficient length of time. Next, let it cool before placing it in the appliance.
- Powdered milk: this type of milk produces a very creamy yoghurt. Always follow the instructions appearing on the manufacturer's packaging.
Fermentation Agent
For the yoghurt
The fermentation agent may be:
- A plain yoghurt purchased in a store, whose expiration date is the latest one available.
- A freeze-dried fermentation agent or lactic cultures. In this case, follow the activation duration indicated in the fermentation agent's instructions for use. These agents are available in supermarkets, pharmacies and some health food stores.
- One of your recently prepared yoghurts – this must be a plain yoghurt, the most recent possible. This process is called a "culture".
The properties of the agents may be destroyed by overly elevated temperatures.
Fermentation Time
- Depending on the basic ingredients used and the desired result, the fermentation of the yoghurt will take between 6 and 12 hours.


Once the cooking is done, put the yoghurt in the refrigerator for at least 4 hours, and consume it within 7 days.
Rennet (for soft white cheese)
To make your cheeses, you can use some rennet or an acidic liquid such as lemon juice or vinegar to curdle the milk.
CLEANING AND MAINTENANCE

- Unplug the appliance and wait for it to cool down completely.
- Wash the pan and the kneading paddle using hot soapy water. If the kneading paddle stays in the pan, soak it for 5 to 10 min.
- Clean the body of the appliance with a damp cloth sponge. Dry thoroughly.
- The appliance and removable parts are unsuitable for dishwasher use.
- Don't use any household cleanser, abrasive pads or alcohol. Use a soft, damp cloth.
- Never submerge the appliance's body or the lid in water or any other liquid..
TROUBLESHOOTING GUIDE TO IMPROVE YOUR RECIPES


TECHNICAL TROUBLESHOOTING GUIDE
| PROBLEMS | CAUSES - SOLUTIONS |
| The kneading paddle is stuck in the pan. |
|
After pressing on  , nothing happens. , nothing happens. |
|
| After pressing on , the motor is on but no kneading takes place. |
button. Start the recipe again from the beginning. |
| After a delayed start, the bread has not risen enough or nothing happens. |
|
| Burnt smell. |
|
Documents / ResourcesDownload manual
Here you can download full pdf version of manual, it may contain additional safety instructions, warranty information, FCC rules, etc.
Advertisement


Need help?
Do you have a question about the Pain Plaisir and is the answer not in the manual?
Questions and answers