Table of Contents
Advertisement
Advertisement
Table of Contents

Subscribe to Our Youtube Channel
Related Manuals for Ubiquiti UniFi UAP-AC-HD


Summary of Contents for Ubiquiti UniFi UAP-AC-HD
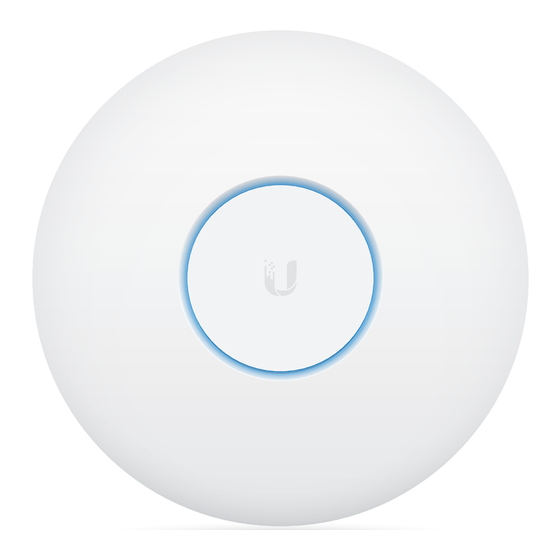
- Page 1 802.11ac Wave 2 Enterprise Wi-Fi Access Point Model: UAP-AC-HD...
-
Page 2: Package Contents
Mount Bracket Guide * Included only in the single-pack of the UAP-AC-HD TERMS OF USE: Ubiquiti radio devices must be professionally installed. Shielded Ethernet cable and earth grounding must be used as conditions of product warranty. TOUGHCable ™ is designed for outdoor installations. It is the customer’s responsibility to follow local country regulations, including operation within legal frequency channels, output power, and Dynamic Frequency Selection (DFS) requirements. -
Page 3: Outdoor Installation Requirements
Ethernet connections and should be grounded through the AC ground of the PoE. We recommend that you protect your networks from harmful outdoor environments and destructive ESD events with industrial-grade, shielded Ethernet cable from Ubiquiti Networks. For more details, visit www.ubnt.com/toughcable System Requirements •... -
Page 4: Network Topology Requirements
Network Topology Requirements • A DHCP-enabled network (for the AP to obtain an IP address as well as for the wireless clients after deployment) • A UniFi Cloud Key or management station running the UniFi Controller v5.3 (or newer) software, located either on-site and connected to the same Layer 2 network, or off-site in the cloud or NOC UniFi Hybrid... -
Page 5: Hardware Overview
Hardware Overview LED Color Status Factory default, waiting to be integrated. White Initializing. Flashing White Device is busy; do not touch or unplug it. Alternating This usually indicates that a process such White/Blue as a firmware upgrade is taking place. Indicates the device has been successfully Blue integrated into a network and is working... - Page 6 Ports Security Slot Reset Button USB 3C Main Port Port Secondary Port Reset The Reset button serves two functions for the UniFi AP: Restart • Press and release the Reset button quickly. • Restore to Factory Default Settings Press and hold the Reset button for more than five seconds.
- Page 7 Upgrade from UAP-AC-PRO The UAP-AC-HD uses the same mounting hardware as the UAP-AC-PRO, so you only need to remove the UAP-AC-PRO and replace it with the UAP-AC-HD. To begin the upgrade, perform the following steps: 1. Insert a straightened paper clip into the UAP-AC-PRO Security Slot to disengage the lock.
-
Page 8: Hardware Installation
Hardware Installation The UniFi AP can be mounted on the wall or ceiling. Perform the steps for the appropriate installation: Wall Mount 1. Position the Mounting Bracket at the desired location on the wall with the Arrow pointing up. 2. Mark the four mounting holes, and use a 6 mm drill bit to drill the holes. - Page 9 3. Insert the Screw Anchors into the holes. Secure the Mounting Bracket to the wall by inserting the Screws into the anchors. 4. Remove the rubber port cover from the UniFi AP.
- Page 10 5. If the Ethernet cable is fed through the wall, skip to step 6. If the Ethernet cable runs along the mounting surface, remove the cable feed plug. 6. Feed the Ethernet cable through the port cover. Note: The feed hole will stretch to accommodate the RJ45 connector, and then seal around the cable.
- Page 11 8. Align the Arrow on the top edge of the UniFi AP with the Arrow on the Mounting Bracket. Arrow Arrow Lock 9. Rotate the UniFi AP clockwise until the tabs lock into place and the Lock Tab engages.
-
Page 12: Ceiling Mount
Ceiling Mount 1. Remove the ceiling tile. 2. Place the Ceiling Backing Plate in the center of the ceiling tile. Mark the four mounting screw holes and a 18 mm hole for the Ethernet cable feed. Optional 18 mm Hole for Ethernet Cable Feed through the Wall 3. - Page 13 4. Insert the Flat Head Screws through the Mounting Bracket, ceiling tile, and Ceiling Backing Plate. Fasten the screws using the Keps Nuts. Then feed the Ethernet cable through the tile and bracket.
- Page 14 5. Remove the port cover from the UniFi AP, and then feed the Ethernet cable through the port cover. Note: The feed hole will stretch to accommodate the RJ45 connector, and then seal around the cable. 6. Connect the Ethernet cable to the Main port and replace the port cover.
- Page 15 7. Align the Arrow on the top edge of the UniFi AP with the Arrow on the Mounting Bracket. Lock Tab Arrow Arrow 8. Rotate the UniFi AP clockwise until the tabs lock into place and the Lock Tab engages. 9.
- Page 16 Powering the UniFi AP The UAP-AC-HD features auto-sensing 802.3at PoE+ support and can be powered by any of the following: • Ubiquiti Networks UniFi Switch with 802.3at PoE+ • 802.3at PoE+ compliant switch • Ubiquiti Networks Gigabit PoE Adapter (48V, 0.5A) The single-pack of the UAP-AC-HD includes one Gigabit PoE adapter.
- Page 17 Connecting to a PoE Adapter 1. Connect the Ethernet cable from the UniFi AP to the POE port of the Gigabit PoE adapter. 2. Connect an Ethernet cable from your LAN to the LAN port of the Gigabit PoE adapter. 3.
-
Page 18: Software Installation
UniFi Controller management interface. For information on configuring and using the UniFi Controller software, refer to the User Guide. Mobile App Installation Ubiquiti Networks also offers the UniFi mobile app, which is available from the App Store (iOS) or Google Play Store ™... -
Page 19: Specifications
Specifications UAP-AC-HD Dimensions 220 x 220 x 48.1 mm (8.66 x 8.66 x 1.89") Weight 700 g (1.54 lb) with Mounting Kit 830 g (1.83 lb) Networking Interface (2) 10/100/1000 Ethernet Ports Buttons Reset Power Method PoE+ 802.3at Power Supply 48V, 0.5A Gigabit PoE Adapter* Max. -
Page 20: Safety Notices
Safety Notices Read, follow, and keep these instructions. Heed all warnings. Only use attachments/accessories specified by the manufacturer. WARNING: Do not use this product in location that can be submerged by water. WARNING: Avoid using this product during an electrical storm. -
Page 21: Limited Warranty
(VI) has no original Ubiquiti MAC label, or is missing any other original Ubiquiti label(s); or (VII) has not been received by Ubiquiti within 30 days of issuance of the RMA. -
Page 22: Limitation Of Liability
SUBJECT TO LIMITATIONS, INTERRUPTIONS, DELAYS, CANCELLATIONS AND OTHER PROBLEMS INHERENT IN THE USE OF COMMUNICATIONS FACILITIES. UBIQUITI NETWORKS, ITS AFFILIATES AND ITS AND THEIR THIRD PARTY PROVIDERS ARE NOT RESPONSIBLE FOR ANY INTERRUPTIONS, DELAYS, CANCELLATIONS, DELIVERY FAILURES, DATA LOSS, CONTENT CORRUPTION, PACKET LOSS, OR OTHER DAMAGE RESULTING FROM ANY OF THE FOREGOING. -
Page 23: Industry Canada
damages, so the above limitation may not apply to you. EXCEPT TO THE EXTENT ALLOWED BY LOCAL LAW, THESE WARRANTY TERMS DO NOT EXCLUDE, RESTRICT OR MODIFY, AND ARE IN ADDITION TO, THE MANDATORY STATUTORY RIGHTS APPLICABLE TO THE LICENSE OF ANY SOFTWARE (EMBEDDED IN THE PRODUCT) TO YOU. - Page 24 This device complies with Industry Canada licence-exempt RSS standard(s). Operation is subject to the following two conditions: This device may not cause interference, and This device must accept any interference, including interference that may cause undesired operation of the device. This radio transmitter (IC: 6545A-UAPACHD) has been approved by Industry Canada to operate with the antenna types listed below with the maximum permissible gain and required antenna impedance for each antenna type...
-
Page 25: Australia And New Zealand
Australia and New Zealand Warning: This is a Class A product. In a domestic environment this product may cause radio interference in which case the user may be required to take adequate measures. CE Marking CE marking on this product represents the product is in compliance with all directives that are applicable to it. - Page 26 Altgeräte benötigen, wenden Sie sich bitte an die örtlichen Behörden oder städtischen Entsorgungsdienste oder an den Händler, bei dem Sie das Produkt erworben haben. Español La Directiva 2012/19/UE exige que los equipos que lleven este símbolo en el propio aparato y/o en su embalaje no deben eliminarse junto con otros residuos urbanos no seleccionados.
-
Page 27: Declaration Of Conformity
[German] Anforderungen und den anderen relevanten Vorschriften der Richtlinie 1999/5/EG befindet. Ελληνική Δια του παρόντος, UBIQUITI NETWORKS, δηλώνει ότι αυτή η συσκευή UBIQUITI NETWORKS, είναι σε συμμόρφωση με τις [Greek] βασικές απαιτήσεις και τις λοιπές σχετικές διατάξεις της οδηγίας 1995/5/ΕΚ. - Page 28 ©2016-2017 Ubiquiti Networks, Inc. All rights reserved. Ubiquiti, Ubiquiti Networks, the Ubiquiti U logo, the Ubiquiti beam logo, TOUGHCable, and UniFi are trademarks or registered trademarks of Ubiquiti Networks, Inc. in the United States and in other countries. App Store is a service mark of Apple, Inc.
Need help?
Do you have a question about the UniFi UAP-AC-HD and is the answer not in the manual?
Questions and answers