
Related Manuals for CORNING Axygen Axypet Pro


Summary of Contents for CORNING Axygen Axypet Pro
- Page 1 Axygen® Axypet® Pro Pipettors Single-channel, 8-channel, A Corning Brand and 12-channel Pipettors Instruction Manual...
-
Page 2: Table Of Contents
Table of contents 1. Product Description ..............1 2. Packing ....................2 3. Pipettor Design ................2 4. Safety Recommendations .............3 5. Specifications................4 6. Pipettor Operation ..............6 7. Operating Instructions ............8 8. Aspiration and Dispensing Instructions ......9 9. Checking Pipetting Accuracy Parameters and Pipettor Recalibration ..........10 10. -
Page 3: Product Description
It can accommodate volumes from 0.1 μL to 1000 μL depending on the model. Axygen Axypet Pro 8-channel and 12-channel pipettors have been designed for microplate filling. The pipettors enable precise and simultaneous delivery of 8 or 12 preset volume doses of liquid. -
Page 4: Packing
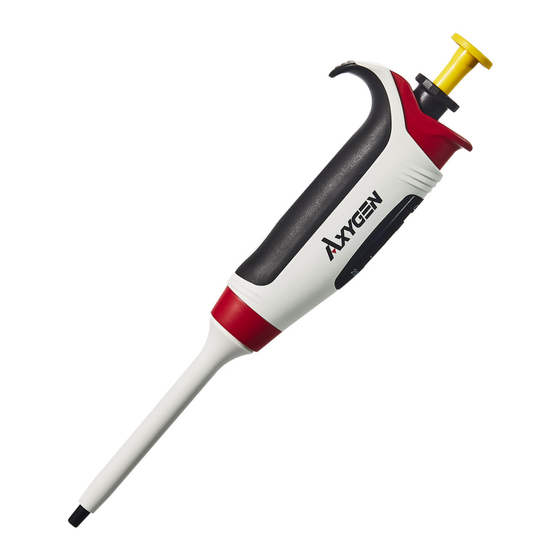
B. Volume adjustment knob: Used to set and lock the preset volume. C. Shaft: Made of high quality plastic, ensuring high chemical and mechanical strength. D. Tip ejector: For multi-channel pipettors, the tips are ejected sequentially, which reduces the required force. 2 | AXYGEN AXYPET PRO PIPETTORS... -
Page 5: Safety Recommendations
E. Calibration switch: Switches the pipettor from operating mode to calibration mode (CAL). L. Volume counter: Four-digit volume counter indicates the preset volume. O. Counter overlay: The overlay is printed with the range of the aspirated volume according to the pipettor model. N. -
Page 6: Specifications
Axygen® pipet tips. It is recommended to use these tips to obtain proper compatibility with the pipettors and proper parameters of accuracy and precision of the aspirated liquid. 4 | AXYGEN AXYPET PRO PIPETTORS... - Page 7 Fit to Tips Nominal Testing Permissible Without Volume Volume Accuracy Volumes Precision Filter (µL) (µL) (µL) (µL) Single-channel Pipettors Min. ±40.0 0.06 - 0.14 ≤12.0 ±12.0 0.176 - 0.224 ≤6.0 ±2.7 0.973 - 1.027 ≤1.3 Max. ±1.5 1.97 - 2.03 ≤0.7 Min.
-
Page 8: Pipettor Operation
Observe this rule particularly with single-channel pipettors of low volume range. ✓ ✕ ✓ ✕ • Never draw liquids directly into the pipettor without the tip attached. 6 | AXYGEN AXYPET PRO PIPETTORS... - Page 9 Volume Setting NOTE: The red calibration switch above the counter should remain in the lower position during operation. Otherwise, any change in volume will result in a loss of calibration of the pipettor. A. To enable volume selection, set the black adjustment knob to the upper position.
-
Page 10: Operating Instructions
• Do not pipette liquids with temperatures above 70°C. NOTE: When pipetting acids or corrosive solutions which emit vapors, it is recommended to disassemble the shaft and rinse the piston and seal with distilled water after finishing the pipetting operation. 8 | AXYGEN AXYPET PRO PIPETTORS... -
Page 11: Aspiration And Dispensing Instructions
8. Aspiration and Dispensing Instructions Aspirating Liquid 1. Press the pushbutton to the first positive stop. Holding the pipettor vertically, immerse the pipet tip into the sample liquid. The depth to which the pipet tip is immersed in the sample liquid depends on the model (for recommended values see Section 7). If the pipet tip is not immersed to the recommended depth or if the pipetting pushbutton is rapidly released, air may enter the disposable pipet tip. -
Page 12: Checking Pipetting Accuracy Parameters
(load intensity and sterilization in the autoclave, replacement of components) in which the pipettor is used. If during pipettor operation you find that the accuracy error (the difference between the real aspirated volume and the preset volume) exceeds the permissible value 10 | AXYGEN AXYPET PRO PIPETTORS... - Page 13 given in the table in Section 5, the pipettor recalibration procedure should be carried out. Recalibration of the pipettor consists in setting on the counter the value of the liquid volume obtained in weighing. Recalibration of the pipettor is performed only for one liquid volume drawn by the pipettor.
- Page 14 6. Set the calibration switch in the position operating position. 7. Fit the ejector pushbutton cap. 8. Repeat the pipetting accuracy check (Section 9: Checking the pipetting accuracy parameter). If the accuracy error value is exceeded, repeat the calibration process. 12 | AXYGEN AXYPET PRO PIPETTORS...
-
Page 15: Pipettor Maintenance
10. Pipettor Maintenance Depending on the applications and the intensity of use, the pipettor requires periodic maintenance. The components most exposed to vapors of aggressive solutions, such as shaft elements, should be regularly checked and cleaned. To properly carry out the maintenance, familiarize yourself with the design of the shaft assembly shown in Figures 10A, 10B, 10C, and follow the instructions given in this Section. - Page 16 • Replace any damaged parts. • Assemble the components in reverse order. NOTE: When disassembling, care should be taken so that the plunger does not pop out under the action of the pipetting spring. 14 | AXYGEN AXYPET PRO PIPETTORS...
- Page 17 Instruction Manual | 15...
- Page 18 After replacing the shaft, it is advised to perform a calibration check of the pipettor. If the pipettor is operating incorrectly, please check if the pipettor was reassembled correctly. 16 | AXYGEN AXYPET PRO PIPETTORS...
- Page 19 Instruction Manual | 17...
- Page 20 NOTE: After replacing the piston or the shaft cap, it is advised to perform a calibration check of the pipettor. In case of any signs of incorrect operation of the pipettor, check the correctness of assembly. 18 | AXYGEN AXYPET PRO PIPETTORS...
- Page 21 Instruction Manual | 19...
-
Page 22: Troubleshooting
If you notice an improper pipettor operation, identify the cause and eliminate the fault. Follow the instructions in the sequence provided. Replacement of parts should be required only occasionally and should not occur under normal pipettor use. 20 | AXYGEN AXYPET PRO PIPETTORS... - Page 23 Problem Cause Solution Droplets of The pipet tip is emptied Decrease the speed liquid remain too fast. of pressing the in the pipet pipettor pushbutton. tip. The pipet tip wettability Replace the tip with has increased due to a new one. extensive use.
-
Page 24: Spare Parts
12. Spare Parts Contact Corning Customer Service to inquire about the availability of spare parts. Pipettor model and name of the part required should be specified. NOTE: The replacement of the plunger requires conducting the calibration procedure according to Section 9. -
Page 25: Limited Warranty
Corning Incorporated (Corning) warrants that this product will be free from defects in material and workmanship for a period of three (3) years from date of purchase. CORNING DISCLAIMS ALL OTHER WARRANTIES WHETHER EXPRESSED OR IMPLIED, INCLUDING ANY IMPLIED WARRANTIES OF MERCHANTABILITY OR OF FITNESS FOR A PARTICULAR PURPOSE. - Page 26 Corning Life Sciences makes no claims regarding the performance of these products for clinical or diagnostic applications. *For a listing of US medical devices, regulatory classifications or specific information on claims, visit www.corning.com/resources.
- Page 27 55 (11) 3089-7400 t 886 2-2716-0338 Mexico t (52-81) 8158-8400 For a listing of trademarks, visit www.corning.com/clstrademarks. All other trademarks are the property of their respective owners. Made in Poland © 2019, 2023 Corning Incorporated. All rights reserved. 1/23 CLS-AN-530/H-AXYPRO-IU REV3...
Need help?
Do you have a question about the Axygen Axypet Pro and is the answer not in the manual?
Questions and answers