Table of Contents
Advertisement
Available languages
Available languages
Quick Links
ESPAÑOL
VOLTÍMETRO/AMPERÍMETRO DC / AC (TRMS)
MANUAL TÉCNICO ............................................................................................... 2/30
FRANÇAIS
VOLTMÈTRE/AMPÈREMÈTRE DC / AC (TRMS)
MANUEL UTILISATEUR ........................................................................................31/59
ENGLISH
USER MANUAL ....................................................................................................60/88
KOSMOS SERIE
VOLTMETER/AMMETER DC / AC (TRMS)
DISEÑOS Y TECNOLOGÍA, S.A.
Xarol, 6-B
P.I. Les Guixeres
www.ditel.es
08915 Badalona - Spain.
Tel. +34 933 394 758
Fax +34 934 903 145
Email: comercial@ditel.es ; web: www.ditel.es
MICRA-E
MICRA-E
20220907
Advertisement
Table of Contents

Related Manuals for Ditel KOSMOS MICRA-E


Summary of Contents for Ditel KOSMOS MICRA-E
- Page 1 VOLTMETER/AMMETER DC / AC (TRMS) USER MANUAL ……………………………………………………………………………………….60/88 DISEÑOS Y TECNOLOGÍA, S.A. Tel. +34 933 394 758 Xarol, 6-B P.I. Les Guixeres Fax +34 934 903 145 KOSMOS SERIE www.ditel.es 08915 Badalona - Spain. Email: comercial@ditel.es ; web: www.ditel.es 20220907...
-
Page 2: Table Of Contents
Funciones por conector ..................16 Diagrama de funciones lógicas ................16 Tabla de funciones programables ................. 17 Programación de las funciones lógicas ..............17 Bloqueo de la programación por software ............. 18 Diagrama del menú de seguridad ..............18/19 KOSMOS SERIE www.ditel.es... - Page 3 Salida RS2 / RS4 ....................24 Diagrama menú RS ..................... 24 Protocolo ASCII ....................25 Protocolo ISO1745 ..................25/26/27 Salida analógica ....................28 Especificaciones técnicas salida analógica ............. 29 Diagrama menú salida analógica ................. 29 Especificaciones técnicas Micra-E ................. 30 KOSMOS SERIE www.ditel.es...
-
Page 4: Introducción Al Modelo Micra E
Leer completamente las instrucciones relacionadas cuando aparezca este símbolo con el fin de conocer la naturaleza del peligro potencial y las acciones a tomar para evitarlo. ATENCIÓN: Posibilidad de choque eléctrico. Equipo protegido por aislamiento doble o aislamiento reforzado KOSMOS SERIE www.ditel.es... -
Page 5: Mantenimiento
Para proteger el medio ambiente y de acuerdo con la legislación europea sobre residuos eléctricos y electrónicos de aparatos puestos en el mercado con posterioridad al 13.08.2005, el usuario puede devolverlo, sin coste alguno, al lugar donde fué adquirido para que de esta forma se proceda a su tratamiento y reciclado controlados. KOSMOS SERIE www.ditel.es... -
Page 6: Como Empezar
La programación puede también realizarse a través de un PC mediante el software gratuito en nuestra web www.ditel.es siempre que el instrumento tenga instalada una opción de comunicación, RS2 ó RS4. Bloqueo de programación El bloqueo de la programación se realiza enteramente por software pudiendo bloquearse en su totalidad o por... -
Page 7: Como Entrar En Modo Programación
Seleccionar una opción de una lista Cuando el parámetro consiste en una opción a escoger de entre una lista, la tecla nos permitirá desplazarse a través de la lista de parámetros hasta que aparezca la opción deseada. KOSMOS SERIE www.ditel.es... -
Page 8: Alimentación Y Conectores
Cuando se mida la corriente de línea, es altamente recomendado utilizar un transformador. Si se utiliza un shunt externo, insertar el shunt en el retorno de línea al neutro. Si el voltaje de aislamiento se excede, es necesario el uso de un transformador. KOSMOS SERIE www.ditel.es... -
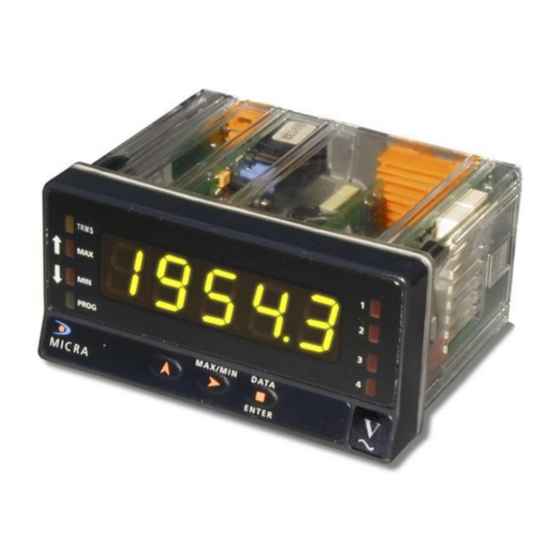
Page 9: Vista Frontal Del Instrumento
AC. Una vez decidido el tipo de señal, debe seleccionarse el rango. Normalmente los rangos 100, 60, 50 mV (nU) corresponden a las señales que provienen de shunts. CnInP U-dC U-AC A-dC A-AC 600 U 200 U 20 U 0,2 A 100nU 60nU 50nU KOSMOS SERIE www.ditel.es... -
Page 10: Conexión Entrada Voltios Ac/Dc
MICRA-E CONEXIÓN ENTRADA VOLTIOS DC / AC Fig. 2 Leer recomendaciones en pagina 8 CONEXION ENTRADA 1A o 5A DIRECTOS Leer recomendaciones en pagina 8 KOSMOS SERIE www.ditel.es... -
Page 11: Conexión Entrada 200Ma Ac/Dc
2VA / 25 = 0.08Ω, si le restamos el valor del shunt interno que es de 0.014Ω nos quedan 0.066Ω que /2 nos da 0.033Ω máximo para cada hilo del transformador al instrumento. Leer recomendaciones en pagina 8 KOSMOS SERIE www.ditel.es... -
Page 12: Conexión Shunt 50, 60, 100Mv Ac/Dc
MICRA-E CONEXIÓN SHUNT 50, 60, 100 mV AC/DC NOTA : Se recomienda trenzar los cables de conexión del shunt al instrumento para evitar al máximo la captación de interferencias. Leer recomendaciones en pagina 8 KOSMOS SERIE www.ditel.es... -
Page 13: Programación Del Display
La relación puede ser directa o inversa. Para tener mayor pre- cisión en la medida, los puntos 1 y 2 deberían situarse aproxi- madamente en los dos extre- mos del proceso. KOSMOS SERIE www.ditel.es... -
Page 14: Menus Configuración Display
Pulsando cualquier tecla se activa nuevamente el display. oFF: desactiva la función El tiempo de espera para apagar el display es configurable de 1 a 99 minutos. (*Medido a 230 V AC alimentación, display 100.00, color ámbar y sin opciones.) KOSMOS SERIE www.ditel.es... -
Page 15: Funciones Por Teclado
Ahora, en caso de tener instalada alguna de las opciones 2RE, 4RE, 4OP, 4OPP, el instrumento pasa al acceso directo a la programación del valor de los setpoints, pasando mediante la tecla secuencialmente por cada uno de los valores de los setpoints disponibles según la opción instalada. KOSMOS SERIE www.ditel.es... -
Page 16: Funciones Por Conector
40 V/ 20 mA en todos los pins respecto al COMÚN. Para garantizar la compatibilidad electro- magnética deberán tenerse en cuenta las recomen- daciones de conexionado de la Pág. 8 Diagrama de las funciones lógicas KOSMOS SERIE www.ditel.es... -
Page 17: Tabla De Funciones Programables
2RE, 4RE, 4OP, 4OPP está instalada, nos dará a elegir uno de los dos o cuatro setpoints disponibles según la opción, que será el valor que el instrumento muestre por display al activar dicha función. KOSMOS SERIE www.ditel.es... -
Page 18: Bloqueo De La Programación Por Software
Programando cada uno de los parámetros a 1 quedará bloqueado y si se dejan a 0 quedará accesible a la programación. No obstante, estando bloqueado puede entrarse a visualizar la programación actual. La indicación "StorE" señala que las modificaciones efectuadas se han guardado correctamente. KOSMOS SERIE www.ditel.es... - Page 19 DIAGRAMA DEL MENÚ DE SEGURIDAD Nota: La selección del color en las alarmas se efectúa en el menú de setpoints 0 permite su programación 1 bloquea el acceso a la programación * Sólo aparecen si están montadas las opciones correspondientes KOSMOS SERIE www.ditel.es...
-
Page 20: Opciones De Salida
(ref. NMA o ref NMV) • una RS232C (ref. RS2) o RS485 (ref. RS4). • una 2 relés (ref. 2RE) o 4 relés (ref. 4RE) ó 4 optos NPN (ref. 4OP) ó 4 optos PNP (ref. 4OPP). KOSMOS SERIE www.ditel.es... -
Page 21: Salida Setpoints
(dly) y por histéresis asimétrica de dos alarmas (SET1 y SET2) programadas para actuación en mo- do HI (OUT1) y en modo LO (OUT2). Actuación temporización Actuación histéresis asimétrica KOSMOS SERIE www.ditel.es... -
Page 22: Instalación Setpoints
NOTA: En caso de utilizar los relés con cargas inductivas, se aconseja conectar una red RC en bornes de la bo- bina (preferentemente) o de los contactos a fin de atenuar los fenómenos electromagnéticos y alargar la vida de los contactos. KOSMOS SERIE www.ditel.es... -
Page 23: Especificaciones Técnicas Setpoints
4RE, 4OP ó 4OPP, en caso de ser la 2RE solo aparecerían Set1 y Set2. Los SetPoints en off no aparecen en la lista. Recuerde que la posición del punto decimal viene fijada por la que se programó en el menú SCAL KOSMOS SERIE www.ditel.es... -
Page 24: Salida Rs2 / Rs4
Están previstos tres modos de comunicación; El modo ASCII utiliza un protocolo sencillo compatible con diversas series de instrumentos DITEL. El modo ISO, conforme a la norma ISO 1745, permite una comunicación más efectiva en entornos ruidosos ya que comprueba la validez de los mensajes tanto en la transmisión como en la recepción. Y además el protocolo MODBUS RTU... -
Page 25: Protocolo Ascii
Efectuar un OR-exclusivo de todos los bytes comprendidos entre el STX (no incluido) y el ETX (sí incluido). - Si el byte obtenido en ASCII es superior a 32, puede tomarse como BCC. - Si el resultado en ASCII es inferior a 32, el byte de control BCC se obtendrá sumándole 32. KOSMOS SERIE www.ditel.es... - Page 26 “45”: NMA ó NMV, RS2, 2RE “46”: NMA ó NMV, RS2, 4 Setpoints(4RE, 4OP ó 4OPP) “48”: NMA ó NMV, RS4 “49”: NMA ó NMV, RS4, 2RE “4:”: NMA ó NMV, RS4, 4 Setpoints(4RE, 4OP ó 4OPP) Modelo + Versión KOSMOS SERIE www.ditel.es...
- Page 27 Modificar valor de setpoint1 sin guardar en memoria. Modificar valor de setpoint2 sin guardar en memoria. Modificar valor de setpoint3 sin guardar en memoria. Modificar valor de setpoint4 sin guardar en memoria. ÓRDENES ASCII Orden Reset pico Reset valle KOSMOS SERIE www.ditel.es...
-
Page 28: Salida Analógica
Cada opción de salida se suministra con una etiqueta adhesiva en la que se indica el conexionado de las opciones (ver Fig.). Para una mejor identificación del aparato, esta etiqueta puede colocarse en la parte superior de la caja, opuesta a la etiqueta de identificación del instrumento. KOSMOS SERIE www.ditel.es... -
Page 29: Especificaciones Técnicas Salida Analógica
CARGA MÁXIMA ............ 500 Ω 10 KΩ Diagrama del menú Salida Analógica Valor del display para una salida de 20 mA (NMA) / 10 V (NMV) Valor del display para una salida de 4 mA (NMA) / 0V (NMV) KOSMOS SERIE www.ditel.es... -
Page 30: Especificaciones Técnicas Micra-E
3 % a 100 % del rango • Factor de cresta: 3 Añadir 0.2% + 10 digitos • Factor de cresta: 5 Añadir 1% + 20 digitos • 40 Hz – 10 kHz: Añadir 1% + 20 digits KOSMOS SERIE www.ditel.es... - Page 31 Fonctions par connecteur ..................45 Diagramme des fonctions logiques ............... 45 Table des fonctions programmables ..............46 Programmation des fonctions logiques ..............46 Blocage de la programmation par software ............47 Diagramme du menu de sécurité ................. 48 KOSMOS SERIE www.ditel.es...
- Page 32 Diagramme du menu sorties RS ................53 Protocole ASCII ....................54 Protocole ISO1745 ..................54/55/56 Sortie analogique ....................57 Spécifications téchniques sortie analogique ............58 Diagramme du menu sortie analogique ............... 58 Spécifications téchniques Micra-E ................. 59 KOSMOS SERIE www.ditel.es...
- Page 33 Lisez attentivement les instructions correspondantes lorsque ce symbole apparaît afin de connaître la nature du danger potentiel et les actions à entreprendre pour l'éviter. ATTENTION : Possibilité de choc électrique. Matériel protégé par une double isolation ou une isolation renforcée KOSMOS SERIE www.ditel.es...
- Page 34 Pour protéger l'environnement et en accord avec la législation européenne sur les résidus électriques et électroniques d'appareils mis sur le marché après le 13.08.2005, l'utilisateur peut le restituer, sans aucun coût, au lieu où il a été acquis pour qu'ainsi se procède à son traitement et recyclage contrôlés. KOSMOS SERIE www.ditel.es...
- Page 35 La programmation peut être aussi réalisée par PC par l´intermédiaire d´un logiciel gratuit disponible sur notre web www.ditel.es si une option de communication, RS2 ou RS4, a été installée sur l´instrument.
- Page 36 Dans ce cas, le premier digit montre (-1), (-), (0), (1) Sélectionner une option d´une liste Quand le paramètre consiste en une option à choisir dans une liste, la touche nous permettra de nous déplacer dans liste de paramètres jusqu´à arriver à l´option désirée. KOSMOS SERIE www.ditel.es...
- Page 37 Lorsque l´on mesure le courant de réseau, il est hautement recommandé d´utiliser un transformateur. Si l´on utilise un shunt externe, insérer le shunt dans le retour du réseau au neutre. Si la tension d´isolement est excedée, il est alors néces- saire d´utiliser un transformateur. KOSMOS SERIE www.ditel.es...
- Page 38 Normalement les gammes 100, 60, 50 mV (nU) correspon- dent aux signaux provenant des shunts. CnInP U-dC U-AC A-dC A-AC 600 U 200 U 20 U 0,2 A 100nU 60nU 50nU KOSMOS SERIE www.ditel.es...
- Page 39 PIN 2 = SHUNT/ 2 V PIN 3 = 200 mA PIN 4 = 1A / 5A PIN 5 = 20/ 200/ 600 V Ampèremètre 1/5 A DC / AC Lire les recommandations à la page 37 KOSMOS SERIE www.ditel.es...
- Page 40 PIN 2 = SHUNT/ 2 V PIN 3 = 200 mA PIN 4 = 1A / 5A PIN 5 = 20/ 200/ 600 V Ampèremètre avec Transfomateur 1 A ou 5 A AC Lire les recommandations à la page 37 KOSMOS SERIE www.ditel.es...
- Page 41 PIN 2 = SHUNT/ 2 V PIN 3 = 200 mA PIN 4 = 1A / 5A PIN 5 = 20/ 200/ 600 V Ampèremètre avec Shunt 50, 60, 100 mV Lire les recommandations à la page 37 DC / AC KOSMOS SERIE www.ditel.es...
- Page 42 La relation peut être directe ou inverse. Pour avoir une plus grande précision dans la mesure, les points 1 y 2 de- vraient être situés approximativement aux deux extrêmes du process. KOSMOS SERIE www.ditel.es...
- Page 43 à nouveau. 0N 0FF oFF: désactive la fonction. Le temps d'attente pour désactiver l'affichage est configurable de 1 à 99 minutes. (* Mesuré avec alimentation de 230V AC, affichage 100.00, couleur ambre et sans options.) KOSMOS SERIE www.ditel.es...
- Page 44 Maintenant, dans le cas ou est installée une des options suivantes 2RE, 4RE, 4OP, 4OPP, l´instrument passe a l´accès directe à la programmation de la valeur des seuils, en passant au moyen de la touche séquentielle- ment par chacunes des valeurs des seuils disponibles selon l´option installée. KOSMOS SERIE www.ditel.es...
- Page 45 40 V/ 20 mA dans tous les pins par rapport au COMMUN. Pour garantir la compatibilité électro- magnétique on devra tenir en compte des recommandations de raccordement de la Pag. 40 Diagramme des fonctions logiques KOSMOS SERIE www.ditel.es...
- Page 46 2RE, 4RE, 4OP, 4OPP est installée, nous aurons la possibilité de choisir un des deux ou quatre seuils dispo- nibles selon l´option, qui sera la valeur que l´instrument affiche lorsque cette fonction est activée. KOSMOS SERIE www.ditel.es...
- Page 47 En programmant chacun des paramètres à 1 ils seront alors bloqués et s´ils sont laissés à 0 on aura accès a la programmation. Lorsqu´ils sont bloqués on peut toutefois visualiser la programmation actuelle. L´indication "StorE" signale que les modifications effectuées ont été gardées correctement. KOSMOS SERIE www.ditel.es...
- Page 48 Remarque : La sélection de la cou- leur des alarmes se fait dans le menu consignes 0 permet sa programmation 1 bloque l´accès à la programmation * Elles apparaissent seulement si les options correspondantes sont mon- tées KOSMOS SERIE www.ditel.es...
- Page 49 (ref. NMA ou ref. NMV) • une RS232C (ref. RS2) ou RS485 (ref. RS4). • une 2 relais (ref. 2RE) ou 4 relais (ref. 4RE) ou 4 optos NPN (ref. 4OP) ou 4 optos PNP (ref. 4OPP). KOSMOS SERIE www.ditel.es...
- Page 50 Les figures ci-dessous montrent l´actuation retardée par temporisation (dly) et par hystérésis asymétrique de deux alarmes (SET1 et SET2) programmées en mode HI (OUT1) et en modo LO (OUT2). Retard par temporisation Retard par hystérésis asymétrique KOSMOS SERIE www.ditel.es...
- Page 51 NOTE: Dans le cas ou les relais sont utilisés avec des charges inductives, il est conseillé d’adjoindre des ré- seaux RC aux bornes de la bobine (de préférence) ou des contacts afin d´atténuer les phénomènes électroma- gnétiques et rallonger la durée de vie des contacts. KOSMOS SERIE www.ditel.es...
- Page 52 4RE, 4OP ou 4OPP, s´il s´agissait de la 2RE apparaîtraient seulement Set1 et Set2. Les valeurs des seuils déshabilités -oFF- n'apparais- sent pas à l´affichage. Rappelez vous que la position du point décimal est celle qui a été programmé dans le menu SCAL KOSMOS SERIE www.ditel.es...
- Page 53 Trois modes de communication sont prévus; Le mode ASCII utilise un protocole simple compatible avec plusieurs séries d´instruments DITEL. Le mode ISO, conforme à la norme ISO 1745, permet une communication plus effective dans un environnement bruyant étant donné qu´il vérifie la validité des messages aussi bien au niveau de la trans- mission comme de la réception.
- Page 54 -Si le byte obtenu en ASCII est supérieur à 32, il peut être pris comme BCC. - Si le résultat en ASCII est inférieur a 32, le byte de control BCC sera obtenu en lui ajoutant 32. KOSMOS SERIE www.ditel.es...
- Page 55 “45”: NMA ou NMV, RS2, 2RE “46”: NMA ou NMV, RS2, 4 Seuils(4RE, 4OP ou 4OPP) “48”: NMA ou NMV, RS4 “49”: NMA ou NMV, RS4, 2RE “4:”: NMA ou NMV, RS4, 4 Seuils(4RE, 4OP ou 4OPP) Modèle + Version KOSMOS SERIE www.ditel.es...
- Page 56 Modifier valeur de seuil1 sans enregistrer en mémoire Modifier valeur de seuil2 sans enregistrer en mémoire Modifier valeur de seuil3 sans enregistrer en mémoire Modifier valeur de seuil4 sans enregistrer en mémoire ORDRES ASCII Ordre Reset pic Reset val KOSMOS SERIE www.ditel.es...
- Page 57 Chaque option de sortie est livrée avec une étiquette adhésive sur laquelle est indiqué le raccordement de chacune des options (voir Fig.). Pour une meilleure identification de l´instrument, cette étiquette doit être située sur la partie supérieure du boîtier, de façon opposée à l´étiquette d ´identification de l´instrument. NMA ou NMV ZONES DE COUPE KOSMOS SERIE www.ditel.es...
- Page 58 0.2 mV/ºC CHARGE MAXIMUM ............ 500 Ω ≥ 10 KΩ Diagramme du menu Sortie Analogique Valeur d´affichage pour sortie 20 mA (NMA) / 10 V (NMV) Valeur d´affichage pour sortie 4 mA (NMA) / 0V (NMV) KOSMOS SERIE www.ditel.es...
- Page 59 3 % à 100 % de la plage • Facteur de crête: 3 Ajouter 0.2% + 10 digits • Facteur de crête: 5 Ajouter 1% +20 digits • 40 Hz – 10 kHz: Ajouter 1% +20 digits KOSMOS SERIE www.ditel.es...
- Page 60 Configuration display menus ................72 Keyboard Functions .................... 73 Connector Functions ................... 74 Logic Functions Diagram ..................74 Table of Programmable Functions ................ 75 Logic Functions Programming ................75 Lock out Programming ..................76 Security menu diagram .................. 76/77 KOSMOS SERIE www.ditel.es...
- Page 61 RS232 / RS4485 Outputs ..................82 RS outputs menu diagram ................... 82 ASCII Protocol ....................83 ISO1745 Protocol ..................83/84/85 Analog Output ....................86 Analog Output Technical Specifications ..............87 Analog Output menu diagram ................87 MICRA-E Technical Specifications ................. 88 KOSMOS SERIE www.ditel.es...
- Page 62 Read the related instructions completely when this symbol appears in order to know the nature of the potential danger and the actions to take to avoid it. ATTENTION: Possibility of electric shock Equipment protected by double insulation or reinforced insulation KOSMOS SERIE www.ditel.es...
- Page 63 13 August 2005, the user can give it back, without any cost, to the place where it was acquired to proceed to its controlled treatment and recycling. KOSMOS SERIE www.ditel.es...
- Page 64 Programming can also be done via PC with free software available in our website www.ditel.es provided that communication option RS2 or RS4, has been installed.
- Page 65 In these case the first digit shows (-1) (-), (0), (1). Selecting an option from the list When the parameter is an option to be chosen among different possibilities, the key allows you to browse through the list of options until you find the desired parameter KOSMOS SERIE www.ditel.es...
- Page 66 When measuring line currents, the use of a current transformer is recommended. If using external current shunts, insert the shunt in the neutral return line. If the isolation voltage rating is exceeded, the use of an isolating current transformer is necessary. KOSMOS SERIE www.ditel.es...
- Page 67 Once the type of signal has been selected you have then to select the range. Usually the 100, 60, 50 mV (nU) ranges are shunts signals. CnInP U-dC U-AC A-dC A-AC 600 U 200 U 20 U 0,2 A 100nU 60nU 50nU KOSMOS SERIE www.ditel.es...
- Page 68 PIN 1 = COMMUN PIN 2 = SHUNT/ 2 V PIN 3 = 200 mA PIN 4 = 1A / 5A PIN 5 = 20/ 200/ 600 V Ammeter 1 / 5 A DC / AC Read recommendations page 66 KOSMOS SERIE www.ditel.es...
- Page 69 PIN 2 = SHUNT/ 2 V PIN 3 = 200 mA PIN 4 = 1A / 5A PIN 5 = 20/ 200/ 600 V Ammeter with transformer 1 A or 5 A AC Read recommendations page 66 KOSMOS SERIE www.ditel.es...
- Page 70 SHUNT 50 / 60/ 100 mV DC/ AC Input wiring NOTE: we recommend braiding the cables used to wire the shunt to the instrument in order to avoid as much as posible to pick-up interferences. Read recommendations page 66 KOSMOS SERIE www.ditel.es...
- Page 71 The relationship can be direct or re- versed. In order to obtain more accura- cy, points 1 and 2 should be located approximately at both extremes of the process. KOSMOS SERIE www.ditel.es...
- Page 72 Display will be again active after pressing any key. 0N 0FF oFF: Deactivates the function. *Measured at 230V AC power supply, display 100.00, amber colour and with no options. KOSMOS SERIE www.ditel.es...
- Page 73 Now, in case any of the 2RE, 4RE, 4OP, 4OPP options has been installed, the instrument allows a direct access to the programming of the setpoints value, pressing the key sequentially for each one of the setpoints values available according the option installed. KOSMOS SERIE www.ditel.es...
- Page 74 40 V/ 20 mA present at all terminals with respect to COMMON. In order to guarantee the electromagnetic compatibility please refer to the connection instruc- tions given on Page LOGIC FUNCTIONS DIAGRAM KOSMOS SERIE www.ditel.es...
- Page 75 2RE, 4RE, 4OP, 4OPP options is installed, it will allows us to choose one of the two or four setpoints available de- pending on the option, which will be the value displayed by the instrument when this function is activated. KOSMOS SERIE www.ditel.es...
- Page 76 Programming each one of the parameters to 1 will active the lockout, if they are set to 0 programming will be accessible. Though the programming is locked out, it remains possible to visualise the cur- rent programming. The "StorE" indication informs that the modifications effectuated have been stored correctly. KOSMOS SERIE www.ditel.es...
- Page 77 SECURITY MENU DIAGRAM Note: the color selection of the alarms is made in the setpoints menu 0 allows its programming 1 locks the access to programming * Only appear if the corresponding op- tions have been installed KOSMOS SERIE www.ditel.es...
- Page 78 One analog (ref. NMA or ref NMV) • One RS232C (ref. RS2), or RS485 (ref. RS4). • One 2 relays (ref. 2RE) or 4 relays (ref. 4RE) or 4 NPN (ref. 4OP) or 4 PNP (ref. 4OPP) outputs. KOSMOS SERIE www.ditel.es...
- Page 79 The figures 1 and 2 show the time delay action (dly) and the asymmetrical hysteresis action (hys-1) of two alarms (SET1 and SET2) programmed to activate in HI mode (OUT1) and LO mode (OUT2) Delay action Asymmetrical hysteresis KOSMOS SERIE www.ditel.es...
- Page 80 NOTE: In case that the outputs are used to drive inductive loads, it is recommended to add an RC network be- tween the coil terminals (preferably) or between the relay contacts to limit electromagnetic effects. KOSMOS SERIE www.ditel.es...
- Page 81 4RE, 4OP or 4OPP, if it is the 2RE card only Set1 y Set2 would appear. Setpoints configured at "off" do not appear on the list". Remember that the decimal point position comes determined by what has been programmed in the SCAL menu. KOSMOS SERIE www.ditel.es...
- Page 82 KOSMOS instruments to a PC and whole programming, as well as to verify its communication’s hard- ware. Three communication modes are available; the ASCII mode uses a simple protocol compatible with several DITEL instruments. The ISO mode, in accordance with the ISO 1745 norm, allows a more effective communication in noisy environments as it checks the messages validity checking both transmission and reception.
- Page 83 - If the obtained byte (in ASCII format) is higher than 32, it can be taken as the BCC. - If the obtained byte (in ASCII format) is lower than 32, the BCC byte will be obtained by adding 32. KOSMOS SERIE www.ditel.es...
- Page 84 “45”: NMA or NMV, RS2, 2RE “46”: NMA or NMV, RS2, 4 Setpoints(4RE, 4OP ó 4OPP) “48”: NMA or NMV, RS4 “49”: NMA or NMV, RS4, 2RE “4:”: NMA or NMV, RS4, 4 Setpoints(4RE, 4OP ó 4OPP) Model + Version KOSMOS SERIE www.ditel.es...
- Page 85 Change the setpoint1 value without saving in memory Change the setpoint2 value without saving in memory Change the setpoint3 value without saving in memory Change the setpoint4 value without saving in memory COMMANDS DITEL Command Peak reset Valley reset KOSMOS SERIE...
- Page 86 Each output card is supplied with an adhesive label that indicates the wiring connections of each option (see fig.). To help identifying each terminal, this label should be placed in the lower side of the meter case, beside the basic functions label. NMA or NMV Cutout zones KOSMOS SERIE www.ditel.es...
- Page 87 THERMAL DRIFT ............. 0.5 μA/ºC 0.2 mV/ºc MAX. LOAD............... 500 Ω 10 KΩ Analog Output Menu Diagram Display value for output: 20 mA (NMA) /10 V (NMV) Display value for output: 4 mA (NMA) / 0 V (NMV) KOSMOS SERIE www.ditel.es...
- Page 88 45 Hz -400 Hz sine wave input • 3 % to 100 % of range • Crest Factor: 3 Addr 0.2% + 10 digits • Crest Factor: 5 Add 1% +20 digits • 40 Hz – 10 kHz: Add 1% +20 digits KOSMOS SERIE www.ditel.es...
Need help?
Do you have a question about the KOSMOS MICRA-E and is the answer not in the manual?
Questions and answers