
Related Manuals for NSR Marine NVR-3000


Summary of Contents for NSR Marine NVR-3000
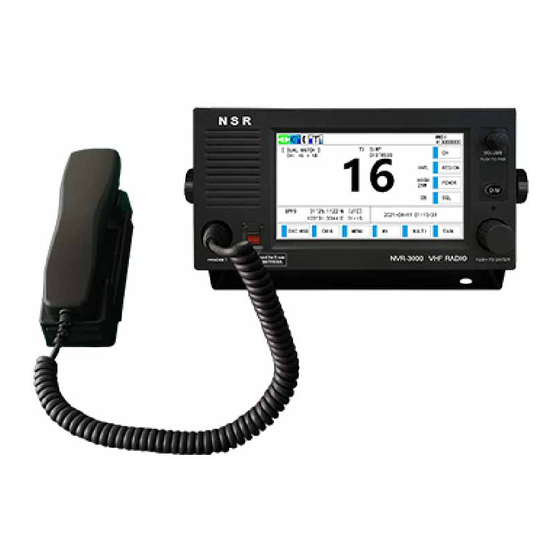
- Page 1 Operation Manual & Installation Manual VHF RADIO(GMDSS) NVR-3000 NVR-3000 OM.E 20230109-08...
- Page 2 Any attempt to modify the software on this device in a way not specified by NSR will result in the warranty being void. iv. Notice Please read this manual carefully to ensure proper use before installation and operation of the NVR-3000. NVR-3000 OM.E 20230109-08...
- Page 3 1.3, 2.8, 5.3, Appendix 2/5 Add BAM description, etc. 2021/08/29 General modification 2022/05/09 1, 5.3, Appendix 1/2/5 General modification 2022/07/29 1.3, 5.3, Appendix 5 Add Alarm Unit 2023/01/09 1, 2, 4, Appendix Update ITU channel table, etc NVR-3000 OM.E 20230109-08...
-
Page 4: Table Of Contents
2.10.4 Key Test ............................17 2.10.5 Audio Test ............................ 18 2.11 User Manager ............................19 2.11.1 Private Channel .......................... 20 2.11.2 Alert List ............................21 2.11.3 User Test............................22 2.11.4 DSC Log ............................22 3. VOICE OPERATION ............................24 NVR-3000 OM.E 20230109-08... - Page 5 6.2 Simple Troubleshooting .......................... 76 6.3 Error Messages ............................76 APPENDIX 1 TECHNICAL SPECIFICATIONS ....................77 APPENDIX 2 MENU TREE ..........................79 APPENDIX 3 CHANNEL TABLES ........................80 APPENDIX 4 SENTENCE DESCRIPTION ....................... 91 APPENDIX 5 INSTALLATION DRAWINGS ...................... 95 NVR-3000 OM.E 20230109-08...
-
Page 6: Overview
NVR-3000 OPERATION MANUAL & INSTALLATION MANUAL 1. OVERVIEW 1.1 Outline NVR-3000 is a ship borne GMDSS VHF equipment which provides function of VHF radiotelephone and DSC (class A). NVR-3000 conforms to the regulations of ITU-R M.493-15, IMO MSC.1/Circ.1460/Rev.3, IMO MSC.302 (87) [2010], IEC 61097-3:2017, IEC 61097-7:2018, IEC 62923-1:2018, IEC 62923-2:2018, IEC 60945. - Page 7 NVR-3000 OPERATION MANUAL & INSTALLATION MANUAL Q’ty Item Type Part No. N501232 Handset Box (dual handsets only) NHS-201 N501233 Handset Box (dual handsets only) NHS-202 The below figure is for the system diagram. NVR-3000 OM.E 20230109-08...
-
Page 8: Basic Operation
② ③ ⑤ ④ NVR-3000 can be operated by key & knob on panel or touch-screen operation. When operating with knob, rotate to select an item on screen and press the knob to confirm the selection. Panel Button Function ... -
Page 9: Main Screen
NVR-3000 OPERATION MANUAL & INSTALLATION MANUAL 2.3 Main Screen Indication Meaning Own ship's ID (9 digits) MMSI Note: Request service to set your MMSI. DSC Message Alert Display RX Signal Level The signal level of receiving Handset Volume The volume of handset... -
Page 10: Channel Watch Scan Screen
NVR-3000 OPERATION MANUAL & INSTALLATION MANUAL 2.4 Channel Watch Scan Screen 2.4.1 Dual Watch Scan In Dual Watch, CH16 and an additional channel will be scanned for watching. Generally, CH16 will be sampled for 0.15s while the additional channel is sampled for 1.85s. -
Page 11: Brightness Adjustment
NVR-3000 OPERATION MANUAL & INSTALLATION MANUAL Note: Transmitting is disabled during scanning. 2.5 Brightness Adjustment There are two ways to adjust the brightness of screen. ① Press the DIM button on panel to adjust the brightness by ten steps, or ②... -
Page 12: System Setting
NVR-3000 OPERATION MANUAL & INSTALLATION MANUAL Note: When own ship's communication is in high priority, set to manual acknowledgement. The auto acknowledgement is not sent in the following cases: • There are DSC communications (for individual call). • Channel is in use. -
Page 13: Audio
NVR-3000 OPERATION MANUAL & INSTALLATION MANUAL ③ Set [RX MESSAGE] and [SELFTEST INFO] similarly. ④ You can also set the printer type and port baud rate here. 2.8.3 Audio Click [AUDIO] in [SYSTEM SETTING] to set the key buzzer and alarm buzzer etc. -
Page 14: Display Setting
NVR-3000 OPERATION MANUAL & INSTALLATION MANUAL 2.8.3.4 Voice enhance This item can increase the volume of receiving and transmitting voice. Click [VOICE ENHANCE] to select the value between 1~10 and OFF. 2.8.4 Display Setting 2.8.4.1 LCD dimmer Please refer to Section 2.5. -
Page 15: Date/Time Setting
NVR-3000 OPERATION MANUAL & INSTALLATION MANUAL 2.8.5 Date/Time Setting This is to set the date and time for the system. Click [DATE/TIME] in [SYSTEM SETTING] to open the [DATE/TIME SET] screen. There are four items can be set: MODE, DATE-UTC, TIME-UTC and ZONE. -
Page 16: Position Setting
NVR-3000 OPERATION MANUAL & INSTALLATION MANUAL Note: When manually enter date and time, use UTC (Universal Time Coordinated). Do not use local time (LMT). If LMT is selected, it will be showed on the bottom right of Main screen. 2.8.6 Position Setting This is to set a position used for DSC operations only when GNSS input is not available. -
Page 17: Timeout Setting
NVR-3000 OPERATION MANUAL & INSTALLATION MANUAL ③ For manual input, click [POS&TIME], use the numeric keys to enter latitude/longitude of your position, and UTC time. To change coordinate, click 1 for North or East; 2 for South or West. After entering each data, click OK. -
Page 18: Address List
NVR-3000 OPERATION MANUAL & INSTALLATION MANUAL 2.9 Address List This is to build up a list of regularly used stations. Click [ADDRESS] in the [MAIN MENU]-[DSC] menu, you can do the following operations. 2.9.1 View an Address ① Click to select the address in list. -
Page 19: Add An Address
NVR-3000 OPERATION MANUAL & INSTALLATION MANUAL The address can be edited in this menu. 2.9.2 Add an Address ① Click [ADD] to add an address. For example, add a group MMSI. ② Click [MMSI], enter the MMSI with the numeric keys in [INPUT]. -
Page 20: Delete An Address
NVR-3000 OPERATION MANUAL & INSTALLATION MANUAL ⑤ Click OK to confirm the editing. ⑥ Click [SAVE] and select YES . The address is added in the list. 2.9.3 Delete an Address ① Click to select an address in list. ② Click [DEL], delete the selected address directly. -
Page 21: Diagnostics
NVR-3000 OPERATION MANUAL & INSTALLATION MANUAL ② Click [CALL], you can send a DSC call to the selected address. For example: To a coast station: You can send INDIVIDUAL or TEST call. To a group: You can send GROUP call. -
Page 22: Program Version
NVR-3000 OPERATION MANUAL & INSTALLATION MANUAL 2.10.1 Program Version It is to check the program version at [DIAGOSTICS] menu. Click [PROGRAM VERSION], the following screen appears: 2.10.2 COM Monitor It’s to check the communication sentences on the I/O ports. 2.10.3 LCD Test After clicking [LCD TEST], press the DIM button to test the Display Brightness. -
Page 23: Audio Test
NVR-3000 OPERATION MANUAL & INSTALLATION MANUAL KEY test: DIM: Press the DIM button. DISTRESS: Press the DISTRESS button. KNOB test: LEFT/RIGHT/ENT: Turn the PUSH TO ENTER knob to left and right, then press it. LEFT2/RIGHT2/ENT2: Turn the PUSH TO PWR knob to left and right, then press it. -
Page 24: User Manager
NVR-3000 OPERATION MANUAL & INSTALLATION MANUAL Click the items to test the corresponding audio. Note: 1. The ALARM buzzer should be set to ON while do the test. 2. The setting (ON or OFF) of [MIC LOOPBACK] (used for handset microphone loop test) won’t be saved. -
Page 25: Private Channel
NVR-3000 OPERATION MANUAL & INSTALLATION MANUAL 2.11.1 Private Channel Click [PRIVATE CHANNEL], the following screen appears: ① View/Edit a private channel: Move the cursor to the wanted channel, click [VIEW], the [CHANNEL EDIT] screen appears: You can click the TYPE, TX frequency or RX frequency to edit. For example: Click [TX], enter the TX frequency with the numeric keys in [INPUT]. -
Page 26: Alert List
NVR-3000 OPERATION MANUAL & INSTALLATION MANUAL 2.11.2 Alert List Click [MAIN MENU] - [USER] - [ALERT LIST ], the following menu appears. [VIEW]: Check the details of the alert selected. [MUTE]: Mute the alert. [ACK]: Acknowledge the alert. [LOG]: Check the alert history. -
Page 27: User Test
NVR-3000 OPERATION MANUAL & INSTALLATION MANUAL Alert Description Table: Alert Alert Alert Alert Priority Alert Title Additional Description Identifier Instance Category 3122 WARNING DISTRESS RX Receipt of distress call 3008 WARNING TRANSCEIVER FAIL Not Transmitting Check 3062 WARNING GENERAL FAULT HW error. - Page 28 NVR-3000 OPERATION MANUAL & INSTALLATION MANUAL NVR-3000 OM.E 20230109-08...
-
Page 29: Voice Operation
NVR-3000 OPERATION MANUAL & INSTALLATION MANUAL 3. VOICE OPERATION You can make a voice call at Main screen or from [MAIN MENU]-[USER]-[PRIVATE CHANNEL]-[CALL]. 3.1 Channel Region Selection The channel region can be selected by clicking [REGION] on the main menu. - Page 30 NVR-3000 OPERATION MANUAL & INSTALLATION MANUAL Click the number (2 ~ 4 digits) to enter channel then click OK. ② Click the channel number in the center of the screen. The following screen appears: Click to choose the desired channel.
-
Page 31: Transmit
NVR-3000 OPERATION MANUAL & INSTALLATION MANUAL ③ Rotate the nob to change the directly while [ PUSH TO ENTER k channel number SQL] is OFF, or mark appears on the left side of [CH]. 3.3 Transmit Transmitting power setting Click [POWER] to select [HIGH] (25W) or [LOW] (1W). -
Page 32: Receive
NVR-3000 OPERATION MANUAL & INSTALLATION MANUAL Handset Operation The handset controls voice communications. Press the PTT (push-to-talk) switch to talk, and release it to listen for response. ① Pick up the handset. ② Hold the handset close to your mouth, press the PTT switch and speak clearly. - Page 33 NVR-3000 OPERATION MANUAL & INSTALLATION MANUAL Note: While using the handset for communication, press the PTT switch to talk and release it to listen. NVR-3000 OM.E 20230109-08...
-
Page 34: Dsc Operation
NVR-3000 OPERATION MANUAL & INSTALLATION MANUAL 4. DSC OPERATION 4.1 DSC Description DSC (Digital Selective Calling) is an important mean for emergency calls at sea. It’s a part of GMDSS (Global Maritime Distress and Safety System) set by IMO (International Marine Organization). -
Page 35: Audio Alarms
NVR-3000 OPERATION MANUAL & INSTALLATION MANUAL Urgency: A very urgent call concerning safety of ship, aircraft or other vehicle or safety of person. Safety: A call containing an important navigational or meteorological warning. Routine: General calling. Communication mode TELEPHONE: Telephone (F3E/G3E) by VHF radiotelephone ... -
Page 36: Dsc Call Screens
NVR-3000 OPERATION MANUAL & INSTALLATION MANUAL Alarm Frequency (interval) Distress Count Down 2000Hz 500ms, Silence 500ms Two Tone (Distress) 2200Hz 250ms, 1300Hz 250ms Distress Ack 2200Hz 500ms, 1300Hz 500ms Urgency 2200Hz 250ms, Silence 250ms Urgency Ack 2200Hz 500ms, Silence 500ms... - Page 37 NVR-3000 OPERATION MANUAL & INSTALLATION MANUAL 3) When receiving position data with no information for expansion, the indication is "LAT: 12° 34.----’N". The contents of other types of RX calls are similar to that of the individual call. 4.1.3.2 TX calls...
-
Page 38: Dsc Distress Operation
NVR-3000 OPERATION MANUAL & INSTALLATION MANUAL 4.2. DSC Distress Operation When own ship in distress: ① Press the DISTRESS button to send a distress call. ② Wait for the distress alert acknowledgement. ③ Communicate with the coast station. 4.2.1 Send a Distress Call 4.2.1.1 By DISTRESS button with distress information not edited... - Page 39 NVR-3000 OPERATION MANUAL & INSTALLATION MANUAL (2) After the distress call has been sent, the screen changes as below. Wait to receive the distress acknowledge call from a coast station. The elapsed time since transmission is displayed. At this time, the icons for other DSC received messages except the distress acknowledge call are not displayed.
- Page 40 NVR-3000 OPERATION MANUAL & INSTALLATION MANUAL ② [OPTION] - [Start]: ③ [OPTION] - [Cancel]: Please see the details in Section 4.2.4 - Cancel a Distress Call. (4) You can click [Resend] to resend the distress call. Also, you can re-send the distress alert manually by pressing the DISTRESS button for 3 seconds.
- Page 41 NVR-3000 OPERATION MANUAL & INSTALLATION MANUAL (5) When the distress acknowledge call is received, the audio alarm sounds, the LED of DISTRESS button flashes and the icon for DISTRESS ACK received ) appears. The screen changes as right. ① Click CLICK to silence the audio alarm. Then, the DISTRESS button stops flashing, and the pop-up message disappears.
- Page 42 NVR-3000 OPERATION MANUAL & INSTALLATION MANUAL ③ Click [POSITION], select [EPFS], [MANUAL] or [NO INFO] in pop-up window. [EPFS]: The position information from EPFS is automatically shown. [MANUAL]: Input your position manually. [NO INFO]: No information. For [MANUAL], go to step ④. For others, go to step ⑤.
-
Page 43: Receive A Distress Call
NVR-3000 OPERATION MANUAL & INSTALLATION MANUAL ④ Use the numeric keys to enter latitude/longitude of your position, and UTC time. To change coordinate, click 1 for North or East; 2 for South or West. After enter each data, click OK. - Page 44 NVR-3000 OPERATION MANUAL & INSTALLATION MANUAL Note: You must wait at least 5 minutes before you can acknowledge the distress call so that the coast station has time to send a distress acknowledgement. (1) Send the DSC distress acknowledgement to ship in distress :...
- Page 45 NVR-3000 OPERATION MANUAL & INSTALLATION MANUAL ⑤ The following message appears on the screen. ⑥ Click YES to transmit the distress acknowledgement to the ship in distress. Note: You can not edit the message for the distress acknowledgement. (2) Send the distress relay to coast station: ①...
- Page 46 NVR-3000 OPERATION MANUAL & INSTALLATION MANUAL ④ Click [CALL], the screen changes to the [TX MESSAGE-RELAY INDIVIDUAL] for transmitting as following. After transmitting, the [WAIT ACK] screen appears. When the distress relay individual acknowledgement from the coast station is received, the audio alarm sounds and a pop-up message appears.
-
Page 47: Relay A Distress Call
NVR-3000 OPERATION MANUAL & INSTALLATION MANUAL 4.2.3 Relay a Distress Call 4.2.3.1 Send distress relay to coast station You can send the distress relay to a coast station on behalf of a ship in distress in the following cases: ... - Page 48 NVR-3000 OPERATION MANUAL & INSTALLATION MANUAL ④ With [TO] selected, click to enter the MMSI where to send the distress relay by numeric keys in [INPUT]. Click OK to confirm. ⑤ Click [DISTRESS ID], choose INPUT to enter the ID (MMSI) of the ship in distress with the numeric keys then click OK.
- Page 49 NVR-3000 OPERATION MANUAL & INSTALLATION MANUAL ⑦ With [POSITION] selected, click to select [EPFS], [MANUAL] or [NO INFO]. For [MANUAL], go to step ⑧. For others, go to step ⑨. ⑧ Use the numeric keys to enter latitude and longitude of the ship in distress. Switch coordinates: Click 1 to switch to North (East for longitude);...
- Page 50 NVR-3000 OPERATION MANUAL & INSTALLATION MANUAL [Hold]: You can hold the distress relay ( changes to ) and activate it again by clicking [OPTION]. Note: If you click [CH16] to Main screen, the operation is held automatically, and click [TASK] to return to DSC screen.
-
Page 51: Cancel A Distress Call
NVR-3000 OPERATION MANUAL & INSTALLATION MANUAL ⑥ Click YES, the distress relay is transmitted to all ships. 4.2.4 Cancel a Distress Call You can cancel the distress call while it is being sent or while waiting for its acknowledgement as follows. -
Page 52: Dsc General Calls
NVR-3000 OPERATION MANUAL & INSTALLATION MANUAL ④ Click [FINISH] to finish the operation. ⑤ Click [OPTION] to select the further operation. 4.3. DSC General Calls The procedure for sending and receiving non-distress DSC messages is similar among different message types. The following is an example of the procedure for an individual call. -
Page 53: Individual Call
NVR-3000 OPERATION MANUAL & INSTALLATION MANUAL 4.3.1 Individual Call The individual call is for calling a specific station. After sending an individual call, called ACK RQ transmission, wait to receive the acknowledge back (ACK BQ) signal from the receiving station. - Page 54 NVR-3000 OPERATION MANUAL & INSTALLATION MANUAL (3) With [TO] selected, enter the MMSI where to send the call with the numeric keys in [INPUT]. Click OK to confirm. (4) Click [PRIORITY] to select [ROUTINE], [SAFETY] or [URGENCY]. (5) The [COMM MODE] is [TELEPHONE] automatically.
- Page 55 NVR-3000 OPERATION MANUAL & INSTALLATION MANUAL The timer starts counting up the time since the call is sent. After the call is sent, the equipment waits for acknowledgement of the call, showing the [WAIT ACK] screen as below. You can also do the option: [Hold]/[Quit]/[Resend].
- Page 56 NVR-3000 OPERATION MANUAL & INSTALLATION MANUAL There are three types of ACK messages: [INDIVIDUAL ACK], [INDIVIDUAL ACK] (NEW CH) and [UNABLE ACK]. (9) Do one of the following depending on the message type shown at step (8). Individual acknowledge call received: ①...
- Page 57 NVR-3000 OPERATION MANUAL & INSTALLATION MANUAL ② After you have completed communications, click [OPTION], select [Quit] to Main screen. Unable to acknowledge call received: ① Click CLICK to silence the audio alarm and erase the pop-up message. The reason for [UNABLE ACK] is displayed on the screen.
- Page 58 NVR-3000 OPERATION MANUAL & INSTALLATION MANUAL Send unable acknowledge automatically: If you cannot use the channel specified by the sending station, an unable acknowledge [CH UNABLE] is sent automatically. The [ACK SETTING] menu is set to [AUTO-UNABLE]. It takes a few seconds to transmit the call.
- Page 59 NVR-3000 OPERATION MANUAL & INSTALLATION MANUAL ② Communicate by radiotelephone. ③ After you have completed communications, click [OPTION] to select [Quit]. (2) Send unable acknowledge call ① Click [Unable]. ② With [REASON] selected, click [CALL] to send unable acknowledge call.
-
Page 60: Group Call
NVR-3000 OPERATION MANUAL & INSTALLATION MANUAL ③ Set the channel by the numeric keys and click OK to confirm. For example, CH06. ④ Click [CALL], send the able to change channel acknowledge call. ⑤ Communicate by radiotelephone. ⑥ After you have completed communications, click [OPTION] to select [Quit]. - Page 61 NVR-3000 OPERATION MANUAL & INSTALLATION MANUAL (1) Click [DSC MSG], or click [MENU] and choose [DSC] – [MESSAGE], then click [GENERAL MESSAGE] in [MESSAGE]. (2) Click [MSG TYPE] to select [GROUP]. (3) With [TO] selected, enter the group MMSI that where to send the group call in [INPUT], then click OK to confirm.
- Page 62 NVR-3000 OPERATION MANUAL & INSTALLATION MANUAL Communicate by radiotelephone. (7) After you have completed communications, click [OPTION], select [Quit] and click YES to Main screen. (8) You can also do the option: [Hold] or /[Resend]. 4.3.2.2 Receive a group call Group MMSI must be registered in order to receive a group call.
-
Page 63: All Ships Call
NVR-3000 OPERATION MANUAL & INSTALLATION MANUAL (2) Watch on the channel. Communicate by radiotelephone. (3) After you have completed communications, click [OPTION] to select [Quit]. 4.3.3 All Ships Call The purpose of an all ships call is to send an urgency or safety call to all ships for assistance. After sending the call, you can communicate by radiotelephone. - Page 64 NVR-3000 OPERATION MANUAL & INSTALLATION MANUAL (5) Click [CALL] to send the call. The screen changes as below. Communicate by radiotelephone. (6) After you have completed communications, click [OPTION], select [Quit] and click YES to Main screen. (7) You can also do the option: [Hold] or [Resend].
-
Page 65: Position Call
NVR-3000 OPERATION MANUAL & INSTALLATION MANUAL (1) Click CLICK to silence the audio alarm and erase the pop-up message. The channel is automatically tuned to the received communication channel. (2) Watch on the channel. Communicate by radiotelephone. (3) After you have completed communications, click [OPTION] to select [Quit]. - Page 66 NVR-3000 OPERATION MANUAL & INSTALLATION MANUAL Send own ship's position to other station: 4.3.4.1 Request other ship's position Click [DSC MSG], or click [MENU] and choose [DSC] – [MESSAGE], then click [GENERAL MESSAGE] in [MESSAGE]. (2) Click [MSG TYPE] to select [POSITION].
- Page 67 NVR-3000 OPERATION MANUAL & INSTALLATION MANUAL (4) [PRIORITY] is automatically selected to [SAFETY]. (5) Click [CALL] to send position call. The screen changes as below. (6) After the call has been sent, the [WAIT ACK] screen appears as below. The elapsed time since sending the call is displayed.
- Page 68 NVR-3000 OPERATION MANUAL & INSTALLATION MANUAL (7) When you receive an acknowledge message, the audio alarm sounds and a popup message appears. (8) Click CLICK to silence the audio alarm and erase the pop-up message. If you receive and unable acknowledge message (no position information), the screen is as follows:...
- Page 69 NVR-3000 OPERATION MANUAL & INSTALLATION MANUAL (9) Click [OPTION], select [Quit] to back to Main screen. 4.3.4.2 Receive a position request call You can enable automatic acknowledge of position request with [POSITION] on the [ACK SETTING] menu. Automatic reply When another ship requests your position and the setting of [POSITION] on the [ACK SETTING] menu is [AUTO], the equipment automatically transmits a reply.
- Page 70 NVR-3000 OPERATION MANUAL & INSTALLATION MANUAL (1) To silence the audio alarm, click CLICK. (2) Click [OPTION], do the operation as follows. Send the ACK with position information: Click [Accept], send position information of own ship. NVR-3000 OM.E 20230109-08...
-
Page 71: Test Call
NVR-3000 OPERATION MANUAL & INSTALLATION MANUAL Send the ACK with no position information: Click [Unable]. The screen changes as below. (3) After the ACK is finished, click [OPTION] to select [Quit]. 4.3.5 Test Call 4.3.5.1 Send a test call (1) Click [DSC MSG], or click [MENU] and choose [DSC] –... - Page 72 NVR-3000 OPERATION MANUAL & INSTALLATION MANUAL (2) Click [MSG TYPE] to select [TEST]. (3) Click [TO], enter the MMSI where to send the test call in [INPUT], then click OK to confirm. (4) Click [CALL] to send test call. The screen changes as below.
- Page 73 NVR-3000 OPERATION MANUAL & INSTALLATION MANUAL (6) When you receive an acknowledge message, the audio alarm sounds and a popup message appears. (7) Click CLICK to silence the audio alarm and erase the pop-up message. (8) Click [OPTION], select [Quit] to back to Main screen.
- Page 74 NVR-3000 OPERATION MANUAL & INSTALLATION MANUAL Manual reply When a test call is received and the setting of [TEST] on the [ACK SETTING] menu is [MANUAL], send the acknowledgement manually. When you receive a test call, the audio alarm sounds. The icon ( ) appears in the tab area, and the pop-up message "RECEIVED A DSC MESSAGE.
-
Page 75: Polling Call
NVR-3000 OPERATION MANUAL & INSTALLATION MANUAL If you click [Accept], the test acknowledgement will be sent. After the acknowledgement is finished, click [OPTION] to select [Quit]. 4.3.6 Polling Call Polling means that another ship wants to confirm if it is within communication range of own ship. - Page 76 NVR-3000 OPERATION MANUAL & INSTALLATION MANUAL (2) Click [OPTION], choose one of the operations: [Hold], [Quit] or [Accept]. If you click [Accept], the polling acknowledgement will be sent. After the acknowledgement is finished, click [OPTION] to select [Quit]. NVR-3000 OM.E 20230109-08...
-
Page 77: Installation
NVR-3000 OPERATION MANUAL & INSTALLATION MANUAL 5. INSTALLATION 5.1 VHF Antenna There are two VHF antennas to be connected. It’s very important to choose a proper location for VHF antenna as a metal object close to the antenna could affect receiving sensitivity. -
Page 78: Power Supply
PRINTER(+) --------------- PRINTER(-) Necessary settings are needed for NPT-100 before properly working with NVR-3000. Please refer to the manual supplied by the printer maker. The settings include the following parameters: - Serial port setting The output of NPT-100 should be set as SERIAL. -
Page 79: Connect With Handset
Hereafter the MMSI number is briefly displayed after powered on. The MMSI is a unique, 9-digit identifier assigned to own ship. To operate ATIS function of NVR-3000, ATIS ID must be registered also. Do the following to set own ship’s MMSI/ATIS ID. - Page 80 NVR-3000 OPERATION MANUAL & INSTALLATION MANUAL ③ Click [MMSI LOCK] / [ATIS ID LOCK] and choose YES to confirm the setting. And MMSI/ATIS ID will be locked afterwards. For example: ATIS LOCK. LOCK” appears after clicking [ATIS LOCK] again. “ATIS NOTE: Without a programmed MMSI, the DISTRESS button will not work! The [DSC MSG] cannot be opened either if the MMSI has not been programmed during installation.
-
Page 81: Maintenance
NVR-3000 OPERATION MANUAL & INSTALLATION MANUAL 6. MAINTENANCE 6.1 Maintenance Regular maintenance helps to keep your equipment in good condition and prevents future problems. Check the items shown in the table below. Item Check point Remedy/Remarks Antenna Check for physical damage and corrosion. -
Page 82: Appendix 1 Technical Specifications
NVR-3000 OPERATION MANUAL & INSTALLATION MANUAL APPENDIX 1 TECHNICAL SPECIFICATIONS General Specifications TX Frequency 156.025-157.425MHz RX Frequency 156.050-163.275MHz ITU channel: 52 channels USA channel: 46 channels CAN channel: 75 channels Number of Channels IWW channel:52 channels WX (Weather): channel: 10 channels... - Page 83 NVR-3000 OPERATION MANUAL & INSTALLATION MANUAL Receiver ≤2uV e.m.f (SINAD=20dB) Sensitivity ≥70dB Adjacent Selectivity ≥40dB ( 1kHz, 70% modulated, 30dBμV RF input) Signal To Noise Ratio ≥70dB Spurious Response Rejection ≤2nW (9kHz~2GHz) Spurious Emission ≥65dB Intermodulation Rejection ≤10% Harmonic Distortion...
-
Page 84: Appendix 2 Menu Tree
NVR-3000 OPERATION MANUAL & INSTALLATION MANUAL APPENDIX 2 MENU TREE MAIN USER PRIVATE CHANNEL MENU ALERT LIST USER TEST PRINT DSC LOG DAILY OFF HISTORY MESSAGE ADDRESS ACK SETTING REASON (NO REASON/BUSY/EUT DISABLED/CH UNABLE/MODE UNABLE) INDIVIDUAL (AUTO-UNABLE/MANUAL) POSITION (AUTO-UNABLE/MANUAL/AUTO-ABLE) POLLING (MANUAL/AUTO) -
Page 85: Appendix 3 Channel Tables
NVR-3000 OPERATION MANUAL & INSTALLATION MANUAL APPENDIX 3 CHANNEL TABLES ITU VHF Channel Table (REV.WRC-19 Appendix18) Transmitting Port operations and ship frequencies Public movement Channel (MHz) Notes Inter- ship corres- designator pondence From ship From coast Single stations stations frequency frequency 156.025... - Page 86 NVR-3000 OPERATION MANUAL & INSTALLATION MANUAL Transmitting Port operations and ship frequencies Public movement Channel (MHz) Notes Inter- ship corres- designator pondence From ship From coast Single stations stations frequency frequency 1019 156.950 156.950 2019 161.550 156.975 161.575 1079 156.975 156.975...
- Page 87 NVR-3000 OPERATION MANUAL & INSTALLATION MANUAL Notes referring to the Table General notes Administrations may designate frequencies in the inter-ship, port operations and ship movement services for use by light aircraft and helicopters to communicate with ships or participating coast stations in predominantly maritime support operations under the conditions specified in Nos.
- Page 88 NVR-3000 OPERATION MANUAL & INSTALLATION MANUAL – The lower frequency portion of these channels may be operated as single frequency channels by ship and coast stations. – Transmission using the upper frequency portion of these channels is limited to coast stations.
- Page 89 NVR-3000 OPERATION MANUAL & INSTALLATION MANUAL described in the most recent version of Recommendation ITU-R M.1084 by an administration that wishes to do so, subject to not causing harmful interference to, or claiming protection from other stations in the maritime mobile service using digitally modulated emissions and subject to coordination with affected administrations.
- Page 90 NVR-3000 OPERATION MANUAL & INSTALLATION MANUAL ITU Channel Table (According to REV.WRC-19 Appendix18) TX ( MHz) RX ( MHz) REMARK 156.050 160.650 156.100 160.700 156.150 160.750 156.200 160.800 156.250 160.850 156.300 156.300 156.350 160.950 156.400 156.400 156.450 156.450 156.500 156.500 156.550...
- Page 91 NVR-3000 OPERATION MANUAL & INSTALLATION MANUAL USA Channel Table (According to FCC 47 CFR Part 80: 80.215, 80.371 and 80.373) TX ( MHz) RX ( MHz) REMARK 1001 156.050 156.050 1005 156.250 156.250 156.300 156.300 1007 156.350 156.350 156.400 156.400 156.450...
- Page 92 NVR-3000 OPERATION MANUAL & INSTALLATION MANUAL CAN Channel Table (According to RAMN-ARNM-2021) TX ( MHz) RX ( MHz) REMARK 156.050 160.650 1001 156.050 156.050 156.100 160.700 156.150 160.750 156.200 160.800 156.250 160.850 1005 156.250 156.250 156.300 156.300 156.350 160.950 1007 156.350...
- Page 93 NVR-3000 OPERATION MANUAL & INSTALLATION MANUAL TX ( MHz) RX ( MHz) REMARK 156.475 156.475 156.525 156.525 For DSC operation only 156.575 156.575 156.675 156.675 156.725 156.725 156.775 156.775 Fixed at 1W 156.825 156.825 Fixed at 1W 156.875 156.875 Fixed at 1W 156.925...
- Page 94 NVR-3000 OPERATION MANUAL & INSTALLATION MANUAL IWW Channel Table (According to ETSI EN 300 698 V2.2.1) TX ( MHz) RX ( MHz) REMARK 156.050 160.650 156.100 160.700 156.150 160.750 156.200 160.800 156.250 160.850 156.300 156.300 Fixed at 1W 156.350 160.950 156.400...
- Page 95 NVR-3000 OPERATION MANUAL & INSTALLATION MANUAL WX (Weather) Channel Table (According to FCC Rule 47CER80.371(c) and 80.373(f)) RX (MHz) REMARK 162.550 NOAA Weather Channel / CANADA CMB Service 162.400 NOAA Weather Channel / CANADA CMB Service 162.475 NOAA Weather Channel / CANADA CMB Service 162.425...
-
Page 96: Appendix 4 Sentence Description
NVR-3000 OPERATION MANUAL & INSTALLATION MANUAL APPENDIX 4 SENTENCE DESCRIPTION I/O Sentences Input sentences (IEC 61162-1) GNSS port: GGA, ZDA, GNS, RMC BAM port: ACN Output sentence (IEC 61162-1) BAM port: ALF, ALC, HBT, ARC Format of GNSS port, BAM port and Data port... - Page 97 NVR-3000 OPERATION MANUAL & INSTALLATION MANUAL 3. Longitude, E/W 4. GPS quality indicator 5. Number of satellite in use,00-12, may be different from the number in view 6. Horizontal dilution of precision 7. Antenna altitude above/below mean sea level (geoid), m 8.
- Page 98 NVR-3000 OPERATION MANUAL & INSTALLATION MANUAL RMC- Recommended minimum specific GNSS data $--RMC,hhmmss.ss,A,llll.ll,a,yyyyy .yyy,a,x.x,x.x,xxxxxx,x.x,a,a,a*hh<CR><LF> | | | | | | | | | | | | | +-----------------------10 | | | | | +-------------------- 9 | | | +--+------------------ 8...
- Page 99 NVR-3000 OPERATION MANUAL & INSTALLATION MANUAL NOTE A: If the system time is out of sync with valid ZDA sentence, this filed is NULL. ALC - Cyclic alert list $--ALC, xx, xx, xx, x.x, aaa, x.x, x.x,x.x, .., aaa, x.x, x.x, x.x*hh <CR><LF>...
-
Page 100: Appendix 5 Installation Drawings
NVR-3000 OPERATION MANUAL & INSTALLATION MANUAL APPENDIX 5 INSTALLATION DRAWINGS NVR-3000 OM.E 20230109-08... - Page 121 Copyright by NEW SUNRISE CO., LTD. (NSR) www.nsrmarine.com info@nsrmarine.com Jan, 2023...
Need help?
Do you have a question about the NVR-3000 and is the answer not in the manual?
Questions and answers