
Related Manuals for Atlas Copco STwrench


Summary of Contents for Atlas Copco STwrench
- Page 1 User Guide STwrench Atlas Copco Industrial Technique AB 9836 4134 01 2014-07 Edition 2.9...
- Page 3 3.1. 2010-03 09 July 2010 M. Grippa Added connection to Torque 3.1.x 3.1x Supervisor (par. 16), added Appendix B – STwrench factory settings (par. 22) 9836 4134 01 Edition 2.9 3 (326)
- Page 4 M. Grippa Real time torque traces function 7.8.x 3.7x updated (par. 13), Traces import/export function added (par. 12.3), Results viewer on STwrench display added (par. 11), smartHEAD 800 Nm added, Settings for trace resolution to Power Focus added (par. 10.2.4.5).
- Page 5 NOTE: The programming software (ToolsTalk BLM) may be updated with no changes regarding the STwrench functionalities. The minimum version indicated here is required for the reference firmware version. NOTE: In the event of conflicts between translations of this user guide, always refer to the official English version.
-
Page 6: Table Of Contents
Buzzer and Vibration Devices ................. 61 smartHEAD Illuminating Light ................. 62 IRDA Port ....................... 62 Mini USB Port ......................62 Getting Started with the STwrench ..............63 Executing a Free Test ..................... 64 6 (326) 9836 4134 01 Edition 2.9... - Page 7 5.2.3 Status bar ........................ 79 5.2.4 Wrench Map ......................80 Settings in ToolsTalk BLM ..................82 Connecting to the STwrench .................. 83 Wrench LOG Viewer ....................85 Enabling LOG File ....................86 Pset ........................87 Torque Parameters ....................88 Angle Parameters ....................91 Timeout ........................
- Page 8 Setting the source for Pset/Multistage/Job selection ......166 10.2.1.17 Setting the STwrench display language ..........167 10.2.1.18 Setting the STwrench date format ............167 10.2.1.19 Configuring the “results” menu on the STwrench ........ 168 8 (326) 9836 4134 01 Edition 2.9...
- Page 9 Compatibility between different end-fitting tools ........185 Offline Programming ..................186 11.1 Creating the Offline File ..................187 11.2 Uploading the Offline File to the STwrench ............191 Results Viewer ....................193 Traces Viewer ....................198 13.1 View one Trace ....................199 13.2 Traces Comparison ....................
- Page 10 18.3.1.3 Configuring the report footer ..............271 18.3.1.4 Objects available in the report ............... 272 18.3.1.5 Completing the report and saving to the STwrench ......275 18.4 Input/Output Operations ..................276 18.4.1 Configuring the Inputs ................... 281 18.4.2 Configuring the Outputs ..................284 18.5 ToolsNet Connection via QATnode ...............
- Page 11 No. 9836 4489 00 CAREFULLY PRIOR TO USING THE PRODUCT AND STRICTLY FOLLOW THE SAFETY INSTRUCTIONS PROVIDED. IF THE EQUIPMENT IS USED IN A MANNER NOT SPECIFIED BY ATLAS COPCO BLM, THE PROTECTION PROVIDED BY THE EQUIPMENT MAY BE IMPAIRED. 9836 4134 01 Edition 2.9...
-
Page 12: Battery Information According To European Regulation 2006/66/Ce
Battery information STwrench User Guide BATTERY INFORMATION according to European Regulation 2006/66/CE BATTERY PACK SPECIFICATION MODEL STwrench battery STwrench battery short HD STwrench Battery BI 8059 0930 86 8059 0930 83 8059 0930 85 Lithium-ion, 3.75V 5.2A Lithium-ion, 3.75V 2.6A Lithium-ion, 3.7V 2.9A... -
Page 13: Introduction
STwrench User Guide Introduction Introduction About This Document This document is a user guide for the STwrench and is divided into the following main parts: Part Name Description Chapter 1 Introduction This chapter introduces this user guide and provides the wrench technical specifications. - Page 14 STwrench User Guide Chapter 10 STwrench Settings This chapter guides the operator in all the settings of the STwrench, in order to customize the product to the customer’s needs. Chapter 11 Offline Programming This chapter explains the function to create the...
-
Page 15: Reference Documents
• ToolsNet User Guide • Power Focus User Guide • BLM Torque Supervisor User Guide • STwrench WEEE manual: Instructions about how to dispose of the product at the end of its life 9836 4134 01 Edition 2.9 15 (326) -
Page 16: Specifications
• Units of measurement supported: N·m, kgf·m, kgf·cm, lbf·ft, lbf·in, ozf·ft, ozf·in, kp·m, dN·m BATTERY PACK • Battery power supply: - STwrench standard battery: 3.75 V, 5.2 Ah - STwrench battery short HD: 3.75 V, 2.6 Ah - STwrench battery inside BI: 3.7 V, 2.9 Ah • Battery type: Lithium-ion (Li-ion) •... - Page 17 STwrench 800 N·m 1040 1416 1353 2.87 6.33 STwrench 1000 N·m 1270 1646 1668 3.72 8.20 STwrench BI 15 N·m 18.3 0.80 1.76 STwrench BI 30 N·m 18.3 0.83 1.83 STwrench BI 80 N·m 18.3 0.86 1.89 9836 4134 01 Edition 2.9...
- Page 18 3.52 7.76 * Dimension Z is 50.5 mm when the STwrench battery short HD is installed (and Dimension K decreases by 45.5 mm) ** Dimension J is the standard arm (measured at the center of the end-fitting tool); these data are used to calculate the torque correction coefficient when an extension is used.
- Page 19 STwrench User Guide Introduction • IRC-B radio module (optional): - Frequency: 2.402 ÷ 2.480 GHz - RF output power: max 16.9dBm (49mW) - Receiver sensitivity: -89 dBm - Receive input level (max): +16 dBm • IRC-Z radio module (optional): - Channels: 11 ÷ 26 - Frequency: 2.405 ÷...
- Page 20 • Environmental class: II • IP grade according to EN IEC 60529: IP40 • Ambient temperature: 5 to 40°C • Atmospheric humidity: 95%, non-condensing • Altitude: Up to 2000m • Shock indicator on STwrench controller. 20 (326) 9836 4134 01 Edition 2.9...
-
Page 21: Standard Conformity
Optional ACCREDIA (ex SIT) certification is available on request and by agreement. Atlas Copco BLM is an ACCREDIA calibration center. Standard Conformity The STwrench is in conformity with the requirements of the council Directives on 06/22/1998 on the approximation of the laws of the Member States relating: • 1999/05/EC Radio and telecommunications terminal equipment •... - Page 22 Introduction STwrench User Guide • ETSI EN 300 328 V.1.7.1:2006 RADIO • ETSI EN 300 330 V.1.3.1:2006-04 RADIO • FCC Rules N. 47 Part 15 RADIO FREQUENCY DEVICES • EN 301 489-1 V1.6.1:2005-04 • EN 301 489-17 V1.2.1:2002-08 • EN 61000-4-2:1995 +A1:1998 + A2:2001 •...
-
Page 23: System Overview
Microsoft Excel and printed, or transferred to Torque Supervisor. • Joint analysis: The STwrench is a perfect tool for studying a joint through the joint analysis feature. The yield point is automatically detected and the trace can be transferred to a PC for analysis. -
Page 24: Stwrench Versions
System Overview STwrench User Guide STwrench Versions This chapter provides a summary of the tightening strategies available on the different STwrench and smartHEAD versions. The STwrench version is defined by the Rapid Backup Unit (RBU) installed: RBU Quality RBU Production... -
Page 25: Stwrench Typical Applications Scenario
2.3.1 Stand-alone wrench printing the results The STwrench can work as a stand-alone instrument for either production or quality control, programmed by its management software (ToolsTalk BLM), which can retrieve tightening results and traces, to be printed and/or exported into a Microsoft Excel file. -
Page 26: Stand-Alone Wrench Driven By Remote Device, With The Option Of Printing The Results
System Overview STwrench User Guide IRC-W Access Point Network See the Working with the QATnode chapter for more information. 2.3.2 Stand-alone wrench driven by remote device, with the option of printing the results 26 (326) 9836 4134 01 Edition 2.9... -
Page 27: Wrench Connected To Power Focus
Access Point Network The STwrench can work as a stand-alone instrument for either production or quality control, programmed by its management software (ToolsTalk BLM), which can retrieve tightening results and traces, to be printed in an exported Microsoft Excel file if required. - Page 28 System Overview STwrench User Guide IRC-Z IRC-W Access Point Network IRC-W IRC-W Dual Radio receiver 28 (326) 9836 4134 01 Edition 2.9...
-
Page 29: Wrench Connected To Toolsnet
STwrench User Guide System overview The STwrench can work in conjunction with Power Focus, via IRC-B, IRC-Z, IRC-W radio communication, or through the STwrench Cable Box. The RBU must be Production. In this mode, the management software (ToolsTalk BLM) is optional; the tightening programs are created and transferred to the wrench via Power Focus. - Page 30 The QATnode T allows the I/O module to be used and the tightening results to be printed on a STAR printer. In such cases, the IRC-W connection can be used to connect the STwrench to the QATnode; the QATnode sends the data to ToolsNet and connects to a remote device (through I/O module) and/or STAR...
-
Page 31: Wrench Connected To Torque Supervisor
Access Point Network The STwrench can work in conjunction with Torque Supervisor, to make quality control tests on joints. Communication is through via a USB cable or IRC-W Dual Band radio module. In this application, Torque Supervisor generates and sends to the wrench a list of tests to be done (the “route”). -
Page 32: Custom Application With Api
Interface). The connection can be made in two different ways: USB cable: Allows only one STwrench to be connected to the API at the same time. It is not possible to send a Pset/Multistage/Job to the wrench via the API. -
Page 33: Presentation
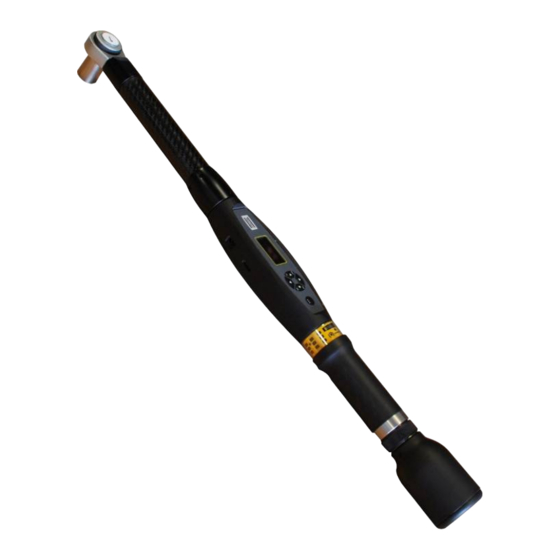
STwrench User Guide System overview Presentation The STwrench is modular. The minimum set of required modules is: STwrench controller The main module of the wrench containing all the hardware and firmware. The version BI (for which the battery inside must be used) is also available. - Page 34 STwrench settings and TAG writer function. The following optional modules can be installed in the STwrench controller: QAT barcode reader module Module for scanning barcode labels on assembly components for easy traceability.
- Page 35 System overview The following accessories are also available: STwrench Cable Box Kit for interfacing the STwrench with Power Focus via a cable. The Tensor SL Cable (available in 4 different lengths: 3m, 5m, 10m or 15m) must be purchased separately.
- Page 36 System Overview STwrench User Guide Battery Inside (BI) This battery in used for the STwrench Controller BI version, and it is mounted inside the controller, reducing the wrench length. Its capacity and operating time is about 56% compared to the standard battery.
-
Page 37: Stwrench Assembly
STwrench User Guide System overview 2.4.1 STwrench assembly The STwrench is delivered in separated packages for each module; in order to start working with the wrench, you must first put all the pieces together: Battery smartHEAD Controller 1. Remove the cover from the controller and insert the RBU inside the controller. Tighten the... - Page 38 System Overview STwrench User Guide 4. Install the smartHEAD on the wrench controller (tighten the locking nut) Guide PIN Reference PIN NOTE: There is only one way to insert the smartHEAD into the wrench controller. The guide pin and the reference pin must be inserted in the correct housings; do not force them into other positions.
- Page 39 ToolsTalk BLM Illuminating light CAUTION: Once assembled, the STwrench modules, with the exception of the battery pack, must not be disassembled during normal operations. For example, do not disassemble the smartHEAD from the controller at the end of the working day.
-
Page 40: Stwrench Controller
System Overview STwrench User Guide 2.4.2 STwrench controller The controller is the core of the STwrench: It contains the main hardware boards and firmware. There are two controller versions: STwrench controller standard Standard version. It works with standard battery and “short HD” battery. - Page 41 The maximum angular speed of the gyroscope is 150°/s; if this speed is exceeded during tightening, the STwrench displays an “overspeed” error message; this will result in the angle result being set to 9999 degrees.
- Page 42 Illuminating light (back side) Locking nut ring NOTE: When installing a new smartHEAD in the STwrench, ensure that it can support all the tightening programs present in the wrench memory. For instance, if the capacity of the new smartHEAD is lower than the capacity of the old smartHEAD, some of the tightening programs with a target torque higher than the capacity of the new smartHEAD could cause a transducer capacity error.
-
Page 43: Rbu
RBU (Rapid Backup Unit) is a memory chip which defines which functions are activated and provides backup for your tightening programs. It also stores the specific settings of your STwrench (see the default configuration in Appendix C - STwrench Factory Settings); by installing your RBU in another wrench you therefore get an exact copy of the original wrench. -
Page 44: Qat Barcode Reader
When you turn on the wrench with the new RBU the following message is shown: • Select RBU: The data (STwrench settings and all the tightening programs) are loaded from the RBU; all the data stored in the wrench memory are overwritten. -
Page 45: Irc
See the chapter Identifier for more information. 2.4.6 The Industrial Radio Communication (IRC) technology operates on the free 2.4 and 5 GHz ISM band. For the STwrench, three different versions for the different IRC standards are available: • IRC-B • IRC-Z •... - Page 46 System Overview STwrench User Guide IRC-B • 79 (1 MHz) channels • IRC-B features dynamic Adaptive Frequency Hopping (AFH). • No frequency planning needed. IRC-B with AFH avoids collisions on the 2.4 GHz ISM band, for example with Wi-Fi networks.
-
Page 47: Qat Irc-W Radio Module
IRC-W, three channels occupying the 2.4GHz ISM band. 2.4.6.1 QAT IRC-W radio module The IRC-W Dual Band radio module allows the interface between the STwrench and ToolsNet, Power Focus, QATnode, and API. IRC-W Radio To install the IRC-W module in the wrench, turn off the wrench, remove the cover and insert the IRC-W module (tighten the two screws with your fingers). - Page 48 System Overview STwrench User Guide • For ToolsNet connection: See the chapter Establishing Communication between STwrench and ToolsNet for more information. For ToolsNet connection with QATnode T, see the chapter Working with the QATnode • For Power Focus connection: See the section Interface with IRC-W Radio Module in the chapter Working with Power Focus.
-
Page 49: Qat Irc-B / Irc-Z Radio Modules
2.4.6.2 QAT IRC-B / IRC-Z radio modules The IRC-B and IRC-Z (Industrial Radio Communication) radio modules allow the interface between the STwrench and Power Focus. IRC-B / IRC-Z Radio To install the IRC-B or IRC-Z radio module in the wrench, turn off the wrench, remove the cover, and insert the radio module (tighten the two screws with your fingers). -
Page 50: Battery
Battery short HD Battery inside BI The STwrench is powered by its battery pack. The rechargeable Lithium-ion standard battery ensures over 16 hours of operating time, or 7.5 hours if the IRC-W module is installed in the controller. Standard or “short HD”... -
Page 51: Battery Charger
STwrench User Guide System overview To replace the battery, turn off the wrench, loosen the nut ring, remove the battery and replace it). NOTE: Refer to the chapter Battery Pack Maintenance for important notes about how to keep the battery in good working order. -
Page 52: Stwrench Cable Box
With this kind of connection, the STwrench is powered by Power Focus and the battery is no longer required. A Tensor SL Cable is required to connect the STwrench to the Cable Box, and must be purchased separately. 52 (326) - Page 53 STwrench User Guide System overview The STwrench Cable Box does not need to be powered from an external source; simply connect the cable between the STwrench and the Adapter, and connect the two serial connectors of the adapter to the ports...
-
Page 54: Qatnode
System Overview STwrench User Guide 2.4.9 QATnode These accessories provide additional functions to the STwrench. The QATnode is available in three different versions: • QATnode P: QATnode for printing the tightening result on a STAR printer. • QATnode I/O: QATnode for printing the tightening result on a STAR printer, and I/O module for communication with a remote device. -
Page 55: End-Fitting Tools
STwrench User Guide System overview 2.4.10 End-fitting tools The end-fitting tools for the STwrench must be ordered separately, according to Atlas Copco price list. A wide selection of end-fitting tool is available: Open end Box end Flared end Reversible ratchet Black end: This tool can be welded to customized wrench extensions. - Page 56 The end-fitting tool can be used to start a tightening program automatically when it is plugged into the STwrench smartHEAD (see Setting the source for Pset/Multistage/Job selection), or it can be simply associated with the tightening program (the wrench checks that the right tool is used before starting the tightening operation.
-
Page 57: Stwrench Holder
2.4.11 STwrench holder The STwrench holder can be installed on a table or a wall in a horizontal or vertical position in order to hold the STwrench in a fixed position. Simply position the STwrench in the holder (push the wrench until hearing the “click”) as shown in the... -
Page 58: Rubber Protections
Rubber protection for smartHEAD Rubber protection for controller Rubber protection for standard battery Note that, even if the rubber protections have been fitted, the STwrench must be handled with care to prevent damage. 58 (326) 9836 4134 01 Edition 2.9... -
Page 59: User Interfaces
STwrench User Guide User Interfaces User Interfaces LEDs A set of three LEDs is alighted during the tightening operations, to guide the operator during tightening and to signal the final results. Moreover, three rows of yellow LEDs provide additional information on the ongoing tightening operation and result. -
Page 60: Display
User Interfaces STwrench User Guide Display The wrench display allows you to explore the wrench menu, and to monitor torque and angle during the tightening operation: Pset / Multistage name Radio/IRDA Battery charge connection Torque Angle Job information Tightening direction... -
Page 61: Keyboard
NOTE: Buzzer and vibration devices can be enabled/disabled in the STwrench Controller Setup menu of ToolsTalk BLM. Along with the onboard LEDs, the STwrench also has buzzer and vibration devices to give more information on the result of the current tightening operation: •... -
Page 62: Smarthead Illuminating Light
The USB port is available for programming the wrench with ToolsTalk BLM. See the Working with ToolsTalk BLM chapter for more information. It also allows the use of the STwrench with the API. See the Working with the API chapter for more information. -
Page 63: Getting Started With The Stwrench
Getting Started with the STwrench To turn on the STwrench press the ON button on the wrench keyboard. To turn the wrench off, press the OFF button and hold it down for a few seconds. The power on screen is shown for few seconds, followed by the zero adjustment and radio module search screen. -
Page 64: Executing A Free Test
STwrench User Guide • Free Mode: This menu allows you to conduct a free test, without having to program the wrench with a specific tightening program. This menu can be disabled if desired (see the STwrench Settings chapter for more information). •... -
Page 65: Track
STwrench User Guide Getting started with STwrench 4.1.1 Track This mode can be used to execute a very simple tightening operation in which the operator tightens the screw at the desired torque, monitoring the torque applied on the wrench display. -
Page 66: Peak
Getting started with STwrench STwrench User Guide 4.1.2 Peak Like track mode, this mode can be used to perform a very simple tightening operation in which the operator tightens the screw at the desired torque, monitoring the torque applied on the wrench display. In peak mode, the maximum value reached during tightening remains frozen on the wrench display. -
Page 67: Residual Torque / Time
STwrench User Guide Getting started with STwrench 4.1.3 Residual Torque / Time This test evaluates the residual torque on a bolt, using the torque / time method. Breakaway Torque Torque Breakaway = residual Residual Min. Load Time Time No input parameters are needed; simply apply the torque on the bolt and increase it until it starts moving;... -
Page 68: Residual Torque / Angle
Set the desired target torque value by clicking on the UP and DOWN arrows on the wrench keyboard and click the OK button to confirm and execute the test. The STwrench start analyzing the torque/angle trace from the half value of the target entered. -
Page 69: Tight Torque / Angle
STwrench User Guide Getting started with STwrench The wrench displays the torque applied in real time, and freezes the residual torque value when the residual point is detected. The green LED and the vibration device (active for 1 second) advise the operator that the residual torque point has been detected. -
Page 70: Track Angle
Time In this mode, the wrench displays the angle in real time. The STwrench can be rotated in either a clockwise (positive angle) or counterclockwise (negative angle) direction. By clicking on the OK button on the wrench keyboard, the angle measurement is reset. -
Page 71: Working With Toolstalk Blm
It offers easy user-friendly programming and real time monitoring of the wrench. ToolsTalk BLM serves as an interface between the user and the STwrench. With ToolsTalk BLM, users can create and edit the tightening programs for the wrench; it also allows configuration of wrench settings, and receives the tightening results and traces executed by the wrench. -
Page 72: Software Installation And Registration
CD; if the CD content is copied into a PC folder, it must be a local PC folder. If possible, install the software with a STwrench switched on and connect to the PC via a USB cable. To install the software, simply double-click on the setup file on the installation CD and follow the instructions. - Page 73 STwrench User Guide Working with ToolsTalk BLM If the software is installed without a STwrench connected, at the end of the installation, the user will be required to connect a STwrench to the PC to continue with driver installation: Turn on the STwrench and wait until initialization has finished and the main menu is shown on the wrench display.
- Page 74 Click on Continue Anyway if this Windows message shown Wait until the end of the installation and click on Finish. After installation, run the program by selecting Start → Programs → Atlas Copco Tools AB → ToolsTalk BLM: 74 (326) 9836 4134 01 Edition 2.9...
-
Page 75: Software Registration
After installing the software, you need to register at www.atlascopco.com/tools/software. If not registered, the software only works as demo for 60 days. The registration form can be open from the Start → Atlas Copco Tools AB → ACTLicense menu: 5.1.2 Software upgrade When upgrading the ToolsTalk BLM software to a new version, simply install the new version. -
Page 76: Toolstalk Blm Overview
Offline area Wrench Map Status bar NOTE: ToolsTalk BLM adapts automatically to the STwrench firmware version and RBU type. As a result, some menus or commands may be hidden or disabled if not supported by the firmware/RBU version of the STwrench. -
Page 77: Menu List
STwrench User Guide Working with ToolsTalk BLM 5.2.1 Menu list The following options are available in the ToolsTalk BLM Menu list: Illustration Name Description File Reads and stores the .TTB files containing all the tightening programs. View Enables the Toolbar and the Status bar in the main page of ToolsTalk BLM. -
Page 78: Toolbar
This icon opens the programming window for the first Pset. A Pset contains all the information the STwrench needs to perform tightening. Click on the arrow to the right of the icon to select one of the existing Psets (identified by number). -
Page 79: Status Bar
This icon is not active in this software version. 5.2.3 Status bar The status bar is shown when the STwrench is connected to ToolsTalk BLM. It shows the connection status between the PC and the STwrench and the battery charge level: • Green: Battery level over 50% •... -
Page 80: Wrench Map
Prog Mode menu: NOTE: In Prog. Mode, the STwrench reads the RFID TAG of the end-fitting tool (if the function is enabled in the controller setting). If the torque and/or angle readings are correct in the Free Mode but incorrect in the Prog. - Page 81 STwrench User Guide Working with ToolsTalk BLM If the Group Menu is enabled in the STwrench Controller Setup, the Pset, Multistages and Jobs are grouped into three different folders: The wrench map also provides shortcuts to all the wrench controller and smartHEAD settings, and to the results and traces viewer.
-
Page 82: Settings In Toolstalk Blm
.ttb file (by selecting File → Save As), and modifying the Pset offline before sending it back to the wrench. NOTE: It is possible to create the tightening programs and configure the STwrench settings also offline, and transfer then the offline file to one or more STwrenches. See the Offline Programming chapter for more information. -
Page 83: Connecting To The Stwrench
STwrench User Guide Working with ToolsTalk BLM Connecting to the STwrench First of all, select the STwrench as the device target: Select STwrench If you are connecting the wrench to the PC with the software for the first time, you need to enter the Tools →... - Page 84 • Connect the STwrench to the PC via a USB cable (with the STwrench already turned on) • Click on the Connect icon to connect to the wrench (or double-click on the USB icon in the...
-
Page 85: Wrench Log Viewer
STwrench User Guide Working with ToolsTalk BLM Wrench LOG Viewer The Wrench log viewer function allows you to obtain information about the STwrench – ToolsTalk BLM communication and about the STwrench – ToolsNet communication. This can be helpful for troubleshooting activities. -
Page 86: Enabling Log File
Creates a log file containing only warnings, errors and fatal errors. Partial The log file is added in the Log folder, which is automatically created in the same installation directory of the ToolsTalk BLM, typically: C:\Program Files\Atlas Copco Tools AB\Tools Talk BLM\Log 86 (326) 9836 4134 01 Edition 2.9... -
Page 87: Pset
The set of parameters that controls a tightening process or a residual torque test is contained within a so- called Pset. This section describes how to setup the Pset parameters necessary to perform a tightening. The STwrench can store up to 200 Pset/Multistage in its memory. Click on the Pset icon and enter the Pset Number and Name. -
Page 88: Torque Parameters
Pset STwrench User Guide Torque / angle parameters Torque Parameters Cycle Start Torque value from which to start the tightening operation. This must be higher than the smartHEAD Min. Load value; if not, when the Pset is started the following error message is shown: 88 (326) 9836 4134 01 Edition 2.9... - Page 89 Loosening limit For production strategies, if the torque goes over this value in the direction opposite to the tightening direction (CW or CCW), the STwrench detects an unwanted loosening operation, and the message “loosening detected” is shown on the display. In this case the result of the test is marked as Not OK.
- Page 90 During Pset definition, in case of conflict between parameters the error description is displayed by moving the mouse pointer over the red error sign: When using the Torque Correction Coefficient (STwrench with extension or torque multiplier), the maximum value for Pset torque parameters is given by the formula: ≤...
-
Page 91: Angle Parameters
STwrench User Guide Pset Angle Parameters Torque threshold from which to start the angle count. Start final angle Angle limit (low). Min angle Max angle Angle limit (high). Alarm on rehit Enable/disable the function to check if the screw is already tightened (defined via the Check already tightened angle parameter). -
Page 92: Timeout
Pset STwrench User Guide Maximum angle for If the Measure Torque at is set to Angle Peak, the result is taken at the maximum result search torque in the last angle degrees defined here, starting from the angle peak measured. -
Page 93: Batch Parameters
Minimum value: 0.1 sec Maximum value: 5 sec Loosening If the Loosening limit it is set to a value different from 0, the STwrench continues to monitoring search for unwanted loosening operations also after the end of the test, for the time specified here (in seconds). -
Page 94: Options
Pset STwrench User Guide NOTE: If the Batch count is disabled, the Batch status in the tightening results is always OK. By enabling the Batch count and setting the Batch size to 1, The Batch result status will only be OK if the Pset shows OK. - Page 95 Leave the Torque Correction Coefficient set to 1, and the Angle Correction Coefficient set to 0, if these parameters are set into the RFID TAG of the end- fitting tool; if different values are specified, the STwrench corrects torque and angle reading considering all of them (the two torque correction coefficients are multiplied, while the two angle correction coefficients are added together).
- Page 96 Pset STwrench User Guide Barcode required If enabled, before starting the Pset execution, the wrench needs to scan the specified barcode. See the chapter Identifier. To use the barcode reading to select Pset automatically, see the Setting the source for Pset/Multistage/Job selection chapter. When that function is used, this flag does not have any effect.
-
Page 97: Running A Pset
Once the Pset is created on the wrench map area in ToolsTalk BLM, it is automatically sent to the STwrench. To execute the Pset, select Prog. Mode from the main menu of the STwrench: Select the Pset from the list of the available Psets and click on the OK button on the wrench keyboard to start Pset execution. - Page 98 Pset STwrench User Guide Pset, the following message is shown if the specified tool is not inserted in the wrench head: During Pset execution, the wrench display shows the torque and angle values, and the tightening direction: Pset execution Pset name.
-
Page 99: Tightening Strategies
STwrench User Guide Pset For each tightening operation, the LEDs indicator, buzzer and vibration devices are activated according to the selected tightening strategy. Refer to the Tightening Strategies chapter for more information. Tightening results data and traces are stored automatically in the wrench memory; see the Results Viewer and Traces Viewer chapters for information on how to retrieve results and traces with ToolsTalk BLM. - Page 100 Pset STwrench User Guide This is a more accurate way to tighten, as we use additional information (angle) during the tightening process. You can detect possible problems on the joint using this method: Torque is correct, but angle is too short: •...
- Page 101 STwrench User Guide Pset The goal is to stress the bolt over the yield point. Even with differences in the angle, the torque (causing clamping force) is quite consistent. Sometime the joint is specially designed and of course experiments have been done (joint analysis) to ensure that the strain is far from the breaking point.
- Page 102 (this bolt works as a precise spring). The next paragraphs explain in details how the STwrench performs these tightening methods. Tightening with prevailing torque The bolt is tightened in a joint having prevailing torque. The STwrench compensates the prevailing torque in the target value.
-
Page 103: Torque
If the torque goes over the Change Screw value, a message is shown on the wrench display advising the operator to replace the screw. The torque result is the maximum torque measured during the tightening. The STwrench LEDs, buzzer and vibration devices are activated as follows: Torque result between Cycle Start and Min. Torque. Yellow LED Torque result between Min. - Page 104 Pset STwrench User Guide Torque over 1 percentage. First line of yellow LEDs Torque over 2 percentage. Second row of yellow LEDs Torque over 3 percentage. Third row of yellow LEDs NOTE: The three rows of LEDs are all activated if the torque goes over the Max. Torque value (normally set higher than the 3 percentage value).
-
Page 105: Torque (Control) / Angle (Monitor)
STwrench User Guide Pset 6.7.1.2 Torque (Control) / Angle (Monitor) This strategy guides the operator in reaching the desired target torque and monitoring the angle. The Start Final Angle parameter is the threshold from which to start angle measurement (normally set to 50% of the Target Torque). - Page 106 Pset STwrench User Guide The STwrench LEDs, buzzer and vibration devices are activated as follows: Yellow LED Torque result between Cycle Start and Min. Torque, or torque between Min. Torque and Max. Torque but angle under the Min. Angle. If Measure torque/Angle at is set to Angle peak, the Start Final Angle value is used instead of the Cycle Start.
-
Page 107: Torque (Monitor) / Angle (Control)
STwrench User Guide Pset Activated together with the third row of LEDs, and remains active until the Vibration torque applied to the wrench is released. 6.7.1.3 Torque (Monitor) / Angle (Control) This strategy helps the operator to reach the desired target angle and monitoring torque. - Page 108 Pset STwrench User Guide Torque/angle results: If the torque/angle does not exceed the torque/angle limits, the result is taken at the torque peak or angle peak as specified in the Pset options. If the torque/angle goes over the limit, the result is taken as follows:...
- Page 109 STwrench User Guide Pset The STwrench LEDs, buzzer and vibration devices are activated as follows: Yellow LED Angle result between Cycle Start and Min. Angle, or torque between Min. Torque and Max. Torque with angle under the Min. Angle. If Measure torque/Angle at is set to Angle peak, the Start Final Angle value is used instead of the Cycle Start.
-
Page 110: Torque + Angle Strategy
Pset STwrench User Guide percentage are reached. At the end of the tightening operation, two more beeps inform the operator of the end of the operation, and if the final result is in the red area, the buzzer signal stays steadily ON. -
Page 111: Torque (Control) / Angle (Control) Or
Torque peak Torque peak Angle peak Angle peak Torque peak selected in the Pset options Angle peak selected in the Pset options The STwrench LEDs, buzzer and vibration devices are activated as follows: 9836 4134 01 Edition 2.9 111 (326) - Page 112 Pset STwrench User Guide Angle result between Cycle Start and Min. Angle, or torque between Min. Torque Yellow LED and Max. Torque with angle under the Min. Angle. If Measure torque/Angle at is set to Angle peak, the Start Final Angle value is used instead of the Cycle Start.
- Page 113 STwrench User Guide Pset Buzzer The beep emitted by the buzzer starts when the torque goes over the Cycle Start value; it increases its signal when: - Torque reaches 1 percentage - Torque reaches 2 percentage - Torque and angle within the minimum and maximum limits; torque or angle having reached the target value.
-
Page 114: Torque (Control) / Angle (Control) And
Torque peak Torque peak Angle peak Angle peak Torque peak selected in the Pset options Angle peak selected in the Pset options The STwrench LEDs, buzzer and vibration devices are activated as follows: 114 (326) 9836 4134 01 Edition 2.9... - Page 115 STwrench User Guide Pset Angle result between Cycle Start and Min. Torque, or torque between Min. Yellow LED Torque and Max. Torque with angle under the Min. Angle. If Measure torque/Angle at is set to Angle peak, the Start Final Angle value is used instead of the Cycle Start.
-
Page 116: Yield Point
Pset STwrench User Guide The beep emitted by the buzzer starts when the torque goes over the Cycle Start Buzzer value; it increases its signal when the 1 percentage, the 2 percentage, the angle and target values, and the Max torque are reached. -
Page 117: Yield Point Detection Algorithm
The values T and A are calculated as moving averages of 128 torque/angle samples measured by the STwrench. This means that each time a new value is acquired, new T and A values are calculated: 9836 4134 01 Edition 2.9... - Page 118 Pset STwrench User Guide Torque Torque and A and A and A 128 samples → and A Angle Angle This filtering eliminates the noise from the trace: torque / angle samples and A values The last 10 T and A values are considered to calculate the following parameters: ∑...
- Page 119 30 consecutive samples, and staying under 1.6xLSC for 1 degree → YIELD xLSC average POINT α The yield point result given by the STwrench is the first point when the goes below 0.4xLSC average 9836 4134 01 Edition 2.9 119 (326)
-
Page 120: Loose
Min Torque Cycle start Angle Target Angle The STwrench LEDs, buzzer and vibration devices are activated as follows: Torque over Cycle Start value. Yellow LED Torque between Min. Torque and Max. Torque, and angle at Target Angle (if Green LED Target Angle is not specified, angle is at the necessary value to complete the loosening operation). -
Page 121: Pvt Compensate With Snug
STwrench User Guide Pset Activated together with the 3 rows of yellow LEDs. Buzzer Activated together with the 3 rows of yellow LEDs, and remains active until the Vibration torque applied to the wrench is released. 6.7.1.8 PVT compensate with snug This strategy is useful for joints with prevailing torque, in particular when the prevailing torque level is higher than the final target. - Page 122 Final target + PVT compensate interval: Torque peak value not compensate (absolute peak). The snug point is automatically detected by the software algorithm in real time. After the snug point is detected, the three rows of yellow LEDs on the STwrench LED ring starts guiding the operator to reach the target value.
-
Page 123: Quality Control Strategies
The Loose strategy is normally considered a production strategy, but is available also in the quality strategies. See the Loose chapter for more information. The paragraphs below describe in detail how the STwrench performs these strategies. 9836 4134 01 Edition 2.9... -
Page 124: Yield Point (Joint Analysis)
Define a wide range for the angle limits (i.e. Min. Angle set to 0 and Max. Angle set to 999 degrees). The STwrench LEDs, buzzer and vibration devices are activated as follows: Yellow LED Torque result between the Cycle Start and the Min. Torque value, or Min. -
Page 125: Residual Torque/Time
STwrench User Guide Pset First, second, and third row Yield point is detected (within torque limits). of yellow LEDs Buzzer Activated when the torque goes over the Cycle Start value. Increase its signal when the yield point is detected. Vibration Activated together with the green LED, and remains active for one second. -
Page 126: Residual Point Detection Algorithm
If the operator goes over the Change Screw value during the test, a message is shown on the wrench display to indicate that the screw must be replaced with a new one. The STwrench LEDs, buzzer and vibration devices are activated as follows: Torque over Cycle Start value, or click-point not detected Yellow LED (and torque not exceeding the maximum value). - Page 127 Torque max The STwrench algorithm monitors the last 14 values α If all of them are decreasing, and the average last one is less than the 40% of the first one, the Torque min breakaway/residual point is detected.
- Page 128 STwrench User Guide Torque max: Maximum residual value for having result OK. For instance, a bolt tightened to 100 Nm and using a STwrench with 150 Nm smartHEAD to detect the residual point could be a proper setting: 128 (326)
-
Page 129: Residual Torque/Angle
The Start Final Angle, which must be greater than the Cycle start; defines the point from which the STwrench algorithm starts analyzing the torque/angle trace. This is useful to filter all the noise that may occur at low torque value, and that could be detected as a false residual point. - Page 130 Pset STwrench User Guide Yellow LED Torque over Cycle Start value, or click-point not detected (and torque not exceeding the maximum value). Green LED Result OK. The residual point is detected within the torque limits. Red LED Torque over Max. Torque.
- Page 131 STwrench User Guide Pset • Concave-up point threshold Is specifies the maximum angle (measured from the Start Final Angle) for the residual torque when a the residual torque is lower than the breakaway point. The default value for the Concave-up point threshold is 20 degrees.
-
Page 132: Residual Point Detection Algorithm
Pset STwrench User Guide Note that if the breakaway point is over the Concave-down point threshold, the residual point is never detected even if the residual point is before the Concave-up point threshold: Not detected Concave-down Concave-up 6.7.2.3.1 Residual point detection algorithm The following algorithm is used to detect the torque/angle residual point: α... - Page 133 Torque max the gradient of the torque/angle function when the bolt starts moving. The STwrench algorithm takes as the breakaway point the point of maximum distance “d” between the torque/angle trace and the straight line from the start to the actual point of the trace. This distance must be...
- Page 134 Pset STwrench User Guide For instance, a bolt tightened to 100 Nm and using a STwrench with 150 Nm smartHEAD to detect the residual point could be a proper setting: Torque Angle In the wrench torque/angle trace, the torque is left at zero until the torque reaches the Start Final Angle (50 Nm).
-
Page 135: Residual Torque/Peak
STwrench User Guide Pset 6.7.2.4 Residual Torque/Peak This strategy evaluates the residual torque on a joint as the peak torque necessary to rotate the screw further. With this strategy the breakaway point is not detected automatically. Therefore, this is a less objective method of evaluating residual torque;... - Page 136 If the torque goes over the Change Screw value, a message is shown on the wrench display advising the operator to replace the screw. The STwrench LEDs, buzzer and vibration devices are activated as follows: Torque over Cycle Start value.
-
Page 137: Loose And Retight
If the torque goes over the Change Screw value, a message is shown on the wrench display advising the operator to replace the screw. The STwrench LEDs, buzzer and vibration devices are activated as follows: Torque over Cycle Start value during loosening. -
Page 138: Multistage
The Multistage feature offers a dynamic link to more than one Pset in several steps in order to perform a sequence of operations. The STwrench can store up to 200 Psets/Multistages in its memory A typical application scenario is joint conditioning, in which the fastener is run to a torque level of 10 Nm then backed off by 180 degrees and then fastened to a final torque level of 14 Nm. -
Page 139: Batch Parameters
STwrench User Guide Multistage Batch Parameters Batch count Set to Pset if you want to execute the multistage sequence more than once. Batch size If Batch count is enabled, specify how many times the multistage sequence is to be executed. -
Page 140: Running A Multistage
Once the Multistage has been created in the wrench map area in ToolsTalk BLM, it is automatically sent to the STwrench. To execute the Multistage, select Prog. Mode from the main menu of the STwrench: Select the Multistage from the list of available Multistages and click on the OK button on the wrench keyboard to start Multistage execution. - Page 141 STwrench User Guide Multistage See the Setting the source for Pset/Multistage/Job selection and Identifier chapters for more information. If the source program is the not the Barcode, but a barcode reading is required for the Pset, the following message is shown to indicate that the bar code is required:...
- Page 142 Multistage STwrench User Guide The M: 0/3 indicates that the first Pset of the Multistage is being executed. If the Multistage batch size is greater than one, the batch count number is displayed on the right-hand side of the bottom part of the screen.
-
Page 143: Job
A Job is useful when an object needs different Psets and Multistages. Instead of manually selecting each Pset or Multistage, the Job function keeps Psets and Multistages in a predefined order. The STwrench can store up to 100 Jobs in its memory. Job name and type... -
Page 144: Control
In the event of Not OK, select whether to repeat just the Pset or the entire batch. This flag does not have effect if the Batch increment condition in the STwrench settings is set to OK + Not OK. Result of non tightenings If enabled, a Not OK result is generated for tightenings that have not been performed. -
Page 145: Running A Job
Once the Job has been created on the wrench map area in ToolsTalk BLM, it is automatically sent to the STwrench. To execute the Job, select Prog. Mode from the main menu of the STwrench: Select the Job from the list of the available Jobs and click on the OK button on the wrench keyboard to start Job execution. - Page 146 STwrench User Guide During Job execution, the wrench display shows the torque and possibly angle values, and the tightening direction: The same information as for the Pset/Multistage execution is displayed, with the following difference: Pset in execution. When the Pset batch is completed, the next Pset will be loaded automatically.
- Page 147 STwrench User Guide The data and traces from the tightening results are stored automatically in the wrench memory; see the chapters Results Viewer and Traces ViewerTraces Viewer regarding how to retrieve results and traces using ToolsTalk BLM. 9836 4134 01 Edition 2.9...
-
Page 148: Identifier
The Identifier section describes the identifier concept, functions and settings. It is possible to define a maximum number of 300 identifier strings in the STwrench memory. An identifier, or barcode string, can be used for example to select Psets or Multistages or Jobs, identify motor vehicles (VIN) and other work pieces, variants, and operators. -
Page 149: Identifier Concepts
Store additional information on the tightening result. An identifier (barcode) string can have different standards and lengths. It can be scanned and stored as it is, but the STwrench can also be configured to identify parts of the string. These parts are called significant strings. -
Page 150: Identifier Prerequisites And Details
- The information from the identifier types can be displayed in the result parts independently of result part number. For example, all result parts can display information from Type 1. - A work order must be completed before the STwrench stores the accepted identifiers in the result and selects the next Pset/Multistage or Job. -
Page 151: Configuration Of Identifier Functions
STwrench User Guide Identifier Configuration of Identifier Functions 9.3.1 Configuring identifiers The procedure for setting identifiers differs between identifier Type 1 and Types 2, 3 and 4. Always start with Type 1. Click on the Identifier icon in the Wrench map or in the main tool bar: Select Wrench scanner as the input source, or OFF, to enable or disable the various barcode types;... - Page 152 Identifier STwrench User Guide Click on Add row and enter the identifier string to add a string to be associated with a Pset/Multistage/Job. Click on Remove row to delete a row, and use the arrows in the tool bar to move the selected row.
-
Page 153: Configuring A Work Order
NOTE: If the barcode reading is required for the Pset/Multistage, and is not the source program, it is possible to specify only the Length without any Significant positions and Significant strings. In this case, to start the Pset/Multistage, the STwrench has to scan any barcode of the defined length: If not desired, the length may also be left undefined (-);... -
Page 154: Configuring Result Parts
Identifier STwrench User Guide The identifier types added to the Work order are mandatory to start the Pset/Multistage/Job, and need to be scanned by the wrench in the order specified here; the identifier types left as Optional are left as optional. -
Page 155: Printing Identifier Strings
STwrench User Guide Identifier 9.3.4 Printing identifier strings Once the identifiers have been defined, a useful tool allows the operator to generate a printout of the identifiers. Click on Print strings identifiers to generate the following preview (available only for strings not exceeding 50 characters): 9836 4134 01 Edition 2.9... - Page 156 Identifier STwrench User Guide Maximum 50 characters for printing in this page If the identifier has more characters than specified in the Significant strings, or if the identifier length is not specified, the unspecified characters are automatically filled in with an X in this printout.
-
Page 157: Scanning Identifiers With Stwrench
Identifiers Work order With the STwrench in the main menu, scan the first identifier (Type 2 in this example) in the specified working order: The wrench display shows that the first identifier (Type 2) in the given working order has been read. Scan the next identifier: 9836 4134 01 Edition 2.9... - Page 158 Identifier STwrench User Guide The wrench display shows that the second identifier (Type 3) in the given working order has been read. Scan the optional identifier (the optional identifier can be scanned at any time in the working order sequence):...
- Page 159 STwrench User Guide Identifier After having scanned the Type 1 barcode, the wrench automatically starts the associated Pset/Multistage/Job. NOTE: Pressing the CL button on the wrench keyboard during the identifier reading sequence will result in the wrench exiting to the main menu and canceling the readings already taken;...
-
Page 160: Stwrench Settings
10.1 Settings Menu on the STwrench The Settings menu on the wrench display is active only if enabled. See STwrench Controller Setup to enable / disable this menu. The Diagnostic menu is covered in the Troubleshooting Guide chapter of this manual. -
Page 161: Stwrench Controller Setup
STwrench User Guide STwrench Settings 10.2 STwrench Controller Setup You can access the wrench settings in the Controller section of the Wrench Map: 10.2.1 Configuration By selecting the Configuration submenu, the following window is shown: 9836 4134 01 Edition 2.9... -
Page 162: Settings Stwrench Name
STwrench Settings STwrench User Guide 10.2.1.1 Settings STwrench name Device Name Name which is reported in the Wrench Map. 162 (326) 9836 4134 01 Edition 2.9... -
Page 163: Settings Stwrench Date And Time
If enabled, the option Vibrate on NOK results makes the STwrench vibrate continuously in case of Not OK results, until the OK or CL button is pressed on the STwrench keyboard, or a new test is started. 9836 4134 01 Edition 2.9... -
Page 164: Enabling Stwrench Free Mode
STwrench User Guide 10.2.1.5 Enabling STwrench free mode Free Mode enabled Enables the free mode function on the main menu of the STwrench. 10.2.1.6 Enabling STwrench settings menu Menu settings enabled Enables the Settings on the main menu of the STwrench. -
Page 165: 10.2.1.11 Enabling The Result Confirmation
Always: At the end of each test, the STwrench asks if the result must be considered or discarded. NOK only: At the end of each Not OK test, the STwrench asks if the result must be considered or discarded. The result confirmation is shown on the display as follows:... -
Page 166: 10.2.1.14 Enabling Stwrench Automatic Shutdown
10.2.1.16 Setting the source for Pset/Multistage/Job selection When the STwrench is working with the QATnode, these two parameters are overridden by those defined in the STwrench QATnode settings. See the chapter QATnode and STwrench Settings for more information. -
Page 167: 10.2.1.17 Setting The Stwrench Display Language
(specified in the Job definition), and this setting does not affect job execution. 10.2.1.17 Setting the STwrench display language Select the language of the STwrench menu. This is also possible from the wrench Settings menu (See the chapter Settings Menu on the... -
Page 168: 10.2.1.19 Configuring The "Results" Menu On The Stwrench
STwrench Settings STwrench User Guide 10.2.1.19 Configuring the “results” menu on the STwrench Select the Controller → Configuration menu in ToolsTalk BLM, and select then Result fields: Results field Select three fields to be displayed in the Results menu of the STwrench main menu. -
Page 169: Information
10.2.3 ToolsNet settings These settings are required when you have added the IRC-W module to the STwrench to communicate with ToolsNet. Set the parameters here according to your own network and your own ToolsNet station. Once all of the parameters have been set, click on Store, enable the ToolsNet connection enabled flag and click on Store again. -
Page 170: Power Focus Settings
See the chapter Working with Power Focusfor for more information). NOTE: When storing the Power Focus configuration, or when the pairing procedure is complete, the STwrench asks if the user want to reset the following parameters to the default values:... - Page 171 STwrench User Guide STwrench Settings 1. Disable 2. Store 2. Select submenu IRC-B. Click on Start pairing procedure and then on Store: Click to start pairing 3. Start the pairing procedure on Power Focus. 4. Wait until pairing is complete (ensure that pairing is completed with no errors).
-
Page 172: Irc-Z
STwrench Settings STwrench User Guide 10.2.4.2 IRC-Z For IRC-Z, the pairing procedure must be executed here (is not possible to execute it directly from the wrench). The pairing is necessary only the first time. • Disable the Enable connection with IRC flag and click on Store: 1. -
Page 173: Irc-W
10.2.4.4 Cable Box The Cable Box connection between STwrench and Power Focus can be activated directly from the wrench keyboard (See the chapter Working with Power Focus for details). However, it is possible to enable/disable the connection from this window: After enabling (or disabling) the Cable Box connection, click on Store to confirm. -
Page 174: Trace Resolution
STwrench Settings STwrench User Guide 10.2.4.5 Trace resolution In the Common settings, it is possible to select the resolution of the trace sent to Power Focus: Default value, recommended. In case the Low setting does not provide the desired accuracy in the trace... -
Page 175: Led Settings
STwrench User Guide STwrench Settings 10.2.6 LED settings NOTE: This paragraph is not applicable for the following Pset control strategies: residual torque, loose and retight, yield point. In this area, it is possible to customize the thresholds for the 3 rows of yellow LEDs; during a tightening operation (in Torque or Angle) the 3 rows of LEDs are illuminated when the torque or angle, depending on the tightening strategy, reaches certain percentages of the target value. -
Page 176: Memory
STwrench Settings STwrench User Guide In the Custom settings window, it is possible to define different thresholds for the various tightening strategies: By using the mouse or the LEFT and RIGHT arrows on the PC keyboard, set the values and click on Apply to save. -
Page 177: Traces Settings
RBU objects; see the chapter Deleting RBU objects for more information. ** Do not use this option when STwrench is sending traces to Power Focus or ToolsNet. NOTE: When decreasing the number of traces manageable, any traces stored in the wrench memory are deleted. -
Page 178: Minimum Load Settings
A warning message alerts the user that the instrument precision indicated in the technical specifications is not guaranteed. Click on Apply to store the setting, then disconnect and connect again ToolsTalk BLM to the STwrench see the change effective in the ToolsTalk BLM Pset programming window. 178 (326) -
Page 179: Deleting Rbu Objects
STwrench User Guide STwrench Settings 10.2.7.3 Deleting RBU objects In the Configuration → Reset menu, it is possible to delete objects from the wrench memory: Delete RBU objects Deletes all the Psets/Multistages/Jobs (and Type 1 strings of the identifiers) from the RBU. -
Page 180: Tool Setup
STwrench Settings STwrench User Guide 10.3 Tool Setup In the Tool section of the Wrench Map, you can access smartHEAD information and TAG number programming: 180 (326) 9836 4134 01 Edition 2.9... -
Page 181: Information
STwrench User Guide STwrench Settings 10.3.1 Information This window provides some information about the smartHEAD currently on the STwrench: Serial number of the STwrench smartHEAD. Serial number Calibration value of the smartHEAD currently installed on the wrench. Calibration value Cell sensitivity (gain) Transducer gain (set to 2, or 0.8, or 0.59). - Page 182 STwrench Settings STwrench User Guide Wrench capacity Maximum torque value applicable. This is normally slightly higher than the nominal capacity marked on the smartHEAD. Zero factory value for the torque transducer; if the current zero value Cell zero value performed every time the wrench is switched on varies by more than 2% of this value, an error message is shown on the wrench display.
-
Page 183: Tag Writer
10.3.2 TAG writer The STwrench features the TAG reading/writing function to aid recognition of the end-fitting tool. Reading the TAG number can be used to automatically select the Pset/Multistage to be executed (see the Setting the source for Pset/Multistage/Job selection chapter), or to check that the proper end-fitting tool is used during Pset/Multistage execution. -
Page 184: Torque And Angle Correction Coefficients
Two coefficients to correct the torque and angle reading can be stored on the end-fitting tool. These coefficients are used to correct the torque and angle measure when an extension is used on the STwrench. The torque correction coefficient is used also to compensate the torque measurement when a torque multiplier is used on the STwrench. -
Page 185: Compatibility Between Different End-Fitting Tools
Short RFID TAG NOTE: If this tool is already used by the LINEwrench, it will not be read by the STwrench. However, once it has been written with the TAG writer function, it can be read and used by the STwrench;... -
Page 186: Offline Programming
The Offline Programming mode gives the user the opportunity create a set of tightening programs and define the STwrench configuration without a STwrench connected. Using this function is like producing a virtual RBU, stored in a .ttb file which is transfer then to one or more STwrenches (with same RBU type and same firmware version). -
Page 187: Creating The Offline File
To create a file from scratch, open ToolsTalk BLM, click on File and then select File → New (or double- click on File): STwrench offline Create a new file Creating a file from a STwrench gives the full functionality of the offline programming. Connect a STwrench to ToolsTalk BLM, and select Save As…: STwrench online Create a new file... - Page 188 Offline Programming STwrench User Guide Once the file is created, disconnect the STwrench and select File → Open (or double-click on File): Open the STwrench file offline Open the file When the file is opened, it is possible to start programming the tightening programs and wrench...
- Page 189 Remote device communication: The offline mode can program the STwrench communication parameters with the remote devices (Power Focus, ToolsNet, QATnode, API). However, once the offline file is uploaded to the STwrench, the communication must be enabled with the STwrench connected (as shown in the following example for Power Focus communication):...
- Page 190 Offline Programming STwrench User Guide • The IRC-W security types EAP cannot be programmed offline: Not available offline • The QATNode I/O and ToolsNet configuration is not supported offline: Not available offline • The .ttb file created with ToolsTalk BLM version 8.0 or later cannot be opened by ToolsTalk BLM versions before 8.0.
-
Page 191: Uploading The Offline File To The Stwrench
Once the offline .ttb file is created, it is possible to transfer it on one or more STwrenches. Switch on the STwrench and connect to ToolsTalk BLM. Select File → Save as to transfer the programs to the STwrench: The following window is shown:... - Page 192 Click on the selection icon to select / deselect all items present in each folder. If on item is not compatible with the STwrench RBU or firmware, it is marked with a red X and cannot be transferred to the STwrench: 192 (326) 9836 4134 01 Edition 2.9...
-
Page 193: Results Viewer
STwrench User Guide Results Viewer Results Viewer The STwrench can store up to 5000 Pset results; when the memory is full, new results overwrite the oldest results stored. The results can be viewed in details by ToolsTalk BLM. It is possible to view them also from the Results menu from the main menu of the STwrench:... - Page 194 Results Viewer STwrench User Guide To retrieve the results with ToolsTalk BLM, click on the Results viewer icon: The following window is shown: Select the Psets/Multistages The result viewer provides results from Pset and Multistage only, and not Job results. All Job results are grouped with the single Psets/Multistages making up the Job.
- Page 195 STwrench User Guide Results Viewer Select the Pset (or Multistage) you want to review (more than one Pset/Multistage can be selected at once): Click on a column to sort the results according to the column field. Using the command Open with Excel and Save to File you can open this table with Excel and save the results in an Excel (.xls) file, or in a .csv file, or in a .XML file.
- Page 196 Results Viewer STwrench User Guide All of the information related to the tightening operation is displayed in the various columns. Pset number Pset number. Status This is the global status of the tightening operation. It is OK when both the Torque Status and Angle Status are OK.
- Page 197 STwrench User Guide Results Viewer Torque target, Torque max., Start angle, Angle min., Angle target, Angle max. Barcode, Barcode 2, Barcode 3, Barcode readings associated with the Pset/Multistage. Barcode 4 Transducer S/N Serial number of the smartHEAD which executed the tightening.
-
Page 198: Traces Viewer
Click on the traces viewer icon to retrieve the traces from the wrench. In its default setting, the STwrench can store up to 10 traces, each a maximum of 30 s in length; when the memory is full, the new traces overwrite the oldest traces stored. It is possible to change the default settings to store less traces of longer length. -
Page 199: View One Trace
Select the trace to view by clicking on the bar in the top part of the window (the second figure is applicable when the STwrench is set to store 90 traces and stores more than 10 traces): Trace of the last tightening... - Page 200 Traces Viewer STwrench User Guide In the trace title box on the left-bottom area of the window, it is possible to customize the trace title. This title is shown above the graph. It can be used to copy/print/export a trace assigning to it a specific name.
- Page 201 STwrench User Guide Traces Viewer For PVT strategy, also the PVT compensate value is available in the Limits area. To zoom in on a section of the trace, simply select the desired area with the mouse: Select the area to...
- Page 202 Traces Viewer STwrench User Guide The Trace parameters window displays detailed information about the trace: To evaluate the trace in detail, click on Show cursor to activate the cursor on the graph. 202 (326) 9836 4134 01 Edition 2.9...
-
Page 203: Traces Comparison
This feature allows the traces to be overlapped so that tightening operations can be compared. Click on Trace comparison to open the comparison window (the second figure below is shown when the STwrench is set to store 90 traces and stores more than 10 traces): 9836 4134 01 Edition 2.9... - Page 204 Traces Viewer STwrench User Guide Select the traces to compare Select the traces to compare 204 (326) 9836 4134 01 Edition 2.9...
- Page 205 STwrench User Guide Traces Viewer Select the traces you wish to compare on the left side of the screen. Select the type of graph (Torque/Time, Angle/Time, or Torque/Angle) using the Traces scroll window. The selected traces are displayed in the graph. You can hide the selected curve using the selection box displayed under the graph.
-
Page 206: Copy, Print And Export A Trace
Traces Viewer STwrench User Guide By enabling Highlight trace, it is possible to highlight a trace in the graph: Enable Highlight trace Highlighted trace Select the trace to highlight 13.3 Copy, Print and Export a Trace Some useful commands are available in the graph toolbar: Prints the trace. - Page 207 It is also possible to export traces to the PC, in a .ttt file, to be re-viewed offline later. To export the traces from the STwrench memory, connect ToolsTalk BLM to the STwrench and select the Tools → Offline traces → Export traces menu: 9836 4134 01 Edition 2.9...
- Page 208 Traces Viewer STwrench User Guide The following window is shown: Select only the traces loaded in the traces viewer window. Select all the traces Select manually the traces Select the traces to be exported (maximum 10) and click on Export to create the file. In the combo-box in the upper-right area of this window, choose one of the following options in case the file already exists: •...
- Page 209 STwrench User Guide Traces Viewer Select the file exported before and the traces are loaded in a traces viewer window: Offline traces File information More than one file can be opened at the same time (each file is opened in a new trace viewer window).
-
Page 210: Real Time Traces
USB cable. • IRC-W, if the RBU installed in the STwrench includes the API interfaces. In this case the function is opened by the API application software and not from ToolsTalk BLM. See the Working with the API chapter for more information about how to enable the Real Time Traces via IRC-W. - Page 211 Tightening data For each tightening strategy the torque/time, angle/time and torque/angle traces, depending from the STwrench Controller Setup, can be shown: • In real time: The trace is drawn in real time during the tightening • Hidden: The trace is not shown •...
- Page 212 Real Time Traces STwrench User Guide It is possible to zoom in and out the trace, print or export the trace with the same commands provided by the Traces Viewer function. See the Traces Viewer chapter for more information. As per the traces viewer function, also the real time traces window provides the exporting of the traces to the PC.
- Page 213 ToolsTalk BLM. To go back to ToolsTalk BLM, close all of the windows opened by the Real Time Traces and exit the Pset execution menu on the STwrench. WARNING: The Real Time Traces function implies a certain use of the device and network resources.
-
Page 214: Enabling And Settings The Real Time Traces Function
The settings are divided in two groups: • Global Settings: Settings applied for all the STwrench connected to the PC where ToolsTalk BLM is installed • Device Settings: Settings stored only on the STwrench connected when these settings are performed. - Page 215 The default value of 100 Hz is recommended. Connection type Select if the STwrench – PC connection is performed via USB or IRC-W Advanced settings Select which traces enable/disable for each tightening strategy: Select the traces shown for each tightening strategy and click on OK to save.
-
Page 216: Working With Power Focus
NOTE: Power Focus 3000/4000 version required: W10.14 Power Focus 2000 is not supported In this mode, Psets/Multistages are created and transferred to the STwrench by Power Focus (refer to the Power Focus manual for tightening strategies available and programming details). The results are sent in real time to Power Focus, but also stored in the wrench memory. -
Page 217: Interface With Irc-B Radio Module
The tightening strategies available are those provided by Power Focus, and not the strategies described in this manual, which are provided by ToolsTalk BLM. The LEDs behavior is also dictated by Power Focus, so the LED settings performed on the STwrench with ToolsTalk BLM do not have any effect in this mode. - Page 218 NOTE: The pairing procedure can also be performed from ToolsTalk BLM. See Power Focus settings for more information. NOTE: When the STwrench is connected to the ToolsTalk BLM via the USB cable, the connection with Power Focus is not active. After completing the wrench settings and/or programming, disconnect the USB cable to activate the connection to Power Focus.
-
Page 219: Interface With Irc-Z Radio Module
Interface with IRC-Z Radio Module IRC-Z Ensure that the IRC-Z radio module is installed in the STwrench (see the chapter QAT IRC-B / IRC-Z radio modules for more information about the installation). To make the IRC-Z radio module work with the remote device (Power Focus), you must execute the pairing procedure. -
Page 220: Interface With Irc-W Radio Module
IRC-W Dual Radio receiver Peer-to-peer (Ad hoc) Ensure that the IRC-W radio module is installed in the STwrench (see the chapter QAT IRC-W radio module for installation more information). Ensure that the PF is set to work with IRC-W connection. - Page 221 STwrench User Guide Working with Power Focus Connect the wrench to ToolsTalk BLM and select the Controller → Power Focus menu: NOTE: The same port must be set on the Power Focus Set all the parameters according with your specific network parameters. For EAP-TLS security type, refer to the Appendix B –...
- Page 222 Working with Power Focus STwrench User Guide Regulatory domains Channels Select one of the option for the 2.4 GHz and/or one or more options for the Regulatory domain 5GHz. Once the regulatory domain has been chosen, click on Selected Channels to...
- Page 223 Once you have completed the configuration, click on STORE to save. In the IRC menu, enable the Enable connection with IRC flag: NOTE: When the STwrench is connected to the ToolsTalk BLM via the USB cable, the connection to Power Focus is not active. After completing wrench settings and/or programming, disconnect the USB cable to activate the connection to Power Focus.
-
Page 224: Peer-To-Peer (Ad Hoc) Connection
Select Peer to Peer in the IRC-W mode and click on Store. All the parameters are disabled, and the Start pairing procedure command is activated: Start pairing In this mode, the STwrench and Power Focus must be associated with the pairing procedure. Follow the following sequence: 224 (326) - Page 225 Working with Power Focus Click on the Start pairing procedure command NOTE: It is possible to start the pairing procedure directly from the STwrench: Switch on the STwrench, and press the DOWN, RIGHT and BARCODE buttons in sequence during the cell and gyroscope zero automatic adjustment.
-
Page 226: Interface With Stwrench Cable Box
When the connection is fully established, the whole logo is displayed: 15.4 Interface with STwrench Cable Box NOTE: This connection via cable is not possible with the STwrench Controller BI, but only with the standard STwrench controller. Ensure that the STwrench Cable Box is properly installed: 226 (326) 9836 4134 01 Edition 2.9... - Page 227 Connect the grey cable of the adapter to the connector named “RS232(2)” on the Power Focus See the chapter STwrench Cable Box for more information of Power Focus connectors. To allow the STwrench to work with the Power Focus, the Power Focus mode must be activated as follows: 1.
-
Page 228: Settings On Power Focus
NOTE: The Power Focus mode can also be enabled / disabled from ToolsTalk BLM. See Power Focus settings for more information. NOTE: When the STwrench is connected to the ToolsTalk BLM via the USB cable, the connection to Power Focus is not active. After completing wrench settings and/or programming, disconnect the USB cable to activate the connection to Power Focus. - Page 229 P128 Rehit angle Check already tightened angle P130 Soft start speed These parameters are not used by the STwrench. However, they P131 Step 1 speed must be set in a consistent way in order not to produce errors. Set P133 Loosening speed them to any value that does not give an error.
- Page 230 When programming a Pset in Power Focus, ensure that all of the torque parameters are higher than the STwrench minimum load (5% of the wrench capacity), and lower than the STwrench capacity; if not, an error is shown on Power Focus.
-
Page 231: Working With Toolsnet
Working with ToolsNet NOTE: ToolsNet 4000 minimum version: W7 SR5 ToolsNet is a part of the ATS (Assembly Tools Software), which can work together with STwrench to complete the tightening process. ToolsNet works together with the controllers and the selected database, Microsoft Sequel Server or Oracle, to collect, store and display all historic tightening-related data. - Page 232 ToolsNet as soon as the connection is active again; if the maximum number of traces is reached while the STwrench is offline, a warning message alerts the user that the new traces are about to start overwriting the oldest traces stored.
-
Page 233: Establishing Communication Between Stwrench And Toolsnet
In order to set up the wrench IRC-W module properly, the following parameters of your own wireless network are required: • Name (SSID): Name of the wireless network. • Security Options: The STwrench IRC-W module supports the following security options: - Disable (None) - WEP 64 - WEP 128 - WPA - TKIP... - Page 234 Working with ToolsNet STwrench User Guide Connect the wrench to ToolsTalk BLM and select the Controller → ToolsNet menu: In the ToolsNet settings window, select Connection: Check that the ToolsNet connection enabled is not selected If the flag is enabled, disable it and click on Store 234 (326) 9836 4134 01 Edition 2.9...
- Page 235 STwrench User Guide Working with ToolsNet Select IRC-W → General Settings and enter the following settings: • SSID: Enter the SSID name of your own wireless network • IRC-W mode: Select Access Point • Host name: Specify a name of the wrench; if you have more than one wrench the names must be different 9836 4134 01 Edition 2.9...
- Page 236 Internet protocol (TCP/IP): Select Enabled DHCP if your network uses the DHCP protocol (and specify the DNS 1 and DNS 2 if they are not set automatically by the network). It is also possible to set manually an IP address (with Sub mask and Gateway) to the STwrench by selecting IP Config.
- Page 237 Power mode The Sleep mode is recommended for lower power consumption. Select the threshold under which the STwrench will search for a new access Roaming threshold point to connect through. Select ToolsNet → Settings and enter the following settings: 9836 4134 01 Edition 2.9...
- Page 238 Select STwrench as System Type Code. The Station Name identifies the tree structure which is shown in ToolsNet. The Station Number is associated with the tightening results; if more devices (STwrench and other instruments) are connected to ToolsNet, the Station Number must be unique.
- Page 239 STwrench User Guide Working with ToolsNet The following is shown on ToolsNet 3000: The tightening results are displayed like this: System Name, Station Number and Results Spindle Number Double-clicking on a single result brings up a window with more detailed information.
-
Page 240: Tightening Data Transferred To Toolsnet
STwrench User Guide On ToolsNet 4000 the results are presented like this: 16.2 Tightening Data Transferred to ToolsNet For each tightening operation performed by the STwrench, the following results are sent to ToolsNet: • Tightening program name • Tightening program number •... -
Page 241: Sending Traces To Toolsnet 4000
• Identifiers: Barcode readings 16.2.1 Sending traces to ToolsNet 4000 ToolsNet 4000 can retrieve the traces from the STwrench. For this mode the following prerequisites are necessary: STwrench settings: • The traces transfer to ToolsNet must be enabled (see previous paragraphs with ToolsNet settings from ToolsTalk BLM) •... -
Page 242: Working With Torque Supervisor
Minimum version of Torque Supervisor required: 4.10 When the STwrench is used with Torque Supervisor, the route of tests is created and transferred to the wrench by Torque Supervisor. The wrench only executes the tests and Torque Supervisor downloads the test results. - Page 243 NOTE: In this application, ToolsTalk BLM is optional. However, if you do not purchase it, you will not be able to access all the STwrench settings defined via ToolsTalk BLM (as described in chapter STwrench Controller Setup). Neither will you be able to use the TAG Writer function.
- Page 244 Define STwrench and enter settings. ***refer to the Torque Supervisor User Guide for more information*** Connect STwrench to a PC using Torque Supervisor. Ensure that you are connecting a wrench that matches the serial number specified in Torque Supervisor.
-
Page 245: Connecting The Stwrench To Torque Supervisor
17.1 Connecting the STwrench to Torque Supervisor The STwrench can be connected to Torque Supervisor via USB or IRC-W Dual Band radio module. For USB connection, the STwrench does not need any special settings. For IRC-W Dual Band radio module connection, the radio module must be properly configured; Connect the STwrench via USB to ToolsTalk BLM. - Page 246 Internet Protocol (TCP/IP): Select Static IP, enable the TCP listener, and set the port as in Torque Supervisor (default value 11000). Enable the Device IP Config (which assigns an IP address to the STwrench), and set the network parameters. The IP address must match the value specified in Torque Supervisor.
- Page 247 STwrench User Guide Working with Torque Supervisor Regulatory domains Channels Select one of the option for the 2.4 GHz and/or one or more options for the Regulatory domain 5GHz. Once the regulatory domain has been chosen, click on Selected Channels to...
- Page 248 The Sleep mode is recommended for lower power consumption. Power mode Select the threshold under which the STwrench will search for a new access Roaming threshold point to connect through. Once all of the settings are done, enable the connection to API and click on Store to save:...
-
Page 249: Test Execution
17.2 Test Execution Once the STwrench has been programmed by Torque Supervisor, the list of Psets to test the joints is available in the Prog. Mode menu: Execute the tests and then download the results from Torque Supervisor. Partial results are downloaded from the STwrench memory anyway (in which case the statistics are generated only when the remaining test results are executed and downloaded). - Page 250 Working with Torque Supervisor STwrench User Guide Breakaway angle Residual torque peak *see formula below Cycle Start Minimum torque Final Torque Min Maximum torque Final Torque Max **see formula below Change Screw Threshold Start final angle Breakaway torque – degrees...
-
Page 251: Working With The Qatnode
STwrench User Guide Working with the QATnode Working with the QATnode The QATnode is powered by AC power 110 ÷ 230 VAC (50/60Hz). Connect the AC power cable and turn on the main switch when using the QATnode. I/O connector (not... -
Page 252: Associating The Stwrench With The Qatnode
IRDA connection To establish an IRDA connection, turn on the STwrench and the QATnode. Place the STwrench on the QATnode and wait until the IRDA logo is shown on the STwrench display: The STwrench and QATnode are now associated. The IRDA logo is shown only when the connection is active. -
Page 253: Irc-W Connection
Working with the QATnode 18.1.2 IRC-W connection To establish an IRC-W connection, turn on the STwrench and the QATnode (which must connected to the access point). The association is automatically performed between the QATnode and the first STwrench found online. -
Page 254: Qatnode And Stwrench Settings
Printer QATnode, which does not support the ToolsNet connection. In this case, the STwrench settings for the QATnode (defined via ToolsTalk BLM) must be updated with the proper QATnode you are using, as described in the next paragraphs of this chapter. - Page 255 Working with the QATnode The Source program and Sub source job defined here are the same as the parameters defined in the STwrench Controller settings; they are replicated here for convenience. See the chapter Setting the source for Pset/Multistage/Job selection.
- Page 256 (and specify the DNS 1 and DNS 2 if they are not set automatically by the network). It is also possible to set manually an IP address (with Sub mask and Gateway) to the STwrench by selecting the IP Config.
- Page 257 STwrench User Guide Working with the QATnode Regulatory domains Channels Select one of the option for the 2.4 GHz and/or one or more options for the Regulatory domain 5GHz. Once the regulatory domain has been chosen, click on Selected Channels to...
- Page 258 QATnode. Lock Type If one of these flags is enabled, the STwrench must be put on the QATnode at the end of the Job/Batch/Pset in order to continue with the next tightening program; this applies only if the source of the tightening program is set to QATnode.
-
Page 259: Qatnode Settings
18.2.2 QATnode settings When the STwrench is connected to the QATnode with an IRC-W module, or when the QATnode T is connected to ToolsNet, the QATnode Settings software (included with the QATnode) allows you to set a proper IP address suitable for your own network. - Page 260 Working with the QATnode STwrench User Guide Select the COM port of your PC and click on Open: Select and open the COM port of your PC Click on Read to display QATnode parameter. Click on Read to display the QATnode settings.
-
Page 261: Web Interface
STwrench User Guide Working with the QATnode 18.2.2.1 Web interface Once the IP address of the QATnode has been set with a proper value, a web interface is also available to read/set the QATnode parameters. The web interface and the QATnode Settings software provide the same functions;... - Page 262 Working with the QATnode STwrench User Guide Enter the QATnode IP address QATnode parameters Save QATnode parameters The parameters listed here are the same of those you can configure using the QATnode Settings software. A Login and Password are required to access the web interface page. It is advisable to replace the default login and/or password with customized ones.
-
Page 263: Removing The Stwrench - Qatnode Association
18.2.3 Removing the STwrench - QATnode association If you want to associate a different STwrench with the QATnode, the current association must be removed before the new association can be established. Open the QATnode Settings software supplied with the QATnode. Connect the COM 2 port of the QATnode to your PC via a serial cable. - Page 264 QATnode Click on Remove Association. Click on Read to verify that the association has been removed (the fields STwrench S/N and STwrench RBU S/N will be blank). The association can be also removed by using the web interface (see the previous paragraph of this manual for more information).
-
Page 265: Printing The Tightening Results On A Star Printer
NOTE: The serial cable from the QATnode to the printer must be shielded, and not longer than 10 meters. Ensure that the STwrench is associated with the QATnode; also, ensure that the settings on STwrench and QATnode are correct as described in the first paragraph of this chapter. - Page 266 When all the data have been printed, the following message is shown on the wrench display: Click on OK to continue. If for any reason the STwrench-QATnode connection is interrupted during the printing (wrench removed from QATnode with IRDA connection, or IRC-W connection missing, or paper running out), the report is entirely reprinted when the connection is reestablished or when new paper is loaded into the printer.
-
Page 267: Configuring The Report
STwrench User Guide Working with the QATnode 18.3.1 Configuring the report In ToolsTalk BLM, select Accessories → QATnode: Disable connection. NOTE: a disabling/enabling cycle of this flag will erase any data in the wrench that are still to be printed. - Page 268 Working with the QATnode STwrench User Guide Click on Create to build your own report: Toolbar Header Results Fields available for the selected area Optional details Footer The report is composed of: Header Report header, replicated for every Pset/Multistage/Job. Page detail Area with the tightening results, replicated for every result.
-
Page 269: Configuring The Report Header
Adds a blank row. Blank row Label Adds a label. Adds a field containing the serial number of the STwrench controller. STwrench serial number Adds a field containing the firmware version of the STwrench controller. Firmware version 9836 4134 01 Edition 2.9... -
Page 270: Configuring The Results Area
Working with the QATnode STwrench User Guide RBU serial number Adds a field containing the serial number of the RBU currently installed on the STwrench. 18.3.1.2 Configuring the results area Results Fields available for the results The result area is composed of four rows. The objects available for the header are shown in the left area of the window. -
Page 271: Configuring The Report Footer
STwrench User Guide Working with the QATnode RBU serial number Adds a field containing the serial number of the RBU currently installed on the STwrench. Other objects All the fields available in the results window of ToolsTalk BLM are Results Viewer available here. -
Page 272: Objects Available In The Report
Working with the QATnode STwrench User Guide 18.3.1.4 Objects available in the report Here are the details of the various objects available to configure the header, results and footer of the report. Line Separator and Blank Row: Simply select the row in which placing the item and click on Add to... - Page 273 STwrench User Guide Working with the QATnode The maximum length of a label is 10 characters; split into two or more different labels to insert a longer label. Feed n. lines: Available only in the report footer, makes the printer feed the paper for the number of lines specified.
- Page 274 Working with the QATnode STwrench User Guide Torque Status: Same as the Status window except for the Status conditions available: Angle Status: Same as the Status window, except for the Status conditions available: Other fields for results area: Same as for a label. Simply place them in the desired row and horizontal position and click on Add to confirm.
-
Page 275: Completing The Report And Saving To The Stwrench
18.3.1.5 Completing the report and saving to the STwrench When the report is configured, click on Update. The report may look like this: Click on Store to make this active for the STwrench. 9836 4134 01 Edition 2.9 275 (326) -
Page 276: Input/Output Operations
Working with the QATnode STwrench User Guide Finally, go back to the Connection settings and enable the QATnode connection: Enable connection Store 18.4 Input/Output Operations This function is provided only by the QATnode I/O and the QATnode T. Inputs / Outputs... - Page 277 STwrench User Guide Working with the QATnode Ensure that the STwrench is associated with the QATnode. The STwrench – QATnode connection can be established via an IRDA or IRC-W module: IRC-W Access Point Network NOTE: If the QATnode is also used to print the tightening result on a STAR printer, connect and set the printer to the QATnode as described earlier in this chapter.
- Page 278 Working with the QATnode STwrench User Guide The following table details the I/O connector pinout: Description Description Common Input GND Common Output Common Input GND Common Output Input 1 + Output 1 Input 2 + Output 2 Input 3 +...
- Page 279 STwrench User Guide Working with the QATnode In ToolsTalk BLM, select Accessories → QATnode: Disable connection Select IRDA or IRC-W Store Select QATnode Disable the connection and click on Store to access the configuration menu. The Source program, and possibly the Sub source job, must be set to QATnode; this ensures that tightening program is driven via the I/O inputs of the QATnode.
- Page 280 Working with the QATnode STwrench User Guide Enable The next two paragraphs describe how to configure inputs and outputs. After having configured them, go back to the Connection settings and enable the QATnode connection: Enable connection Store 280 (326) 9836 4134 01 Edition 2.9...
-
Page 281: Configuring The Inputs
STwrench User Guide Working with the QATnode 18.4.1 Configuring the Inputs There are 6 inputs available, which means 64 possible configurations; each of them can be used to select a tightening program or an “Action”. Select Input settings: Enable to reserve an input for settings the... - Page 282 - Action: Allows you to select the “idle” mode. In this mode the STwrench does not execute an operation. For an IRC-W connection, if the “idle” mode is selected during a tightening operation, the Pset/Multistage/Job will be completed before entering the “idle”...
- Page 283 If selected, the specified input cannot be used to define the various configurations. The input is reserved to put the STwrench in the Tool Locked mode; when the input is activated, the STwrench will be locked and the following message is shown on the display:...
-
Page 284: Configuring The Outputs
Selects what to associate with the output from the list of the available signals. The Tool Connected output is active when the STwrench is connected to the QATnode, via IRDA or IRC-W. The Program Loaded output is an acknowledgement message... - Page 285 STwrench User Guide Working with the QATnode STwrench; it is active until the end of the tightening. Note that if the input status does not change and the same tightening program is executed again, this output is not activated again; to...
-
Page 286: Toolsnet Connection Via Qatnode
Access Point Network The ToolsNet settings must be specified in a different menu to the one used when the STwrench is connected to ToolsNet directly via the IRC-W radio and not passing through the QATnode. In ToolsTalk BLM, select Accessories → QATnode 286 (326) 9836 4134 01 Edition 2.9... - Page 287 Port: specify the port number of the PIM server (part of the ToolsNet configuration) • Keep alive timeout: The STwrench and QATnode exchange a “keep alive” message at a certain frequency. This parameter specifies the time interval between two messages; the default value of 1 second is recommended.
- Page 288 Working with the QATnode STwrench User Guide Finally, go back to the Connection settings and enable the QATnode connection: Enable connection Store NOTE: If the QATnode is also used to print the tightening result on a STAR printer and/or to interface with a remote device via the I/O connectors, set the printer report and/or I/O configuration as described earlier this chapter.
- Page 289 STwrench User Guide Working with the QATnode Select and open the COM port of your PC - Click the update icon - Set Level to Full or Partial. - Enable log and click on Send. Log messages will be shown here Enables log messages excluding debug messages;...
-
Page 290: Working With The Api
The STwrench API is a software library that serves as the interface between the custom application and the actual STwrench units. This means that it exports a number of objects and methods that the custom application can access in order to manipulate the STwrench units. - Page 291 Technically the STwrench API can be used with a COM interface or a .NET interface. Before using the STwrench API, you must install the component on the PC you are going to use it from. It also installs a small custom application example, written in Visual Basic 6 and Visual Basic .NET, that shows you an example of how the API can be used.
-
Page 292: Api Connection With Irc-W
19.1 API Connection with IRC-W The STwrench and API can be connected via IRC-W. The IRC-W module must be installed in the STwrench (see the chapter QAT IRC-W radio module for more information). The IRC-W module must be properly configured; the configuration can be done directly from the API (connecting the STwrench via a USB cable). - Page 293 STwrench User Guide Working with the API Connection disabled Then select the IRC-W API settings menu: • SSID: Enter the SSID name of your own wireless network. • IRC-W mode: Select Access Point. • Host name: Specify a name of the wrench; if you have more than one wrench the names must be different.
- Page 294 (and specify the DNS 1 and DNS 2 if they are not set automatically by the network). It is also possible to set manually an IP address (with Sub mask and Gateway) to the STwrench, by selecting Static IP, and then configuring the Device IP Config: For IRC-W Dual Band radio module, if the Internet Protocol (TCP/IP) is set to Static IP, it is possible to enable the TCP Listener (and port);...
- Page 295 STwrench User Guide Working with the API Regulatory domains Channels Select one of the option for the 2.4 GHz and/or one or more options for the Regulatory domain 5GHz. Once the regulatory domain has been chosen, click on Selected Channels to...
-
Page 296: Using The Real Time Traces With Irc-W
19.2 Using the Real Time Traces with IRC-W If the STwrench is equipped with RBU supporting the API interface, it is possible to configure and use the Real Time Traces function via IRC-W. First of all, install the API software. Refer to the STwrench-STanalyser – Introduction to API manual for more information about the installation. - Page 297 STwrench User Guide Working with the API - Configure the network parameters: 9836 4134 01 Edition 2.9 297 (326)
- Page 298 Enable the TCP listener and configure all the network parameters. - Enable the IRC-W connection and click on Store: Disconnect the STwrench from ToolsTalk BLM. Launch the STwrench API application, available in the Start → Programs → BLM Atlas-Copco APIs → Examples: 298 (326)
- Page 299 STwrench User Guide Working with the API The following window is shown: 9836 4134 01 Edition 2.9 299 (326)
- Page 300 W orking with the API STwrench User Guide 1 8 B Enable the IRC-W (Sender), and click on Client settings. The following window is shown: 300 (326) 9836 4134 01 Edition 2.9...
- Page 301 Enable the Auto reconnect to reconnect the wrench automatically in case of communication temporary lost. Click OK to save. Click on Connect and verify that the STwrench is connected (the IRC-W logo is also shown on the STwrench display):...
- Page 302 The Real Time Traces function is now active. Keep the API software application open and connected to the STwrench. Execute a tightening and the Real Time Traces window will be shown. Refer to the Real Time Traces chapter for more information of the Real Time Traces function.
-
Page 303: Scheduled Maintenance
20.1 Yearly Calibration The STwrench needs to be recalibrated every year. Calibration must be performed by trained people, with the STwrench Calibration KIT P/N 8059 0920 95, which consists of the STwrench Calibrator Software, Calibration smartHEAD and the Service RBU. -
Page 304: Battery Pack Maintenance
STwrench User Guide It turns red when a shock over the limit occurs. In this case, even if the STwrench does not seem to have any major problems, a wrench check must be performed, including recalibration. The torque transducer and gyroscope could be damaged even if they continue to work without evident faults. -
Page 305: Troubleshooting Guide
Troubleshooting Guide Troubleshooting Guide Here is a quick troubleshooting guide for the STwrench. If a problem occurs, before taking any action (replacing parts or contacting customer support), be sure to check that the wrench is being used properly; improper operation can cause defects even if the system is in good working order. - Page 306 Min. Load value higher than the value specified in the Pset Need pairing is shown on - Power Focus mode enabled - Perform pairing procedure between STwrench wrench display but pairing procedure has not and Power Focus been performed...
- Page 307 Pset to the Pset list defined in the Pset list Radio not present is shown on - Radio module not present - Install the radio module in the STwrench, or wrench display but STwrench connected to disable the Power Focus connection.
-
Page 308: Stwrench Diagnostics
The diagnostic menu can be used to perform a check of the wrench hardware. To execute the diagnostic, the Settings menu must be enabled; see the chapter STwrench Controller Setup. Select Diagnostic from the Settings menu to start the diagnostic procedure:... - Page 309 STwrench User Guide Troubleshooting guide The diagnostic procedure is interactive: Simply follow the instructions given on the wrench display to complete the procedure; if a component gives a Not OK result during the test, it should be repaired or replaced.
-
Page 310: Appendix A - Calculating Torque And Angle Correction Coefficients
Also when a torque multiplier is used on the STwrench, the torque provided on the joint is greater than the torque produced by the wrench; in this case the torque correction coefficient is needed to adjust the STwrench torque reading (see below). - Page 311 Warning: When using an extension, the torque reading is affected by the hand positioning. Always place the hand on the middle of the handle of the STwrench: If a torque multiplier is used on the STwrench, the Torque Correction Coefficient must be set equal to the torque multiplying coefficient of the torque multiplier.
-
Page 312: Angle Correction Coefficient
The value is expressed in degrees at the maximum torque of the wrench. When a torque multiplier is used on the STwrench, the angle correction coefficient must be left to zero; in this case the STwrench cannot compensate the angle measurement. - Page 313 Click on OK on the wrench keyboard to confirm the value and start the angle correction coefficient calculation: Apply the target torque of the STwrench on a non-rotating joint; when the target is reached, the display shows the value: This screen is displayed only when target torque is reached with a proper angle value.
-
Page 314: Correction Formulas
Appendix A – Calculating correction coefficients for extensions STwrench User Guide The angle value displayed here is the value referred to at wrench capacity. In this example, 2.12 degrees at wrench capacity is equivalent to 1.59 degrees at 75% capacity. -
Page 315: Appendix B - Eap-Tls Security Type
STwrench User Guide Appendix B – EAP-TLS Security Type Appendix B – EAP-TLS Security Type When one of the EAP-TLS security types is selected for the IRC-W radio module, the following configuration is required: The Domain/User must be the same of the one used to create the certificates for the server and for the client (the figure above is just as example). - Page 316 Appendix B – EAP-TLS Security Type STwrench User Guide Click on Store on the window above to save. The certificates are shown: The configuration is completed. In case the certificates must be replaced, deselect the flag and click on Store. Then it is possible to browse...
-
Page 317: Appendix C - Stwrench Factory Settings
STwrench User Guide Appendix C – STwrench factory settings Appendix C - STwrench Factory Settings The STwrench settings are stored in the RBU. The following table details the RBU default configuration: This field is left blank in factory settings Wrench name... - Page 318 Appendix C – STwrench factory settings STwrench User Guide Date time synchronization None mode Vibrate on NOK results Free Mode enabled Menu settings enabled Wrench light on YES. Wrench sounds on Note that it was set to NO for RBU produced before serial number RBU P 01156, RBU Q 00170, RBU PA 0010, RBU QA 0016.
- Page 319 STwrench User Guide Appendix C – STwrench factory settings Disabled. When enabled by the user, the following parameters are set by default: Open maximized: Disabled Higher limit, lower limit, target: Enabled for all the traces Real time traces Sampling option: 100 Hz...
-
Page 320: Abbreviations
Abbreviations STwrench User Guide Abbreviations Abbreviation Description Abbreviation Description Ampere Numbers (of values) Alternating current N.A. Not Applicable Adaptive Frequency Hopping Newton meter Ampere-hour Number Application Programmers Interface Approved (tightening) Assembly Tools Software Not approved (tightening) Angle Correction Coefficient Personal Computer... -
Page 321: Index
Index Index residual torque/angle; 127 residual torque/peak; 133 residual torque/time; 123 Buzzer; 60 Abbreviations; 310 enabling STwrench buzzer; 162 Alarm on rehit; 91 Angle correction coefficient automatic procedure; 301 calculating from wrench menu; 158 correction formula; 304 Cable Box; 52 setting the parameter from ToolsTalk BLM;... - Page 322 Abbreviations STwrench User Guide Export enabling STwrench illuminating light; 162 export a diagnostic report; 299 export a trace to image; 197 how to select IRC type; 45 export the results to excel; 186 IRC-B; 48 connecting to Power Focus; 168; 207 installation;...
- Page 323 Pairing procedure executing pairing for IRC-B with ToolsTalk BLM; 168 executing pairing for IRC-Z with ToolsTalk BLM; 170 Ratchet time; 92; 93 executing pairing with STwrench keyboard; 207 RBU; 43 Power Focus installation; 44 exit power focus mode for Cable Box; 217 RBU information;...
- Page 324 Snug point; 120 Software. See ToolsTalk BLM Software upgrade; 73 Safety; 11 Span; 179 Save Specifications; 16 save offline programs to STwrench; 84 Barcode reader; 19 save tightening programs from STwrench; 79 battery; 16 Sensitivity; 179 battery charger; 17 Serial number; 167 dimensions;...
- Page 325 Unit of measure; 89 connecting with QATnode; 276 USB port; 61 data exchanged with STwrench; 230 connecting to STwrench; 81 transfer STwrench traces to ToolsNet 4000; 231 User interfaces; 58 working with ToolsNet; 221 ToolsTalk BLM; 69 connecting to STwrench; 81 LOG file;...
- Page 326 9836 4134 01 2014-07 Edition 2.9 www.atlascopco.com...
Need help?
Do you have a question about the STwrench and is the answer not in the manual?
Questions and answers