Table of Contents
Advertisement
Available languages
Available languages
Quick Links
Printed Matter No.9836 1733 02
Publication Date 2019-12-11
Valid from Serial No. 2012-07
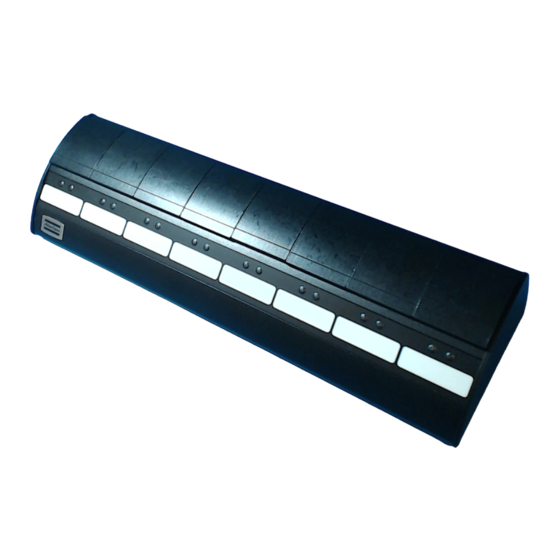
Selector 4
Selector 8
Read all safety warnings and instructions
Failure to follow the safety warnings and instructions may result in
electric shock, fire and/or serious injury.
Save all warnings and instructions for future reference
8433 0610 04
8433 0610 08
WARNING
Selector
Product Instructions
Advertisement
Table of Contents

Subscribe to Our Youtube Channel
Related Manuals for Atlas Copco Selector


Summary of Contents for Atlas Copco Selector
- Page 1 Selector Printed Matter No.9836 1733 02 Publication Date 2019-12-11 Valid from Serial No. 2012-07 Product Instructions Selector 4 8433 0610 04 Selector 8 8433 0610 08 WARNING Read all safety warnings and instructions Failure to follow the safety warnings and instructions may result in electric shock, fire and/or serious injury.
- Page 2 Table of Contents Product Instructions ....................3 Notice d'utilisation du produit................11 Produktanweisungen .................... 16 Instrucciones del producto ................... 21 Produktinstruktioner ....................26 Инструкции по изделию ..................34 © Atlas Copco Industrial Technique AB - 9836 1733 02...
-
Page 3: Installation
4222 0470 .. and termination 4222 0443 00. Both selectors work with Tensor DS D312 & PF3000, not with PF2000 or Tensor DS D302. The basic functionality of the selector allows the operator to use the same tool for applications with differ- ent socket sizes and /or various torque levels, and automatically switch parameter set accordingly. - Page 4 The active region (A) for the sensor for the socket is shown in the figure. Make sure that the hole is drilled so that the socket is within this area. See drilling instructions below. Loosen the screw at the rear side of Selector. Remove the plastic socket holder by tilting forwards.
-
Page 5: Connectors And Cables
Connectors and cables On the Selector there are two connectors for the I/O Bus. Both of these has to be connected. The drive is also equipped with two connectors for the I/O -Bus, which have to be connected as well. Every connector in the system has to be connected , either by a cable, 4222 0470, or a termination, 4222 0443 00. -
Page 6: Power Supply
Tensor DS The P-sets are listed in the same order as the socket position on the selector tray, starting from left (1-3). In order to turn on/off a position on the selector when connected to Tensor DS, open or delete the P-set corresponding to that position (4-5). - Page 7 Selector Product Instructions PF3000 Please read the PF3000 manual for detailed information. © Atlas Copco Industrial Technique AB - 9836 1733 02...
-
Page 8: Product Instructions
Product Instructions Selector Product Instructions Exploded views / tables Socket holder Remark / Included Ref. No. Ordering No. Description in Service kit © Atlas Copco Industrial Technique AB - 9836 1733 02... -
Page 9: Bit Holder
Selector Product Instructions Bit holder Remark / Included Ref. No. Ordering No. Description in Service kit © Atlas Copco Industrial Technique AB - 9836 1733 02... - Page 10 Product Instructions Selector Cables Remark / Included Ref. No. Ordering No. Description in Service kit © Atlas Copco Industrial Technique AB - 9836 1733 02...
- Page 11 Tournez le contacteur vers le chiffre/lettre approprié. Le chiffre indique l'adresse du noeud sur le bus E/S. À la livraison, il est préréglé sur 5 pour le sélecteur 4 et sur 6 pour le sélecteur 8. © Atlas Copco Industrial Technique AB - 9836 1733 02...
- Page 12 Alignez le trou de la douille avec la ligne de guidage (B) sur le dessus du porte-douille, comme indi- qué sur la figure. Dimension du perçage = diamètre de douille + 1 mm. Percez le trou comme indiqué sur la figure. © Atlas Copco Industrial Technique AB - 9836 1733 02...
-
Page 13: Montage
équipée de deux connecteurs pour le bus E/S, qui doivent aussi être connectés. Chaque connecteur du système doit être connecté, soit par câble, 4222 0470, soit avec un embout, 4222 0443 00. La figure explique comment connecter les accessoires E/S. © Atlas Copco Industrial Technique AB - 9836 1733 02... -
Page 14: Alimentation Électrique
(1-3). Pour activer/désactiver une position sur le sélecteur quand il y a connexion au Tensor DS, ouvrez ou sup- primez le programme correspondant à cette position (4-5). © Atlas Copco Industrial Technique AB - 9836 1733 02... - Page 15 Selector Notice d'utilisation du produit PF3000 Pour plus de détails, consultez le manuel PF3000. © Atlas Copco Industrial Technique AB - 9836 1733 02...
- Page 16 Installation Befolgen Sie für die Installation des Selektor 4/8 die folgenden Anweisungen. Anschlüsse Bez.-Nr. Beschreibung Eingangsspannung +24 V (Gleichstrom) Kabel/ Abschlusswiderstand E/A-Bus Hex-Schalter Hex-Schalter Unterhalb des Selektors befindet sich ein Hex-Schalter. © Atlas Copco Industrial Technique AB - 9836 1733 02...
- Page 17 Das Loch für den Steckschlüssel auf die Führungslinie (B) an der Oberseite des Steckschlüsselhal- ters wie in der Abbildung dargestellt ausrichten. Bohrungsgröße = Steckschlüsseldurchmesser + 1 mm. Das Loch wie in der Abbildung gezeigt bohren. © Atlas Copco Industrial Technique AB - 9836 1733 02...
- Page 18 Jeder Stecker im System muss angeschlossen werden und zwar entweder über ein Kabel (4222 0470) oder mit einem Abschlusswiderstand (4222 0443 00). In der Abbildung ist dargestellt, wie das Zubehör für den E/A-Bus anzuschließen ist. © Atlas Copco Industrial Technique AB - 9836 1733 02...
- Page 19 Die P-Sätze sind in derselben Reihenfolge angeordnet wie im Selektor, von links beginnend (1-3). Um bei angeschlossenem Tensor DS eine Position am Selektor ein- bzw. auszuschalten, öffnen oder lö- schen Sie den P-Satz, der zu dieser Position gehört (4-5). © Atlas Copco Industrial Technique AB - 9836 1733 02...
- Page 20 Produktanweisungen Selector PF3000 Weitere Einzelheiten finden Sie im Handbuch zum PF3000. © Atlas Copco Industrial Technique AB - 9836 1733 02...
-
Page 21: Instrucciones Del Producto
Gire el conmutador al número/letra correctos. El número indica la dirección del nodo del bus de E/S. La configuración de fábrica es 5 para el Selector 4 y 6 para el Selector 8. © Atlas Copco Industrial Technique AB - 9836 1733 02... - Page 22 Asegúrese de taladrar el orificio para que el zócalo quede en este área. Consulte las instrucciones de ta- ladrado a continuación. Afloje el tornillo de la parte trasera del Selector. Extraiga el soporte de plástico del zócalo inclinándolo hacia delante.
-
Page 23: Montaje
Tamaño del tornillo: 4 mm. Conectores y cables En el Selector hay dos conectores para el bus de E/S. Deben conectarse los dos. La unidad está equi- pada también con dos conectores para el bus de E/S que deben conectarse también. Deben conectarse todos los conectores del sistema, bien con un cable 4222 0470, o con una terminación, 4222 0443 00. -
Page 24: Fuente De Alimentación
Fuente de alimentación El selector recibe la alimentación de la unidad DS o PF3000 a través del cable del bus de E/S. La po- tencia máxima de salida del DS/PF3000 es 800 mA. Si hay equipos adicionales conectados al DS/ PF3000 que, junto con el selector, consuman más de 800 mA, es necesario disponer de una fuente de... - Page 25 Selector Instrucciones del producto PF3000 Lea el manual de PF3000 para obtener información detallada. © Atlas Copco Industrial Technique AB - 9836 1733 02...
- Page 26 Det sitter en hex-omkopplare under väljaren. Vrid omkopplaren till rätt siffra/bokstav. Siffran anger nodadressen på I/O-bussen. Vid leverans är den förinställd på 5 för väljare 4 och på 6 för väljare 8. © Atlas Copco Industrial Technique AB - 9836 1733 02...
- Page 27 Passa in hålet för hylsan med hjälp av guidelinjen (B) upptill på hylshållaren enligt figuren. Borrstor- lek = hylsdiameter + 1 mm. Borra hålet enligt figuren. Märk väljaren med hylsans namn (C). © Atlas Copco Industrial Technique AB - 9836 1733 02...
- Page 28 I/O-bussen, som också måste anslutas. Varje anslutning i systemet måste vara ansluten med antingen en kabel, 4222 0470, eller en terminering, 4222 0443 00. Figuren visar hur I/ O-bussens tillbehör ska anslutas. © Atlas Copco Industrial Technique AB - 9836 1733 02...
- Page 29 P-set listas i samma ordning som hylspositionen på väljarbrickan, med början från vänster (1-3). För att sätta på/stänga av en position på väljaren när den är ansluten till Tensor DS, öppna eller radera det P-set som motsvarar denna position (4-5). © Atlas Copco Industrial Technique AB - 9836 1733 02...
- Page 30 Produktinstruktioner Selector PF3000 Läs bruksanvisningen till PF3000 för utförlig information. © Atlas Copco Industrial Technique AB - 9836 1733 02...
- Page 31 Selector Produktinstruktioner Produktinstruktioner Sprängskisser/tabeller Hylshållare Anmärkning/inklu- Beställningsnum- derad i servicepa- Ref. nr. Antal Beskrivning 4222049211 24,5 mm standard 4222049215 50 mm tillval 0196116900 Skruv (M4x8 sex- kant) © Atlas Copco Industrial Technique AB - 9836 1733 02...
- Page 32 Produktinstruktioner Selector Bitshållare Anmärkning/inklu- Beställningsnum- derad i servicepa- Ref. nr. Antal Beskrivning 1 (2-9) 4222093391 Bitshållare kompl. Bitshållare 3 (4-6) 4222093394 Fjäder kompl. Ställskruv © Atlas Copco Industrial Technique AB - 9836 1733 02...
- Page 33 Plåt kompl. Stift Plåt Kablar Anmärkning/inklu- Beställningsnum- derad i servicepa- Ref. nr. Antal Beskrivning 4222047000 Kabel 0,5 m 4222047001 Kabel 4222047002 Kabel 4222047003 Kabel 4222047005 Kabel 4222047015 Kabel 15 m © Atlas Copco Industrial Technique AB - 9836 1733 02...
- Page 34 При установке селектора 4/8 следуйте приведенным ниже инструкциям. Разъемы Номер для справки Описание Вход +24 В пост. тока Кабель шины ввода-вывода/концевая заглушка Шестнадцатипозиционный переключатель Шестнадцатипозиционный переключатель На нижней стороне селектора расположен шестнадцатипозиционный переключатель. © Atlas Copco Industrial Technique AB - 9836 1733 02...
- Page 35 Установите держатель головки в тиски. Выровняйте отверстие для головки по направляющей линии (B) на верхней стороне держате- ля головки, как показано на рисунке. Диаметр сверла = диаметр головки + 1 мм. Просверлите отверстие согласно рисунку. © Atlas Copco Industrial Technique AB - 9836 1733 02...
- Page 36 Привод также оснащен двумя разъемами для шины ввода-вывода, которые тоже должны быть под- соединены. К каждому разъему в системе должен быть подсоединен либо кабель (4222 0470), либо концевая заглушка (4222 0443 00). На рисунке показаны способы подключения принадлежностей шины ввода-вывода. © Atlas Copco Industrial Technique AB - 9836 1733 02...
- Page 37 Наборы PSet указываются в том же порядке, что и позиции головок в лотке селектора, начиная сле- ва (1–3). Чтобы включить/отключить позицию на селекторе, подключенном к Tensor DS, откройте или удали- те набор PSet, соответствующий этой позиции (4–5). © Atlas Copco Industrial Technique AB - 9836 1733 02...
- Page 38 Инструкции по изделию Selector PF3000 Для получения подробной информации см. руководство по PF3000. © Atlas Copco Industrial Technique AB - 9836 1733 02...
- Page 40 Traducción de las instrucciones originales Översättning av ursprungliga instruktioner Перевод оригиналов инструкций © Copyright 2019, Atlas Copco Industrial Technique AB. All rights reserved. Any unauthorized use or copying of the contents or part thereof is prohibited. Atlas Copco Industrial This applies in particular to trademarks, model denominations, part numbers Technique AB and drawings.
Need help?
Do you have a question about the Selector and is the answer not in the manual?
Questions and answers