
Related Manuals for Moxa Technologies AWK Series


Summary of Contents for Moxa Technologies AWK Series
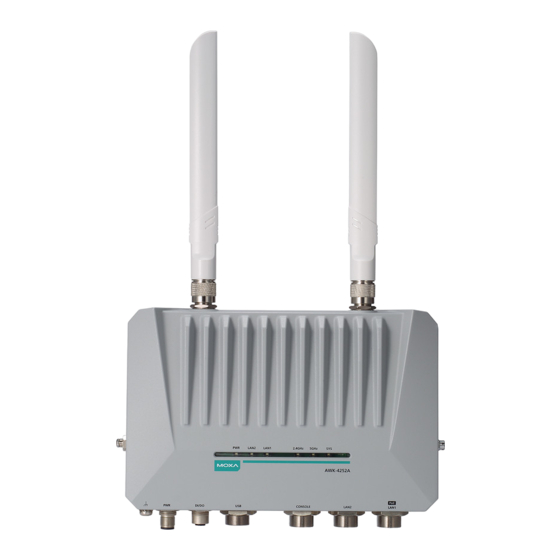
- Page 1 AWK Series User Manual Version 2.0, March 2023 www.moxa.com/products Models covered by this user manual: AWK-1151C Series AWK-3252A Series AWK-4252A Series © 2023 Moxa Inc. All rights reserved.
- Page 2 AWK Series User Manual The software described in this manual is furnished under a license agreement and may be used only in accordance with the terms of that agreement. Copyright Notice © 2023 Moxa Inc. All rights reserved. Trademarks The MOXA logo is a registered trademark of Moxa Inc.
-
Page 3: Table Of Contents
Table of Contents About This Manual ..........................5 Symbol Definition for Web Interface Configurations..................5 About Note, Attention, and Warning ......................6 Configuration Reminders ........................7 A: About Mandatory Parameters ....................... 7 B: Preconfiguring Settings ....................... 7 Getting Started ............................. 9 Functional Design .......................... - Page 4 Setup Wizard ............................ 133 Wi-Fi Basic ..........................134 Wi-Fi Security ..........................136 System ............................. 138 Maintenance and Tools ........................140 Language ..........................140 Disable Auto Save ........................141 Locator ............................. 142 Reboot ............................144 Reset to Defaults ........................145 Renew Device Unique Key ......................146 Change Password ........................
-
Page 5: About This Manual
Thank you for purchasing a Moxa’s AWK-3252A Series/AWK-4252A Series/AWK-1151C Series product, referred to as 'AWK Series" in this manual. Read this user’s manual to learn how to connect your Moxa product with various interfaces and how to configure all settings and parameters via the user-friendly web interface. -
Page 6: About Note, Attention, And Warning
Attention: This is used to notify readers of matters or situations that require extra attention to avoid possible issues. Here is an example: ATTENTION When a different type of module has been inserted into the AWK Series, we suggest you configure the settings, or use reset-to-default. AWK Series User Manual... -
Page 7: Configuration Reminders
For example, on the SNMP configuration page, users can configure the SNMP Account List settings while SNMP is disabled. When SNMP is enabled, the previously configured Account List settings will take effect. AWK Series User Manual... - Page 8 AWK Series User Manual...
-
Page 9: Getting Started
Getting Started In this chapter, we provide an overview of the AWK Series, and explain how to log into the Moxa’s AWK Series for the first time through the web-based interface. Functional Design LED Indicators The LEDs on the front and right panels of the AWK Series provide a quick and easy means of determining the current operational status and wireless settings. - Page 10 AP/Master with a SNR value of less than 35. Blinking Data is being transmitted over the 5 GHz band. System initialization failure, configuration error, or system error. Green System startup completed and is operating normally. AWK-3252A Series AWK Series User Manual...
- Page 11 Data is being transmitted at 1000 Mbps. LAN port’s 1000 Mbps link is inactive. LAN 2 Link established on the LAN port at 10/100 Mbps. Amber Blinking Data is being transmitted at 10/100 Mbps. The LAN port’s 10/100 Mbps link is inactive. AWK Series User Manual...
- Page 12 Data is being transmitted at 1000 Mbps. LAN port’s 1000 Mbps link is inactive. Link established on the LAN port at 10/100 Mbps. Amber Blinking Data is being transmitted at 10/100 Mbps. The LAN port’s 10/100 Mbps link is inactive. AWK Series User Manual...
-
Page 13: Event Indicators
The Reset button is being pressed for longer than 10 Solid on – – – – – – seconds (Abort reboot or reset) Beeper The beeper emits two short beeps when the system is ready. AWK Series User Manual... -
Page 14: Reset Button
Reset Button Depending on the AWK Series model, the Reset is located on the side panel (AWK-4252A), top panel (AWK- 3252A), or bottom panel (AWK-1151C). You can reboot the AWK series or reset it to factory default settings by pressing the RESET button with a pointed object such as an unfolded paper clip. -
Page 15: First-Time Installation And Configuration
First-time Installation and Configuration Before installing the AWK Series, make sure that all items in the Package Checklist listed in the Quick Installation Guide are in the box. You will need access to a notebook computer or PC equipped with an Ethernet port. - Page 16 Select your country or region from the drop-down list and click NEXT. Step 6: Create a user account and password. There is no default user account and password. Enter the username, password, and email address for your user account and click CREATE. AWK Series User Manual...
- Page 17 After creating your account, you will be automatically redirected to the login screen. Step 7: Log in to the device. Once the initialization message disappears (in red), enter your username and password and click LOG IN. AWK Series User Manual...
-
Page 18: Communication Testing
Two testing methods are described below. Use the first method if you are using only one AWK Series device as an AP and use the second method if you are using AWK Series devices as Client and AP. - Page 19 How to Test the AWK Series as a Client AWK-3252A/AWK-4252A/AWK-1151C If you are testing the AWK Series as a Client, you will need a second notebook computer (Notebook B) equipped with an Ethernet port as well as an AP connected to notebook A. Configure the AWK Series connected to notebook B for Client mode with the correct SSID and credentials matching the target AP.
-
Page 20: Web Interface Configuration
Login Name: This shows the name of the user that is currently logged in. Search Bar: Type the name of the function you want to search for in the function menu tree. Function Menu: All functions of the AWK Series are shown here. Click the function you want to view or configure. -
Page 21: Device Summary
Device Summary After successfully connecting to the AWK Series, the Device Summary will automatically appear. To view the device summary from anywhere in the interface, click Device Summary on the Function Menu. See the following sections for a detailed description of each widget. -
Page 22: System Status
This shows the system status, including system time, system uptime, and IP address. SSID This shows information for the SSIDs configured on the AWK Series. This widget includes both the 2.4 GHz and 5 GHz bands. AWK Series User Manual... -
Page 23: System
Configure Backup and Restore. System Information On the System Information screen, you can enter a device name, description, and location for the device. This makes it easier to identify different AWKs that are connected to your network. AWK Series User Manual... - Page 24 Setting Description Factory Default Enter the contact information of the person responsible for the Max. 255 characters None device in case there is a problem with the device. When finished, click APPLY to save your changes. AWK Series User Manual...
- Page 25 Select Local from the Source drop-down list. Before performing the firmware upgrade, download the target firmware (*.rom) file first from Moxa’s website (www.moxa.com) to the local host. Running Firmware Version Setting Description Factory Default Current firmware Current running This shows the current running firmware version. version number version AWK Series User Manual...
- Page 26 (*.rom) is located. File Name Setting Description Factory Default Firmware file name Enter the file name of the new firmware. None When finished, click UPLOAD to upload the file, then click UPGRADE to perform the firmware upgrade. AWK Series User Manual...
- Page 27 Enter the SFTP user account password. This account must be SFTP server password None authorized to ensure a secure connection to the SFTP server. When finished, click UPLOAD to upload the file, then click UPGRADE to perform the firmware upgrade. AWK Series User Manual...
- Page 28 Click the browse icon and navigate to the firmware file on the Select the firmware file None attached ABC-02 device. When finished, click UPLOAD to upload the file, then click UPGRADE to perform the firmware upgrade. AWK Series User Manual...
- Page 29 Backup The Backup tab is used to export a backup of the current configuration. This backup file can then be used to restore the device’s configuration settings, or to import it to other AWK Series devices. Local Select Local first from the Storage Location drop-down list.
- Page 30 Description Factory Default TFTP server address Enter the IP address of the TFTP server. None File Name Setting Description Factory Default Max. 256 characters (including the .ini file Enter the configuration backup file name. None extension). AWK Series User Manual...
- Page 31 Enter the IP address of the SFTP server where the new SFTP server address None firmware file (*.rom) is located. File Name Setting Description Factory Default Max. 256 characters (including the .ini file Enter the configuration backup file name. None extension). AWK Series User Manual...
- Page 32 When finished, click BACK UP. ABC-02 Select ABC-02 from the Storage Location drop-down list. This method requires a Moxa ABC-02 configuration backup and restore USB tool to be connected to the AWK Series. Configuration Source Setting Description...
- Page 33 Factory Default Enable or disable automatically backing up the device’s Enabled/Disabled Disabled configuration to the ABC-02. When finished, click APPLY. Restore From the Restore tab you restore the device’s configuration using a previously created backup file. AWK Series User Manual...
- Page 34 TFTP server address Enter the IP address of the TFTP server. None File Name Setting Description Factory Default Max. 256 characters (including the .ini file Enter the file name of the configuration backup file. None extension) AWK Series User Manual...
- Page 35 SFTP server. Password Setting Description Factory Default Enter the SFTP user account password. This account must be SFTP server password None authorized to ensure a secure connection to the SFTP server. AWK Series User Manual...
- Page 36 Click the browse icon and navigate to the backup file on the Backup file None local host. Configuration Password Setting Description Factory Default Enter the configuration password. You will need to enter this Configuration password None password when importing the backup file. When finished, click RESTORE. AWK Series User Manual...
-
Page 37: Account Management
Automatic Restoration to ABC-02 The AWK Series supports automatic configuration restoration when using a Moxa ABC-02 backup and restore tool. Auto Restore Status Setting Description Factory Default Enable or disable automatically restoring the device’s Enabled/Disabled Disabled configuration from an ABC-02. - Page 38 Edit the following settings: Status Setting Description Factory Default Enabled/Disabled Enable or disable the user account. Disabled Username Setting Description Factory Default Min. 4 characters Enter a username for this account. None AWK Series User Manual...
- Page 39 Refer to Appendix D for a detailed overview of the required authority for each device feature or service to determine the privilege requirements when setting up an account. When finished, click APPLY to create a new account. AWK Series User Manual...
- Page 40 Edit an Existing Account Click the Edit icon of the account you want to edit. AWK Series User Manual...
- Page 41 Edit the account settings. Refer to Create a New Account for a description of each setting. When finished, click APPLY. AWK Series User Manual...
- Page 42 If necessary, you can manually terminate a specific user’s active session for a specific interface. This will also record an event log. Click Session Management tab and click the Terminate Session icon next to the user. AWK Series User Manual...
- Page 43 Select check box to enforce the required password complexity: At least one digit (0-9) Selectable checkboxes Unchecked At least one upper case letter (A-Z) At least one lower case letter (a-z) At least one special character (~!@#$%^&*-_|:;,.<>{}[]()) AWK Series User Manual...
-
Page 44: Management Interface
The Management Interface section houses the User Interface, Hardware Interface, and SNMP configuration screens. User Interface The User Interface configuration screen lets you manage the interfaces available to users to access the device. Click User Interface under Management Interface to access this screen. AWK Series User Manual... - Page 45 Enable or disable HTTPS connections. Enabled HTTPS – TCP Port Setting Description Factory Default 1 to 65535 Specify the HTTPS interface TCP port number. Telnet Status Setting Description Factory Default Enabled/Disabled Enable or disable Telnet connections. Disabled AWK Series User Manual...
- Page 46 Maximum number of Login Sessions for Telnet + SSH + Serial Console Setting Description Factory Default Specify the maximum number of concurrent Telnet, SSH, and 1 to 10 Serial login sessions allowed on the device. When finished, click APPLY. AWK Series User Manual...
- Page 47 AWK-3252A and AWK-4252A Series; the WLAN LED on the AWK-1151C Series. Serial Status Setting Description Factory Default Enabled/Disabled Enable or disable the serial port. Enabled USB Status Setting Description Factory Default Enabled/Disabled Enable or disable the USB port. Enabled When finished, click APPLY. AWK Series User Manual...
- Page 48 SNMP The Moxa AWK Series supports SNMP V1, V2c, and V3. SNMP V1 and SNMP V2c use a community string match for authentication, which means that SNMP servers access all objects with read-only or read/write permissions using the default “public” and “private” community strings. SNMP V3 requires MD5 or SHA authentication.
- Page 49 “0 disabled” and “not support” messages. When finished, click APPLY. Edit an SNMP Account On the SNMP Account List tab, click the Edit icon of the account you want to edit. Configure the following settings: AWK Series User Manual...
- Page 50 Specify AES as the Encryption Method. Encryption Key Setting Description Factory Default Depending on the selected Encryption Method, specify the 8 to 63 characters Encryption Key. The password must be at least 8 characters None long. When finished, click APPLY. AWK Series User Manual...
-
Page 51: Time
Set the clock source to internal. This requires the date and Internal Clock time to be specified manually. Internal Clock Set the clock source to NTP. This will sync the system clock with an external NTP server. AWK Series User Manual... - Page 52 Browser to sync the time with your web browser. Configure Time Servers (NTP) Time Server 1 Setting Description Factory Default Specify the IP or domain address of the primary NTP server to NTP time server use (e.g., 192.168.1.1, time.stdtime.gov.tw, or None time.nist.gov). AWK Series User Manual...
- Page 53 Configure the following settings: Time Zone Setting Description Factory Default GMT (Greenwich Time zone Select a time zone. Mean Time) Daylight Saving Time The Daylight Saving Time settings are used to automatically adjust the time according to regional standards. AWK Series User Manual...
- Page 54 User-specified date Specify the date that Daylight Saving Time begins. Jan, 1st, Sun, 00. Setting Description Factory Default User-specified date Specify the date that Daylight Saving Time ends. Jan, 1st, Sun, 00 When finished, click APPLY. AWK Series User Manual...
-
Page 55: Wi-Fi
Wi-Fi connection status. Click Wireless Settings under Wi-Fi in the function tree to access this screen. General Settings The General section is used for setting the AWK’s operation mode, creating SSIDs, and configuring RF settings. Click the General tab to access this screen. AWK Series User Manual... - Page 56 For configuring RF settings, refer to RF Settings. When finished, click APPLY to change the operation mode. Master Mode Settings Select Master from the drop-down list of Operation Mode. Master Mode requires at least one active SSID. AWK Series User Manual...
- Page 57 For SSID and security settings, refer to Create a New SSID. For configuring RF settings, refer to RF Settings. When finished, click APPLY to change the operation mode. Sniffer Mode Settings Select Sniffer from the drop-down list of Operation Mode. Configure the following settings: AWK Series User Manual...
- Page 58 Client-Router mode allows you to enable Network Address Translation (NAT) functionality to forward data to LAN ports of connected devices. Select Client-Router from the drop-down list of Operation Mode. Client-Router Mode requires at least one active SSID. AWK Series User Manual...
- Page 59 Add a New SSID (AP, Master Mode only) For AP and Master operation modes, configure and enable the SSID profile. There are no SSIDs on the device by default. To add a new SSID, click the Add icon. AWK Series User Manual...
- Page 60 Enter a name for the SSID. None RF Band Setting Description Factory Default 2.4 GHz Use the 2.4 GHz RF band on this SSID. 5 GHz 5 GHz Use the 5 GHz RF band on this SSID. AWK Series User Manual...
- Page 61 Specify the RTS/CTS threshold for the SSID. 2346 Transmission Rate: 5 GHz/2.4 GHz Data Transmission Rate Setting Description Factory Default The AWK Series will automatically sense the speed of the Auto Auto connected device(s) and adjust the data rate accordingly. Minimum Data Transmission Rate Setting Description Factory Default Specify a minimum transmission rate.
- Page 62 Use WPA/WPA3 Mixed authentication. This allows both WPA2 WPA2/WPA3 Mixed and WPA3 clients to connect to the AWK. The AWK Series provides various standardized wireless security modes: Open, WPA (Wi-Fi Protected Access), WPA2, and WPA3. Open: No authentication, no data encryption.
- Page 63 When finished, click CREATE to add a new SSID. Edit an Existing SSID To edit an existing SSID, click the Edit icon next to the SSID you want to edit. Refer to Create a New SSID for more information about setting. AWK Series User Manual...
- Page 64 Delete an Existing SSID To delete an existing SSID, check the SSID, then click the Delete icon above the table. When prompted, click DELETE. AWK Series User Manual...
- Page 65 RF Settings When selecting any operation mode, configure the following RF settings. NOTE Available RF settings depend on which Operation mode is active: AP, Master, Client, Client-Router, Sniffer, or Slave mode. AWK Series User Manual...
- Page 66 Factory Default Set the channel width to 20 MHz. If you are not sure which 20 MHz option to use, select 20/40 MHz. 20/40/80 MHz 20/40 MHz Set the channel width to 20/40 MHz. This is recommended. AWK Series User Manual...
- Page 67 100 (ms) When finished, click APPLY. Advanced RF Settings (Client, Client-Router, Slave Mode Only) Some operation modes require additional advanced RF settings. NOTE Available RF settings depend on which Operation mode is active. Configure the following settings: AWK Series User Manual...
- Page 68 Specify the RTS/CTS threshold for the SSID. 2346 Transmission Rate: 5 GHz/2.4 GHz Data Transmission Rate Setting Description Factory Default The AWK Series will automatically sense the speed of the Auto Auto connected device(s) and adjust the data rate accordingly. Minimum Data Transmission Rate Setting Description Factory Default Specify a minimum transmission rate.
- Page 69 Specify the static MAC address of LAN 1 that the connected LAN 1 AWK devices should copy. LAN 1 Specify the static MAC address of LAN 2 that the connected LAN 2 AWK devices should copy. When finished, click APPLY. AWK Series User Manual...
- Page 70 Select the SSID from the drop-down list to view its current status. In Client Mode, you can also view the client list to see all the connected client devices. Click the Filter icon to select the information items that you want to show. AWK Series User Manual...
- Page 71 For the Client, Client-Router, and Slave operation modes, this view displays the SSID the device is associated with, and the properties of the connection. AWK Series User Manual...
-
Page 72: Connection Management
Configure the following settings: Client-to-AP Link Check Status Setting Description Factory Default Enabled/Disabled Enable or disable the Client-to-AP Link Check function. Disabled AWK Series User Manual... - Page 73 If the AP does not respond after the specified number of retries, the client will begin scan for other AP candidates in order to recover network communications as quickly as possible. Configure the following settings: AP Alive Check Status Setting Description Factory Default Enabled/Disabled Enable or disable the AP Alive Check function. Disabled AWK Series User Manual...
- Page 74 The mechanism works by checking if the remote host is reachable at the defined check interval. If the host is still unreachable after the specified number of retries, the client will disconnect from the current AP and will attempt to associate with another AP. AWK Series User Manual...
- Page 75 1 to 5 the host. When finished, click APPLY. AP-based Disconnection The AP-based Disconnection tab contains Wi-Fi connectivity tools to configure the signal strength conditions for clients to meet normal operational communication requirements. Additionally, this screen AWK Series User Manual...
- Page 76 AP will disconnect the client. Indicator of Disconnection Threshold Setting Description Factory Default SNR/Signal Strength Select the threshold type for the disconnection mechanism. AWK Series User Manual...
-
Page 77: Roaming
2.4 GHz: Roaming Threshold (for SNR) Setting Description Factory Default Specify the SNR roaming threshold. If the current connection 5 to 60 (dB) quality is below this threshold, the client will start looking better signal AP to associate with. AWK Series User Manual... -
Page 78: Client Isolation
When finished, click APPLY. Client Isolation The AWK Series supports client isolation functionality for AP-based operation modes to provide an additional layer of security for connected client devices. For configured virtual access points, select the SSID you wish to enable client isolation for. Client isolation can be either enforced based on SSID where clients connecting to the same SSID on the AP are isolated from each other;... -
Page 79: Wi-Fi Acl
Wi-Fi ACL The AWK Series supports Wi-Fi ACL filtering for both AP and client-based operation modes. Depending on the active operation mode, Wi-Fi ACL has two purposes. For AP-based operation modes, it blocks rogue client devices attempting to exhaust the Wi-Fi interface's resources. For client-based operation modes, it designates the list of authorized APs for the client to connect to. -
Page 80: Ports
From the Ports section, you can configure Port Settings. Port Settings The Ports Settings page is used to configure the physical LAN 1 and LAN 2 network ports on the device. Click Port Settings under Ports in the function tree to access this screen. AWK Series User Manual... - Page 81 When both LAN1 and LAN2 are enabled, only one LAN port should be used as an uplink. The other LAN port may be used to connect other Ethernet based devices such as IP cameras. Be careful NOT to connect both LAN ports as uplinks to a switch simultaneously to prevent switching loops. AWK Series User Manual...
-
Page 82: Layer 2 Switching
Reduce broadcast and multicast traffic to unnecessary destinations • • Improve network performance and reduce latency Increase security • • Secure network restricts members to resources on their own VLAN Clients roam without compromising security • AWK Series User Manual... - Page 83 Internet. A member of the human resource department could send and receive e-mail and access the Internet but would be prevented from accessing servers or hosts on the local corporate network. AWK Series User Manual...
- Page 84 If the port type is set to Hybrid, specify the VLAN ID for Dependent on the 1 to 4094 tagged devices that connect to this port and the tags that selected PVID need to be removed in egress packets. When finished, click APPLY. AWK Series User Manual...
- Page 85 VLAN Settings From the Settings tab, you can create, edit, and delete VLANs. Click the Settings tab to access this screen. Create a New VLAN ID To add a new VLAN ID, click the Add icon. AWK Series User Manual...
- Page 86 0 to 32 characters Enter a name for the VLAN ID. None When finished, click APPLY. Edit VLAN Interface Settings To edit the VLAN interface settings, click the Edit icon next to the interface you want to edit. AWK Series User Manual...
- Page 87 4094 need to be removed in egress packets. Copy Configurations to Interfaces Setting Description Factory Default Select the interface to copy the configuration of this interface Interface None When finished, click APPLY. AWK Series User Manual...
-
Page 88: Ip Configuration
IP address URL (e.g., http://ap11.abc.com) in your browser’s address None field instead of entering the IP address. The Secondary DNS server will be used if the Primary DNS server fails to connect. When finished, click APPLY. AWK Series User Manual... -
Page 89: Ip Configuration Status
MAC-based IP assignment table. If no matching entry is found, the system will assign an IP address from the configured DHCP IP pool. NOTE Due to a functional limitation, if the device's own IP is acquired through DHCP, the DHCP Server feature cannot be enabled on the device. AWK Series User Manual... -
Page 90: Routing And Nat
Routing and NAT From the Routing and NAT section you can configure Routing and NAT settings. Routing The Routing section is used for managing static routes and checking the routing table. AWK Series User Manual... - Page 91 Routing > Unicast Route in the function tree. Create a New Static Route Click the Add icon to create a new entry. Configure the following settings: Entry Status Setting Description Factory Default Enabled/Disabled Enable or disable the static route entry. Disabled AWK Series User Manual...
- Page 92 1 to 32766 None value take priority over routes with a higher cost. When finished, click CREATE. Routing Table To view the current routing table, click Routing Table under Routing > Unicast Route in the function tree. AWK Series User Manual...
-
Page 93: Nat
The AWK Series supports Network Address Translation (NAT) and Port Forwarding in Client-Router operation mode. This feature translates the outgoing communication from private IPs to external IPs (WAN IP). Network Address Translate The NAT page lets you enable NAT functionality and manage NAT rules. Click NAT in the function tree. - Page 94 Set the mapping type to Subnet to Subnet. Mapping Type (PAT Mode only) Setting Description Factory Default Single Port Set the mapping type to Single Port. Single Port Multiple Ports Set the mapping type to Multiple Ports. AWK Series User Manual...
- Page 95 For PAT mode only. Specify the LAN TCP or UDP port number. None Click APPLY to create the new NAT rule. For 1 to 1 NAT Mode and PAT Mode, refer to the following figure illustrations. AWK Series User Manual...
- Page 96 Edit an Existing NAT Rule To edit an existing NAT rule, click the Edit icon next to the rule you want to edit. Refer to Create a New NAT Rule for more information about each setting. When finished, click APPLY. AWK Series User Manual...
- Page 97 You can view the status of all NAT rules from the NAT rule list page. You select what information you want to view by clicking Select Visible Columns icon and checking the corresponding check boxes. Only information for the selected items will be shown. AWK Series User Manual...
-
Page 98: Firewall
If the default action is set to Drop and all rules are disabled, all packets will be allowed. If the default action is set to Accept and all rules are disabled, all packets will be denied. When finished, click APPLY to save your changes. AWK Series User Manual... - Page 99 Packets that match the policy rule will be denied. ATTENTION Be careful when configuring the packet filtering function: If the default action is set to Drop and all rules are disabled, all packets will be allowed. AWK Series User Manual...
-
Page 100: Layer 3 Policy
If the default action is set to Drop and all rules are disabled, all packets will be allowed. If the default action is set to Accept and all rules are disabled, all packets will be denied. When finished, click APPLY. AWK Series User Manual... - Page 101 1 to 64 Specify the priority for this rule. Default Action Setting Description Factory Default Accept Packets that match the policy rule will be allowed. Accept Drop Packets that match the policy rule will be denied. AWK Series User Manual...
-
Page 102: Certificate Management
For example, administrators can update the certificate and key of Syslog Server 1 through the Certificate Management page, instead of having to navigate to Diagnostics > Event Logs and Notifications > Syslog > Authentication to perform the same task. AWK Series User Manual... -
Page 103: Device Certificate
Device Certificate The Device Certificate table shows the current certificate for the listed functions. The AWK Series supports different certificates for different functions to increase security and minimize the potential risk in the event a certificate is compromised. Table Field Name... -
Page 104: Server Ca Certificate
Server CA Certificate From the Server CA Certificate screen, administrators can upload third-party trusted CA certificates which are used to verify the authenticity of received server certificates during the signature verification process of the listed applications. AWK Series User Manual... -
Page 105: Security
ATTENTION The AWK Series device will automatically check and issue a warning message if the uploaded certificate has expired or was not issued by a trusted CA. Please note that the device will not automatically connect to public key infrastructure (PKI) to verify whether the uploaded certificate has been revoked or not. It is highly recommended to take additional measures to manually confirm the validity of the certificate (i.e. - Page 106 Session Lifetime Setting Description Factory Default Specify how long a user can be inactive for before being 5 to 1440 (min.) automatically logged out and be required to log in again. When finished, click APPLY. AWK Series User Manual...
- Page 107 If the identified risk cannot be directly mitigated through the AWK Series' configuration, such as an active unsecure protocol to support legacy devices, consider consulting a qualified security expert to implement additional measures to mitigate the risk.
-
Page 108: Diagnostics
The Utilization screens features widgets and charts showing the real-time resource usage of the AWK. Click Utilization under Diagnostics > System Status in the function tree to access this screen. CPU Usage This widget shows the current CPU usage. AWK Series User Manual... - Page 109 CPU Usage History The graph shows the CPU usage history. AWK Series User Manual...
- Page 110 Memory Usage This widget shows the current memory usage. Memory Usage History This graph shows the memory usage history. AWK Series User Manual...
-
Page 111: Network Status
With SNMP, this information can be used to generate network visualization. From the web interface, you can enable or disable LLDP, and set the LLDP transmit interval. In addition, you can view the neighbor-list, which is reported by its network neighbors. AWK Series User Manual... - Page 112 Specify the transmission interval at which LLDP messages are 5 to 4095 (sec.) sent. NOTE The LLDP protocol transmits data in clear text and discloses the device model name. When finished, click APPLY. LLDP Status Click the Status tab to view the LLDP status. AWK Series User Manual...
- Page 113 Bridge Table The Bridge Table page provides more detailed bridging information. Click Bridge Table under Diagnostics > Network Status in the function tree to access this screen. AWK Series User Manual...
-
Page 114: Event Logs And Notifications
From the Event Log page, you can view the current log list, configure the log oversize action, and back up the event log. Click Event Log under Diagnostics > Event Logs and Notifications in the function menu to access this page. AWK Series User Manual... - Page 115 Click the Log List tab to view a list of all logged events. Registered Logs Click the Registered Logs tab to view and edit event log groups. To edit an event log group, click the Edit icon next to the group you want to edit. AWK Series User Manual...
- Page 116 Send the event logs to a Syslog server. When finished, click APPLY. Oversize Action From the Oversize Action page, you can configure what happens when the log capacity has been reached. Click the Oversize Action tab to access this screen. AWK Series User Manual...
- Page 117 Factory Default IP address Enter the IP address of the SFTP server. None Pathname (for SFTP only) Setting Description Factory Default Specify the file path on the SFTP server for storing the event Pathname None log backup. AWK Series User Manual...
- Page 118 You can configure the notification settings for individual event types. Click Notifications under Diagnostics > Event Logs and Notifications in the function tree to access this screen. To edit the notification settings, click the Edit icon next to the event you want to edit. AWK Series User Manual...
- Page 119 Specify the syslog severity as Warning Notice Specify the syslog severity as Notice. Info. Specify the syslog severity as Information. Syslog Server 1 Status Setting Description Factory Default Enabled/Disabled Enable or disable the first syslog server. Disabled AWK Series User Manual...
- Page 120 SNMP Trap/Inform The SNMP Trap/Inform section is used for setting up SNMP Traps and Inform triggers for events. Click SNM Trap/Inform under Diagnostics > Event Logs and Notifications in the function tree to access this page. AWK Series User Manual...
- Page 121 SNMP Server. Configure the following settings. Inform Retry Setting Description Factory Default 1 to 99 Specify the maximum number of Inform retries. Timeout Setting Description Factory Default 1 to 300 Specify the Inform timeout value. When finished, click APPLY. AWK Series User Manual...
- Page 122 DES is the encryption method. None AES is the encryption method. Encryption Key (when DES and AES is selected) Setting Description Factory Default 8 to 64 characters Enter the encryption key. None When finished, click APPLY. AWK Series User Manual...
- Page 123 Enable or disable authentication for the email server. Disabled Username Setting Description Factory Default Max. 60 characters Enter the email user account. None Password Setting Description Factory Default Max. of 60 characters Enter the email user password None AWK Series User Manual...
- Page 124 Click Relay Alarm Cut-off under Diagnostics > Event Logs and Notifications in the function menu to access this screen. NOTE Relay Alarm Cut-off is only supported by the AWK-3252A and AWK-4252A Series. AWK Series User Manual...
- Page 125 Click CUT-OFF to deactivate the event. AWK Series User Manual...
-
Page 126: Tools
Factory Default 5 GHz Scan the 5 GHz RF band. 2.4 GHz Scan the 2.4 GHz RF band. None 5 GHz & 2.4 GHz Scan both 5 GHz and 2.4 GHz RF bands. When finished, click ANALYZE. AWK Series User Manual... - Page 127 The result of the scan will be shown in the table at the bottom of the page. The Load(%) metric indicates the time the channel was used (in percentage) during the scan. The scan duration is approximately 330 ms for each channel. AWK Series User Manual...
- Page 128 This data is used to analyze if the configured Turbo Roaming Threshold and Roaming Difference values are suitable for the current network environment. Click RSSI Reporting under Diagnostics > Tools > Wi-Fi Tools in the function tree to access this screen. AWK Series User Manual...
- Page 129 Using the One Key Info function, all running configuration files, event logs, and CLI status will be saved as a compressed ZIP file and stored on the selected medium. Click the One Key Info. Tab to access this screen. AWK Series User Manual...
- Page 130 Enter the account name of the SFTP server. None Server Password (for SFTP only) Setting Description Factory Default Account password Enter the account password of the SFTP server. None When finished, click DOWNLOAD to download the file. AWK Series User Manual...
- Page 131 The file will be downloaded to an SFTP server. ABC-02 The file will be downloaded to the connected ABC-02 USB. Server IP Address (for TFTP only) Setting Description Factory Default IP address Enter the IP address of the TFTP server. None AWK Series User Manual...
- Page 132 Diagnostic Support This feature allows an authorized user to generate an engineering account for Moxa support staff to access and troubleshoot the AWK Series. Click Diagnostic Support under Diagnostics > Tools in the function tree to access this screen. Duration...
-
Page 133: Setup Wizard
Click Setup Wizard in the function tree to start the Wizard, then follow the on-screen instructions. There are three configuration tabs: Wi-Fi Basic, Wi-Fi Security, and System. While the Wizard will start from the Wi-Fi Basic section by default, you can go to any other tab at any time. AWK Series User Manual... -
Page 134: Wi-Fi Basic
Indoor Set the application environment to outdoor. Available channels Outdoor vary depending on the selection. SSID: 2.4 GHZ SSID Status Setting Description Factory Default Enabled/Disable Enable or disable the SSID. Disabled AWK Series User Manual... - Page 135 Bonded Channel (for AP and Master modes only) Setting Description Factory Default The bonded channel used by the AP will be shown here if 40/44/48 (read only) None channel width is set to 36 (5180 GHz). When finished, click NEXT. AWK Series User Manual...
-
Page 136: Wi-Fi Security
Wi-Fi Security AP/Master Mode Client/Client-Router/Slave Mode SSID Setting Description Factory Default SSID (read only) Shows the name for the SSID. None AWK Series User Manual... - Page 137 Enter the passphrase. This is the master key to generate keys for encryption and decryption. The passphrase cannot contain 8 to 63 characters None the following special characters: ` ' " | ; & $ Check Show Password to display the password in clear text. AWK Series User Manual...
-
Page 138: System
Use TTLS to validate the connection. This option requires users to also specify the Anonymous Name, Username, and Password. PEAP Use PEAP to validate the connection. This option requires users to also specify the Anonymous Name, Username, and Password. When finished, click NEXT. System AWK Series User Manual... - Page 139 Specify the date that Daylight Saving Time ends. None IP Configuration IP Mode Setting Description Factory Default The AWK is assigned an IP address automatically by the DHCP network’s DHCP server. Static Static Manually configure up the AWK’s IP address. AWK Series User Manual...
-
Page 140: Maintenance And Tools
Language The AWK Series v2.0 firmware and above support language localization. Administrators can select the display language of the web interface from the drop-down menu. The AWK supports the following languages: English, Simplified Chinese, Traditional Chinese, and Japanese. -
Page 141: Disable Auto Save
AWK is restarted. If Auto Save is disabled, all parameters will be temporarily stored in the running configuration (memory). To make any changes take effect, you will need to save the running-configuration to the startup configuration after applying the changes. AWK Series User Manual... -
Page 142: Locator
Clicking Locator will trigger the wireless and SYSTEM LEDs to start flashing green at a 4 Hz interval for one minute (default) alongside an audible beeper. This feature is useful for locating the physical device in a field site. AWK Series User Manual... - Page 143 Duration Setting Description Factory Default 1 to 300 (sec.) Specify the duration the LEDs will be blinking for. When finished, click START to activate the LEDs. LEDs triggered: AWK-3252A/AWK-4252A: 2.4GHz, 5GHz, SYSTEM (SYS) AWK-1151C: WLAN, SYSTEM AWK Series User Manual...
-
Page 144: Reboot
Reboot To reboot the AWK, click Reboot. When prompted, click REBOOT to reboot the AWK. AWK Series User Manual... -
Page 145: Reset To Defaults
When prompted, check Keep all event logs if you want to keep the event history, then click CONFIRM. WARNING Resetting the AWK to the factory default settings will permanently delete all your configuration settings. This is permanent and cannot be undone. AWK Series User Manual... -
Page 146: Renew Device Unique Key
Renew Device Unique Key The AWK Series has a built-in device unique key. This unique key is used to encrypt the following sensitive information stored on the device: Configurations • Certifications • Encryption/decryption keys (for firmware decryption, diagnostic support encryption, etc.) •... -
Page 147: Log Out
None Confirm Password Setting Description Factory Default 4 to 63 characters Enter the new password again. None When finished, click APPLY to change the password. Log Out To log out of the AWK, click Log out. AWK Series User Manual... - Page 148 When prompted, click LOG OUT to log out of the AWK. AWK Series User Manual...
-
Page 149: Supporting Information
Follow the instructions in the Accessing the Serial Consoles section to access the serial console CLI interface and enter the “reload” command to reboot the device. When the terminal is showing “Restarting device … [device]# Booting …”, enter the “failsafe” command. AWK Series User Manual... - Page 150 Enter Y to make the device initiate a reset to factory default settings. When the command line prompt displays the login prompt, it means the device was successfully reset to factory default settings. AWK Series User Manual...
-
Page 151: Accessing The Serial Consoles
Telnet/SSH console. The serial console connection method, which requires a serial cable to connect the AWK Series to a PC’s COM port, can be used if you do not know the AWK Series' IP address. The other consoles can be used to access the AWK Series over an Ethernet LAN, or over the Internet. - Page 152 Console Connection, 115200 for Baud Rate, 8 for Data Bits, None for Parity, and 1 for Stop Bits. Click on the Terminal tab and select VT100 (or ANSI) for Terminal Type. Click OK to continue. The Console login screen will appear. Log into the RS-232 console with the device’s account and password. AWK Series User Manual...
-
Page 153: Configuration By Telnet And Ssh Consoles
AWK Series' functions over the network from a PC host that is connected to the same LAN as the AWK Series, you need to make sure that the PC host and the AWK Series are on the same logical subnet. To do this, check your PC host’s IP address and subnet mask. - Page 154 When using an SSH client (e.g. PuTTY), run the software and enter the AWK devce's IP address as the Host Name along with port 22, and select SSH as the connection type. The Console login screen will appear. Please refer to the previous paragraph “RS-232 Console Configuration” and for login and administration. AWK Series User Manual...
-
Page 155: Security Guidelines
Installation Physical Installation To comply with IEC 62443 requirements, the AWK Series device MUST be installed within an access- controlled area, where only authorized personnel have physical access to the AWK Series device. To comply with IEC 62443 requirements, the device MUST NOT be directly connected to the Internet, which means the AWK Series device MUST be installed within a security perimeter with firewall. -
Page 156: Account Management
Password protection has two means of enforcement: Password Lifetime and Password Complexity. We recommend to: a. Review whether the password lifetime needs to be adjusted according to your organization's policies. b. Review whether the configured password complexity options enabled on the AWK Series system (refer to Create a New Account) is sufficient according to your organization's policies. -
Page 157: Maintenance
Power off the device to be decommissioned and unmount it from its physical installation location. Identify the serial number or device name and locate (if applicable) any configuration backup files or certificates generated by the device to be decommissioned and ensure the deletion of these files. AWK Series User Manual... - Page 158 To avoid any sensitive information such as the organization's information, account passwords, or certificates from being leaked, always reset the device to the factory default settings before decommissioning the device. AWK Series User Manual...
-
Page 159: Service Authority Table
Roaming Network Wi-Fi Security Network Ports Port Settings (Refer to breakdown below) General Network Port Status Status Monitoring Layer 2 Switching VLAN Network IP Configuration General System Management Status Status Monitoring Network Service DHCP Server Network AWK Series User Manual... - Page 160 Wi-Fi Mirroring Diagnostic General Diagnostic Authentication Diagnostic RSSI Reporting Diagnostic System Data Collection Diagnostic Diagnostic Support Advanced Diagnostic Ping Diagnostic Setup Wizard Network and System Management Maintenance Bar Language Basic Disable/Disable Auto Save System Management Locator Diagnostic AWK Series User Manual...
- Page 161 Configuration Section Authority Required Reboot System Management Reset Device System Management Renew Device Unique Key System Management Change Password Basic Log Out Basic AWK Series User Manual...
Need help?
Do you have a question about the AWK Series and is the answer not in the manual?
Questions and answers