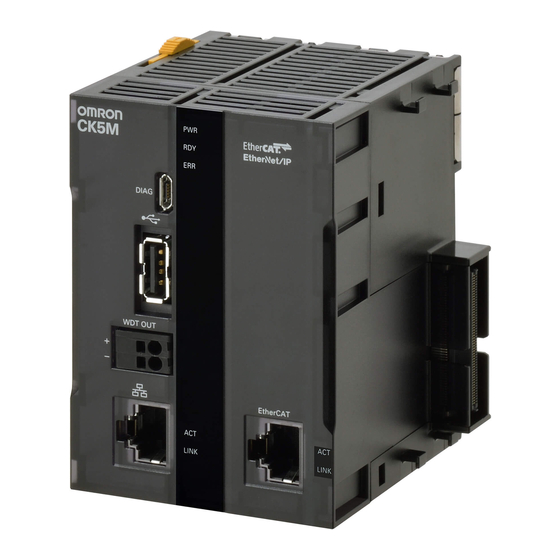
Omron CK5M-CPU1 1 Series Application Manual
Programmable multi-axis controller
Hide thumbs
Also See for CK5M-CPU1 1 Series:
- Startup manual (42 pages) ,
- Hardware user manual (302 pages) ,
- Startup manual (76 pages)

Related Manuals for Omron CK5M-CPU1 1 Series


Summary of Contents for Omron CK5M-CPU1 1 Series
- Page 1 Programmable Multi-Axis Controller Application Guide Laser Application CK5M-CPU11 CK3M-CPU11 CK3W-AX2323 CK3W-GC2200 O052-E1-02...
- Page 2 Moreover, because OMRON is constantly striving to improve its high-quality products, the information contained in this manual is subject to change without notice. 3. Every precaution has been taken in the preparation of this manual. Nevertheless, OMRON assumes no responsi- bility for errors or omissions.
- Page 3 Sections in this Manual Sections in this Manual About This Guide Target Device and Device Configuration Connection Procedures How to Customize Various Settings Application Guide Laser Application (O052)
-
Page 4: Table Of Contents
CONTENTS CONTENTS Sections in this Manual ................... 3 Precautions ......................6 Symbols ................................6 Related Manuals....................... 7 Terms and Definitions....................8 Revision History....................... 9 Section 1 About This Guide Introduction ..........................1-2 Section 2 Target Device and Device Configuration Device Configuration......................2-2 Section 3 Connection Procedures Work Flow..........................3-2 Controller Setting Preparations....................3-4... - Page 5 CONTENTS 3-7-1 Wiring of Devices ........................3-51 3-7-2 Guide Laser Output ........................3-51 3-7-3 Programming..........................3-53 3-7-4 Setup of the Laser Oscillator .....................3-56 3-7-5 Confirmation of the Settings ......................3-58 Section 4 How to Customize Various Settings globaldefinitions.pmh......................4-2 MotionOnTheFly.pmh ......................4-3 MotorControl.pmh........................4-4 SensorControl.pmh .......................4-7 Galvano.pmh ..........................4-8 LaserControl.pmh ........................4-10 TCRConfigurations.pmh .....................
-
Page 6: Precautions
• No part or the whole of this document may be copied, duplicated, or redistributed without the per- mission of OMRON Corporation. • The contents of this document may be subject to change without notice for the purpose of improve- ment. -
Page 7: Related Manuals
“Precautions for Safe Use”, and other contents of the manuals or user’s guides, including “Precautions for Correct Use”, before use. The manuals provided by OMRON Corporation (hereinafter, “OMRON”) and Delta Tau Data Systems Inc. (hereinafter “DT”) are as shown below. -
Page 8: Terms And Definitions
Direct PWM OMRON’s unique communications method for communications between the Power PMAC and the servo amplifier. The Power PMAC directly sends an ON/OFF signal from the power device of the servo amplifier, while the servo amplifier sends a cur- rent feedback value to the Power PMAC. -
Page 9: Revision History
Revision History Revision History A manual revision code appears as a suffix to the catalog number on the front and back covers of the manual. Cat. No. O052-E1-02 Revision code Revision Date Revised content code May 2021 Original production • Revision due to change of applicable Servo Drives January 2023 •... - Page 10 Revision History Application Guide Laser Application (O052)
-
Page 11: About This Guide
About This Guide This section provides an introduction of this document. Introduction ....................1-2 Application Guide Laser Application (O052) -
Page 12: Introduction
1 About This Guide Introduction This document describes the procedure for assembling a laser processing system using the OMRON Programmable Multi-Axis Controller CK£M-££££ (hereafter referred to as “Controller”). CAUTION The scope of this document is to confirm the connection of devices listed as the con- nection targets. -
Page 13: Target Device And Device Configuration
Target Device and Device Config- uration This section lists the target equipment and system configurations for connections in these materials. Device Configuration ..................2-2 Application Guide Laser Application (O052) -
Page 14: Device Configuration
2 Target Device and Device Configuration Device Configuration The configuration devices for reproducing the connection procedures in this document are shown be- low. Manufacturer Name Model Version OMRON Programmable Multi-Axis Controller CK£M-CPU1£1 Ver. 2.6.1 or lat- CPU Unit OMRON Programmable Multi-Axis Controller CK3W-AX2323N... - Page 15 2 Target Device and Device Configuration intelli SCAN varioSCAN DSCB DSIB-SL S8VK-S12024 EE-SX674 G3RV-SR500-D DC24 INC-5723-D0-0S S8VK-G03005 IINC-5716-D0-0S Direct PWM Amplifier CK3A-G310L Application Guide Laser Application (O052)
- Page 16 2 Target Device and Device Configuration Application Guide Laser Application (O052)
-
Page 17: Connection Procedures
Connection Procedures This section describes the procedures to connect the Controller and the devices that make up the laser application. The description assumes that the Controller is set to factory default. Work Flow ....................... 3-2 Controller Setting Preparations ..............3-4 3-2-1 Creation of a New Project ................ -
Page 18: Work Flow
3 Connection Procedures Work Flow The procedures for building a laser application are shown below. 3-2 Controller Setting Preparations on page Perform the Controller setting preparations. 3-2-1 Creation of a New Project on page 3-4 3-2-2 Controller Initial Setting on page 3-5 3-3 Setup of the MOTF on page 3-7 Set up the MOTF. - Page 19 3 Connection Procedures 3-5-4 Setup of Home Positions on page 3-42 3-6 Setup of the Galvo Scanner on page 3-44 Set up the Galvo Scanner. 3-6-1 Wiring of Devices on page 3-44 3-6-2 Programming on page 3-45 3-6-3 Setup of Control Commands on page 3-47 3-6-4 Confirmation of the Settings on page 3-49 3-6-5 Verification of the MOTF on the Actual Machine on page 3-50...
-
Page 20: Controller Setting Preparations
3 Connection Procedures Controller Setting Preparations Perform the Controller setting preparations. Install the Power PMAC IDE on the PC beforehand. 3-2-1 Creation of a New Project Follow the procedure below to create a new project. Connect the Controller and computer with an Ethernet cable. -
Page 21: Controller Initial Setting
3 Connection Procedures From the File menu, select New – Project. As shown in the right figure, after you select Power PMAC, input a project name and save destination, and select the OK button. 3-2-2 Controller Initial Setting Follow the procedure below to perform the initial settings for the Controller. Precautions for Correct Use Since all memory is cleared by the initial settings, be sure to save any data remaining in the Controller that you may need. - Page 22 3 Connection Procedures Type the save command in the Power PMAC IDE Terminal. • When the save is completed, "Save Completed" is displayed in the Termi- nal. Type the $$$ command in the Power PMAC IDE Terminal. • When the reset is completed, "PowerPMAC Reset complete"...
-
Page 23: Setup Of The Motf
3 Connection Procedures Setup of the MOTF 3-3-1 Programming Set up the MOTF. This document assumes that you use a low-pass filter with EMA (Exponential Mov- ing Average) to sort a positioning command into low frequency components and high frequency com- ponents. - Page 24 3 Connection Procedures Open the global definitions.pmh file under PMAC Script Language – Global Includes in the Solution Explorer. Write the text shown on the right to the Sys.WpKey=$AAAAAAAA global definitions.pmh file. //Segmentation Time • For details on the annotated settings, re- Coord[1].SegMoveTime=0.1;//*1 fer to Section 4 How to Customize Vari- ous Settings on page 4-1.
- Page 25 3 Connection Procedures In the Name box, type MotionOnTheFly.pmh and click the Add button. Open the MotionOnTheFly.pmh file under PMAC Script Language – Global Includes in the Solution Explorer. Write the text shown on the right to the Mo- //LPF’s Gain tionOnTheFly.pmh file.
- Page 26 3 Connection Procedures In the Solution Explorer, right-click the usercode.c file under C Language – Realtime Routines and select Properties. In Build Action in the Properties window, select Compile. Open the usercode.c file under C Language – Realtime Routines. Delete the CfromScript function definitions double CfromScript(double cfrom_type,double arg2, shown on the right.
- Page 27 3 Connection Procedures Write the text shown on the right to the static double prevLpfXPos=0; usercode.c file. static double prevLpfYPos=0; double CfromScript(double kinTypeDouble,double ar g2,double arg3,double arg4,double arg5,double arg 6,double arg7,LocalData *Ldata) int kinType=(int)kinTypeDouble; double deltaXPos,deltaYPos; double *L=GetLVarPtr(Ldata); double *C=GetCVarPtr(Ldata); switch(kinType) case Forward_Kinematics_State: _KinPosAxisX=_KinPosMotor1+(_KinPosMotor3/Galv...
- Page 28 3 Connection Procedures In the Solution Explorer, right-click Kinematics Routines under PMAC Script Language and select Add – New Item..Select Inverse Kinematic and click the Add button. Write the text shown on the right to the In- open inverse(1) verse1.kin file.
-
Page 29: Determination Of Filter's Coefficients
3 Connection Procedures Write the text shown on the right to the For- open forward(1) ward1.kin file. local ret; ret=CfromScript(0,0,0,0,0,0,0); close 3-3-2 Determination of Filter’s Coefficients Adjust the KdGain parameter of the filter used for the MOTF. In the Solution Explorer, right-click Global Includes under PMAC Script Language and select Add –... - Page 30 3 Connection Procedures Write the text shown on the right to the EncTable[1].type=1 VirtualMotor.pmh file. EncTable[1].index1=0 EncTable[1].index2=0 EncTable[1].index3=0 EncTable[1].index4=0 EncTable[1].pEnc1=Sys.udata[10].a EncTable[1].pEnc =Sys.udata[10].a; EncTable[1].ScaleFactor=1; Motor[1].pDac=Sys.udata[10].a Motor[1].pEnc =EncTable[1].a Motor[1].pEnc2=EncTable[1].a Motor[1].pLimits=0 Motor[1].pAmpFault=0 Motor[1].Ctrl=Sys.PosCtrl Motor[1].ServoCtrl=1 Motor[1].MaxSpeed=0 Motor[1].FatalFeLimit=0 EncTable[2].type=1 EncTable[2].index1=0 EncTable[2].index2=0 EncTable[2].index3=0 EncTable[2].index4=0 EncTable[2].pEnc1=Sys.udata[11].a EncTable[2].pEnc=Sys.udata[11].a; EncTable[2].ScaleFactor=1;...
- Page 31 3 Connection Procedures EncTable[3].type=1 EncTable[3].index1=0 EncTable[3].index2=0 EncTable[3].index3=0 EncTable[3].index4=0 EncTable[3].pEnc1=Sys.udata[12].a EncTable[3].pEnc=Sys.udata[12].a EncTable[3].ScaleFactor=1 Motor[3].pDac=Sys.udata[12].a Motor[3].pEnc=EncTable[3].a Motor[3].pEnc2=EncTable[3].a Motor[3].pLimits=0 Motor[3].pAmpFault=0 Motor[3].Ctrl=Sys.PosCtrl Motor[3].ServoCtrl=1 Motor[3].MaxSpeed=0 Motor[3].FatalFeLimit=0 EncTable[4].type=1 EncTable[4].index1=0 EncTable[4].index2=0 EncTable[4].index3=0 EncTable[4].index4=0 EncTable[4].pEnc1=Sys.udata[13].a EncTable[4].pEnc=Sys.udata[13].a EncTable[4].ScaleFactor=1 Motor[4].pDac=Sys.udata[13].a Motor[4].pEnc=EncTable[4].a Motor[4].pEnc2=EncTable[4].a Motor[4].pLimits=0 Motor[4].pAmpFault=0 Motor[4].Ctrl=Sys.PosCtrl Motor[4].ServoCtrl=1 Motor[4].MaxSpeed=0 Motor[4].FatalFeLimit=0 Open the prog1.pmc file under PMAC Script Language –...
- Page 32 3 Connection Procedures Write the program to use for processing open prog 1 to the prog1.pmc file. The text on the right is an example of coord[1].FeedTime=1000; the processing program. Coord[1].MaxFeedRate=180; ta(0.1); td(0.1); ts(0); F(100); abs; linear; X(50) Y(50); X(-50) Y(50); X(-50) Y(-50);...
- Page 33 3 Connection Procedures Type the save command in the Power PMAC IDE Terminal. • When the save is completed, "Save Completed" is displayed in the Termi- nal. Type the $$$ command in the Power PMAC IDE Terminal. Select Tools – Plot from the Delta Tau menu.
- Page 34 3 Connection Procedures In the Step3 – Data Processing area, select the following items and click the >> button. • Motor[1] Cmd Position • Motor[2] Cmd Position • Motor[3] Cmd Position • Motor[4] Cmd Position 3-18 Application Guide Laser Application (O052)
- Page 35 3 Connection Procedures Click the Gather Data button and type the &1 enable and the &1 start 1 com- mand in the Power PMAC IDE Termi- nal. Click the Upload Data button. 3-19 Application Guide Laser Application (O052)
- Page 36 3 Connection Procedures Click the Plot Data button. Confirm that the position of each axis is displayed as shown on the right. If either Motor[3] Cmd Position or Mo- tor[4] Cmd Position exceeds the maxi- mum or the minimum command value of the Galvo Scanner, open the global definitions.pmh file and edit the KdgainX and KdgainY settings.
-
Page 37: Setup Of The Motors And Encoder
Connect the amplifier connector of the CK3W-AX2323£ to the C2 connector of the servo amplifier with the following dedicated cable. Manufacturer Name Model Length OMRON Direct PWM Cable CK3W-CAAD009A 0.9 m CK3W-CAAD018A 1.8 m CK3W-CAAD036A 3.6 m 3-21 Application Guide Laser Application (O052) -
Page 38: Programming
3 Connection Procedures b. Connection between the servo amplifier and each servo motor Connect the motor connector of the linear motor to the P2 connector of the servo amplifier. c. Connection between the Controller and each servo motor Connect the encoder connector of the CK3W-AX2323£ to the connector of the linear encoder with the dedicated cable CK3W-CAEA03A. - Page 39 3 Connection Procedures In the Name box, type MotorControl.pmh and click the Add button. Open the MotorControl.pmh file under PMAC Script Language – Global Includes in the Solution Explorer. Write the following text to the MotorControl.pmh file. • For details on the annotated settings, refer to Section 4 How to Customize Various Settings on page 4-1. 3-23 Application Guide Laser Application (O052)
- Page 40 3 Connection Procedures Sys.WpKey=$AAAAAAAA //Servo Task Configurations Motor[1].ServoCtrl=1 //*1 Motor[2].ServoCtrl=1 //*1 Motor[1].pEnc=EncTable[1].a //*2 Motor[2].pEnc=EncTable[2].a //*2 Motor[1].pEnc2=EncTable[1].a //*2 Motor[2].pEnc2=EncTable[2].a //*2 Motor[1].EncType=6 //*3 Motor[2].EncType=6 //*3 Motor[1].PosUnit=3 //*4 Motor[2].PosUnit=3 //*4 EncTable[1].Type=1 //*5 EncTable[2].Type=1 //*5 EncTable[1].pEnc=Gate3[0].Chan[0].ServoCapt.a //*6 EncTable[2].pEnc=Gate3[0].Chan[1].ServoCapt.a //*6 EncTable[1].ScaleFactor=1.0 //*7 EncTable[2].ScaleFactor=1.0 //*7 Motor[1].AmpFaultLevel=1 //*8 Motor[2].AmpFaultLevel=1 //*8 Motor[1].FatalFeLimit=5.0 //*9 Motor[2].FatalFeLimit=2.0 //*9...
- Page 41 3 Connection Procedures //PWM Output Configurations Motor[1].PwmSf=0.95*16384 //*19 Motor[2].PwmSf=0.95*16384 //*19 Motor[1].MaxDac=9.88*32768*COSD(30)/31.35 //*20 Motor[2].MaxDac=9.88*32768*COSD(30)/31.35 //*20 Motor[1].I2tSet=3.08*32768*COSD(30)/31.35 //*21 Motor[2].I2tSet=3.08*32768*COSD(30)/31.35 //*21 Motor[1].I2tTrip=(Motor[1].MaxDac*Motor[1].MaxDac-Motor[1].I2tSet*Motor[1].I2tSet)* 2 //*22 Motor[2].I2tTrip=(Motor[2].MaxDac*Motor[2].MaxDac-Motor[2].I2tSet*Motor[2].I2tSet)* 2 //*22 Gate3[0].Chan[0].PwmDeadTime=3 / 0.0533 //*23 Gate3[0].Chan[1].PwmDeadTime=3 / 0.0533 //*23 Gate3[0].Chan[0].PwmFreqMult=2 //*24 Gate3[0].Chan[1].PwmFreqMult=2 //*24 Gate3[0].Chan[0].PackOutData=0 //*25 Gate3[0].Chan[1].PackOutData=0 //*25 //Current Loop Configurations Gate3[0].AdcAmpStrobe = $901001;...
-
Page 42: Tuning Of The Current Loop
3 Connection Procedures Make sure that there are no errors in the Output window. Type the save command in the Power PMAC IDE Terminal. Type the $$$ command in the Power PMAC IDE Terminal. 3-4-3 Tuning of the Current Loop Make the tuning of the current loop of the servo amplifier. - Page 43 3 Connection Procedures Set the following parameters. IliGain: 0.0099999998 (Default) IpfGain: 1 (Default) IpbGain: 0 Magnitude: 1,000 bits Dwell Time: 50 ms Click the Current Step button. • The current step response is dis- played. 3-27 Application Guide Laser Application (O052)
-
Page 44: Establishment Of The Phase Reference
3 Connection Procedures Adjust the IliGain and IpfGain values to obtain the desired response charac- teristics. • If the rising edge response is slow, increase the IliGain value. • If the amount of overshooting or os- cillation is large, increase the IpfGain value. -
Page 45: Open-Loop Testing
3 Connection Procedures Type the Motor[1].PhasePos=0 com- mand in the Power PMAC IDE Termi- nal. Type the Motor[1].PhaseFound=1 command in the Power PMAC IDE Ter- minal. Type the Motor[1].IbBias=0 command in the Power PMAC IDE Terminal. Type the #1 k command in the Power PMAC IDE Terminal. -
Page 46: Position Loop Auto-Tuning
3 Connection Procedures Set the following tuning parameters. Amplitude: 1.0% Test Time: 1,000 ms Repetitions: 2 *1. If the motor does not rotate, set a larger value. Click the Open Loop Step button. • The motor makes a reciprocating mo- tion, and then the test results as shown on the right are displayed. -
Page 47: Position Loop Interactive Tuning
3 Connection Procedures Set the following parameters. Amplifier Type: Direct PWM Maximum: 1 mu (1 mm) Click the Identify and Tune button. When the screen on the right appears, click the Implement button. Confirm that the Current Gains set- tings reflect the Recommended Gains values and click the OK button. - Page 48 3 Connection Procedures Select Position Loop Interactive Tuning – Step tab page on the Tune screen. Set the following parameters. FeedBack Gains Integral Gains (Ki): 0 Move Parameters Size: 10 mu Time: 1,000 ms Click the Step Move button. Check the step response characteris- tics.
- Page 49 3 Connection Procedures Adjust the Proportional Gain (Kp) and Derivative Gain 1 (Kvfb) values to ob- tain the desired response characteris- tics. • If the rising edge response is slow, increase the Proportional Gain (Kp) value. • If the amount of overshooting or os- cillation is large, increase the Derivative Gain 1 (Kvfb) value.
- Page 50 3 Connection Procedures Check the parabolic response charac- teristics of velocity. If the Following Error has a positive Command Velocity correlation with the velocity, increase the Kvff value. If it has a negative cor- relation, decrease the Kvff value. Time (ms) Following Error (positive correlation) Time (ms) Following Error (negative correlation)
-
Page 51: Tuning Of The Y Axis
3 Connection Procedures Click the Parabolic Velocity Move but- ton again. • Repeat this operation until the Following Error is no longer corre- lated with the velocity. Similarly, if the Following Error has a Command Velocity correlation with the Acceleration or friction, increase or decrease the Kaff or Kfff value. -
Page 52: Confirmation Of The Tuning Results
3 Connection Procedures Select Motor2 in the Select Motor area of the Tuning screen. Perform the current loop turning, open- loop testing, position loop auto-tuning, and position loop interactive tuning pro- cedures. 3-4-9 Confirmation of the Tuning Results Confirm that the tuning results are correct, and reflect them in the project file. Type the #1 hmz command in the Pow- er PMAC IDE Terminal. - Page 53 3 Connection Procedures Add the gain settings obtained from the Motor[1].IiGain=*** tuning to the MotorControl.pmh file. Motor[2].IiGain=*** Motor[1].IpfGain=*** Motor[2].IpfGain=*** Motor[1].Servo.Kp=*** Motor[2].Servo.Kp=*** Motor[1].Servo.Kvfb=*** Motor[2].Servo.Kvfb=*** Motor[1].Servo.Ki=*** Motor[2].Servo.Ki=*** Motor[1].Servo.Kaff=*** Motor[2].Servo.Kaff=*** Motor[1].Servo.Kvff=*** Motor[1].Servo.Kfff=*** Open the pp_startup.txt file under Configuration in the Solution Explorer. Write the phase search commands enable plc PhaseSearch shown on the right.
- Page 54 3 Connection Procedures Right click on the Solution Explorer project name at the upper right of the Power PMAC IDE screen, select Build and Download All Programs, and ex- ecute Build and Download. • You can download the gain settings to the PMAC as a program by writing them in the MotorControl.pmh file as shown in steps 5 and 6.
-
Page 55: Setup Of Overtravel Limit Switches And Home Positions
3 Connection Procedures Setup of Overtravel Limit Switches and Home Positions 3-5-1 Wiring of Devices The figures below show how to wire the CK3M to various sensors. CK3W-AX2323 CK3W-GC2200 S8VK-S12024 S8VK-S12024 EE-SX674 Connect the EE-SX674 to the following FLAG terminals of the CK3W-AX2323N. •... - Page 56 3 Connection Procedures In the Solution Explorer, right-click Global Includes under PMAC Script Language and select Add – New Item..In the Name box, type SensorControl.pmh and click the Add button. Open the SensorControl.pmh file un- der PMAC Script Language – Global Includes in the Solution Explorer.
-
Page 57: Confirmation Of The Settings (Overtravel Limit Switches)
3 Connection Procedures Make sure that there are no errors in the Output window. Type the save command in the Power PMAC IDE Terminal. Type the $$$ command in the Power PMAC IDE Terminal. 3-5-3 Confirmation of the Settings (Overtravel Limit Switches) Confirm that the settings of overtravel limit switches operate correctly. -
Page 58: Setup Of Home Positions
3 Connection Procedures Confirm that Motor[1].MinusLimit of the X-axis negative overtravel limit switch is Confirm that Motor[2].PlusLimit of the Y- axis positive overtravel limit switch is 1. Confirm that Motor[2].MinusLimit of the Y-axis negative overtravel limit switch is 3-5-4 Setup of Home Positions Set up the home positions. - Page 59 3 Connection Procedures Confirm that the following variables are correctly reflected. • Motor[1].HomePos: Home trigger po- sition • Motor[1].HomeComplete: 1 Move the Y axis to the home position and type the #2 hmz command in the Power PMAC IDE Terminal. Confirm that the following variables are correctly reflected.
-
Page 60: Setup Of The Galvo Scanner
3 Connection Procedures Setup of the Galvo Scanner 3-6-1 Wiring of Devices The figures below show how to wire the CK3M to the Galvo Scanner. CK3W-AX2323 CK3W-GC2200 DSCB DSIB-SL varioSCAN IntelliSCAN Connect the sections a and b in the above figures as follows. a. -
Page 61: Programming
3 Connection Procedures CK3W-GC2200 DSIB-SL Signal Signal XY-IN+ DATA OUT+ DATA-OUT- XY-IN- XY-OUT+ DATA-IN+ XY-OUT- DATA-IN- 3-6-2 Programming Program the settings of the Galvo Scanner. In the Solution Explorer, right-click Global Includes under PMAC Script Language and select Add – New Item..In the Name box, type Galvano.pmh and click the Add button. - Page 62 3 Connection Procedures Write the text shown on the right to the Gal- Sys.WpKey=$AAAAAAAA vano.pmh file. • For details on the annotated settings, re- //SL2-100 Configurations Gate3[1].SerialEncCtrl=$82800//*1 fer to Section 4 How to Customize Vari- ous Settings on page 4-1. //Servo Task Configurations Motor[3].ServoCtrl=1//*2 Motor[4].ServoCtrl=1//*2...
-
Page 63: Setup Of Control Commands
3 Connection Procedures Right click on the Solution Explorer project name at the upper right of the Power PMAC IDE screen, select Build and Download All Programs, and execute Build and Download. Make sure that there are no errors in the Output window. - Page 64 3 Connection Procedures Type the Motor[5].pDac=Sys.Udata[0].a com- mand in the Power PMAC IDE Termi- nal. Type the Gate3[1].SerialEncCtrl= $8E800 command in the Power PMAC IDE Terminal. Type the Gate3[1].Chan[0].Dac[0]=-206353203 2 command in the Power PMAC IDE Terminal. Type the Gate3[1].Chan[1].Dac[0]=-206353203 2 command in the Power PMAC IDE Terminal.
-
Page 65: Confirmation Of The Settings
3 Connection Procedures Type the Gate3[1].Chan[2].Dac[0]=-206241792 0 command in the Power PMAC IDE Terminal. Type the $$$ command in the Power PMAC IDE Terminal. 3-6-4 Confirmation of the Settings Confirm that the settings of the Galvo Scanner are correct. Type the #3 j=65536 command in the Power PMAC IDE Terminal. -
Page 66: Verification Of The Motf On The Actual Machine
3 Connection Procedures Type the #4 j=65536 command in the Power PMAC IDE Terminal. Confirm that Gate3[1].Chan[1].Serial- EncDataA=65536 or so is displayed. Type the #5 j=65536 command in the Power PMAC IDE Terminal. Confirm that Gate3[0].Chan[2].Serial- EncDataA=65536 or so is displayed. 3-6-5 Verification of the MOTF on the Actual Machine Confirm that the settings of the MOTF are operating correctly on the actual machine. -
Page 67: Setup Of The Laser Oscillator
3 Connection Procedures Setup of the Laser Oscillator 3-7-1 Wiring of Devices The figures below show how to wire the CK3M to the laser oscillator. CK3W-AX2323 CK3W-GC2200 S8VK-S12024 S8VK-G03005 G3RV-SR500-D DC24 Connect the GPIO terminal of the CK3W-AX2323N to the MFP as shown below. •... - Page 68 3 Connection Procedures In the Solution Explorer, open the ptr LaserPower->Gate3[0].GpioData[0].16.4 LaserControl.pmh file under PMAC ptr LaserLatch->Gate3[0].GpioData[0].20.1 Script Language – Global Includes ptr MasterOscillator->Gate3[0].GpioData[0].21 and add the text shown on the right. ptr GuideLaser->Gate3[0].GpioData[0].22.1 Type the GuideLaser=1 command in the Power PMAC IDE Terminal and confirm that guide laser light is output.
-
Page 69: Programming
3 Connection Procedures Type the #4 j=0 command in the Power PMAC IDE Terminal and confirm that Gate3[1].Chan[1].SerialEncDataA=0 is displayed. Confirm that the guide laser light is out- put to the center of the XY table. Type the #5 j={Position} command in the Power PMAC IDE Terminal and confirm that the spot diameter of guide laser light is appropriate. - Page 70 3 Connection Procedures In the Name box, type LaserControl.pmh and click the Add button. In the Solution Explorer, open the Sys.WpKey=$AAAAAAAA LaserControl.pmh file under PMAC Script Language – Global Includes and add the //Q-Switch Configurations text shown on the right. Gate3[1].Chan[0].CompA=$8000D000//*1 •...
- Page 71 3 Connection Procedures Select Motor 6, and then select CalcTableBasedCompare from the User Servo list. Click the Apply button. In the Solution Explorer, click the static double X_old=0; usercode.c file under C Language – static double Y_old=0; Realtime Routines and add the functions static double SumDistance=0;...
-
Page 72: Setup Of The Laser Oscillator
3 Connection Procedures In the Solution Explorer, right-click Global Includes under PMAC Script Language and select Add – New Item..In the Name box, type TCRConfigurations.pmh and click the Add button. Write the text shown on the right to the global DistanceCountOn TCRConfigurations.pmh file. - Page 73 3 Connection Procedures Confirm that the emergency stop push- button switch is OFF. Type the LaserPower=$1 command in the Terminal. Type the LaserLatch=1 command in the Terminal. Type the MasterOscillator=1 com- mand in the Terminal. Type the Gate3[1].Chan[2].CompB= $C000000 command in the Terminal. Confirm that the laser light is output.
-
Page 74: Confirmation Of The Settings
3 Connection Procedures 3-7-5 Confirmation of the Settings Confirm that the settings in this document are made correctly, by checking whether the processing is actually available. Open the prog1.pmc file under PMAC Script Language – Motion Programs in the Solution Explorer. Write the program to use for processing to the prog1.pmc file. - Page 75 3 Connection Procedures Type the save command in the Power PMAC IDE Terminal. • When the save is completed, "Save Completed" is displayed in the Termi- nal. Type the &1 start 1 command in the Power PMAC IDE Terminal. Confirm that the processing is complet- ed correctly.
- Page 76 3 Connection Procedures 3-60 Application Guide Laser Application (O052)
- Page 77 How to Customize Various Set- tings This section describes how to customize various settings. globaldefinitions.pmh ..................4-2 MotionOnTheFly.pmh..................4-3 MotorControl.pmh ..................4-4 SensorControl.pmh..................4-7 Galvano.pmh ....................4-8 LaserControl.pmh ..................4-10 TCRConfigurations.pmh................4-11 Application Guide Laser Application (O052)
-
Page 78: Globaldefinitions.pmh
4 How to Customize Various Settings globaldefinitions.pmh This file contains various clock and task period settings. Parameter Description Coord[1].SegMoveTime Specify the interpolation time period in ms for circular interpolation, etc. of the trajectory. The smaller this value, the closer to the exact trajectory, but the larger the computation load on the CPU due to the increase in the amount of computation. -
Page 79: Motiononthefly.pmh
4 How to Customize Various Settings MotionOnTheFly.pmh This file contains the settings for the MOTF. Parameter Description KdgainX Specify the filter’s coefficient to use for the MOTF for the X axis. The smaller this value, the larger the operating range of Galvo Scanner. A higher-speed response can be made by setting this value to such a small value as can make the most of the range that the Galvo Scanner can control. -
Page 80: Motorcontrol.pmh
4 How to Customize Various Settings MotorControl.pmh This file contains the settings for linear motor control. Parameter Description Motor[x].ServoCtrl For axis x that uses servo control, set this to 1. In this manual, six axes are used. However, to use more axes, also set Motor[y].Ser- voCtrl (y >... - Page 81 4 How to Customize Various Settings Parameter Description Motor[x].AdcMask Specify which bits of the register in No. 14 you want to use for feed- back values. Set this value according to the specifications of the AD converter for reading current values that is installed in the servo am- plifier.
- Page 82 4 How to Customize Various Settings Parameter Description Motor[x].I2tTrip Specify the allowable time for the short-time rated current value of the motor and servo amplifier. Please calculate the time using the fol- lowing formula. The allowable time is 2 seconds according to the CK3A-G310L specifications.
-
Page 83: Sensorcontrol.pmh
4 How to Customize Various Settings SensorControl.pmh This file contains the settings for overtravel limit switches. Parameter Description Motor[x].pLimits Specify the register to be referenced by the overtravel limit switch. Motor[x].LimitBits Specify which bits of the register (No. 1) are to be referenced by the overtravel limit switch. -
Page 84: Galvano.pmh
4 How to Customize Various Settings Galvano.pmh This file contains the settings for controlling the Galvo Scanner. Parameter Description Gate3[1].SerialEncCtrl Set this according to the figure below. Motor[x].ServoCtrl For axis x that uses servo control, set this to 1. In this manual, six axes are used. - Page 85 4 How to Customize Various Settings 31 30 29 28 27 26 25 24 23 22 21 20 19 18 17 16 15 14 13 12 11 10 9 8 7 6 5 4 3 2 1 0 0 0 0 0 0 0 0 0 0 0 0 0 1 0 0 0 0 0 1 0 1 0 0 0 0 0 0 0 0 0 0 0 −...
-
Page 86: Lasercontrol.pmh
4 How to Customize Various Settings LaserControl.pmh This file contains the settings for controlling the laser oscillator. Parameter Description Gate3[1].Chan[0].CompA Set this according to the figures below. Gate3[1].Chan[1].CompA Set the delay time of SL2-100 communications data to the internal clock of the PMAC. In this manual, this is set to 0. Gate3[1].Chan[2].CompA Set this according to the figures below. -
Page 87: Tcrconfigurations.pmh
4 How to Customize Various Settings TCRConfigurations.pmh This file contains the condition settings for turning ON/OFF the laser. Parameter Description Gate3[1].Chan[1].CompB Set the travel distance before the laser turns from OFF to ON. Gate3[1].Chan[1].CompB Set the travel distance before the laser turns from ON to OFF. After this, add the condition to toggle the laser output. - Page 88 4 How to Customize Various Settings 4-12 Application Guide Laser Application (O052)
- Page 90 Tel: (31) 2356-81-300 Fax: (31) 2356-81-388 Tel: (1) 847-843-7900 Fax: (1) 847-843-7787 ©OMRON Corporation 2021 - 2023 All Rights Reserved. OMRON ASIA PACIFIC PTE. LTD. OMRON (CHINA) CO., LTD. In the interest of product improvement, 438B Alexandra Road, #08-01/02 Alexandra Room 2211, Bank of China Tower, specifications are subject to change without notice.
Need help?
Do you have a question about the CK5M-CPU1 1 Series and is the answer not in the manual?
Questions and answers