Table of Contents
Advertisement
Quick Links
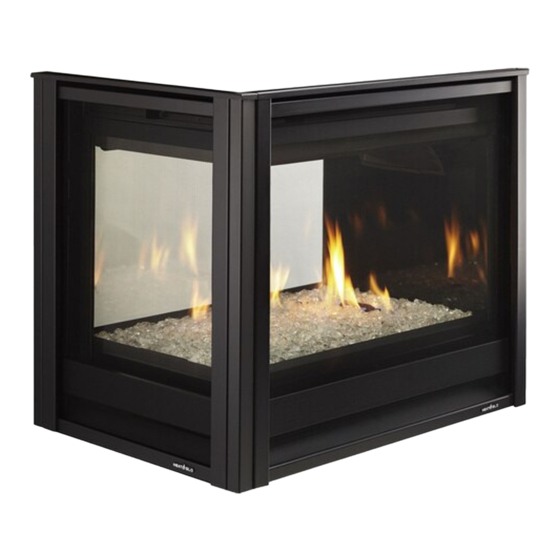
Models: PIER-36TRB-IFT, ST-36TRB-IFT, ST-DV36IN, PIER-DV36IN, GDFL4136IFT, GDST4336IFT
Leave this manual with party responsible for use
and operation.
DANGER
DO NOT TOUCH GLASS
NEVER ALLOW CHILDREN
A barrier designed to reduce the risk of
burns from the hot viewing glass is provided
with this appliance and must be installed for
the protection of children and other at-risk
individuals.
CAUTION! Do not install damaged components.
WARNING! Risk of Injury! This kit must be installed by
a qualified service technician.
WARNING! Choking Hazard! Keep media and stones
out of reach of children.
CAUTION! Risk of Cuts, Abrasions or Flying Debris.
Wear protective gloves and safety glasses during instal-
lation. Sheet metal edges are sharp.
TOOLS
Screw gun equipped with 1/4 in. socket or
1/4 in. wrench
3/8 in. wrench (Propane Appliances Only)
Instructions for optional glass kit, if applicable.
Hearth & Home Technologies • STPR-MOD-KIT Contemporary Kit Instructions • 2488-971 Rev. F • 3/22
STPR-MOD-KIT
HOT GLASS WILL
CAUSE BURNS.
UNTIL COOLED.
TO TOUCH GLASS.
Note: The control module MUST be set to 30%
turndown when the STPR-MOD-KIT kit is installed.
Note: If an optional LINER-36ST or LINER-36PIER kit
will be used with the STPR-MOD-KIT, the LINER-36ST/
LINER-36PIER instructions will be needed during instal-
lation of the STPR-MOD-KIT.
Note: The STPR-MOD-KIT is not compatible with fiber
refractory.
BTU Specifications
Models
(U.S. or Canada)
STPR-MOD-KIT
(0-2000 FT)
(NG)
STPR-MOD-KIT
(0-2000 FT)
(PROPANE)
Preparation
CAUTION! Risk of Burns! The fireplace should be
turned off and cooled before contemporary kit is installed.
•
Remove the STPR-MOD-KIT burner assembly from
the base pan assembly by removing four screws.
•
Shut off gas supply and disconnect electrical power.
•
Remove decorative fronts, glass assemblies, lava
rock, embers and logs, if previously installed.
Maximum
Orifice
Minimum
Input
Size
Input BTU/h
BTU/h
(DMS)
38,000
26,000
32
29,000
19,000
52
1
Advertisement
Table of Contents

Related Manuals for Hearth & Home PIER-36TRB-IFT


Summary of Contents for Hearth & Home PIER-36TRB-IFT
- Page 1 STPR-MOD-KIT Models: PIER-36TRB-IFT, ST-36TRB-IFT, ST-DV36IN, PIER-DV36IN, GDFL4136IFT, GDST4336IFT Installation Instructions Note: The control module MUST be set to 30% Leave this manual with party responsible for use and operation. turndown when the STPR-MOD-KIT kit is installed. DANGER Note: If an optional LINER-36ST or LINER-36PIER kit...
- Page 2 Installation Instructions KIT COMPONENTS (Shown in Figure 1) (1) Basepan Assembly 1. Remove pilot shield by removing the two screws that (1) Burner Assembly secure the shield to the base pan. (1) Pilot Shield/Rock Stop Jig Assembly 2. Remove the two screws that secure the pilot to the (2) Side Vanity Shrouds pilot support.
- Page 3 5. Remove base pan by removing one screw and lifting it 7. Install refractory channels as shown in Figure 1, using out of the firebox. See Figure 3 for screw location. two self-tapping screws for each channel. Place pilot side refractory channel into position by setting onto the tab and installing the two self-drill- REMOVE 4 BURNER BRACKET SCREWS REMOVE 4 BURNER BRACKET SCREWS...
- Page 4 8. The two tabs on the bottom of the metal refractory must be bent upward behind the panel or broken off in order for the refractory to fit in the refractory channel. See Figure 7. 9. Reinstall metal refractory by setting the bottom edge into the refractory channel and using the screws that were removed in Step 3.
- Page 5 11. Slide air shutter toward the pilot, into the closed posi- PILOT BRACKET PILOT BRACKET BURNER SCREWS BURNER SCREWS tion. SCREWS SCREWS 12. To install the burner assembly, lower the burner into the base pan, then slide the burner neck through the shutter and onto the orifice.
- Page 6 14. PIER36TRB-IFT, PIER-DV36IN, and GDFL4136IFT 15. With the burner neck fully engaged on the orifice, Only: Install the end vanity shroud opposite the pilot. loosen the two screws securing the adjustable base Set the shroud in place as shown in Figure 14 and pan ledge on the opposite end of the pilot.
- Page 7 Install Glass Media WARNING! Risk of Explosion! DO NOT place media on pilot assembly. Delayed ignition could occur. Use media jig for proper media placement. 17. A media kit is required for use with the STPR-MOD- KIT. Install the media according to the instructions included with the kit.
- Page 8 Optional Stones Kit 22. Reinstall glass assemblies and decorative fronts. An optional stones kit can be used with the STPR-MOD- 23. Verify the visual appearance of the flame. The flames KIT. Install the stones according to the instructions in- will start out blue and gradually turn yellow. The cluded with the kit.
Need help?
Do you have a question about the PIER-36TRB-IFT and is the answer not in the manual?
Questions and answers