
Related Manuals for ROBINHOOD RWA3CL9SS


Summary of Contents for ROBINHOOD RWA3CL9SS
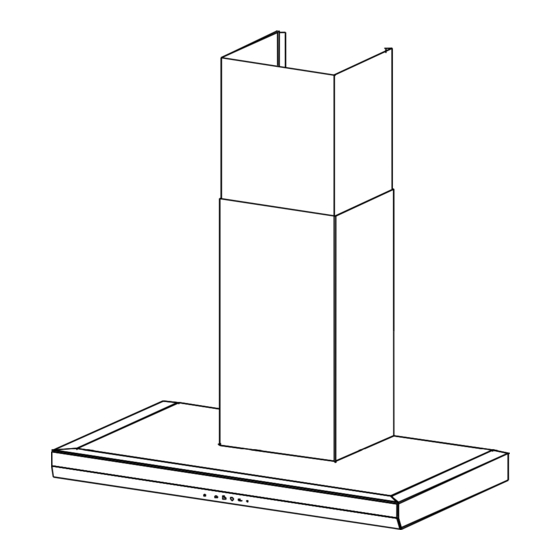
- Page 1 RWA/B Issue:J Description: ROBINHOOD WALL CANOPY Model Numbers: RWA3CL9SS, RWA3CL12SS RWB3CL9SS, RWB3CL12SS RWA3CL9SS RWB3CL9SS All dimensions in mm Models may vary slightly from images pictured...
-
Page 2: Pre-Installation
RWB3CL9SS & RWB3CL12SS RWA3CL9SS & RWA3CL12SS Pre-Installation Thank you for purchasing a quality Robinhood rangehood. Robinhood has a high standard of quality control and every rangehood is tested and approved before it leaves the factory. Important: Please read the entire instructions before installing the rangehood, always switch power off prior to installation. -
Page 3: Ducting Options
Please note that this chart is designed as a guide. Please consult Robinhood customer services if unsure. For NZ phone (09) 415 6000 or www.robinhood.co.nz. For AUS phone 1800 648 556 or www.robinhood.com.au. -
Page 4: Installation Position
Any installation above 750mm will compromise performance. Vertical height from bottom of rangehood to mounting screws 272mm for RWA3CL9SS, RWA3CL12SS 313mm for RWB3CL9SS, RWB3CL12SS Distance between 2 mounting screw holes in the back plate of the rangehood 230mm for all models: RWA3CL9SS, RWA3CL12SS, RWB3CL9SS, RWB3CL12SS... -
Page 5: Installation
Installation Mounting to a stud is recommended. However, if fitted to other wall linings (plasterboard, concrete etc) suitable fixings will be required. Before drilling any holes check that the wall and ceiling are clear of any electrical cables, pipes etc. Rear wall Wall stud Fixing screw... - Page 6 Installation - continued 7. Connect and secure the ducting (use duct tape if required). 8. Insert the upper chimney piece into the lower chimney piece. Assemble the lower chimney bracket onto the lower chimney using screws provided and ensure the bracket holds both chimney pieces. Do not fully tighten the screws as some adjustments are required in step 9.
-
Page 7: Control Icons
Operating Instructions Control icons Pictured: Capacitive touch icons Notes: Touch entire icon(s): a short beep will indicate a functional operation o Allow approximately 2 seconds for the canopy motor to start. Power icon Touch the power icon to turn the canopy motor on or off. The motor will resume the speed to which it was previously set. -
Page 8: Control Panel Back-Lighting
Operating Instructions - continued Filter cleaning reminder mode - continued When filters need cleaning, warning beeps will sound (short sequence of beeps for 2 seconds every 2 minutes). Touching any icon will stop this warning and reset the count down. Note: o If the power to the canopy is disconnected the filter cleaning memory is lost and will need to be reset. -
Page 9: Parts And Accessories List
Cleaning and Maintenance - continued Parts and Accessories list o Chimney extension 1550mm for 3048mm 10 ft ceiling 1761 o Chimney extension 2150mm for 3658mm 12 ft ceiling 1762 For any other problems please call help line on NZ (09) 415 6000 or AUS1800 648 556 Chimney Extensions (990mm ... -
Page 10: Important Safety Information
Product Approvals and Ratings Product rating 285W Max at 240V 50Hz Electric approval 60335.2.31 AS/NZS Important safety information This appliance is not intended for use by persons (including children) with reduced physical, sensory or mental capabilities, or lack of experience and knowledge, unless they have been given supervision or instruction concerning use of the appliance by a person responsible for their safety. - Page 11 The following conditions apply in respect of the warranty given in this certificate: 1. Monaco Corporation Limited (“Monaco”) warrants the following Robinhood products against manufacturing defects and faulty materials, under normal use and subject to the exclusions in this certificate, for a period of: Rangehood, Ovens, Cooktops, Dishwashers - 24 months from date of original purchase for domestic use.
- Page 12 The product was used outdoors. 2. All Robinhood Rangehoods are suitable for indoor use only and not suitable over BBQs or charcoal cookers designed for outdoor use. 3. In addition, this warranty does not extend to damage or defects which in our opinion, directly or indirectly arise from or are due to: exposing the product to acidic or corrosive materials or chemicals such as dyes, solvents, denture cleaner or acetone;...
Need help?
Do you have a question about the RWA3CL9SS and is the answer not in the manual?
Questions and answers