Table of Contents
Advertisement
Quick Links
CSN-A2 Series Panel Printer's
Notice: This technical specifications are subject to change without notice,ask Xiamen cashino
technology Co.,Ltd. for the latest version
User Manual
Draw up: Lin Xiaopeng 2017.04.06
Audit: Hu Riyu 2017.04.08
standardization:Liu Zhonghua 2017.04.09
Approved: Wang Huanyong 2017.04.11
A2 User Manual
1
Advertisement
Table of Contents

Subscribe to Our Youtube Channel
Related Manuals for Cashino CSN-A2 Series


Summary of Contents for Cashino CSN-A2 Series
- Page 1 CSN-A2 Series Panel Printer's User Manual Draw up: Lin Xiaopeng 2017.04.06 Audit: Hu Riyu 2017.04.08 standardization:Liu Zhonghua 2017.04.09 Approved: Wang Huanyong 2017.04.11 Notice: This technical specifications are subject to change without notice,ask Xiamen cashino technology Co.,Ltd. for the latest version...
- Page 2 A2 User Manual REVISON RECORD Page Data Modify the content Prepared by Review number 20170406 First draft Lin Xiaopeng Hu Riyu Add settings, cancel Zhu Chunyan Hu Riyu 20180416 characters upside down 20180416 Printer parameter Zhu Chunyan Hu Riyu Modify the size of the 20180523 Zhu Chunyan Hu Riyu...
-
Page 3: Table Of Contents
A2 User Manual Content Content..................................3 1.Product Description............................5 2.Feature..................................5 3.Product specification............................5 3.1Printer dimention............................5 3.2Installation method........................... 5 4.Printer Parameter..............................6 5.Paper roll placement............................6 6.Description for interface pin definition ( three type interface )..............7 7. How to operate the Panel of Printer........................9 7.1 the instruction of LED indicator light.....................9 7.2. - Page 4 A2 User Manual Print downloaded bitmap........................27 Define NV bitmap..........................28 Print NV bitmap.............................31 ④Tab Commands..........................32 Horizontal tab............................32 Horizontal tab position setting......................33 ⑤One-dimension bar code command....................34 1D bar code readable character(HRI) print position setting............34 1D bar code height setting........................34 1D bar code width setting........................
-
Page 5: Product Description
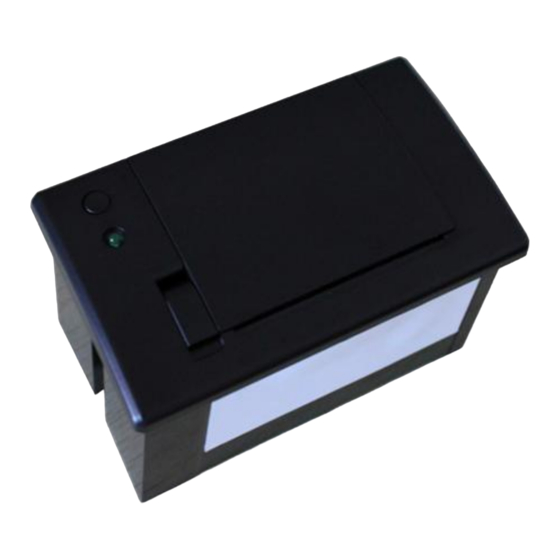
A2 User Manual 1.Product Description Name:Micro panel thermal printer Model:A2 Installation Port Size:103.3(W)*57.3(H)mm Insert Depth:50mm Application:Medical equipment, Measuring equipment, Security equipment, Analyzing Instrument & Meter 2.Feature ① Elegant style ②Support for ESC/POS print command ③Easy paper loading ④Low noise, thermal printing ⑤Multi-interface optional ⑥Easy to embed in all kinds of instruments 3.Product specification... -
Page 6: Printer Parameter
A2 User Manual Put the printer into the front of device as the picture 1 and picture 2 , Install the fixed block from the back, lock the screw as the picture 3 Note: the machine panel could be adjusted the thickness range from 1 to 6CM Picture 1 Picture 2 Picture 3... -
Page 7: Description For Interface Pin Definition ( Three Type Interface )
A2 User Manual 6.Description for interface pin definition ( three type interface ) Type 1 : CSN-A2-T/R standard model Interface Direction Description Ground POWER Voltage 5-9V or 12V Ground RS232/TTL Receive data Transfer data... - Page 8 A2 User Manual Type 2: CSN-A2-T/R as oprtional Direction Description Ground Receive data Transfer data RTS/DTR Request to send/Data terminal ready Voltage 5-9V or 12V Type 3: CSN-A2-RU/TU as opitonal Interface Direction Description Ground POWER Voltage 5-9V or 12V Ground RS232/TTL Receive data Transfer data...
-
Page 9: How To Operate The Panel Of Printer
A2 User Manual 7. How to operate the Panel of Printer 7.1 the instruction of LED indicator light Power on, the indicator light will flash 2 times, interval 1sec, it say the startness is OK, and then the instructions for the indicator light as below: Blink once: Work well (Stay lit for some customized board) Blink twice:... -
Page 10: Command Details
A2 User Manual ESC ? n Delete customized character ESC R n Select International character ESC t n Select the character code page ESC * Bitmap vertical modulus data fillings GS v 0 Bitmap horizontal modulus data print GS * Define download bitmap Graphic print commands GS / m... -
Page 11: Enter
A2 User Manual model Notes None Example None Enter Name Enter ASCII :CR Code DEC :13 HEX :0D Function Adjust print position to initial position of the same line. Range None Defaults None Support Model After executing, R command, the new printing data will cover old data Notes in the printing buffer. -
Page 12: Set Line Space As N Dots
A2 User Manual Set line space as n dots Set line space as n dots Name ASCII :ESC 3 n Code :27 51 n :1B 33 n Function Set line space as n dots Range 0 ≤ n ≤ 255 Defaults n = 33 Support Model... -
Page 13: Set Left Margin
A2 User Manual ASCII :ESC $ nL nH Code DEC :27 36 nL nH HEX :1B 24 nL nH Function Set left side blank area as(nL + nH × 256)dots 0 ≤ nL ≤ 255 Range 0 ≤ nH ≤ 255 Defaults None Support Model... -
Page 14: Set Character Size
A2 User Manual Bit Function Value 0 Font Normal Small character 1 Undefined 2 Undefined 3 Bold Cancel Setting 4 Double hight Cancel Setting 5 Double width Cancel Setting 6 Undefined 7 Underline Cancel Setting Range None Defaults n = 0 Support Model The command is effective with Chinese and foreign languages. -
Page 15: Set、Remove White Printing
A2 User Manual width height 1(Normal) 1(Normal) 2(double width) 2(double height) Range None Defaults n = 0 Support Model This command is effective with Chinese and other foreign languages, Notes except for HRI character. The command setting is disable when ESC@, printer reset or power off. 1b 40 1d 21 11 Example 30 31 32 0d 0a... -
Page 16: Set、Remove Underline
A2 User Manual 1b 40 1d 42 01 Example 30 31 32 0d 0a 30 31 32 0d 0a remove underline 、 Set、 remove underline Name ASCII :ESC - n :27 45 n Code :1B 2D n Set / remove underline mode,based on the value of n as follow: Functions 0, 48 Function... -
Page 17: Set、Remove 90°Revolving Printing
A2 User Manual Notes None Example None remove 90°revolving printing 、 Set 、 remove 90°revolving printing Name ASCII :ESC V n Code :27 86 n :1B 56 n Set or remove 90° revolving printing Function When n is equal to 0 or 48,remove 90°revolving printing. When n is equal to 1 or 49,set 90°revolving printing. -
Page 18: Set Chinese Mode
A2 User Manual 30 31 32 0D 0A 1B 40 1B 61 00 30 31 32 0D 0A Set Chinese mode Name Set Chinese mode ASCII :FS & :28 38 Code :1C 26 Set Chinese mode Function Range None Defaults None Support Model When the Chinese character mode is selected, the printer processes all... -
Page 19: Define User Customized Characters
A2 User Manual When cancel customized characters , automatically select the internal Notes character set. Example None Define user customized characters Name Define user customized characters ASCII :ESC & y c1 c2 [x1 d1 ... d (yx1)] ... [xk d1 ... d(y x k)] Code :27 38 y c1 c2 [x1 d1 ... - Page 20 A2 User Manual d1= <0F>H d4 = <30>H d7 = <40>H ..d2 = <03>H d5 = <80>H d8 = <40>H ..d3 = <00>H d6 =<00>H d9 = <20>H ..①y = 2 1B 40 1b 26 02 20 20 06 FF FF FF FF FF FF FF FF FF FF FF FF...
-
Page 21: Cancel User Customized Characters
A2 User Manual 20 20 0D 0A 1b 3f 20 30 20 30 20 0d 0a Cancel user customized characters Name Cancel user customized characters ASCII :ESC ? n :27 63 n Code :1B 3F n Function Cancel user customized characters of specified code by n Range 32 ≤... -
Page 22: Select Character Code
A2 User Manual China Range 0 ≤ n ≤ 15 Defaults Support Model Notes 1B 40 1B 52 00 20 21 22 23 24 25 26 27 28 29 2A 2B 2C 2D 2E 2F 30 31 32 33 34 35 36 37 38 Example 39 3A 3B 3C 3D 3E 3F 40 41 42 43 44 45 46 47 48 49 4A 4B 4C 4D 4E 4F 50 51 52 53 54 55 56 57 58 59 60 6A 6B 6C 6D 6E 6F 70 71 72 73 74 75 76 78 79... -
Page 23: ③Graphic Printing Command
A2 User Manual WCP1257 [Baltic] Thai CP720[Arabic] CP855 CP857[Turkish] WCP1250[Central Europe] CP775 WCP1254[Turkish] WCP1255[Hebrew] WCP1256[Arabic] WCP1258[Vietnam] ISO-8859-2[Latin 2] ISO-8859-3[Latin 3] ISO-8859-4[Baltic] ISO-8859-5[Cyrillic] ISO-8859-6[Arabic] ISO-8859-7[Greek] ISO-8859-8[Hebrew] ISO-8859-9[Turkish] ISO-8859-15 [Latin 9] Thai2 CP856 Cp874 CP932 SHIFT_JIS UNICODE UCS-2 BIG5 Range 0 ≤ n ≤ 255 Defaults Support Model Notes... - Page 24 A2 User Manual Name Fill Graphics vertical module data ASCII :ESC * m Hl Hh [d]k Code :27 42 m Hl Hh [d]k HEX :1B 2A m Hl Hh [d]k Print vertical module graphic data,the parameters are as below: m is bit map format: mode horizontal scale vertical scale...
-
Page 25: Print Graphics Horizontal Module Data
A2 User Manual only after receiving the printing commands.Printing buffer will be cleared after graphic printing. If you need to print higher graphics,you can divide it into several sections which has 8(m = 0、1)or 24(m = 32、33)dots graphics to print. After filling graphic data,you can continue to fill other information to make graphic and other information print simultaneously. -
Page 26: Define Downloaded Bitmap
A2 User Manual 1≤ xL + xH×256 ≤ 72 0 ≤ yL ≤ 255,0 ≤ yH ≤ 255 0 ≤ d ≤ 255 k = (Hl + Hh×256)×(yL + yH×256) Defaults None Support Model [d] k corresponding bit is 1,which means that this bit can print. While it is 0,it means that this bit can not print. -
Page 27: Print Downloaded Bitmap
A2 User Manual If x*y is out of the specified range, this command will be forbidden. The d indicates bitmap data. Data (d) specifies the printing bit as 1 and the not printing bit as 0. The downloaded bitmap definition will be cleared when: ESC @ is executed. -
Page 28: Define Nv Bitmap
A2 User Manual Model 0, 48 Normal 1, 49 Double-width 2, 50 Double-height 3, 51 Quadruple 0 ≤ m ≤ 3 Range 48 ≤ m ≤ 51 Defaults None Support Model this command will be ignored if the bitmap data has not been defined. In standard mode, this command is effective only when there is no data in the buffer area. - Page 29 A2 User Manual Frequent writing command executions may damage the NV memory. Therefore, it is recommended to write the NV memory no more than 10 times per day. The printer performs a hardware reset operation after the procedure of placing the image into the NV memory. Therefore, user-defined characters, downloaded bitmaps should be defined only after completing this command.
- Page 30 A2 User Manual d1...dk]. Therefore, when only one NV bitmap is defined n=1, the printer processes a data group [xL xH yL yH d1...dk] once. The printer uses ([data:(xLxH×256)×(yL yH×256)×8] [header :4]) bytes of NV memory. The definition area in this printer is a maximum of 192K bytes. This command can define several NV bitmaps, but cannot define bitmap data whose total capacity [bitmap data header] exceeds 192K...
-
Page 31: Print Nv Bitmap
A2 User Manual 1B 40 1C 71 01 03 00 03 00 FF FF FF FF FF FF FF FF FF FF FF FF FF FF FF FF FF FF FF FF FF FF FF FF Example FF FF FF FF FF FF FF FF FF FF FF FF FF FF FF FF FF FF FF FF FF FF FF FF FF FF FF FF FF FF FF FF FF FF FF FF FF FF FF FF FF FF FF FF FF FF FF FF... -
Page 32: ④Tab Commands
A2 User Manual :28 112 n m HEX :1C 70 n m Print NV bitmap n using the mode specified by m. Mode 0, 48 Normal Function 1, 49 Double-width 2, 50 Double-height 3, 51 Quadruple 0 ≤ m ≤ 3 Range 48 ≤... -
Page 33: Horizontal Tab Position Setting
A2 User Manual HEX :09 Function Move the print position to the next tab position Range None Defaults None Support model Tab position set by ESC D If the tab position is not set(the default is no horizontal position),this Notes command will be treated as an LF command If the tab position exceeds the print area,the coordinates will move to the star position of the next line(as the data is full,print and wrap) -
Page 34: ⑤One-Dimension Bar Code Command
A2 User Manual Example 1B 44 04 06 08 0A 00 09 30 09 31 09 32 09 33 0D 0A ⑤One-dimension bar code command 1D bar code readable character(HRI) print position setting Name 1D bar code readable character(HRI)print position setting ASCII :GS H n Code... -
Page 35: Bar Code Printing
A2 User Manual ASCII :GS w n Code :29 119 n HEX :1D 77 n Parameter n specifies the unit of a bar code in dots: Function Range 1 ≤ n ≤ 6 Defaults n = 2 Support model Noted The command setting will be valid after ESC @、printer reset、power off Example None... - Page 36 A2 User Manual d1 = 48 ] JAN13 fixed k = 12,13 48≤d≤57 (EAN13) JAN8 fixed k = 7,8 48≤d≤57 (EAN8) 48≤d≤57, chan 0~9,A~Z 65≤d≤90, CODE39 geab 1≤k SP,$,%,*, d = 32, 36, 37, +,-,.,/ 42,43,45, 46,47 chan 2≤k≤255 (Interlea geab 48≤d≤57 (even...
- Page 37 A2 User Manual 46,47 2≤n≤255 (Interlea 48≤d≤57 (even ved 2 of able numbers) 48≤d≤57, 65≤d≤68, 97≤d≤100, CODAB d = 36, 43, 45, 0~9, A~D, a~d 1≤n 46,47,58 $,+,-,.,/,: (NW-7) able (65≤d1≤68, 65≤dk≤68, 97≤d1≤100, 97≤dk≤100) CODE9 1≤n≤255 00H~7FH 0≤d≤127 able 00H~7FH 0≤d≤127 CODE1 1≤n≤255...
- Page 38 A2 User Manual automatically When print UPCE(m = 1 or 66),Please pay attention as following: The system character (NSC) 0 will be inserted automatically when data length is 6 The first system character (NSC) d1 must be 0 when the data length is 7,8,11 and 12.
- Page 39 A2 User Manual When print ITF25(m = 5 or 70), please pay attention as following: Initial character and terminator inserted automatically The check bit could not calculate and add automatically When print CODABAR (NW-7) (m = 6 or 71),please pay attention as following: Initial character and terminator could not inserted automatically,but manual addition by user, that the range from “A”~”D”...
-
Page 40: ⑥Status Querying Commands
A2 User Manual system inserted automatically,otherwise it will be wrong.For example,GS k 74 18 "019501234567890*", 01 is AI,the following will be wrong:GS k 74 18 "(01)9501234567890*" When user use the connection structure,need to insert FNC1(C1H”Decimal=193”) in the middle.The input example as following: GS k 74 18 "019501234567890*"... -
Page 41: Real-Time Transmission Status
A2 User Manual This command is executed when data is generated in the print buffer.Therefore, there may be a time interval between receiving the command and sending status, depending on the status of the receiving buffer. When Auto Status Back (ASB) is enabled using GS a, the status transmitted by GS r and the ASB status must be differentiated using. - Page 42 A2 User Manual Support model •Printer return to the relative status immediately after receiving the command • this command try not to put in command list between 2 or more bite . Though printer being forbid by ESC=,this command still effective. Printer transmit current situation ,each situation show by 1 bite data.
- Page 43 A2 User Manual Turn off upper cover Open upper cover Not press feed key press feed key Fixed to be 1 Paper adequate Paper shortage No error Error Fixed to be 0 n=3:transmit error status bite 0 Hexadecim decimalis Function Fixed to be 0 Fixed to be 1 Undefined...
-
Page 44: ⑦Printing Qr Code
A2 User Manual When the printing head temperature drops,the error will be automatically recovered. n=4:paper sensor status bite Hexadecim decimalis Function Fixed to be 0 Fixed to be 1 2, 3 0 Paper Paper near-end Fixed to be 1 5, 6 0 Paper Paper end Fixed to be 0... -
Page 45: Setting Error Correction Level Of 2-D Bar Code
A2 User Manual Support model Notes Setting mode type of QR code to [n dot × n dot]. Example None Name Mode type of QR code Setting error correction level of QR code Name Setting error correction level of QR code ASCII :GS ( pL pH cn fn n... -
Page 46: Printing Two-Dimension Bar Code
A2 User Manual m=48 0 ≤ d ≤ 255 k = (pL + pH×256 ) - 3 Defaults Support model Store QR code data (d1...dk) to data buffer. Notes ((pL + pH×256) - 3) bytes is processed as a graphic data after the m (d1... - Page 47 A2 User Manual Setting two-dimension bar code graph information The detailed graph information is as follows: Transmit data Hexadecim Decimal Data type Header 1byte Flag 1byte Width 30H-39H 48-57 1-5byte Separator 1byte Height 30H-39H 48-57 1-5byte Separator 1byte Function Fixed Value 1byte Separator 1byte...
- Page 48 A2 User Manual r: describes e rror correction rank describes nL nH: data length describes d1…dk: two dimensional code to be printed 0 ≤ v ≤ 17 Range 1 ≤ r ≤ 4 k = nL + 256 * nH Defaults None Support model...
-
Page 49: ⑧Other Commands
A2 User Manual 00 20 00 0a 01 06 30 31 32 33 34 35 36 37 38 39 00 C0 00 0a 02 00 39 38 37 36 35 34 33 32 31 30 Other commands ⑧ Printer reset Name Printer reset ASCII...
Need help?
Do you have a question about the CSN-A2 Series and is the answer not in the manual?
Questions and answers