Table of Contents
Advertisement
Quick Links
Automation PC 910
User's Manual
Version: 1.00 (November 2012)
Model no.: MAAPC900-ENG
All information contained in this manual is current as of its creation/publication. We reserve the right to change
the contents of this manual without warning. The information contained herein is believed to be accurate
as of the date of publication; however, Bernecker + Rainer Industrie-Elektronik Ges.m.b.H. makes no war-
ranty, expressed or implied, with regard to the products or the documentation contained within this book.
Bernecker + Rainer Industrie-Elektronik Ges.m.b.H. shall not be liable in the event of incidental or consequential
damages in connection with or arising from the furnishing, performance or use of these products. The software
names, hardware names, and trademarks used in this document are registered by the respective companies.
1
Advertisement
Table of Contents

Related Manuals for B&R Automation PC 910


Summary of Contents for B&R Automation PC 910
- Page 1 Automation PC 910 User's Manual Version: 1.00 (November 2012) Model no.: MAAPC900-ENG All information contained in this manual is current as of its creation/publication. We reserve the right to change the contents of this manual without warning. The information contained herein is believed to be accurate as of the date of publication;...
- Page 2 Chapter 1: General information Chapter 2: Technical data Chapter 3: Commissioning Chapter 4: Software Chapter 5: Accessories Chapter 6: Maintenance / Service Appendix A...
-
Page 3: Table Of Contents
2.5.3 Serial interface COM1......................... 35 2.5.4 Monitor / panel connection........................36 2.5.5 DisplayPort............................37 2.5.6 Ethernet 1 (ETH1)..........................38 2.5.7 Ethernet 2 (ETH2)..........................38 2.5.8 USB ports..............................39 2.5.9 IF option 1 slot............................40 2.5.10 IF option 2 slot............................40 Automation PC 910 User's Manual V 1.00... - Page 4 1.3.2 Mounting orientation - Horizontal......................89 1.4 Spacing for air circulation...........................90 2 Cable connections............................91 3 Grounding concept............................92 Chapter 4 Software....................93 1 Windows 7................................93 1.1 General information............................ 93 1.2 Order data..............................93 1.3 Overview..............................93 Automation PC 910 User's Manual V 1.00...
- Page 5 4 USB flash drive.............................111 4.1 5MMUSB.2048-01............................ 111 4.1.1 General information..........................111 4.1.2 Order data............................111 4.1.3 Technical data.............................111 4.1.4 Temperature humidity diagram......................112 5 USB Media Drive............................113 5.1 5MD900.USB2-02.............................113 5.1.1 General information..........................113 5.1.2 Order data............................113 Automation PC 910 User's Manual V 1.00...
- Page 6 3 Installation - Monitor / panel option....................... 143 4 Slide-in compact drive installation / replacement..................147 5 Slide-in drive installation / replacement......................149 6 Fan filter replacement............................ 151 7 Fan kit replacement............................152 Appendix A ......................154 1 Abbreviations..............................154 Automation PC 910 User's Manual V 1.00...
-
Page 7: Chapter 1 General Information
• The bus units 5AC901.BX01-01 and 5AC901.BX02-01 were updated, see " Bus units" on page 61. • "CFast cards" on page 108 added. • USB Media Drive "5MD900.USB2-02" on page 113 added. • Automation PC 910 User's Manual V 1.00... -
Page 8: Safety Guidelines
Electronic devices are never completely failsafe. In the event of a failure on the programmable control system, operating/monitoring device or uninterruptible power supply, the user is responsible for ensuring that other devices that may be connected, e.g. motors, are brought to a safe state. Automation PC 910 User's Manual V 1.00... -
Page 9: Transport And Storage
(e.g. diskette, CD-ROM, USB flash drive, etc.), a network connection or the Internet. The user is responsible for assessing these dangers, implementing preventive measures such as virus protection programs, firewalls, etc. and making sure that software is only obtained from trusted sources. Automation PC 910 User's Manual V 1.00... -
Page 10: Environmentally Friendly
Uninterruptible power supply Batteries & rechargeable batteries Cables Cardboard box / paper packaging Paper / cardboard recycling Plastic packaging Plastic recycling Table 1: Environmentally friendly separation of materials Disposal must comply with applicable legal regulations. Automation PC 910 User's Manual V 1.00... -
Page 11: Organization Of Safety Notices
For 6 to 30 mm ±0.2 mm For 30 to 120 mm ±0.3 mm For 120 to 400 mm ±0.5 mm For 400 to 1000 mm ±0.8 mm Table 3: Nominal measurement areas Automation PC 910 User's Manual V 1.00... -
Page 12: Overview
RS232 extension cable for remote operating of a display unit with touch screen, 5 m. 9A0014.10 RS232 extension cable for remote operating of a display unit with touch screen, 10 m. SDL cable - 45° connector 5CASDL.0018-01 SDL cable; 45° connector, 1.8 m. Automation PC 910 User's Manual V 1.00... - Page 13 5SWWXP.0600-GER Microsoft OEM Windows XP Professional Service Pack 3, CD, German. Only available with a device. 5SWWXP.0600-MUL Microsoft OEM Windows XP Professional Service Pack 3, CD, multilanguage. Only available with a B&R device. Automation PC 910 User's Manual V 1.00...
-
Page 14: Chapter 2 Technical Data
10 years – quite the exception in the otherwise fast-paced PC sector and a significant advantage for the user. The third generation of Automation PCs, represented by the APC910, proves once again that innovation Automation PC 910 User's Manual V 1.00... -
Page 15: Features
• Wide range of interface options • Wide range of monitor/panel options A CFast adapter allows multiple CFast cards to be used. This depends on the respective system unit. Dependent on the device configuration and ambient temperature Automation PC 910 User's Manual V 1.00... -
Page 16: System Components / Configuration
5AC901.FA01-00 5AC901.FA02-00 Main memory Select one or two 5MMDDR.1024-03 5MMDDR.4096-03 5MMDDR.2048-03 5MMDDR.8192-03 Figure 1: Configuration - Base system with fan kit A fan kit is only mandatory when using the heat sink 5AC901.HS00-00. Automation PC 910 User's Manual V 1.00... - Page 17 HM76 CPU boards 5PC900.TS77-01 5PC900.TS77-04 5PC900.TS77-07 5PC900.TS77-02 5PC900.TS77-05 5PC900.TS77-08 5PC900.TS77-03 5PC900.TS77-06 Heat sink Select one 5AC901.HS01-00 Main memory Select one or two 5MMDDR.1024-03 5MMDDR.4096-03 5MMDDR.2048-03 5MMDDR.8192-03 Figure 2: Configuration - Base system without fan kit Automation PC 910 User's Manual V 1.00...
-
Page 18: Configuration - Accessories And Software
5SWWXP.0600-MUL 1) Certain limitations must be taken into account when using IF options. For more information, please refer to "Chapter 2 Technical data", section "Device interfaces". Figure 3: Configuration - Accessories and software Automation PC 910 User's Manual V 1.00... -
Page 19: Complete Device
• BurnInTest tool (BurnInTest V4.0 Pro from Passmark Software) for simulating a 100% load on the interface via loop back adapters (serial interfaces, slide-in drives, USB ports, audio outputs) • Maximum system expansion and power consumption Automation PC 910 User's Manual V 1.00... -
Page 20: Maximum Ambient Temperature
2.1.1 Maximum ambient temperature Operation with a fan kit Information: The heat sink 5AC901.HS00-00 must be used when operating the Automation PC 910 with a fan kit. Operation with a fan kit All temperature values in degrees Celsius (°C) at 500 meters above sea level. -
Page 21: Minimum Ambient Temperature
Information: The 5PC900.TS77-00 CPU board cannot be used when operating without a fan kit. The heat sink 5AC901.HS01-00 must be used when operating the Automation PC 910 without a fan kit. Operation without a fan kit All temperature values in degrees Celsius (°C) at 500 meters above sea level. -
Page 22: Temperature Monitoring
The measured temperature approximates the immediate ambient temperature, but can be influenced by neighboring components. The ADI driver containing the B&R Control Center is available in the Downloads section of the B&R website (www.br-automation.com). Automation PC 910 User's Manual V 1.00... -
Page 23: Humidity Specifications
The listed specifications correspond to the relative humidity at an ambient temperature of 30°C. More detailed information about the specific temperature-dependent humidity values can be found in the technical data for the individual components. Automation PC 910 User's Manual V 1.00... -
Page 24: Power Management
The following block diagram presents the simplified structure of the APC910 supply voltage for system units. 3V3 standby Supply voltage +24 VDC electrically isolated Capacitor UPS IF option UPS battery (optional) electrically isolated Figure 5: Supply voltage for system units Automation PC 910 User's Manual V 1.00... -
Page 25: Power Calculation With 5Pc910.Sx01-00
Model number +5 V Interface option 5AC901.I485-00 5AC901.ICAN-00 5AC901.IHDA-00 0.2 W 0.2 W Monitor / Panel option 5AC901.LDPO-00 5AC901.LSDL-00 Table 9: Power rating table for interface and monitor / panel options Automation PC 910 User's Manual V 1.00... -
Page 26: Power Calculation With 5Pc910.Sx02-00
Model number +5 V Interface option 5AC901.I485-00 5AC901.ICAN-00 5AC901.IHDA-00 0.2 W 0.2 W Monitor / Panel option 5AC901.LDPO-00 5AC901.LSDL-00 Table 11: Power rating table for interface and monitor / panel options Automation PC 910 User's Manual V 1.00... -
Page 27: Block Diagram
Link LED Run LED Interface directed outwards Interface - optional or internal Button Button Green / red Yellow Yellow Green / red Figure 6: System unit 5PC910.SX01-00 + bus unit 5AC901.BX01-00 block diagram Automation PC 910 User's Manual V 1.00... -
Page 28: System Unit 5Pc910.Sx01-00 + Bus Unit 5Ac901.Bx01-01
Link LED Run LED Interface directed outwards Interface - optional or internal Button Button Green / red Yellow Yellow Green / red Figure 7: System unit 5PC910.SX01-00 + bus unit 5AC901.BX01-01 block diagram Automation PC 910 User's Manual V 1.00... -
Page 29: System Unit 5Pc910.Sx02-00 + Bus Unit 5Ac901.Bx02-00
Link LED Run LED Interface directed outwards Interface - optional or internal Button Button Green / red Yellow Yellow Green / red Figure 8: System unit 5PC910.SX02-00 + bus unit 5AC901.BX02-00 block diagram Automation PC 910 User's Manual V 1.00... -
Page 30: System Unit 5Pc910.Sx02-00 + Bus Unit 5Ac901.Bx02-01
Link LED Run LED Interface directed outwards Interface - optional or internal Button Button Green / red Yellow Yellow Green / red Figure 9: System unit 5PC910.SX02-00 + bus unit 5AC901.BX02-01 block diagram Automation PC 910 User's Manual V 1.00... -
Page 31: Monitor / Panel Options
2.4.5 Monitor / panel options DisplayPort transmitter DisplayPort transmitter FPGA Link Figure 10: DisplayPort transmitter 5AC901.LDPO-00 block diagram SDL / DVI transmitter Smart Display Link/DVI transmitter FPGA Link Figure 11: Smart Display Link/DVI transmitter 5AC901.LSDL-00 block diagram Automation PC 910 User's Manual V 1.00... -
Page 32: Device Interfaces
2.5.1 Overview of device interfaces Status LEDs: Power, HDD, Link, Run Power button Reset button USB5 CFast slot Storage tray for CFast card Battery Fan kit insert Figure 12: Device interfaces - Overview (front) Automation PC 910 User's Manual V 1.00... - Page 33 USB2 DisplayPort USB1 RS232 (COM1) Ethernet 1 (ETH1) Ethernet 2 (ETH2) USB4 USB3 Status LEDs: Power, HDD, Link, Run * Depends on the bus unit used Figure 13: Device interfaces - Overview (top) Automation PC 910 User's Manual V 1.00...
-
Page 34: Supply Voltage +24 Vdc
The M4 self-locking nut can be used, for example, to fasten a copper strip that is built into the APC910 at a central grounding point in the control cabinet or system. The largest possible conductor cross section should be used (at least 2.5 mm²). Automation PC 910 User's Manual V 1.00... -
Page 35: Serial Interface Com1
Table 13: Pin assignments - COM1 The interfaces, etc. available on the device or module have been numbered as such for easy identification. This numbering can differ from that used by the particular operating system. Automation PC 910 User's Manual V 1.00... -
Page 36: Monitor / Panel Connection
5CASDL.0100-03 5CASDL.0100-03 5CASDL.0150-00 5CASDL.0150-00 5CASDL.0150-00 5CASDL.0150-00 5CASDL.0150-01 5CASDL.0150-01 5CASDL.0150-01 5CASDL.0150-01 5CASDL.0150-03 5CASDL.0150-03 5CASDL.0150-03 5CASDL.0150-03 5CASDL.0150-03 5CASDL.0200-00 5CASDL.0200-00 5CASDL.0200-00 5CASDL.0200-00 5CASDL.0200-03 5CASDL.0200-03 5CASDL.0200-03 5CASDL.0200-03 5CASDL.0200-03 Table 16: Cable lengths and resolutions for SDL transfer Automation PC 910 User's Manual V 1.00... -
Page 37: Displayport
Ground 18 DP_HPD# Hot Plug detect DisplayPort lane 2 DP_LANE2- 19 RETURN Return for power (negative) DisplayPort lane 3 10 DP_LANE3+ 20 DP_PWR Power for connector (positive) Table 19: Pin assignments - DisplayPort Automation PC 910 User's Manual V 1.00... -
Page 38: Ethernet 1 (Eth1)
A special driver is required in order to operate the Ethernet controller. Drivers for approved operating systems are available in the Downloads area of the B&R website (www.br-automation.com). Information: Required drivers can only be downloaded from the B&R homepage, not from manufacturers' pages. Automation PC 910 User's Manual V 1.00... -
Page 39: Usb Ports
The interfaces, etc. available on the device or module have been numbered as such for easy identification. This numbering can differ from that used by the particular operating system. Each USB port is secured with a maintenance-free "USB current-limiting circuit breaker" (max. 1 A). Automation PC 910 User's Manual V 1.00... -
Page 40: If Option 1 Slot
Technical data • Complete device 2.5.9 IF option 1 slot Automation PC 910 system units include 2 slots for interface options. IF option 1 slot Model number Short description Interface option 2 Interface option 5AC901.I485-00 RS232/422/485 interface option; for installation in an APC910 5AC901.ICAN-00... -
Page 41: Card Slot (Pci / Pcie)
They cannot exceed the following dimensions. 177.7 17.4 25.8 Figure 15: Dimensions - Standard half-size 32-bit PCI card 167.65 11.65 3.65 49.65 57.15 59.05 Figure 16: Dimensions - Standard half-size PCIe card Automation PC 910 User's Manual V 1.00... -
Page 42: Status Leds
Handled by Automation Runtime (ARemb and ARwin) Green Application running Handled by Automation Runtime (ARemb and ARwin) Application in service mode Handled by Automation Runtime (ARemb and ARwin) Table 26: Data - Status LEDs Automation PC 910 User's Manual V 1.00... -
Page 43: Power Button
Pushing the reset button triggers a hardware and PCI reset. The APC910 is restarted (cold restart). Pressing the reset button does not reset the MTCX processor. Power button Reset button Table 28: Reset button Warning! A system reset can result in lost data! Automation PC 910 User's Manual V 1.00... -
Page 44: Battery
5CFAST.8192-00 CFast card, 8 GB CFast slot 5CFAST.016G-00 CFast card, 16 GB 5CFAST.032G-00 CFast card, 32 GB Table 31: CFast slot Warning! Power must be turned off before inserting or removing CFast cards! Automation PC 910 User's Manual V 1.00... -
Page 45: Slide-In Compact Slot
The slide-in compact slot cannot be accessed from the outside. The side panel must be removed in order to exchange a drive. For information about replacing or exchanging an slide-in compact drive, please refer to the section "Slide-in compact drive installation / replacement" on page 147. Automation PC 910 User's Manual V 1.00... -
Page 46: Individual Components
0TB103.91 Connector, 24 VDC, 3-pin female, cage clamps 3.31 mm², pro- tected against vibration by the screw flange Optional accessories Table 33: 5PC910.SX01-00 - Order data Automation PC 910 User's Manual V 1.00... - Page 47 Shielded RJ45 port Transfer rate 10/100/1000 Mbit/s Max. baud rate 1 Gbit/s DisplayPort Quantity Version Panel/Monitor interface Design DVI-I socket Type SDL/DVI/Monitor Inserts PCI / PCIe slots Table 34: 5PC910.SX01-00 - Technical data Automation PC 910 User's Manual V 1.00...
- Page 48 Derating the maximum ambient temperature - typically 1°C per 1000 meters (from 500 meters above sea level). Depending on the process or batch, there may be visible deviations in the color and surface structure. Automation PC 910 User's Manual V 1.00...
- Page 49 Technical data • Individual components Dimensions 1.95 254.75 Figure 17: 5PC910.SX01-00 - Dimensions Automation PC 910 User's Manual V 1.00...
- Page 50 Technical data • Individual components Drilling template 56.5 21.5 ø5.5 ø11 Figure 18: 5PC910.SX01-00 - Drilling template Automation PC 910 User's Manual V 1.00...
-
Page 51: 5Pc910.Sx02-00
32 GB SATA SSD (SLC), Slide-in compact 5AC901.CSSD-01 60 GB SATA SSD (MLC), Slide-in compact 5AC901.CSSD-02 180 GB SATA SSD (MLC), Slide-in compact 5AC901.SDVW-00 DVD-R/RW DVD+R/RW SATA drive, Slide-in Fan kits Table 35: 5PC910.SX02-00 - Order data Automation PC 910 User's Manual V 1.00... - Page 52 DVI-I socket Type SDL/DVI/Monitor Inserts PCI / PCIe slots Quantity 2 PCI slots, or 1 PCI and 1 PCIe slot Slide-in drives Compact slide-in drive Interface option Table 36: 5PC910.SX02-00 - Technical data Automation PC 910 User's Manual V 1.00...
- Page 53 Derating the maximum ambient temperature - typically 1°C per 1000 meters (from 500 meters above sea level). Depending on the process or batch, there may be visible deviations in the color and surface structure. Automation PC 910 User's Manual V 1.00...
- Page 54 Technical data • Individual components Dimensions 1.95 254.75 Figure 19: 5PC910.SX02-00 - Dimensions Automation PC 910 User's Manual V 1.00...
- Page 55 Technical data • Individual components Drilling template 93.5 23.5 ø5.5 ø11 Figure 20: 5PC910.SX02-00 - Drilling template Automation PC 910 User's Manual V 1.00...
-
Page 56: Qm77 Cpu Boards
Number of cores Architectures 22 nm Intel® Smart Cache 6 MB 6 MB 4 MB 4 MB 3 MB 3 MB 3 MB Table 38: 5PC900.TS77-00, 5PC900.TS77-01, 5PC900.TS77-02, 5PC900.TS77-03, 5PC900.TS77-04, 5PC900.TS77-05, 5PC900.TS77-06 - Technical data Automation PC 910 User's Manual V 1.00... - Page 57 ACPI 4.0 with battery support Table 38: 5PC900.TS77-00, 5PC900.TS77-01, 5PC900.TS77-02, 5PC900.TS77-03, 5PC900.TS77-04, 5PC900.TS77-05, 5PC900.TS77-06 - Technical data At max. specified ambient temperature: typically 58 ppm (5 seconds) - worst-case 220 ppm (19 seconds). Automation PC 910 User's Manual V 1.00...
-
Page 58: Hm76 Cpu Boards
21.3 GB/s Graphics Controller Intel® HD Graphics 3000 Max. dynamic graphics frequency 800 MHz Color depth Max. 32-bit Resolution Resolution up to 1920 x 1200 (WUXGA) Table 40: 5PC900.TS77-07, 5PC900.TS77-08 - Technical data Automation PC 910 User's Manual V 1.00... - Page 59 Mass memory management 4x SATA Power management ACPI 4.0 with battery support Table 40: 5PC900.TS77-07, 5PC900.TS77-08 - Technical data At max. specified ambient temperature: typically 58 ppm (5 seconds) - worst-case 220 ppm (19 seconds). Automation PC 910 User's Manual V 1.00...
-
Page 60: Main Memory
512M x 64-bit 1024M x 64 bits Speed DDR3-1600 (PC3-12800) Certification Table 42: 5MMDDR.1024-03, 5MMDDR.2048-03, 5MMDDR.4096-03, 5MMDDR.8192-03 - Technical data Information: A main memory module can only be replaced at the B&R plant. Automation PC 910 User's Manual V 1.00... -
Page 61: Bus Units
Type 32-bit 32-bit 32-bit Design PCI half-size PCI half-size PCI half-size Standard Bus speed 33 MHz 33 MHz 33 MHz PCIe to PCI bridge Table 44: 5AC901.BX01-00, 5AC901.BX01-01, 5AC901.BX02-00, 5AC901.BX02-01 - Technical data Automation PC 910 User's Manual V 1.00... -
Page 62: Heat Sink
Intel Celeron M 827E CPU board, 1.4 GHz, single-core, 1.5 MB L2 cache; HM76 chipset; 2 sockets for SO-DIMM DDR3 mod- ules (total memory max. 16 GB) Table 45: 5AC901.HS00-00, 5AC901.HS01-00 - Order data Automation PC 910 User's Manual V 1.00... -
Page 63: Fan Kit
100,000 hours at 40°C (50x50x15) 100,000 hours at 40°C (70x70x15) Mechanical characteristics Dimensions Width 50 mm 70 mm Height 50 mm 70 mm Depth 15 mm 15 mm Table 47: 5AC901.FA01-00 - Technical data Automation PC 910 User's Manual V 1.00... -
Page 64: 5Ac901.Fa02-00
100,000 hours at 40°C (50x50x15) 100,000 hours at 40°C (70x70x15) Mechanical characteristics Dimensions Width 50 mm 70 mm Height 50 mm 70 mm Depth 15 mm 15 mm Table 49: 5AC901.FA02-00 - Technical data Automation PC 910 User's Manual V 1.00... -
Page 65: Drives
5 to 500 Hz: 0.25 g; no unrecoverable errors Operation (occasional) 5 to 500 Hz: 0.5 g; no unrecoverable errors Storage 10 to 500 Hz: 5 g; no unrecoverable errors Table 51: 5AC901.CHDD-00 - Technical data Automation PC 910 User's Manual V 1.00... - Page 66 24-hour operation means 732 POH (power-on hours) per month. Humidity gradient: Maximum 30% per hour. Slide-in compact mounting Temperature humidity diagram Storage Operation Transport Temperature [°C] Figure 21: 5AC901.CHDD-00 - Temperature humidity diagram Automation PC 910 User's Manual V 1.00...
-
Page 67: 5Ac901.Cssd-00
SSD Enhanced SMART ATA feature set Native Command Queuing (NCQ) command Environmental conditions Temperature Operation 0 to 70°C Storage -55 to 95°C Transport -55 to 95°C Relative humidity Table 53: 5AC901.CSSD-00 - Technical data Automation PC 910 User's Manual V 1.00... - Page 68 Table 53: 5AC901.CSSD-00 - Technical data IOPS: Random read and write input/output operations per second Slide-in compact mounting Temperature humidity diagram Storage Operation Transport Temperature [°C] Figure 22: 5AC901.CSSD-00 - Temperature humidity diagram Automation PC 910 User's Manual V 1.00...
-
Page 69: 5Ac901.Cssd-01
Temperature Operation 0 to 70°C Storage -55 to 95°C Transport -55 to 95°C Relative humidity Operation 5 to 95% Storage 5 to 95% Transport 5 to 95% Table 55: 5AC901.CSSD-01 - Technical data Automation PC 910 User's Manual V 1.00... - Page 70 Table 55: 5AC901.CSSD-01 - Technical data IOPS: Random read and write input/output operations per second Slide-in compact mounting Temperature humidity diagram Storage Operation Transport Temperature [°C] Figure 23: 5AC901.CSSD-01 - Temperature humidity diagram Automation PC 910 User's Manual V 1.00...
-
Page 71: 5Ac901.Cssd-02
Temperature Operation 0 to 70°C Storage -55 to 95°C Transport -55 to 95°C Relative humidity Operation 5 to 95% Storage 5 to 95% Transport 5 to 95% Table 57: 5AC901.CSSD-02 - Technical data Automation PC 910 User's Manual V 1.00... - Page 72 Table 57: 5AC901.CSSD-02 - Technical data IOPS: Random read and write input/output operations per second Slide-in compact mounting Temperature humidity diagram Storage Operation Transport Temperature [°C] Figure 24: 5AC901.CSSD-02 - Temperature humidity diagram Automation PC 910 User's Manual V 1.00...
-
Page 73: 5Ac901.Ccfa-00
General information Certification Interfaces CFast slot Quantity Environmental conditions Temperature Operation Storage Transport Relative humidity Operation 5 to 90% Storage 5 to 95% Transport 5 to 95% Table 59: 5AC901.CCFA-00 - Technical data Automation PC 910 User's Manual V 1.00... -
Page 74: Interface Options
Relative humidity Operation 5 to 90% Storage 5 to 95% Transport 5 to 95% Table 61: 5AC901.I485-00 - Technical data Detailed information can be found in the temperature tables in the user's manual. Automation PC 910 User's Manual V 1.00... - Page 75 Cable cross section 4x 0.25 mm² (24AWG/19), tinned Cu wire Wire insulation Conductor resistance ≤82 Ω/km Stranding Wires stranded in pairs Shield Paired shield with aluminum foil Table 66: RS422 - Cable requirements Automation PC 910 User's Manual V 1.00...
- Page 76 1x 0.34 mm² (22AWG/19), tinned Cu wire Wire insulation Conductor cross section ≤59 Ω/km Outer sheathing Material PUR mixture Features Halogen free Cable shielding From tinned cu wires Table 68: RS485 - Cable requirements Automation PC 910 User's Manual V 1.00...
- Page 77 (see Installation - Interface option, steps 1 to 4). An active terminating resistor is indicated by a yellow LED. Switch for Terminating resistor Terminating resistor LED Figure 26: 5AC901.I485-00 - Terminating resistor Automation PC 910 User's Manual V 1.00...
-
Page 78: 5Ac901.Ican-00
Relative humidity Operation 5 to 90% Storage 5 to 95% Transport 5 to 95% Table 70: 5AC901.ICAN-00 - Technical data Detailed information can be found in the temperature tables in the user's manual. Automation PC 910 User's Manual V 1.00... - Page 79 (see Installation - Interface option, steps 1 to 4). An active terminating resistor is indicated by a yellow LED. Switch for Terminating resistor Terminating resistor LED Figure 27: 5AC901.ICAN-00 - Terminating resistor Automation PC 910 User's Manual V 1.00...
-
Page 80: 5Ac901.Ihda-00
Relative humidity Operation 5 to 90% Storage 5 to 95% Transport 5 to 95% Table 73: 5AC901.IHDA-00 - Technical data Detailed information can be found in the temperature tables in the user's manual. Automation PC 910 User's Manual V 1.00... - Page 81 A special driver is required in order to operate the audio controller. Drivers for approved operating systems are available in the Downloads area of the B&R website (www.br-automation.com). Information: Required drivers can only be downloaded from the B&R homepage, not from manufacturers' pages. Automation PC 910 User's Manual V 1.00...
-
Page 82: 5Ac901.Isrm-00
Relative humidity Operation 5 to 90% Storage 5 to 95% Transport 5 to 95% Table 76: 5AC901.ISRM-00 - Technical data Detailed information can be found in the temperature tables in the user's manual. Automation PC 910 User's Manual V 1.00... -
Page 83: Monitor / Panel Options
Electrical characteristics Power consumption Environmental conditions Temperature Operation Storage Transport Relative humidity Operation Storage Transport Table 78: 5AC901.LDPO-00 - Technical data Detailed information can be found in the temperature tables in the user's manual. Automation PC 910 User's Manual V 1.00... - Page 84 Ground 18 DP_HPD# Hot Plug detect DisplayPort lane 2 DP_LANE2- 19 RETURN Return for power (negative) DisplayPort lane 3 10 DP_LANE3+ 20 DP_PWR Power for connector (positive) Table 79: Pin assignments - DisplayPort Automation PC 910 User's Manual V 1.00...
-
Page 85: 5Ac901.Lsdl-00
XUSB0 SHIELD USB0 GREEN 12 XUSB0- USB lane 0 (negative) C3 ANALOG BLUE Analog blue ANALOG Analog horizontal synchro- XUSB0+ USB lane 0 (positive) HORZ SYNC nization Table 82: Pinout - DVI connection Automation PC 910 User's Manual V 1.00... - Page 86 14 +5 V Power +5 V power supply C5 ANALOG GND G and B signals) Ground (return for +5 V, HSync Ground and VSync) Table 82: Pinout - DVI connection Protected internally by a multifuse Automation PC 910 User's Manual V 1.00...
-
Page 87: Front Covers
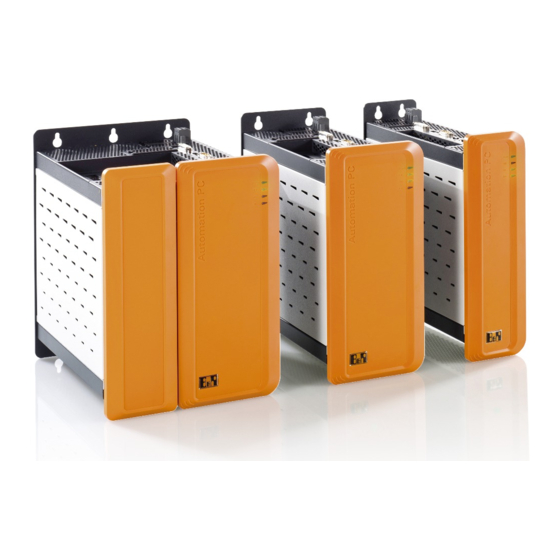
A front cover is available for each APC910 system unit model. Order data Model number Short description Figure Front cover 5AC901.FF01-00 APC910 front cover, 1 slot, orange 5AC901.FF02-00 APC910 front cover 2 slot, orange Table 83: 5AC901.FF01-00, 5AC901.FF02-00 - Order data Automation PC 910 User's Manual V 1.00... -
Page 88: Chapter 3 Commissioning
1. Drill the necessary holes in the control cabinet. The exact positioning of the mounting holes can be seen in the drilling templates. 2. Mount the B&R Industrial PC to the control cabinet using M5 screws. Automation PC 910 User's Manual V 1.00... -
Page 89: Mounting Orientation
Commissioning • Mounting 1.3 Mounting orientation The following diagrams show approved mounting orientations for the Automation PC 910 device. The APC910 system must be mounted as described in the following sections. 1.3.1 Mounting orientation - Vertical APC910 systems with and without fan kit can be mounted this way. -
Page 90: Spacing For Air Circulation
In order to guarantee sufficient air circulation, allow the specified amount of space above, below, to the side and behind the Automation PC 910 . The minimum specified spacing is indicated in the following diagrams. This applies for all Automation PC 910 variants. -
Page 91: Cable Connections
Figure 32: Flex radius - Cable connection Information: The specified flex radius can be found in the Automation Panel 800 or Automation Panel 900 User's Manual, which can be downloaded as a .PDF file from the B&R website (www.br-automation.com). Automation PC 910 User's Manual V 1.00... -
Page 92: Grounding Concept
• Note the line shielding concept, all connected data cables are used as shielded lines. Supply voltage Control cabinet Grounding strip Ground connection Min. 2.5 mm ² Min. 2.5 mm ² Figure 33: Grounding concept Automation PC 910 User's Manual V 1.00... -
Page 93: Chapter 4 Software
945GME Intel® 64-bit German Optional 20 GB 2 GB APC910 Core™2 Duo PPC800 GM45 QM77/HM76 5SWWI7.1200-ENG Professional APC810 945GME Intel® 64-bit English Optional 20 GB 2 GB APC910 Core™2 Duo PPC800 GM45 QM77/HM76 Automation PC 910 User's Manual V 1.00... -
Page 94: Installation
• Windows 7 does not contain a Beep.sys file, which means that audible signal is no longer played (i.e. when touching a key or button). • Windows 7 system classification is not currently supported (does not apply to PP500, APC510, APC511, APC910 or PPC800 with NM10 chipset). Automation PC 910 User's Manual V 1.00... -
Page 95: Windows Embedded Standard 7
16 GB 2 GB HM76 The memory space needed for additional language packs is not included in the minimum size specified for the data storage medium. 64-bit versions are not supported by all systems Automation PC 910 User's Manual V 1.00... -
Page 96: Features With Wes7 (Windows Embedded Standard 7)
Download area of the B&R website (www.br-automation.com). When doing so, be sure that the Enhanced Write Filter (EWF) or File Based Write Filter (FBWF) are not enabled. Information: Required drivers can only be downloaded from the B&R homepage, not from manufacturers' pages. Automation PC 910 User's Manual V 1.00... -
Page 97: Windows Xp Professional
The latest drivers for all approved operating systems can be found in the Download area (Service / Material-related downloads - BIOS / Drivers / Updates) of the B&R website (www.br-automation.com). Information: Required drivers can only be downloaded from the B&R homepage, not from manufacturers' pages. Automation PC 910 User's Manual V 1.00... -
Page 98: Windows Embedded Standard 2009
Windows Firewall ✓ MSN Explorer Outlook Express ✓ Administrative Tools ✓ Remote Desktop Remote Assistance .NET Framework ASP.NET ✓ OpenGL support ✓ Local Network Bridge Table 89: Device functions in Windows Embedded Standard 2009 Automation PC 910 User's Manual V 1.00... -
Page 99: Installation
All drivers required for operation are preinstalled on the operating system. If an older version of the driver is still being used, the latest version can be downloaded from the B&R website (www.br-automation.com) and installed. Be sure to check whether the Enhanced Write Filter (EWF) is disabled. Automation PC 910 User's Manual V 1.00... -
Page 100: R Automation Device Interface (Adi) - Control Center
• Updating and securing BIOS and firmware • Creating reports about the current system (support assistance) • Setting the SDL equalizer value for the SDL cable adjustment • Changing the User Serial ID Automation PC 910 User's Manual V 1.00... -
Page 101: Installation
If a more current ADI driver version exists (see the Downloads area of the B&R website), it can be installed later. During installation, make sure to check whether or not the Enhanced Write Filter (EWF) is disabled. Automation PC 910 User's Manual V 1.00... -
Page 102: R Automation Device Interface (Adi) Development Kit
• Automation PC 820 • Automation PC 910 • Panel PC 300 • Panel PC 700 • Panel PC 800 • Power Panel 100/200 • Power Panel 300/400 • Power Panel 500 • Mobile Panel 40/50 Automation PC 910 User's Manual V 1.00... - Page 103 A detailed description of using the ADI functions can be found in the online help system. The B&R Automation Device Interface (ADI) Development Kit is available in the Download area of the B&R website (www.br-automation.com). Automation PC 910 User's Manual V 1.00...
-
Page 104: R Automation Device Interface (Adi) .Net Sdk
• Automation PC 910 • Panel PC 300 • Panel PC 700 • Panel PC 800 • Power Panel 100/200 • Power Panel 300/400 • Power Panel 500 • Mobile Panel 40/50 • Mobile Panel 100/200 Automation PC 910 User's Manual V 1.00... - Page 105 B&R images of embedded operating systems. A detailed description of using the ADI functions can be found in the online help system. ADI .NET SDK is available in the Downloads area of the B&R website (www.br-automation.com). Automation PC 910 User's Manual V 1.00...
-
Page 106: Chapter 5 Accessories
10 A / contact Contact resistance ≤ 5 mΩ Table 91: 0TB103.9, 0TB103.91 - Technical data Please take the respective limit data for the I/O modules into consideration! Cage clamp terminal blocks cannot be strung together. Automation PC 910 User's Manual V 1.00... -
Page 107: Replacement Cmos Batteries
<1% per year (at 23°C) Voltage range Environmental conditions Temperature Storage -20 to 60°C Relative humidity Operation 0 to 95% Storage 0 to 95% Transport 0 to 95% Table 93: 0AC201.91, 4A0006.00-000 - Technical data Automation PC 910 User's Manual V 1.00... -
Page 108: Cfast Cards
≥ V4.0.0.8 (part of PVI Development Setup ≥ V3.0.2.3014) B&R Embedded OS Installer ≥ V3.10 ≥ V3.10 ≥ V3.10 ≥ V3.20 ≥ V3.21 Environmental conditions Table 95: 5CFAST.2048-00, 5CFAST.4096-00, 5CFAST.8192-00, 5CFAST.016G-00, 5CFAST.032G-00 - Technical data Automation PC 910 User's Manual V 1.00... -
Page 109: Dimensions
3.1.4 Dimensions 42.8 ±0.1 2.3 ±0.1 +0.2 -0.1 1.15 ±0.1 1 ±0.1 41.6 ±0.13 0.6 ±0.07 1 ±0.07 1 ±0.07 Above Below 1 ±0.1 6.35 33.96 ±0.15 Figure 37: Dimensions – CFast card Automation PC 910 User's Manual V 1.00... -
Page 110: Temperature Humidity Diagram
Accessories • CFast cards 3.1.5 Temperature humidity diagram Storage Operation Transport Temperature [°C] Figure 38: 5CFAST.xxxx-00 - Temperature humidity diagram Automation PC 910 User's Manual V 1.00... -
Page 111: Usb Flash Drive
Windows XP Embedded Windows ME Windows 2000 Windows CE 5.0 Windows CE 4.2 Electrical characteristics Power consumption Max. 500 µA sleep mode, max. 120 mA read/write Environmental conditions Temperature Table 97: 5MMUSB.2048-01 - Technical data Automation PC 910 User's Manual V 1.00... -
Page 112: Temperature Humidity Diagram
67.85 mm Height 8.35 mm Table 97: 5MMUSB.2048-01 - Technical data Signals data transfer (send and receive). 4.1.4 Temperature humidity diagram Storage Operation Transport Temperature [°C] Figure 39: 5MMUSB.2048-01 - Temperature humidity diagram Automation PC 910 User's Manual V 1.00... -
Page 113: Usb Media Drive
5m (not including hub) Certification c-UL-us Interfaces CompactFlash slot 1 Type Type I Connection IDE/ATAPI Activity LED Signals read or write access to an inserted CompactFlash card Table 99: 5MD900.USB2-02 - Technical data Automation PC 910 User's Manual V 1.00... - Page 114 10 to 100 Hz: 2 g (19.6 m/s² 0-peak) Shock Operation 5 g, 11 ms Storage 60 g, 11 ms Transport 60 g, 11 ms Altitude Operation Max. 3000 m Mechanical characteristics Dimensions Table 99: 5MD900.USB2-02 - Technical data Automation PC 910 User's Manual V 1.00...
-
Page 115: Dimensions
Temperature data is for operation at 500 meters. Derating the max. ambient temperature - typically 1 °C per 1000 meters (from 500 meters above sea level). 5.1.5 Dimensions Figure 41: 5MD900.USB2-02 - Dimensions 5.1.6 Dimensions with front cover Figure 42: Dimensions - USB Media Drive with front cover Automation PC 910 User's Manual V 1.00... -
Page 116: Cutout Installation
The USB Media Drive can be operated as a desk-top device (rubber feet) or as a rack-mount device (2 mounting rail brackets included). Mounting orientation less than 20° less than 20° less than 20° less than 20° Figure 44: 5MD900.USB2-02 - Mounting orientation Automation PC 910 User's Manual V 1.00... -
Page 117: 5A5003.03
The front cover is attached with 2 mounting rail brackets (included with USB Media Drive) and 4 M3 locknuts. The USB media drive and front cover can be mounted as a whole in (for example) a switching cabinet door. Automation PC 910 User's Manual V 1.00... - Page 118 Accessories • USB Media Drive Figure 46: Front cover mounting and installation depth Cutout installation Figure 47: Installation cutout - USB Media Drive with front cover Automation PC 910 User's Manual V 1.00...
-
Page 119: Cables
Flex radius ≥ 5x cable diameter (plug - ferrite magnet and ferrite magnet - ferrite magnet) Weight Approx. 260 g Approx. 460 g Approx. 790 g Table 105: 5CADVI.0018-00, 5CADVI.0050-00, 5CADVI.0100-00 - Technical data Automation PC 910 User's Manual V 1.00... - Page 120 Accessories • Cables Flex radius specification Figure 48: Flex radius specification Dimensions Figure 49: 5CADVI.0xxx-00 - Dimensions Automation PC 910 User's Manual V 1.00...
- Page 121 If a self-built cable is used, B&R cannot guarantee that it will function properly. B&R guarantees the performance of all cables that they provide. DVI-D (24+1), male DVI-D (24+1), male Pin assignments DVI-D (24+1), male DVI-D (24+1), male Cable shield Cable shield Figure 50: 5CADVI.0xxx-00 - Pinout Automation PC 910 User's Manual V 1.00...
-
Page 122: Sdl Cables
Approx. 300 g Approx. 580 g Approx. 1500 g Approx. 2250 g Approx. 2880 g Approx. 4800 g Approx. 5520 g Table 107: 5CASDL.0018-00, 5CASDL.0050-00, 5CASDL.0100-00, 5CASDL.0150-00, 5CASDL.0200-00, 5CASDL.0250-00, 5CASDL.0300-00 - Technical data Automation PC 910 User's Manual V 1.00... - Page 123 Accessories • Cables Flex radius specification Figure 51: Flex radius specification Dimensions Figure 52: 5CASDL.0xxx-00- Dimensions Automation PC 910 User's Manual V 1.00...
- Page 124 If a self-built cable is used, B&R cannot guarantee that it will function properly. B&R guarantees the performance of all cables that they provide. DVI (24+1), male DVI (24+1), male Pin assignments DVI (24+1), male DVI (24+1), male Cable shield Cable shield Figure 53: 5CASDL.0xxx-00- Pinout Automation PC 910 User's Manual V 1.00...
-
Page 125: Sdl Cables With 45° Plugs
Limited flexibility; valid for ferrite magnet - ferrite magnet (tested 100 cycles with 5x cable diameter, 20 cycles / minute) Weight Approx. 300 g Approx. 590 g Approx. 2800 g Approx. 2860 g Table 109: 5CASDL.0018-01, 5CASDL.0050-01, 5CASDL.0100-01, 5CASDL.0150-01 - Technical data Automation PC 910 User's Manual V 1.00... - Page 126 Accessories • Cables Flex radius specification Figure 54: Flex radius specification Dimensions Figure 55: 5CASDL.0xxx-01 - Dimensions Automation PC 910 User's Manual V 1.00...
- Page 127 If a self-built cable is used, B&R cannot guarantee that it will function properly. B&R guarantees the performance of all cables that they provide. DVI (24+1), male DVI (24+1), male Pin assignments DVI (24+1), male DVI (24+1), male Cable shield Cable shield Figure 56: 5CASDL.0xxx-01 - Pinout Automation PC 910 User's Manual V 1.00...
-
Page 128: Sdl Flex Cables
Oil and hydrolysis resistance According to VDE 0282-10 Environmental conditions Temperature Storage -20 to 80°C Moving -5 to 60°C Fixed installation -20 to 80°C Table 111: 5CASDL.0018-03, 5CASDL.0050-03, 5CASDL.0100-03, 5CASDL.0150-03, 5CASDL.0200-03, 5CASDL.0250-03, 5CASDL.0300-03 - Technical data Automation PC 910 User's Manual V 1.00... - Page 129 In operation ≤50 N During installation ≤400 N Table 111: 5CASDL.0018-03, 5CASDL.0050-03, 5CASDL.0100-03, 5CASDL.0150-03, 5CASDL.0200-03, 5CASDL.0250-03, 5CASDL.0300-03 - Technical data Flex radius specification Figure 57: Flex radius specification Dimensions Figure 58: 5CASDL.0xxx-03 - Dimensions Automation PC 910 User's Manual V 1.00...
- Page 130 DDC data SDL+ SDL+ SDL- SDL- TMDS data 2/SDL shielding TMDS data 2/SDL shielding TMDS data 2+ TMDS data 2+ TMDS data 2- TMDS data 2- Cable shield Cable shield Figure 59: 5CASDL.0xxx-03- Pinout Automation PC 910 User's Manual V 1.00...
-
Page 131: Sdl Flex Cables With Extender
30 m ± 280 mm 40 m ± 380 mm 43 m ± 410 mm Diameter Max. 12 mm Extender box Width 35 mm Length 125 mm Table 114: 5CASDL.0300-13, 5CASDL.0400-13, 5CASDL.0430-13 - Technical data Automation PC 910 User's Manual V 1.00... - Page 132 Approx. 7790 g Tension In operation ≤50 N During installation ≤400 N Table 114: 5CASDL.0300-13, 5CASDL.0400-13, 5CASDL.0430-13 - Technical data Flex radius specification Figure 60: Flex radius specification Dimensions Figure 61: 5CASDL.0xx0-13- Dimensions Automation PC 910 User's Manual V 1.00...
- Page 133 DVI (24+1), male DVI (24+1), male 9 17 Extender unit Black box Pin assignments DVI (24+1), male DVI (24+1), male Cable shield Cable shield Figure 62: 5CASDL.0xx0-13 - Pinout Automation PC 910 User's Manual V 1.00...
- Page 134 Figure 63: Example of the signal direction for the SDL flex cable with extender B&R Industrial PC Panel OUT Panel IN Automation Panel Automation Panel 900 + AP Link 5DLSDL.1000-01 Figure 64: Example of signal direction display - SDL flex cable with extender Automation PC 910 User's Manual V 1.00...
-
Page 135: Usb Cables
If a self-built cable is used, B&R cannot guarantee that it will function properly. B&R guarantees the performance of all cables that they provide. Pin assignments USB Type A, male USB Type B, male Jacket Jacket Figure 65: 5CAUSB.00xx-00 - USB cable pinout Automation PC 910 User's Manual V 1.00... -
Page 136: Rs232 Cables
Mechanical characteristics Dimensions Length 1.8 m ±50 mm 5 m ± 80 mm 10 m ±100 mm Diameter Max. 5 mm Flex radius Min. 70 mm Table 118: 9A0014.02, 9A0014.05, 9A0014.10 - Technical data Automation PC 910 User's Manual V 1.00... - Page 137 If a self-built cable is used, B&R cannot guarantee that it will function properly. B&R guarantees the performance of all cables that they provide. DSUB (9-pin), male DSUB (9-pin), female Pin assignments DSUB (9-pin), male DSUB (9-pin), female Jacket Jacket Figure 66: 9A0014.xx - RS232 cable pinout Automation PC 910 User's Manual V 1.00...
-
Page 138: Chapter 6 Maintenance / Service
Turn off the power before replacing the CFast card! The CFast card can be exchanged quickly and easily by pressing the ejector (see image) with a pointed object such as a pen. Figure 67: Replacing a CFast card Automation PC 910 User's Manual V 1.00... -
Page 139: Installation - Interface Option
Figure 68: Removing the combi-torx screws for the side cover 4. After the screws have been removed, the side cover can be removed by sliding it toward the front and to the side. Figure 69: Removing the side cover Automation PC 910 User's Manual V 1.00... - Page 140 6. Place interface option into slot. Please note that not every interface option can be plugged into interface slot 1 and 2. For more information about this, see the section "IF option 1 slot" on page 40 and "IF option 2 slot" on page 40. Figure 71: Installing the interface option Automation PC 910 User's Manual V 1.00...
- Page 141 Maintenance / Service • Installation - Interface option 7. Secure the interface option to the B&R Industrial PC using torx screws (T10). Figure 72: Securing the interface option 8. Attach side cover. Figure 73: Attaching the side cover Automation PC 910 User's Manual V 1.00...
- Page 142 Maintenance / Service • Installation - Interface option 9. Secure the side cover to the B&R Industrial PC using the same torx screws (T10) from before. Figure 74: Securing the side cover Automation PC 910 User's Manual V 1.00...
-
Page 143: Installation - Monitor / Panel Option
Figure 75: Removing the combi-torx screws for the side cover 4. After the screws have been removed, the side cover can be removed by sliding it toward the front and to the side. Figure 76: Removing the side cover Automation PC 910 User's Manual V 1.00... - Page 144 5. Remove the marked torx screws (T10) and slot cover. Figure 77: Removing the combi-torx screws and slot cover 6. Place monitor / panel option into slot. Figure 78: Placing the monitor / panel option into the APC910 Automation PC 910 User's Manual V 1.00...
- Page 145 7. Secure the monitor / panel option to the B&R Industrial PC using torx screws (T10). Figure 79: Securing the monitor / panel option using combi-torx screws 8. Attach side cover. Figure 80: Attaching the side cover Automation PC 910 User's Manual V 1.00...
- Page 146 Maintenance / Service • Installation - Monitor / panel option 9. Secure the side cover to the B&R Industrial PC using the same torx screws (T10) from before. Figure 81: Securing the side cover Automation PC 910 User's Manual V 1.00...
-
Page 147: Slide-In Compact Drive Installation / Replacement
Figure 82: Removing the combi-torx screws for the side cover 4. After the screws have been removed, the side cover can be removed by sliding it toward the front and to the side. Figure 83: Removing the side cover Automation PC 910 User's Manual V 1.00... - Page 148 Maintenance / Service • Slide-in compact drive installation / replacement 5. Remove / replace the slide-in compact drive from the Automation PC 910. The slide-in compact drive must glide into the guide rails and snap into the connector. Figure 84: Removing / replacing the slide-in compact drive 6.
-
Page 149: Slide-In Drive Installation / Replacement
Figure 87: Removing the combi-torx screws for the side cover 4. After the screws have been removed, the side cover can be removed by sliding it toward the front and to the side. Figure 88: Removing the side cover Automation PC 910 User's Manual V 1.00... - Page 150 Maintenance / Service • Slide-in drive installation / replacement 5. Remove / replace the slide-in drive from the Automation PC 910. The slide-in drive must glide into the guide rails and snap into the connector. Figure 89: Removing / replacing the slide-in drive 6.
-
Page 151: Fan Filter Replacement
The number of locking mechanisms can vary depending on the system unit. Figure 92: Removing the fan filter from the APC910 Information: The dust filter must be inspected regularly depending on the amount of dust in the operating environment. Automation PC 910 User's Manual V 1.00... -
Page 152: Fan Kit Replacement
3. Open and remove the front cover. Figure 93: Removing the front cover 4. Remove heat sink cover. The torx screws (T10) that are marked in the image must be removed. Figure 94: Removing the heat sink cover Automation PC 910 User's Manual V 1.00... - Page 153 6. The fan kit can now be removed from the Automation PC 910. Figure 96: Removing the fan kit from the APC910 7. The Automation PC 910 can now be re-assembled in reverse order of these instructions. Automation PC 910 User's Manual V 1.00...
-
Page 154: Abbreviations
A normally open (N.O.) relay contact. To be defined Used in technical data tables when certain information is not yet available. The value will be provided later. Table 119: Abbreviations used in this user's manual Automation PC 910 User's Manual V 1.00... - Page 155 Figure 52: 5CASDL.0xxx-00- Dimensions.................... 123 Figure 53: 5CASDL.0xxx-00- Pinout..................... 124 Figure 54: Flex radius specification...................... 126 Figure 55: 5CASDL.0xxx-01 - Dimensions................... 126 Figure 56: 5CASDL.0xxx-01 - Pinout....................127 Figure 57: Flex radius specification...................... 129 Automation PC 910 User's Manual V 1.00...
- Page 156 Figure 93: Removing the front cover....................152 Figure 94: Removing the heat sink cover.....................152 Figure 95: Removing the combi-torx screws and fan cable..............153 Figure 96: Removing the fan kit from the APC910................153 Automation PC 910 User's Manual V 1.00...
- Page 157 Table 51: 5AC901.CHDD-00 - Technical data....................65 Table 52: 5AC901.CSSD-00 - Order data....................67 Table 53: 5AC901.CSSD-00 - Technical data.................... 67 Table 54: 5AC901.CSSD-01 - Order data....................69 Table 55: 5AC901.CSSD-01 - Technical data.................... 69 Automation PC 910 User's Manual V 1.00...
- Page 158 5CADVI.0018-00, 5CADVI.0050-00, 5CADVI.0100-00 - Technical data........119 Table 106: 5CASDL.0018-00, 5CASDL.0050-00, 5CASDL.0100-00, 5CASDL.0150-00, 5CASDL.0200-00, 5CASDL.0250-00, 5CASDL.0300-00 - Order data..............122 Table 107: 5CASDL.0018-00, 5CASDL.0050-00, 5CASDL.0100-00, 5CASDL.0150-00, 5CASDL.0200-00, 5CASDL.0250-00, 5CASDL.0300-00 - Technical data............. 122 Automation PC 910 User's Manual V 1.00...
- Page 159 5CAUSB.0018-00, 5CAUSB.0050-00 - Technical data............135 Table 117: 9A0014.02, 9A0014.05, 9A0014.10 - Order data..............136 Table 118: 9A0014.02, 9A0014.05, 9A0014.10 - Technical data............... 136 Table 119: Abbreviations used in this user's manual................. 154 Automation PC 910 User's Manual V 1.00...
- Page 160 5CASDL.0250-00..............................122 5CASDL.0250-03..............................128 5CASDL.0300-00..............................122 5CASDL.0300-03..............................128 5CASDL.0300-13..............................131 5CASDL.0400-13..............................131 5CASDL.0430-13..............................131 5CAUSB.0018-00..............................135 5CAUSB.0050-00..............................135 5CFAST.016G-00..............................108 5CFAST.032G-00..............................108 5CFAST.2048-00..............................108 5CFAST.4096-00..............................108 5CFAST.8192-00..............................108 5MD900.USB2-02..............................113 5MMDDR.1024-03..............................60 5MMDDR.2048-03..............................60 5MMDDR.4096-03..............................60 5MMDDR.8192-03..............................60 Automation PC 910 User's Manual V 1.00...
- Page 161 5PC900.TS77-06..............................56 5PC900.TS77-07..............................58 5PC900.TS77-08..............................58 5PC910.SX01-00..............................46 5PC910.SX02-00..............................51 5SWWI7.1100-ENG..............................93 5SWWI7.1100-GER..............................93 5SWWI7.1200-ENG............................... 93 5SWWI7.1200-GER............................... 93 5SWWI7.1300-MUL..............................93 5SWWI7.1400-MUL..............................93 5SWWI7.1540-ENG............................... 95 5SWWI7.1640-ENG............................... 95 5SWWI7.1740-MUL..............................95 5SWWI7.1840-MUL..............................95 5SWWXP.0600-ENG.............................. 97 5SWWXP.0600-GER.............................. 97 5SWWXP.0600-MUL.............................. 97 5SWWXP.0740-ENG.............................. 98 9A0014.02................................136 9A0014.05................................136 9A0014.10................................136 Automation PC 910 User's Manual V 1.00...
- Page 162 Drilling template – 5PC910.SX02-00........................55 dual-channel memory............................60 DVI cables................................119 DVI resolution............................... 37 ESD..................................8 Electrical components with a housing....................... 8 Electrical components without a housing......................8 Individual components............................8 Packaging................................8 ETH1..................................38 Automation PC 910 User's Manual V 1.00...
- Page 163 Interface option..............................74 Interfaces................................32 CFast slot................................. 44 DisplayPort............................... 37 Ethernet 1................................. 38 Ethernet 2................................. 38 Ground................................34 Monitor / panel connection..........................36 Supply voltage..............................34 USB.................................. 39 LED..................................42 LED indicator................................ 42 LEDs..................................42 Automation PC 910 User's Manual V 1.00...
- Page 164 RS232 cables..............................136 RS422 Bus length................................ 75 Cable type................................ 75 RS485 Bus length................................ 76 Cable type................................ 76 RS485 interface..............................76 Run LED................................42 Safety guidelines..............................8 Intended use............................... 8 Safety notices Environmental conditions........................... 9 Automation PC 910 User's Manual V 1.00...
- Page 165 USB Media Drive..............................113 USB ports................................39 User Serial ID..............................100 Video signal..............................36, 37 WES2009................................98 WES7..................................96 Windows 7................................93 Windows Embedded Standard 2009........................98 Windows Embedded Standard 7.......................... 95 Windows XP Professional............................ 97 Automation PC 910 User's Manual V 1.00...
Need help?
Do you have a question about the Automation PC 910 and is the answer not in the manual?
Questions and answers