Advertisement
Quick Links
Advertisement

Subscribe to Our Youtube Channel
Related Manuals for N-BIOTEK MINI-CELL NB-203M


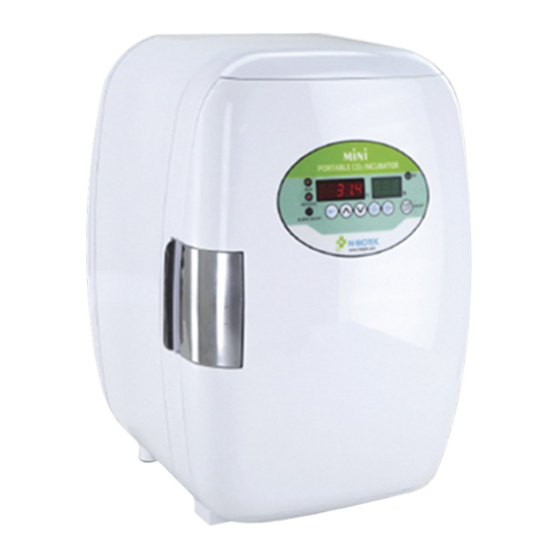
Summary of Contents for N-BIOTEK MINI-CELL NB-203M
- Page 1 Incubator Operation Manual Model: MINI-CELL NB-203M...
-
Page 2: Table Of Contents
CONTENTS PAGE WARRANTY GENERAL INFORMATION ON PRECAUTION TRANSPORATION, STOARGE AND LOCATION OF INSTALLATION PREREQUISITE AND CONFIGURATION FEATURE AND SPECIFICATION CONTROL PANEL OPERATION Page 2 / 17... -
Page 3: Warranty
N-BIOTEK, whichever is sooner as indicated in above table. This period is proved by serial number. 3. N-BIOTEK will not be responsible of free warranty service for the faulty caused by user’s improper operation, excessive use, use of incorrect voltage & frequency, storage in wrong environment mentioned in Manual. -
Page 4: General Information On Precaution
⚫ General Information on Precaution Precaution is to prevent the possible accident or danger during operation. So, you must keep it. Precaution is divided into caution and warning. And, each of them has following meanings. Other marks: 1. Precaution for using the power cable Do not make the power plug be pressed by back of the product. - Page 5 2. Precaution for ground connection Please ground before use the product, if you don't ground, you might get an electrocution when malfunction or an electric leakage occurs. At the place where you can't ground, * Please buy the equipment to prevent any electrical leakage. * An electric shock, an electric leakage and a fire can be occurred without an electric leakage breaker.
-
Page 6: Transporation, Stoarge And Location Of Installation
Please leave the product power off when it is not in use. (It is to prevent an eclectic leakage.) Open and close the door softly and please use a door knob. (A heavy shock can damage the product and breakdown the operating part.) Do not detach the built-in lamp and electrical devices. - Page 7 3. Location of installation and ambient conditions Do not put flammable substances near the product. (It can cause a fire.) When you install the product, you have to put the distance of at least 30cm from the wall. To completely separate the unit from the power supply, power plug must be disconnected.
-
Page 8: Prerequisite And Configuration
When you have received the instrument which is well boxed, inspect the box carefully to check any transit damage. Please report any damage to the carrier or to your local N-BIOTEK distributor immediately. Location The incubator is designed to operate at temperature 5℃ above ambient, and recommended to operate at minimum ambient(temperature in the place for use), 18℃. - Page 9 2. Configuration <Figure #1> Front Side Handle for carrying Control Panel Door Handle Finger Supporter for door close <Figure #2> Inner Side and Rear Side IR CO₂Sensor Door Sealing Gasket Stainless Steel Panel Stainless Steel Shelf Water Container Circulation Fan Page 9 / 17...
- Page 10 <Figure #3> Rear of Incubator Serial Label Power Switch Power Input Receptacle / DC12V Car Jack Receptacle CO₂Input Port CO₂Sample Port Air Circulation Cooling Fan Foot of Incubator with non-slip rubber Note The tube diameter of CO2 inlet port is ∅4 x 2mm (total diameter 4mm, hole 2mm). A connecting tube for CO2 inlet port is provided as well as normal size of tube (6 x 4mm) which is for connecting to CO2 cylinder.
-
Page 11: Feature And Specification
⚫ Feature and Specification 1. Feature 1. Light weight, easy to carry concept of 16-liter portable mini CO2 incubator. 2. Compact size for workstation or clean bench. °C °C °C 3. Precise temperature control by Peltier. (ambient -8 , lowest temp. is 15 at 23 4. -
Page 12: Control Panel
⚫ Control Panel 1. RUN LED Lamp : Normal – 2Hz Blink / Failed – 10Hz Blink 2. HOT/COOL LED Lamp : RED(Heating) / BLUE(Peltier – Cooling) 3. ALARM ON/OFF LED Lamp: No LED Lamp(ON) / RED(OFF) 4. Temperature LED Display 5. -
Page 13: Operation
⚫ Operation Please check the connection of gas supply. And open CO2 gas cylinder for supply with the pressure of regulator set to a certain level. <Co2 incubator Set-up Process> 1. Place and Install the Product Install the product at the desired place and check the level in all directions (side by side, front to back and ground). - Page 14 ▶ Before supply of CO2 gas into incubator by gas tube, check the remaining gas volume in CO2 Gas cylinder. ▶ When previous stage is cleared, connect the gas tube to regulator and incubator. At this point, make sure that valves of all the part besides gas cylinder, Regulator are locked. (④...
- Page 15 6. Setting CO2 Press "CO2/SET" button. Then, LED screen will flicker continually. b. Input the desired value of CO2 density by pushing UP (▲) and DOWN (▼) buttons. after input. “SAVE” is shown up on LED screen as below. Press "CO2/SET" key again Note: If you don't press "CO2/SET"...
- Page 16 No Function! Just skip this stage by pressing set button once. b. Fourth Click “CAL/SET”: CO2 Density Calibration Channel 4 is at CO2 density calibration stage. Press UP (▲) as much as difference from measured value by precise analyzer if it is higher. Press DOWN (▼) as much as difference from measured value by precise analyzer if it is lower.
- Page 17 8. Humidity Mini CO₂ incubator adopts natural humidity system by water container as below image. Please fill up distilled water up to the water line of water tray and keep lid closed for proper humidity level (at about 80%) during operation of incubator. Place the water container be close to back of chamber so the container is more exposed to heated air directly from water pass.
Need help?
Do you have a question about the MINI-CELL NB-203M and is the answer not in the manual?
Questions and answers