Table of Contents
Advertisement
Advertisement
Table of Contents

Subscribe to Our Youtube Channel
Related Manuals for Godex EZ-1200


Summary of Contents for Godex EZ-1200
- Page 1 P/N. 920-011311-01 Edition 2 AUG.13 EZ-1200/EZ-1300 User Manual...
-
Page 2: Fcc Compliance Statement
FCC COMPLIANCE STATEMENT FOR AMERICAN USERS This equipment has been tested and found to comply with the limits for a CLASS A digital device, pursuant to Part 15 of the FCC Rules. These limits are designed to provide reasonable protection against harmful interference when the equipment is operated in a commercial environment. -
Page 3: Warranty Information
Warranty Information All Godex products are sold with warranties. Below is the general information: PRINTER PRODUCTS: Printers. All printers (excluding printheads) are warranted against defect in material or workmanship for twelve (12) months from the invoice date. Proof of shipment date (or Proforma Invoice date) is required to validate the warranty period. - Page 4 defects in material and workmanship for 90 days (except where otherwise denoted) from date of invoice. This warranty becomes void if the item is modified improperly installed, handled or used, or damaged by accident or neglect. SUPPLIES PRODUCTS: Supplies are warranted to be free from defect in material and workmanship for a period of six (6) months for media and twelve (12) months for ribbon from the date of shipment by Godex.
- Page 5 Warranty Exclusions and Conditions Statement The warranties provided above are the only warranties applicable. No other warranties, expressed or implied, are given. Godex does not make any IMPLIED WARRANTY OF MERCHANTABILITY OR FITNESS FOR A PARTICULAR PURPOSE in connection with its sale of products or services.
-
Page 7: Table Of Contents
1. B HAPTER ARCODE 1-1. Introduction... 8 1-2. Printer Options... 8 1-3. Printer Accessories... 8 1-4. General Specifications... 9 1-5. Communication Interface... 10 1-6. Printer Parts... 11 2. P HAPTER RINTER NSTALLATION 2-1. Ribbon Installation ... 13 2-2. Label Installation... 14 2-3. -
Page 8: Chapter 1 - Barcode Printer
The Godex EZ-1000 series is a desktop thermal transfer / direct thermal label printer. With plastic outer casing, the EZ-1000 series is designed to be a lightweight and a low cost printer for large variety of printing requirement. Its features are as follows:... -
Page 9: General Specifications
1-4. General Specifications Model Name EZ-1200 Resolution 203 dpi (8 dot/mm) Print Mode Thermal Transfer / Direct Thermal 16 Bit Sensor Location Moveable, center aligned Sensor Type Reflective Sensor Type: Label gap, black mark, and punch hole sensing. Detection Detection: Label length auto sensing and / or program command setting... -
Page 10: Communication Interface
: 9600 baud rate, no parity, 8 data bits, 1 stop bit, XON/XOFF protocol and RTS/CTS Setting Connector Type: DB9 female, pin assignment is as follows: PIN NO. FUNCTION +5 V Serial interface from PC to printer PC(DTE) EZ-2000(DCE) Note: DCE: Data Communication Eqauipment (PC) DTE: Data Terminal Equipment (Printer) -
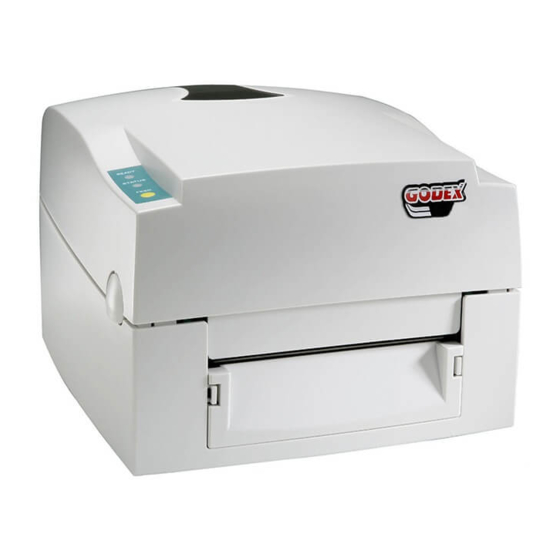
Page 11: Printer Parts
USB Interface Connector Type : Type B PIN NO. FUNCTION USBVCC 1-6. Printer Parts Please use the following diagrams to identify each printer part. - Page 12 Cover Open Button Top Cover Label Roll Core Ribbon Rewind Wheel Print Mechanism Ribbon Rewind Shaft + Empty Ribbon Take Up Core Locking Tenon (left/right) Front Cover Piece Memory Card Cover Print Head Pressure Adj. Screw (left/right) 11 LED Light (Ready) 12 LED Light (Status) 13 FEED Key 14 Print Line Adj.
-
Page 13: Chapter 2 - Printer Installation
Chapter 2 - Printer Installation This printer model has the following print modes: Thermal Transfer (TT): When printing, ribbon must be installed to transfer the print contents onto the media. Direct Thermal (DT): When printing, no ribbon is necessary; it only requires direct thermal media. -
Page 14: Label Installation
2-2. Label Installation Open the top cover. Place the label roll onto the Label Roll Core, Loosen and lift the upper print mechanism by pressing the locking tensons. Feed the label through the two Label Guides to the Tear-off Bar. Align the label guides to the lablel edge. -
Page 15: Label Roll Core Installation Instruction
2-3 Label Roll Core Installation Instruction (A) 1” roll core installation instruction (B) 1.5” roll core installation instruction (C) 3” roll core installation instruction... -
Page 16: Card/Hang Tags Installation
2-5. USB Installation USB is a Plug & Play facility. Once the USB cable is connected from PC to the printer, PC will automatically detect the new device and begin the installation process. Select ” Search for al suitable driver for my device [recommended].“... - Page 17 Select the location of the driver. 4. When the USB device driver is assigned and saved, click “Next” The USB device is built on the serial port, therefore make sure the interface setting is specified to the assigned port.
-
Page 18: Usb Uninstallation
Take the power cable, plug the cable switch to the power socket, and then connect the other end of the cable to the printer power socket. Connect the cable to the parallel port on the printer and on the PC. Power on the printer. The LED light (Ready) should turn green when power is on. 【 】... -
Page 20: Chapter 3 - Options Installation
5. The label / paper used for rewinding purposes is suggested to be at least 30mm in height. Stripper Module Screw (TAP 3*6) x 2pcs [NOTE]: Please power off the printer before installing the stripper module. - Page 21 Place the right side in first, and then fit the left side. Hold the stripper module and tighten the screws (28). Peel off the first label, and feed the liner through the roller and the peel off bracket. Flip close the stripper module. 10.
-
Page 22: Stripper Installation Diagram
3-3. Stripper Installation Diagram Stripper Installation Diagram LABEL LINER LABEL LINER... -
Page 23: Cutter Parts
(one is for stripper installation, another is for cutter installation), before plug the connector into socket, please check the pin first. 29 Cutter Module 30 Screw (TAP 3*6) x 2pcs [NOTE]: Please power off the printer before installing the cutter module. - Page 24 Clip in the right side of the cutter module(29) first,then secure the left side. Flip the cutter module (29) down to open the cutter. Notice: please refer to photo (A). Hold the cutter module and lock it with the two side screws (30).
-
Page 25: Extended Memory Parts
3-6. Extended Memory Parts 3-7. Extended Memory Installation 1. Open the top cover by pressing the Cover Open Buttons on both sides. Extended Memory Card PCB Piller x 2pcs [NOTE]: Please power off the printer before installing the extended memory. - Page 26 2. Take off the media roll spindle. Open and remove the plastic cover on the inner base. 3. Secure the PCB pillar onto the mainboard. 4. Check the pins where the memory is to be connected to, then plug the memory card onto the mainboard.
-
Page 27: Chapter 4 - Led Message Description
When printing with continuous media, when pressing the Feed key, the printer will feed media out to a certain length. When printing labels, pressing the Feed key, the printer will feed one label at a time; if the label is not sent out in a correct position, then please proceed with the Auto Sensing (see page 21). -
Page 28: Dump Mode
Power off the printer, press and hold the Feed key. 2. Press and hold the FEED button while power on the printer, after the printer makes 3 beeps, and the LED READY light flashes green and the LED STATUS light turns orange, the printer goes into the Dump Mode. -
Page 29: Direct Thermal / Thermal Transfer Mode Switch
1. Power off the printer, press and hold the Feed key. 2. Press and hold the FEED button while power on the printer, after the printer makes 3 beeps, and wait until the LED READY light flashes red and the LED STATUS light turns red, the printer will go into Direct Thermal (DT) Mode. -
Page 30: Chapter 5 - Maintenance And Adjustment
Note: (1) Weekly cleaning on the print head is recommended. (2) Please clean the print head with the cleaning card that comes with the printer. 5-2. Thermal Print Head Balance Adjustment When printing with different label materials or using different ribbon types, unbalanced print quality may occur due to the media material differences, thus it’s... -
Page 31: Print Line Adjustment
Turn the power off and use a #M3 hexagen wrench inserted into hole “A” and open the cutter from right to left. 3. Power on the printer after clearing the paper jam, the cutter will return to the correct position automatically. -
Page 32: Troubleshooting
5-5. Troubleshooting Problem Power on the printer, but the LED does not light up LED light turns red (power/status) after printing stops Printing started, but nothing was printed on the label When printing, label is jammed/tangled up When printing, only part of the...
Need help?
Do you have a question about the EZ-1200 and is the answer not in the manual?
Questions and answers
PRINTER GOES TO SLEEP & DOES NOT WANT TO WAKE UP