Godex EZPi-1200 User Manual
Ezpi-1000 series barcode printer
Hide thumbs
Also See for EZPi-1200:
- User manual (12 pages) ,
- User manual (44 pages) ,
- User manual (26 pages)
Table of Contents
Advertisement
Advertisement
Table of Contents

Related Manuals for Godex EZPi-1200


Summary of Contents for Godex EZPi-1200
- Page 1 User’s Manual EZPi-1000 Series P/N. 920-013011-01 Rev. A, 08.2009...
- Page 2 FCC COMPLIANCE STATEMENT FOR AMERICAN USERS This equipment has been tested and found to comply with the limits for a CLASS A digital device, pursuant to Part 15 of the FCC Rules. These limits are designed to provide reasonable protection against harmful interference when the equipment is operated in a commercial environment.
-
Page 3: Safety Instructions
Safety Instructions Bitte die Sicherheitshinweise sorgfältig lesen und für später aufheben. Die Geräte nicht der Feuchtigkeit aussetzen. Bevor Sie die Geräte ans Stromnetz anschließen, vergewissern Sie Sich, dass die Spannung des Geräts mit der Netzspannung übereinstimmt. Nehmen Sie das Gerät bei Überspannungen (Gewitter) vom Netz. Das Gerät könnte sonst Schaden nehmen. - Page 4 Safety Instructions Please read the following instructions seriously. Keep the equipment away from humidity. Before you connect the equipment to the power outlet, please check the voltage of the power source. Disconnect the equipment from the voltage of the power source to prevent possible transient over voltage damage.
-
Page 5: Table Of Contents
1. BARCODE PRINTER..............5 1-1. Printer Accessories ......................5 1-2. General Specifications ....................5 1-3. Communication Interface ....................7 1-4. Printer Parts ........................9 2. PRINTER INSTALLATION............11 2-1. Ribbon Installation ......................11 2-2. Label Installation ......................13 2-3. Label Roll Core Installation Instruction ................. 14 2-4. -
Page 6: Barcode Printer
Width: 1.18” Min - 4.33” (30 mm - 110 mm) Max Ribbon roll diameter.: 2.67“ (68 mm) Core diameter: 1” (25.4 mm) Printer Language EZPL, GEPL (Godex Eltron® Printer Language) Label design software: QLabel-IV (for EZPL only) Software Driver & DLL: Windows 2000, XP and Vista Bitmap fonts: 6, 8, 10, 12, 14, 18, 24, 30, 16X26 and OCR A &... - Page 7 CODEPAGE 437, 850, 851, 852, 855, 857, 860, 861, 862, 863, 865, 866, 869, Code Pages WINDOWS 1250, 1251, 1252, 1253, 1254, 1255 Unicode (UTF8, UTF16) Resident graphic file types are BMP and PCX, other graphic formats are Graphics downloadable from the software Serial port: RS-232 (DB-9) USB port (default on) Parallel port: Centronics 36-pin...
-
Page 8: Communication Interface
1-3. Communication Interface Parallel Interface Handshake : DSTB connects to the printer, BUSY connects to the host Interface cable : Parallel cable compatible to IBM PC Pin out : See below PIN NO. FUNCTION TRANSMITTER /Strobe host / printer Data 0-7 host /Acknowledge printer... - Page 9 Internal Interface UART1 wafer Ethernet module E_MD E_MD E_RST E_RST UART2 wafer Expansion module EZPi-1000 User’s Manual...
-
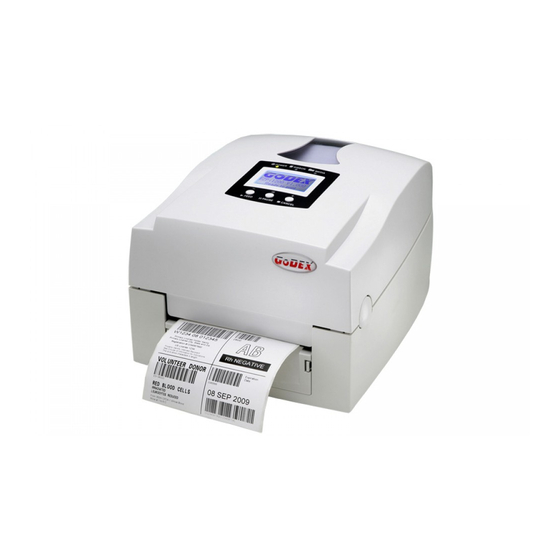
Page 10: Printer Parts
1-4. Printer Parts Cover Open Button Top Cover Label Roll Core Ribbon Rewind Wheel LCD Module Case Printing Mechanism Front Cover Piece Ribbon Rewind Shaft + Empty Ribbon Roll Locking Tenon (left/right) CF Card Slot Cover Print Head Pressure Adjustment Screw (left/right) EZPi-1000 User’s Manual... - Page 11 Ribbon Supply Shaft Label Guide Platen Roller Print Line Adjustment Gear Label Sensor LCD Control Panel Fan-Fold Label Insert Connection Port for PS2 / Wireless LAN Antenna (Optional) Power Switch Ethernet Port USB Port Parallel Port Serial Port (RS-232) Power Socket * The communication ports may vary depending on product types.
-
Page 12: Printer Installation
2. Printer Installation This printer model has the following print modes: Thermal Transfer (TT) When printing, ribbon must be installed to transfer the print contents onto the media. Direct Thermal (DT) When printing, no ribbon is necessary; it only requires direct thermal media. - Page 13 Feed the ribbon from the Ribbon Supply Shaft under the Print Head. Wrap the ribbon around the Ribbon Shaft and stick the ribbon onto the Empty Ribbon Roll Core. Firmly close the upper print mechanism. EZPi-1000 User’s Manual...
-
Page 14: Label Installation
2-2. Label Installation Open the top cover by pressing the Cover Open Buttons on both sides. Insert the Label Roll Core into the label roll. Assemble the Label Stop Plates on both sides of label roll. Place the label roll into the printer. -
Page 15: Label Roll Core Installation Instruction
2-3. Label Roll Core Installation Instruction (A) 1” roll core installation (B) 1.5” roll core installation (C) 3” roll core installation EZPi-1000 User’s Manual... -
Page 16: Card / Hang Tags Installation
2-4. Card / Hang tags Installation When installing cord tags, the tag hole must align with the sensor arrow (as indicated in figure), then use the Label Guide to secure the tags. Sensor Detection Position Sensor 2-5. PC Connection Please make sure the printer is powered off. Take the power cable, plug the cable switch to the power socket, and then connect the other end of the cable to the printer power socket. -
Page 17: Driver Installation
2-6. Driver Installation Insert product CD to your computer’s CD Drive and find the "Windows Drives" folder. Select the icon of driver file and click it to start the installation. Follow the instruction on screen to keep the installation going. Then the Driver Wizard utility should run automatically. - Page 18 Select connection port. Enter the printer name and set printer sharing option. A description page of printer settings will be displayed after all settings are completed. Check if all printer settings are correct and then press Finish to start copying driver files.
-
Page 19: Control Panel
3. Control Panel 3-1. Control Panel Introduction Control keys FEED PAUSE CANCEL LED indicators The Power (Ready) light is to indicate the power Power (Ready) on status and the printer is ready to print. Ribbon Ribbon status indication Media Media status indication 3-2. - Page 20 With different combinations of FEED PAUSE and CANCEL keys, the printer can perform various functions as follows: Item Beep LCD Message Description Press and hold key and turn + Power Self test 3 beeps Self test on the printer until the buzzer beeps 3 times.
-
Page 21: Setting Mode
3-3. Setting mode In the Setting Mode, changes can be made according to requirement on the printing mode, options, media type, and parallel interface (printer can only go into setting when connected to PC by parallel cable, USB cable, or serial cable). Power on the printer and make sure it is on “Ready to print”... - Page 22 Below are general descriptions of setting items. Default: 15 Darkness Set the darkness of printing result. The setting value is from 0 to 19 and the default value is 15. Speed Set the speed of printing. Default: 0 Adjust Stop Position Set the stop position of printing.
- Page 23 Default: Code Page 850 Code Page850 Code Page852 Code Page437 Code Page860 Code Page863 Code Page865 Code Page857 Code Page861 Code Page862 Code Page Code Page855 Code Page866 Code Page737 Code Page851 Code Page869 Windows 1252 Windows 1250 Windows 1251 Windows 1253 Windows 1254 Windows 1255...
- Page 24 The diagram of Setting Mode To enter the Setting mode, please press and hold the Pause key about 3 to 4 seconds until the buzzer beeps 3 times and LCD shows "Setting mode". Item with the ”*" sign is default setting. EZPi-1000 User’s Manual...
-
Page 25: Self-Test
3-4. Self-Test The Self-Test function will help user to check whether the printer is operating normally. The printer will go back to standby mode after printing a Self-Test page. Below are the Self-Test procedures: Power off the printer, press and hold the FEED key. Power on the printer while still holding the FEED key until the printer beeps 3 times and the LCD Display would show “Self Test”, and then release the FEED key. -
Page 26: Dump Mode
3-5. Dump Mode When the print result doesn’t match the label setting, it’s recommended to go into the Dump Mode to check whether there is a mistake in data transmission between the printer and the PC. For example, when printer receives 8 commands, yet without processing these commands, only printed out the contents of the commands, this will confirm whether the commands were received correctly. -
Page 27: Keyboard Mode
3-7. Keyboard Mode EZPi-1000 series printer can support keyboard with PS2 interface. To connect the PS2 keyboard, please do as follows: Please be sure the printer power is on and is showing no error message. Power off the printer and then plug the PS2 keyboard connector into the socket in the back of printer. - Page 28 LCD will show the Serial Number Prompt. Key in the start value. (Example:00001) LCD will show the first Variable Prompt. Key in the variable data. (Example: Apple) 10. LCD will show the second Variable Prompt. 11. Key in the variable data. (Example: 199) 12.
- Page 29 14. The printer will print out 3 labels that include user-defined variables and serial number. EZPi-1000 User’s Manual...
-
Page 30: Error Messages
3-8. Error Messages If problems occur that prevent the printer printing normally, the printer will beep as warning, and error messages will be displayed. Quickly blinking Slowly blinking Light is on LED Message Light Beep Description Solution Message Ribbon Media Display Thermal Re-open the... - Page 31 Delete unnecessary Memory 2 beeps Memory is data in the memory Full twice full or use CF Card. Use “~X4” command to print Filename 2 beeps Can’t find out all the files, then can not be twice the file check whether the found file exist and the names are correct.
-
Page 32: Accessory
4. Accessory 4-1. Stripper Installation Stripper Module Screw (TAP 3*8) x 2pcs 【 】 Note1 Please power off the printer before installing the stripper module. 【 】 Note2 Label liner thickness is recommended to be 0.06mm ㎡ ± 10% with basic weight 65g/ ±... - Page 33 Plug in the stripper connector onto the switchboard socket. (refer to right figure) 【 】 Note There are 2 sockets on the converting boards (one is for stripper installation, and another one is for cutter), before plug the connector into socket, please check the pin first.
- Page 34 10. Follow the direction as shown in figure to feed the liner across the stripper. 11. Close the upper print mechanism and the stripper. 12. Press the FEED key to adjust the position of label and complete the installation. EZPi-1000 User’s Manual...
-
Page 35: Cutter Installation
4-2. Cutter Installation Cutter Module Screw (TAP 3*8) x 2pcs 【 】 Note1 Please power off the printer before installing the cutter module. 【 】 Note2 Do not cut self-adhesive labels! The traces of adhesive will pollute the rotary knife and impair safe operation! The service life of the cutter is 【... - Page 36 Place the left side of the stripper first, and then fit the right side. Flip the cutter module downward to open the cutter. Hold the cutter module and lock it with screws After the screws are locked, flip to close the cutter module.
-
Page 37: Wlan Module Installation
4-3. WLAN Module Installation Ethernet Cable 1.8M Secure Screw*1 Bracket Screw*2 Module Bracket WLAN module Module Connection Wire WLAN Antenna Nut (for Antenna) Washer (for Antenna) Fixture Plate Antenna Bracket Make sure the power is off and the power cable is unplugged. Place the printer onto a smooth surface and flip the whole printer unit upside down. - Page 38 Unscrew the Ethernet Module Secure Screw. Remove the Ethernet Module and its connection wire. Unscrew the screw of PS2 Port with long-nose pliers Unscrew the Ground Wire Screw and unplug the connection wire of PS2 Port to remove the PS2 Port. 10.
- Page 39 13. Align the WLAN module to the Ethernet port and plug into it. 14. Secure the module onto the back plate. 15. Thread the Module Connection Wire through the other connection wires on the mainboard as the direction showed in figure. Then arrange the Antenna Connection Wire as the arrow showed.
- Page 40 17. Put the Fixture Plate first then the Washer and tighten the Nut to mount Antenna Connection Wire on the printer. 【 】 Note It is suggested to tighten the Nut with long-nose pliers when mounting the Antenna Connection Wire. 18.
-
Page 41: Cf Card Adapter Installation
4-4. CF Card Adapter Installation CF Card Adapter (Front) CF Card Adapter (Back) 【 】 Note Please power off the printer before installing the CF Card Adapter. Open the top cover by pressing the Cover Open Buttons on both sides. Take off the label roll core. -
Page 42: Cf Card Instruction
If choose not to format the CF Card, just open the Top Cover of printer and wait for the turn-on procedure complete. After the format is complete, a file folder named “Godex” would be created automatically. This folder is for storing all the data from the printer, please don’t do any change on it. -
Page 43: Maintenance And Adjustment
5. Maintenance and Adjustment 5-1. Thermal Print Head Cleaning Unclear printouts may be caused by dusty print head, ribbon stain or label liner glue. Therefore when printing, it’s necessary to keep the top cover closed. Also, check and prevent paper/label from being stained or dusty to ensure print quality and to prolong the print head life. -
Page 44: Print Line Adjustment
5-3. Print Line Adjustment To get better printing balance and quality, use print head adjusting gear to adjust the contacting surface between print head and label. When turning print head adjusting gear counter-clockwise (as arrow 1 shows), print head would move in the direction where arrow A shows. -
Page 45: Troubleshooting
5-5. Troubleshooting Problem Recommended Solution ♦ Power on the printer, but the Check the power connector is plugged correctly LED does not light up ♦ LED light turns red Check for software setting or program command errors ♦ (power/status) after printing Replace with suitable label or ribbon ♦...
Need help?
Do you have a question about the EZPi-1200 and is the answer not in the manual?
Questions and answers