Table of Contents
Advertisement
Quick Links
Download this manual
See also:
User Manual
Advertisement
Table of Contents

Subscribe to Our Youtube Channel
Related Manuals for Godex EZDT2


Summary of Contents for Godex EZDT2
-
Page 1: User Manual
User Manual EZDT2 / EZDT4 P/N. 920-012511-04 Rev. B, 05.2010... -
Page 2: Safety Instructions
Be careful not to get liquid on the equipment to avoid electrical shock. For safety and warranty reasons, ONLY qualified service personnel should open the equipment. Do not repair or adjust energized equipment under any circumstances. EZDT2 / EZDT4 User Manual... -
Page 3: Table Of Contents
4-1. Installing the label dispenser ..................17 4-2. Installing the cutter ......................20 4-3. Installing the Ethernet module – EZDT2 thermal printer ..........23 4-4. Installing the Ethernet module – EZDT4 thermal printer ..........27 5. MAINTENANCE AND ADJUSTMENT ........30 5-1. -
Page 4: Barcode Printer
Label roll diameter: Max. 5” (127 mm) Core diameter: 1”, 1.5” (25.4 mm, 38.1 Core diameter: 1”, 1.5” (25.4 mm, 38.1 EZPL, GEPL (Godex Eltron® Printer Language), GZPL (Godex Zebra® Printer Printer Language Language) Label design software: QLabel-IV (for EZPL only) Software Driver &... - Page 5 ** Minimum print height specification compliance can be dependent on non-standard material variables such as label type, thickness, spacing, liner construction, etc. Godex is pleased to test non-standard materials for minimum height printing capability.
-
Page 6: Interfaces
】 Note The total current to the serial port may not exceed 500 mA. USB port Connector type : Type B Pin No. Function VBUS Internal interface UART1 wafer Ethernet module E_MD E_MD E_RST E_RST EZDT2 / EZDT4 User Manual... -
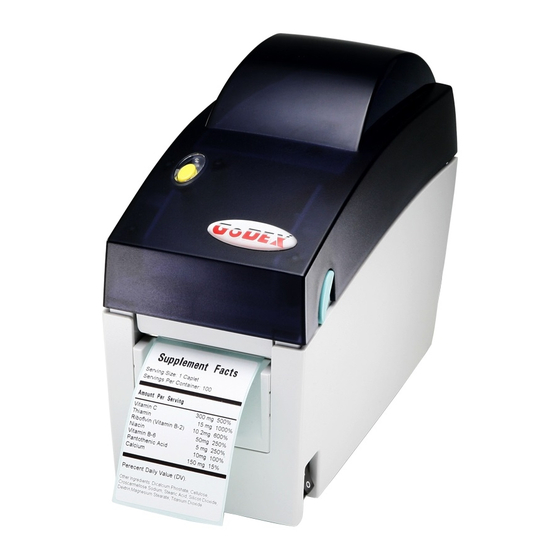
Page 7: Getting To Know Your Printer
1-4. Getting to know your printer LED indicator FEED function button Printer cover On/off switch Release buttons Print head release lever Label roll holder Print mechanism Label supply hub Label guides Front cover EZDT2 / EZDT4 User Manual... - Page 8 Platen cover Label sensor Platen roller Power jack USB port Feed slot for continuous labels Serial port (RS-232) Cover on bottom of printer Mounting points EZDT2 / EZDT4 User Manual...
-
Page 9: Printer Setup
Install the label roll on the label supply hub. Now press the label roll holder down until it clicks into place. Return the label roll holder to its original position. EZDT2 / EZDT4 User Manual... - Page 10 Pass the label under the paper guides and pull it forward. Adjust the paper guides to the width of the label liner. Close the printer cover to finish loading the labels. EZDT2 / EZDT4 User Manual...
-
Page 11: Installing The Label Roll Holder
【 】 Note The hub is also marked on both sides to indicate the core size, as shown in the illustration. 1.5" core EZDT2 / EZDT4 User Manual... -
Page 12: Connecting The Printer To The Host Computer
Connect the power cord to the power supply and to the AC adapter, then connect the adapter to the printer. Connect the printer with the host computer via the USB port or serial port. Switch on the printer. The LED indicator should light up. EZDT2 / EZDT4 User Manual... -
Page 13: Installing The Driver
Follow the instructions in the installation wizard. Select "Install printer drivers" to start with the driver installation. Specify your printer model and continue with the installation. EZDT2 / EZDT4 User Manual... - Page 14 10. If all settings are correct, click Finish to start copying the driver files. 11. Once copying is complete, the new printer should be visible in the "Printers and Faxes" folder. EZDT2 / EZDT4 User Manual...
-
Page 15: Operator Panel
4. Switch on the printer, keeping the FEED button pressed. When the LED starts to flash red, release the FEED button. The printer will now measure the label stock and store the label height. 5. Once the printer has successfully measured the label stock, it will print a self-test label. EZDT2 / EZDT4 User Manual... -
Page 16: Self Test
3-4. Self test The self-test function helps you find out whether the printer is functioning normally. The printer prints the following test page: EZDT2 / EZDT4 User Manual... -
Page 17: Error Alerts
A file of the same name already Change the name of the file and try 2 x 2 beeps exists. The printer prints the storing it again. message "Filename is repeated". EZDT2 / EZDT4 User Manual... -
Page 18: Accessories
Remove the front cover. 【 】 Note You can use a coin or screwdriver to open the cover. Pass the dispenser cable through the opening as shown in the illustration. Fit the label dispenser in the recess provided. EZDT2 / EZDT4 User Manual... - Page 19 Please make sure that you are using the correct connector. Close the cover again (EZDT2: and secure it with the screw). Place the printer the right way up again. EZDT2 / EZDT4 User Manual...
- Page 20 13. Pass the label liner through the printer and dispenser as shown in the illustration. 14. Fold up the dispenser cover to close it. 15. Switch on the printer and press the FEED button to measure the label stock. EZDT2 / EZDT4 User Manual...
-
Page 21: Installing The Cutter
Place the printer on a flat surface and open the printer cover. Remove the front cover. Pass the cutter cable through the opening as shown in the illustration. Fit the label cutter in the recess provided. EZDT2 / EZDT4 User Manual... - Page 22 Please make sure that you are using the correct connector. Close the cover on the bottom of the printer (EZDT2: and secure it with the screw). Place the printer the right way up again. In the next step, load the label stock.
- Page 23 10. Follow the instructions in Section 2-1. 11. Pass the start of the label roll through the cutter and press the FEED button to finish. EZDT2 / EZDT4 User Manual...
-
Page 24: Installing The Ethernet Module - Ezdt2 Thermal Printer
4-3. Installing the Ethernet module – EZDT2 thermal printer Ethernet cable, 1.8 m Connection cable (module to motherboard) Bracket Ethernet module Motherboard back panel Screws for Ethernet module (set of 2) Fastening screw (1 screw) 【 】 Caution Please make sure that you take precautions to prevent electrostatic discharge during the installation. - Page 25 Secure the new back panel using the two hex screws. Secure the Ethernet module on the bracket. 10. Plug the connection cable into the socket on the motherboard and position it between the capacitators to secure it, as shown in the illustration. EZDT2 / EZDT4 User Manual...
- Page 26 Ethernet module socket. 14. To avoid damage to the cable when reassembling the printer, all cables on the right of the motherboard should be routed close to the right-hand side of the housing. EZDT2 / EZDT4 User Manual...
- Page 27 Once you have finished installing the Ethernet module, the command "^XSET,USBETHERNET,1" must be sent to the printer to enable the Ethernet module. While the Ethernet module is enabled, the USB port is disabled. To enable it again, send the command "^XSET,USBETHERNET,0" to the printer. EZDT2 / EZDT4 User Manual...
-
Page 28: Installing The Ethernet Module - Ezdt4 Thermal Printer
Press the release buttons on either side of the printer cover and pull them forward. You can now open the printer cover. Place the printer the right way up again and lift the front cover. EZDT2 / EZDT4 User Manual... - Page 29 Align the Ethernet module with the new motherboard back panel. Secure the Ethernet module using the screw supplied. 10. Connect the Ethernet module to the motherboard using the connection cable as shown in the illustration. EZDT2 / EZDT4 User Manual...
- Page 30 Once you have finished installing the Ethernet module, the command "^XSET,USBETHERNET,1" must be sent to the printer to enable the Ethernet module. While the Ethernet module is enabled, the USB port is disabled. To enable it again, send the command "^XSET,USBETHERNET,0" to the printer. EZDT2 / EZDT4 User Manual...
-
Page 31: Maintenance And Adjustment
Use a screwdriver and turn the screw anticlockwise to loosen the cutter blade and pull out the jammed label. When you have cleared the jam, turn the screw clockwise to secure the cutter blade again. EZDT2 / EZDT4 User Manual... -
Page 32: Labels With Black Marks
EZDT4 For 118 mm wide label stock, the black marks should have the following positions and sizes: A > 10.05 mm high B < 1.95 mm high C > 8.1 mm high EZDT2 / EZDT4 User Manual... -
Page 33: Troubleshooting
Check whether there is dust on the label dispenser. Check whether the label stock is positioned correctly. 【 】 Note If any problems occur that are not described here, please contact your dealer. EZDT2 / EZDT4 User Manual...
Need help?
Do you have a question about the EZDT2 and is the answer not in the manual?
Questions and answers