
Related Manuals for Deerc D20


Summary of Contents for Deerc D20
- Page 1 Instructions For Use Gebrauchsanweisung V 4.0 usa@deerc.com (USA) eu@deerc.com (EU) +1(855)777-8866...
- Page 2 English 01-29 Deutsch 30-56...
-
Page 3: Table Of Contents
Contents 1.0 Disclaimer & Warning ................2.0 Safety Guidelines ..................3.0 Maintenance ....................4.0 Package Contents ..................5.0 Drone Details ....................6.0 Transmitter Details ..................7.0 Joystick Mode ....................8.0 Charging ...................... 9.0 Installation Propeller ......................Propeller Guard .................... Drone Battery ....................Camera Angle Adjustment .............. -
Page 4: Disclaimer & Warning
You agree to only use this product for it's designed purposes and in accordance with the local laws, regulations and all applicable policies and guidelines that Deerc may provide. 2. When using this product, please be sure to strictly abide by the specifica- tion requirements and safety guidelines stated in this document. - Page 5 ④ Please perform a thorough check of the product before each use. Inspect the integrity of the parts, any signs of cracks and wear off on the propellers, battery power and effectiveness of the indicator, etc. If there is any problem found after checking the drone, please refrain from using it until the problem is resolved.
- Page 6 2.3 Operations Requirements ① DO NOT use this product to follow any moving vehicles. ② During the flight, turn off the motors only in case of an emergency. ③ When the battery runs low, return the drone back to your starting point. ④...
- Page 7 ⑥ If the device is not going to be used for an extended period of time, please remove batteries to prevent potential damage to the drone from battery leakage. ⑦ Only use the USB charging cable that comes with the drone to charge the battery.
-
Page 8: Maintenance
3.0 MAINTENANCE ① Clean the drone after each use with a clean, soft cloth. ② Avoid prolonged exposure to direct sunlight and avoid buildup of heat on the drone or batteries. ③ This device is not waterproof and must not be submerged or subjected to water under any circumstance. -
Page 9: Package Contents
4.0 PACKAGE CONTENTS Drone Battery Transmitter Drone USB Charging Propeller Guard Spare Propellers Cable Instructions For Use Gebrauchsanweisung V 4.0 usa@deerc.com (USA) eu@deerc.com (EU) +1(855)777-8866 Screwdriver Instructions For Use -06-... -
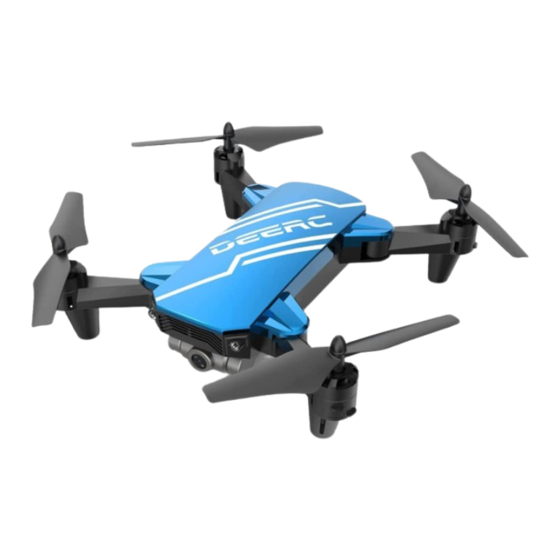
Page 10: Drone Details
5.0 DRONE DETAILS Propeller B Propeller A Propeller A Propeller B Propeller Guard HD Camera Power Switch (Long press) Drone Battery -07-... -
Page 11: Transmitter Details
6.0 TRANSMITTER DETAILS Phone Holder Right Joystick Left Joystick Power Switch Trimmer (Long press) Power Indicator One Key takeoff & Landing Speed Switch /Emergency stop (Long press) 360° Flip/ Take Photo/ Headless Mode Record video (Long press) (Long press) -08-... -
Page 12: Joystick Mode
7.0 JOYSTICK MODE 7.1 MODE 2 (Default Setting) Left Joystick Right Joystick Forward Ascend Descend Down Backward Down Right Left Right Left Fly to Fly to Rotate Left Rotate Right Left Right 7.2 MODE 1 To enter MODE 1, turn on the transmitter while holding the “Speed Switch”... -
Page 13: Charging
8.0 CHARGING USB Adapter (5V/0.5-2.0A) Power Bank 1) When the drone battery runs low, the indicator lights on the drone will blink continuously. About one minute the drone will automatically land on low battery power. 2) Remove the battery and connect the USB charging cable to the battery charging interface. -
Page 14: Installation Propeller
9.0 INSTALLATION 9.1 Propeller HEAD Pic 1 Pic 2 ① Install the propeller on the motor shaft according to the “A/B” corresponding position. (Pic1) ② Use a screwdriver to twist and tighten the screw by pressing the clockwise direction. (Pic2) - - - - - - - - - - - - - - - - - - - - - - - - - - - - - - - - - - - - - - - - - - - - - - - - - - - - - - - - - - - 9.2 Propeller Guard As shown in the picture, install the propeller guard to the motor base. -
Page 15: Drone Battery
9.3 Drone Battery Pic 3 Pic 4 Installation: Push the battery correctly into the drone battery compartment. Make sure the battery is in place to ensure that the battery is jammed in the battery compartment. (Pic3) Removal: Press the lock on the bottom of the battery and pull it back to remove the battery from the fuselage. -
Page 16: Transmitter Battery
9.5 Transmitter Battery Battery Cover 3 x 1.5V AA (Not included) As shown above, insert the battery into the transmitter. Please pay attention to the positive and negative polarity of the battery to ensure the correct installation of the battery. When the transmitter battery runs low, the power indicator of the transmit- ter will blink continuously. -
Page 17: Operation Guide
10.0 OPERATION GUIDE 10.1 Download APP Android APP on Google play Scan the QR code, connect to the App Store™ or Google™ Play and download the “DE FPV” application for free. Required Operating Systems: iOS 9.0 or later/Android 5.1 or later 10.2 Connect to Wi-Fi Connect your phone to the Wi-Fi network created by the drone. -
Page 18: Pairing
All of the operations shown in this manual are demonstrated using MODE 2. 10.3 Pairing ① Press and hold the Power Button for 3 seconds to turn on the drone Power Button and the indicator lights on the drone begins to flash. HEAD ②... -
Page 19: Calibrating The Gyro
10.4 Calibrating the Gyro Push both joysticks down to the bottom right to calibrate the gyro. The indicator lights on the drone will blink quickly and turn solid, indicating calibration is completed. Tip: To ensure a stable flight, we suggest that the pilot calibrates the gyro every time after pairing the drone and after a crash. -
Page 20: Functions Details
11.0 FUNCTIONS DETAILS 11.1 Emergency Stop The Emergency Stop function should only be used in case of emergency during the flight to avoid any damage or injury. Long Press Press and hold the Emergency Stop button ( ) of the transmitter for 2 seconds, the motors will stop immediately. -
Page 21: Trimmer Function
11.3 Trimmer Function F/B Sidewards Drift Trim: Short press the Trimmer button ( ) to enter the Trimmer function. If the drone drifts forward, push the direction joystick down to balance the drone. If the drone drifts backwards, push the direction joystick up to balance the drone. -
Page 22: Take Photo/Video
11.4 Take Photo/Video Take Photo: Press the Photo/Video button ( ) on the transmitter to take pictures. One beep can be heard from the transmitter, and the light flashes once indicating the camera has successfully taken a picture. Record Video: Press and hold the Photo/Video button ( ) on the transmitter for 2 seconds, one long beep from the transmitter will be heard and the... -
Page 23: 360° Flip
11.5 360° Flip 10 Feet When you get familiar with all the functions of the drone, you can try this amazing flip mode. When you fly the drone at least 10 feet, short press the 360° Flip button ( ) on the transmitter, then push the right joystick Forward/Backward or Left/Right, and the drone will do a flip towards the corresponding direction. -
Page 24: Headless Mode
11.6 Headless Mode 1. After pairing/calibration, long press the the Headless Mode button ( on the transmitter to enter the Headless Mode. The indicator lights on the drone continue to flash to indicate that it is in Headless Mode. 2. Press the Headless Mode button again, and you will hear a beep, the indicator lights on the drone will turn solid which indicates the drone exits the Headless Mode. -
Page 25: Specifications
12.0 SPECIFICATIONS DRONE Model: D20 Weight: 69g/2.4oz Max Flight Time: 10 minutes (per battery) Motor Model: 716 Operating Temperature Range: 32° to 104°F (0° to 40°C) Size: 178*117*42 mm(Unfolded) 94*90*42 mm(Folded) - - - - - - - - - - - - - - - - - - - - - - - - - - - - - - - - - - - - - - - - - - - - - - - - - - - - - - - - - - -... - Page 26 TRANSMITTER Operating Frequency: 2452-2474MHz Max Flight Distance: 131 feet/40m (outdoors and unobstructed) Operating Temperature Range: 32° to 104°F (0° to 40°C) Battery Type: 1.5V AA Battery - - - - - - - - - - - - - - - - - - - - - - - - - - - - - - - - - - - - - - - - - - - - - - - - - - - - - - - - - - - CAMERA Operating Frequency: 2417MHz Lens Angle: 80 °...
-
Page 27: Trouble Shooting
- - - - - - - - - - - - - - - - - - - - - - - - - - - - - - - - - - - - - - - - - - - - - - - - - - - - - - - - - - - 14.0 CONTACT US Please do not hesitate to contact us if you need further support. 4:00 PM ~ 7:00 AM (PST) usa@deerc.com (USA) eu@deerc.com (EU) jp@deerc.com (JP) For online support, please scan... -
Page 28: General Information
The Supplier's Declaration of Conformity is available at the following address: https://www.deerc.com/Download/US/D20_FCC_sDoC.pdf. NOTE: This equipment has been tested and found to comply with the limits for a Class B digital device, pursuant to Part 15 of the FCC Rules. These limits are set to provide reasonable protection against harmful interference in a residential installation. - Page 29 RF Exposure The equipment complies with FCC radiation exposure limits set forth for an uncontrolled environment. This device should be installed and operated with a minimum distance of 20cm between the radiator & your body. IC Notice: This device complies with Canada Industry licence-exempt RSS standard(s). Operation is subject to the following two conditions: (1) this device may not cause interference;...
- Page 30 Déclaration d'exposition aux radiations: Cet équipement est conforme aux limites d'exposition aux rayonnements IC établies pour un environnement non contrôlé. Cet équipement doit être installé et utilisé avec un minimum de 20 cm de distance entre lasource de rayonnement et votre corps. HOW TO RECYCLE THIS PRODUCT This symbol on the product or its documentation indicates that it must not be disposed of together with household waste.
- Page 31 6. Never charger on a flammable surface, near flammable products or inside a vehicle(It’s better to place the battery in a non-flammable and nonconduc- tive container). 7. Never leave the battery unattended during the charging process. Never disassemble or modify the housing’s wiring, or puncture the cells. Always ensure that the charger output voltage corresponds to the voltage of the battery.
- Page 32 Directive 2009/48/EC have been fully fulfilled on our product with indication below: Product Name: Remote control four axis series Model/Mark: D20/DEERC The Statement of compliance is available at the following address: http://www.deerc.com/Download/CE/D20_EU_DOC.pdf This product can be used across EU member states.
Need help?
Do you have a question about the D20 and is the answer not in the manual?
Questions and answers