
Related Manuals for Rockwell Automation 1771-IFMS


Summary of Contents for Rockwell Automation 1771-IFMS
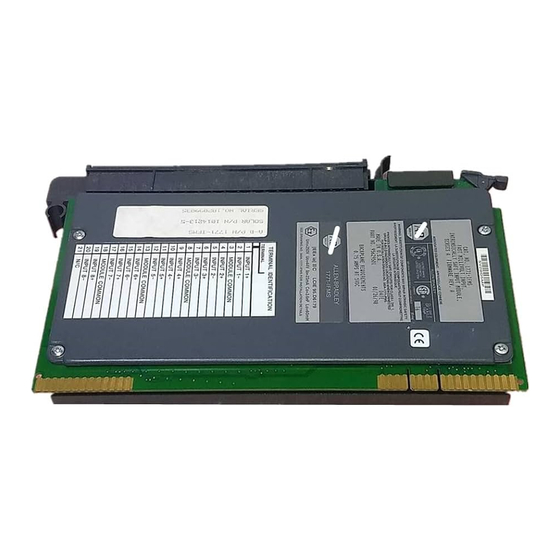
- Page 1 Intrinsically Safe Fast Millivolt Input Module User Manual 1771-IFMS (Catalog Numbers...
- Page 2 No patent liability is assumed by Rockwell Automation, Inc. with respect to use of information, circuits, equipment, or software described in this manual. Reproduction of the contents of this manual, in whole or in part, without written permission of Rockwell Automation, Inc., is prohibited.
-
Page 3: Table Of Contents
Table of Contents Preface About this Manual Purpose ........P-1 Audience . - Page 4 Table of Contents Chapter 4 Module Configuration Chapter Objectives ......4-1 Configuring Your Input Module.
- Page 5 Table of Contents Appendix C Data Formats 4-Digit Binary Coded Decimal (BCD)....C-1 (12-bit) Binary ....... . . C-2 Appendix D Block Transfer (Mini-PLC-2 and Mulitple GET Instructions - Mini-PLC-2 and...
- Page 6 Table of Contents Publication 1771-6.5.119...
-
Page 13: Chapter 1 Chapter Objectives
Chapter Install the Module Chapter Objectives This chapter gives you information on: • calculating the chassis power requirement • choosing the module’s location in the 1771 chassis • keying a chassis slot for your module • wiring the input module’s field wiring arm •... - Page 14 Install the Module European Hazardous Location Approval ATTENTION ASSOCIATED APPARATUS Certification (The following applies when the product bears the Ex or EEx Marking) This equipment is intended for use in potentially explosive atmospheres as defined by European Union Directive 94/9/EC. The LCIE (Laboratoire Central des Industries Electriques) certifies that this equipment has been found to comply with the Essential Health and Safety Requirements relating to the design and construction of apparatus for use in safe areas with Intrinsically Safe Circuits intended for use in potentially explosive...
- Page 15 Install the Module Environment and Enclosure ATTENTION This equipment is intended for use in a Pollution Degree 2 industrial environment, in overvoltage Category II applications (as defined in IEC 60664-1), at altitudes up to 2000 m (6562 ft) without derating. This equipment is considered Group 1, Class A industrial equipment according to IEC/CISPR 11.
-
Page 16: Module Location In The 1771 Chassis
Install the Module North American Hazardous Location Approval The following information applies when operating this equipment Informations sur l’utilisation de cet équipement en environnements in hazardous locations. dangereux. Products marked "CL I, DIV 2, GP A, B, C, D" are suitable for use in Class I Les produits marqués "CL I, DIV 2, GP A, B, C, D"... -
Page 17: Key The Backplane Connector
Install the Module Key the Backplane With your fingers, insert the keying bands in the backplane connector to correspond to the key slots on the module. This prevents you from Connector inserting the wrong module into the slot. For this module, place the keying bands between the following connectors: •... - Page 18 Install the Module 2. On the 1771 chassis, lift the locking bar or locking tab for the desired slot. 1771 Series B Chassis 1771 Chassis locking bar locking tab locking bar pin 19809-C 3. Attach the wiring arm, 1771-WD, to the horizontal bar at the bottom of the chassis.
-
Page 19: Wire The Module
Install the Module Wire the Module Using the diagram below, connect your I/O devices to the wiring arm. ATTENTION Total analog input cable connection length must be less than 15 meters (50 ft). Nonhazardous or Class I, DIV 2 Class I, DIV 1 Groups A, B, C and D Groups A,B,C and D Channel 1+... -
Page 20: Ground The Module
Install the Module Ground the Module When using shielded cable wire, ground the foil shield and drain wire only at on end of the cable. We recommend that you wrap the foil shield and drain wire together and connect them to a chassis mounting bolt. -
Page 21: Single-Point Grounding
Install the Module Single-point Grounding Extend shield to termination point. Expose just enough cable to adequately terminate inner conductors. Use heat shrink tubing or other suitable insulation where wire exits cabe jacket. Shield and Drain twisted together 19923-M External-tooth #10 Thread-forming screw washer Publication 1771-6.5.119... -
Page 22: Status Indicator Behavior
2-10 Install the Module Status Indicator Behavior After applying power to the module, the red FLT indicator turns on during a self check. If there is not fault, the red FLT indicator turns off and the green RUN indicator turns on. If a fault occurs at a later time the red FLT indicator turns on again. - Page 41 Appendix Specifications Intrinsically Safe Fast Millivolt Input Module - 1771-IFMS Attribute Value Inputs 8, differential, low-levels Input voltage range 0…50 mV Resolution 12-bit binary Accuracy 0.1% of range @ 25 °C Linearity ±1 LSB Repeatability ±1 LSB Input overvoltage protection 1M Ω...
- Page 42 Specifications Intrinsically Safe Fast Millivolt Input Module - 1771-IFMS Attribute Value Wiring arm 1771-WG Field Wiring Arm Screw 0.8…1.0 Nm (7…9 lb•in) Torque Enclosure Type Rating None (open-style) North American Temp Code Use this Conductor Category information for planning conductor routing. Refer to Industrial Automation Wiring and Grounding Guidelines, publication 1770-4.1.
- Page 43 Specifications Certifications Attribute Value c-UL-us UL Listed Industrial Control Equipment, certified for US and Canada. See UL File E112294. CSA Certified Process Control Equipment for Class I, Division 2 Group A,B,C,D Hazardous Locations. See CSA File LR88915. European Union 2004/108/EC EMC Directive, compliant with: EN 61326-1;...
- Page 44 Specifications Publication 1771-6.5.119...
- Page 55 Appendix Installation Drawing Publication 1771-6.5.119...
- Page 56 Installation Drawing Publication 1771-6.5.119...
- Page 60 New Product Satisfaction Return Rockwell Automation tests all of its products to ensure that they are fully operational when shipped from the manufacturing facility. However, if your product is not functioning and needs to be returned, follow these procedures.
Need help?
Do you have a question about the 1771-IFMS and is the answer not in the manual?
Questions and answers