
Subscribe to Our Youtube Channel
Related Manuals for Pfeiffer Vacuum BA 251


Summary of Contents for Pfeiffer Vacuum BA 251
- Page 1 OPERATING INSTRUCTIONS Translation of the Original BA 251 | BA 501 Rotary vane pump...
- Page 2 Dear Customer, Thank you for choosing a Pfeiffer Vacuum product. Your new rotary vane pump is designed to support you by its performance, its perfect operation and without interfering your individual application. The name Pfeiffer Vacuum stands for high-quality vacuum technology, a comprehensive and complete range of top-quality products and first-class service.
-
Page 3: Table Of Contents
Limits of use of product Proper use Foreseeable improper use Personnel qualification 2.7.1 Ensuring personnel qualification 2.7.2 Personnel qualification for maintenance and repair 2.7.3 Advanced training with Pfeiffer Vacuum Product description Function 3.1.1 Actuator 3.1.2 Gas ballast 3.1.3 Cooling water controller 3.1.4 Venting or measuring connection... - Page 4 Recommissioning Recycling and disposal General disposal information Dispose of rotary vane pump Malfunctions Service solutions by Pfeiffer Vacuum Spare parts 12.1 Ordering spare part packages 12.2 Set of seals 12.3 Maintenance kit 1 – maintenance level 1 12.4 Maintenance kit – RSSR outside 12.5 Maintenance kit –...
- Page 5 Features of the rotary vane pumps Tbl. 5: Requirements on the cooling water composition Tbl. 6: Settings for the motor protection switch for BA 251 Tbl. 7: Settings for the motor protection switch for BA 501 Tbl. 8: Settings for v-belt bias Tbl.
- Page 6 Oiler and locking screw on a bearing shield Fig. 22: Gas ballast valve Fig. 23: Top of gas ballast valve Fig. 24: Checking v-belt bias with load hook Fig. 25: Dimensions of UnoLine Plus BA 251 Fig. 26: Dimensions of UnoLine Plus BA 501 6/72...
-
Page 7: About This Manual
Keep the manual for future consultation. 1.1 Validity This operating instructions is a customer document of Pfeiffer Vacuum. The operating instructions de- scribe the functions of the named product and provide the most important information for the safe use of the device. The description is written in accordance with the valid directives. The information in this op- erating instructions refers to the product's current development status. -
Page 8: Stickers On Product
This section describes all the stickers on the product along with their meanings. Rating plate (example) D-35614 Asslar D-35614 Asslar Rating plate of the rotary vane vacuum pump Mod. BA 251 Mod. BA 501 PK C42 xxx PK C43 xxx Motor rating plate (not shown) -
Page 9: Abbreviations
About this manual Fig. 1: Position of the stickers on the product 1 Hot surface warning sign Sticker: Check direction of rotation 2 Rating plate of the rotary vane vacuum pump Arrow indicating direction of rotation 3 Notice: Fill up operating fluid Warning symbol: Danger of drawing in at the belt drive 4 Notice: Operating fluid F5 optional... -
Page 10: Safety
Safety 2 Safety 2.1 General safety information The following 4 risk levels and 1 information level are taken into account in this document. DANGER Immediately pending danger Indicates an immediately pending danger that will result in death or serious injury if not observed. ►... - Page 11 ► Install suitable touch protection if the vacuum pump is accessible to untrained persons. ► Allow the vacuum pump to cool down before carrying out any work. ► Contact Pfeiffer Vacuum for suitable touch protection in system solutions. Risks during operation...
- Page 12 ► Install suitable touch protection if the vacuum pump is accessible to untrained persons. ► Allow the vacuum pump to cool down before carrying out any work. ► Contact Pfeiffer Vacuum for suitable touch protection in system solutions. Risks during maintenance, decommissioning and malfunctions...
- Page 13 Safety WARNING Health hazard and risk of environmental damage from toxic contaminated operating fluid Toxic process media can cause operating fluid contamination. When changing the operating fluid, there is a health hazard due to contact with poisonous substances. Illegal disposal of toxic substan- ces causes environmental damage.
-
Page 14: Safety Precautions
Safety Risks during disposal WARNING Health hazard through poisoning from toxic contaminated components or devices Toxic process media result in contamination of devices or parts of them. During maintenance work, there is a risk to health from contact with these poisonous substances. Illegal disposal of toxic sub- stances causes environmental damage. -
Page 15: Proper Use
(F4, F5, A113) as operating fluid. ► Adhere to the installation, commissioning, operating, and maintenance instructions. ► Do not use any accessory parts other than those recommended by Pfeiffer Vacuum. 2.6 Foreseeable improper use Improper use of the product invalidates all warranty and liability claims. Any use that is counter to the purpose of the product, whether intentional or unintentional, is regarded as improper use;... -
Page 16: Ensuring Personnel Qualification
─ Customer with Pfeiffer Vacuum service training ─ Pfeiffer Vacuum service technician 2.7.3 Advanced training with Pfeiffer Vacuum For optimal and trouble-free use of this product, Pfeiffer Vacuum offers a comprehensive range of courses and technical trainings. For more information, please contact Pfeiffer Vacuum technical training. -
Page 17: Product Description
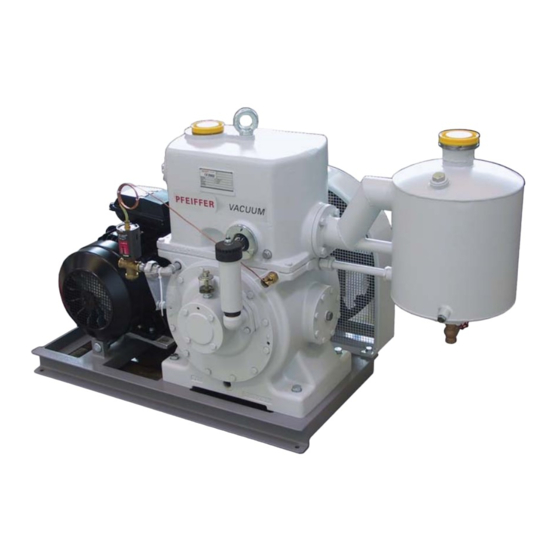
Product description 3 Product description 3.1 Function The water-cooled UnoLine Plus rotary vane pumps are single-stage vacuum pumps. The vacuum pumps are equipped with an operating fluid storage tank with return line. The spring-loaded pump valves are made of wear proof stainless steel. Thanks to their robust design, the pumps are especially suitable for vacuum generation in industrial applications Fig. -
Page 18: Cooling Water Controller
Product description 3.1.3 Cooling water controller The cooling water controller controls the flow rate of the cooling water as a function of the pump temper- ature, so that the rotary vane pump remains at operating temperature. The cooling water controller is a continuously operating control valve controlled by the temperature-dependent refrigerant. -
Page 19: Product Features
Features of the rotary vane pumps 3.4 Identifying the product ► To ensure clear identification of the product when communicating with Pfeiffer Vacuum, always keep all of the information on the rating plate to hand. ► Observe the motor-specific data on the motor rating plate attached separately. -
Page 20: Transportation And Storage
4. For lifting, use the eye bolts intended for this purpose on the top of the pump. – Rotary vane pump BA 251 has only one eye bolt. 5. Alternatively: Lift up the vacuum pump by means of a forklift truck, using the two holes on the side of the base frame. -
Page 21: Storing Vacuum Pump
► Do not store the vacuum pump in the vicinity of machines, traffic routes, or similar. Storage Pfeiffer Vacuum recommends storing the products in their original transport packaging. Procedure 1. Close both connection flanges and all openings on the vacuum pump. -
Page 22: Installation
NOTICE Property damage from contaminated gases Pumping gases that contain contamination damages the vacuum pump. ► Use suitable filters or separators from the Pfeiffer Vacuum range of accessories, to protect the vacuum pump. Required tools ● Socket key, WAF 13 ●... -
Page 23: Fig. 5: Vacuum Connection With Flange Connection
7. Support or suspend the piping to the vacuum pump so that no piping system forces act on the vacuum pump. 8. Use a separator or filter from the Pfeiffer Vacuum line of accessories, if necessary. Establishing horizontal vacuum connection 1. -
Page 24: Connecting Exhaust Side
7. Support or suspend the piping to the vacuum pump so that no piping system forces act on the vacuum pump. 8. Use a separator or filter from the Pfeiffer Vacuum line of accessories, if necessary. 5.3 Connecting exhaust side WARNING... -
Page 25: Connecting The Cooling Water Supply
6. Support or suspend the piping to the vacuum pump so that no piping system forces act on the vacuum pump. 7. Use a separator or filter from the Pfeiffer Vacuum line of accessories, if necessary. 5.4 Connecting the cooling water supply... -
Page 26: Connecting To Mains Power Supply
Installation Fig. 7: Connecting the cooling water supply 1 Cooling water inlet, 1/2" thread Cooling water outlet, 1/2" thread 2 Cooling water controller Cooling water drain screw Recommendations ► Use a dirt trap in the feed line. ► Connect the cooling water supply such that the flow can be visually inspected. ►... -
Page 27: Connecting Three-Phase Motor With 6-Pin Terminal Board
Installation NOTICE Risk of property damage from excess voltage Incorrect or excessive mains voltage will destroy the motor. ► Always observe the motor rating plate specifications. ► Route the mains connection in accordance with locally applicable provisions. ► Always provide a suitable mains fuse to protect the motor and supply cable in the event of a fault. Rotary vane pumps without motor ●... -
Page 28: Setting Motor Protection Switch
► Set the appropriate value on the contactor. 5.5.3 Connecting the PTC thermistor tripping unit Tripping units store the shut-down Pfeiffer Vacuum recommends connecting motors with PTC in the stator winding to a PTC resistor tripping device for protection against overload. 28/72... -
Page 29: Checking Direction Of Rotation
Installation F1 - F3 AC 220 ... 240 V T1...T3 Fig. 10: Connection example with PTC thermistor tripping unit Supply voltage T1 – T3 PTC resistor sensor AUS button Tripping indicator EIN button Motor, 3-phase RESET button For devices with two relay outputs only Contactor For MSR type (model) only F1 –... -
Page 30: Installing Belt Guard
Installation 4. If the direction of rotation is incorrect, exchange the 2 phases on the connection cable. 5. Refill the operating fluid. 6. Tension the v-belt. (see chapter “Tensioning v-belt”, page 52) 5.6 Installing belt guard WARNING Danger of injury from exposed belt drive During maintenance and installation work, the belt guard and, if necessary, reach-in protection of the belt drive are removed in the motor area. -
Page 31: Tensioning V-Belt
Load hook L/2 Half of theoretical strand length Scale for test load Deflection of the strand Deflection gage with scale Required test load Strand Parameter BA 251 BA 501 Force 50 N 50 N Path Tbl. 8: Settings for v-belt bias... -
Page 32: Mounting Belt Guard Temporarily
Installation Procedure 1. Locate the spring balance with load hook at the center of the strand. 2. Pull the spring balance perpendicularly to the strand and apply the required test load using the scale. 3. Measure the deflection of the load-carrying v-belt with the deflection gage. 4. -
Page 33: Installing Cage Nuts
3 Shaft Procedure 1. Position the protection screen on the belt guard, flush at the bottom. – BA 251: Horizontal position – BA 501: Vertical position 2. Position the pump-side and motor-side protective coverings on the belt guard. – Pay attention to the gap of 8 mm to the drive flange or shaft. -
Page 34: Mounting Protective Coverings To Belt Guard
Installation Fig. 15: Mounting belt guard to base frame 1 Belt guard Washer 2 Hexagon head screw, M12×25, 2× Floor panel 3 Washer Washer, 5× 4 Base frame Oval-head tapping screw, 5× 5 Hexagon head screw, M8×16, 2× Procedure 1. From above, place the belt guard on the base frame. 2. -
Page 35: Filling Up Operating Fluid
Product-specific performance data are not achieved. All liability and warranty claims against Pfeiffer Vacuum are also excluded. ► Only use approved operating fluids. ► Only use other application-specific operating fluids after consultation with Pfeiffer Vacuum. Prerequisite ● Vacuum pump cooled Approved operating fluid ●... - Page 36 Installation Filling up operating fluid 1. Unscrew the filler screw. 2. Refill the operating fluid. – Fill level on initial fill: Middle of the inspection glass 3. Screw in the filler screw. – Be careful with the o-ring. – Tightening torque: 60.0 Nm Checking oiler Ex factory, the oil chambers of the bearings are filled with the operating fluid of the rotary vane pump.
-
Page 37: Operation
Operation 6 Operation 6.1 Commissioning vacuum pump WARNING Danger of poisoning due to toxic process media escaping from the exhaust pipe During operation with no exhaust line, the vacuum pump allows exhaust gases and vapors to escape freely into the air. There is a risk of injury and fatality due to poisoning in processes with toxic process media. -
Page 38: Switching On Vacuum Pump
► Install suitable touch protection if the vacuum pump is accessible to untrained persons. ► Allow the vacuum pump to cool down before carrying out any work. ► Contact Pfeiffer Vacuum for suitable touch protection in system solutions. NOTICE Risk of damage to the drive from increased motor current consumption At an intake pressure of approximately 300 hPa and under unfavorable operating conditions (such as for example exhaust side counterpressure), the power input exceeds the rated current. -
Page 39: Setting Cooling Water Controller
3. Check operating fluid fill level daily during continuous operation, and every time vacuum pump is switched on. 6.3 Setting cooling water controller Settings following consultation with Pfeiffer Vacuum ● Do not change the operating temperature and maximum operating temperature before consulting Pfeiffer Vacuum. -
Page 40: Operating Rotary Vane Pump With Gas Ballast
► Observe the application instructions and precautions. ► Do not allow tobacco products to come into contact with the operating fluid. Refill during operation Pfeiffer Vacuum recommends refilling operating fluid during operation in final vacuum with- out gas ballast. 40/72... -
Page 41: Switching Off Vacuum Pump
Operation Checking operating fluid level In the event of high gas throughput, the operating fluid is set in motion and might disappear from the visible sight glass area. Reliable monitoring is only possible at intake pressures < 50 hPa. Required consumables ●... -
Page 42: Maintenance
► Dismantle the vacuum pump for inspection, away from the system if necessary. NOTICE Danger of property damage from improper maintenance Unprofessional work on the vacuum pump will lead to damage for which Pfeiffer Vacuum accepts no liability. ► We recommend taking advantage of our service training offering. -
Page 43: Checklist For Inspection And Maintenance
● Determine the specific service lives during the first operating interval. ● Consult with Pfeiffer Vacuum Service if you wish to reduce the maintenance frequency. You can carry out maintenance work at Maintenance Level 1 yourself. -
Page 44: Change The Operating Fluid
Should process conditions change, you can convert to a different operating fluid type. Safety data sheets You can obtain the safety data sheets for operating fluids from Pfeiffer Vacuum on request, or from the Pfeiffer Vacuum Download Center. -
Page 45: Determining Degree Of Aging Of P3 Operating Fluid
Maintenance Instructions for when operating fluid should be changed ● Vacuum pump does not reach the specified final pressure. ● Operating fluid soiled, milky or unclear ● Mineral operating fluid with thermic aging (color number > 4) 7.3.1 Determining degree of aging of P3 operating fluid WARNING Health hazard and risk of environmental damage from toxic contaminated operating fluid Toxic process media can cause operating fluid contamination. -
Page 46: Changing Operating Fluid In Operating Fluid Storage Tank
Required consumables ● Operating fluid of the vacuum pump Required aids ● BA 251: Collection receptacle (> 20 l) ● BA 501: Collection receptacle (> 50 l) Procedure 1. Place a collection receptacle below the operating fluid and condensate drain. -
Page 47: Rinsing And Cleaning Rotary Vane Pump
7.3.3 Rinsing and cleaning rotary vane pump Cleaning by changing the operating fluid In the event of heavy contamination with process residues, Pfeiffer Vacuum recommends cleaning the inside of the vacuum pump only by changing the operating fluid in the operat- ing fluid storage tank once, due to the design and the large amount of operating fluid. -
Page 48: Changing Operating Fluid In Bearings
Maintenance 7.3.4 Changing operating fluid in bearings WARNING Health hazard and risk of environmental damage from toxic contaminated operating fluid Toxic process media can cause operating fluid contamination. When changing the operating fluid, there is a health hazard due to contact with poisonous substances. Illegal disposal of toxic substan- ces causes environmental damage. -
Page 49: Disassembling And Cleaning Gas Ballast Valve
Maintenance Procedure 1. Place a collection receptacle below the locking screw. 2. Unscrew the locking screw. 3. Allow operating fluid to drain into collection receptacle. 4. Screw in the closing screw. – Be careful with the o-ring. – Tightening torque: 15 Nm 5. -
Page 50: Fig. 22: Gas Ballast Valve
Maintenance Fig. 22: Gas ballast valve Circlip Allen head screw, M6 Oval-head screw Clamping blocks Hexagon nut, M5 Intermediate piece Valve spindle O-ring, 32 × 3 Hexagon nut, M12 Hexagon insert Washer Hexagon head screws, M10 Spring washer Washers Lock nut Filled sealing ring Valve cone Housing... -
Page 51: Adjusting The Noise Reduction
Maintenance Cleaning gas ballast valve ► Clean all parts. ► Examine all parts for wear. ► Replace the spare parts using the maintenance kit. Installing gas ballast valve 1. Place the profile seal in the valve cone. 2. Push the valve cone through the lock nut. 3. -
Page 52: Tensioning V-Belt
2 Lock nut Recommendations Pfeiffer Vacuum has preset the noise reduction. ► If possible, do not change the preset noise reduction, as changes adversely affect the final vac- uum of the rotary vane pump without gas ballast, as well as the noise development. -
Page 53: Tbl. 10: Settings For V-Belt Bias
Load hook L/2 Half of theoretical strand length Scale for test load Deflection of the strand Deflection gage with scale Required test load Strand Parameter BA 251 BA 501 Force 50 N 50 N Path Tbl. 10: Settings for v-belt bias Safely operating belt drive ►... -
Page 54: Decommissioning
16. Pack the vacuum pump together with a drying agent in a plastic bag, and seal the vacuum pump airtight if it is to be stored in rooms with damp or aggressive atmospheres. 17. For longer storage periods (> 2 years), Pfeiffer Vacuum recommends changing the operating fluid again prior to recommissioning. -
Page 55: Recycling And Disposal
– Fluoroelastomers (FKM) – Potentially contaminated components that come into contact with media 9.2 Dispose of rotary vane pump Pfeiffer Vacuum rotary vane pumps contain materials that you must recycle. 1. Fully drain the lubricant. 2. Dismantle the motor. 3. Decontaminate the components that come into contact with process gases. -
Page 56: Malfunctions
► Always provide a suitable mains fuse to protect the drive and supply cable in the event of a fault. NOTICE Danger of property damage from improper maintenance Unprofessional work on the vacuum pump will lead to damage for which Pfeiffer Vacuum accepts no liability. ► We recommend taking advantage of our service training offering. - Page 57 ● Replace the motor protection switch. ● Pumping system conta- ● Clean the vacuum pump. minated ● Contact Pfeiffer Vacuum Serv- ice. ● Pumping system dam- ● Clean and maintain the vacuum aged pump. ● Contact Pfeiffer Vacuum Serv- ice.
-
Page 58: Tbl. 11: Troubleshooting For Rotary Vane Pumps
● Clean the noise reduction or re- place it. ● Pumping system conta- ● Clean and maintain the vacuum minated or damaged pump. ● Contact Pfeiffer Vacuum Serv- ice. ● Motor bearing is defec- ● Change the motor. tive ● Contact Pfeiffer Vacuum Serv- ice. -
Page 59: Service Solutions By Pfeiffer Vacuum
We are always focused on perfecting our core competence – servicing of vacuum components. Once you have purchased a product from Pfeiffer Vacuum, our service is far from over. This is often exactly where service begins. Obviously, in proven Pfeiffer Vacuum quality. - Page 60 Service solutions by Pfeiffer Vacuum 5. Prepare the product for transport in accordance with the provisions in the contamination declaration. a) Neutralize the product with nitrogen or dry air. b) Seal all openings with blind flanges, so that they are airtight.
-
Page 61: Spare Parts
► Have the part number to hand, along with other details from the rating plate as required. ► Install original spare parts only. Spare part package Order number BA 251 BA 501 Set of seals PK E40 001 AT PK E40 002 AT Maintenance kit –... -
Page 62: V-Belt Kit
Spare parts 12.7 V-belt kit The v-belt kit contains: ● V-belt 12.8 Exhaust valve kit The exhaust valve kit contains: ● Wear parts for repairing the exhaust valves ● Seals of the pump dome 12.9 Set of vanes The set of vanes contains: ●... -
Page 63: Accessories
Part number Selection field PK 133 115 -T Operating fluid level switch P 4747 161 MF Pressure monitor for cooling water circulation system BA 251/501 310VEP063-02 EVB 063 PA, Angle valve, electro-pneumatic, with PI, with PV, 24 V DC 63/72... - Page 64 Selection field PK 133 115 -T Operating fluid level switch P 4747 161 MF Pressure monitor for cooling water circulation system BA 251/501 310VEP100-02 EVB 100 PA, Angle valve, electro-pneumatic, with PI, with PV, 24 V DC PK Z30 012...
-
Page 65: Tbl. 15: Consumables
Accessories Consumables Order number P3, mineral oil, 1 l PK 001 106 -T P3, mineral oil, 5 l PK 001 107 -T P3, mineral oil, 20 l PK 001 108 -T Tbl. 15: Consumables 65/72... -
Page 66: Technical Data And Dimensions
Technical data and dimensions 14 Technical data and dimensions 14.1 General Basis for the technical data of Pfeiffer Vacuum rotary vane pumps: ● Specifications according to PNEUROP committee PN5 ● ISO 21360-1: 2016: “Vacuum technology - Standard methods for measuring vacuum-pump per- formance - Part 1: General description”... -
Page 67: Technical Data
Technical data and dimensions 14.3 Technical data Type designation BA 251 BA 251 BA 501 BA 501 Part number PK C42 602 PK C42 637 PK C43 602 PK C43 637 Connection flange DN 63 ISO-F DN 63 ISO-F DN 100 ISO-F... -
Page 68: Dimensions
1100 kg Cooling method, – – – – standard Tbl. 19: Technical data 14.4 Dimensions DN 63 ISO -F DN 63 ISO-K DN 16 KF 1030 1529 ø18 (6x) Fig. 25: Dimensions of UnoLine Plus BA 251 Dimensions in mm 68/72... -
Page 69: Fig. 26: Dimensions Of Unoline Plus Ba 501
Technical data and dimensions DN 100 ISO-F DN 100 ISO-K DN 16 KF 1260 1907 1204 ø18 (6x) Fig. 26: Dimensions of UnoLine Plus BA 501 Dimensions in mm 69/72... -
Page 70: Ec Declaration Of Conformity
DIN EN ISO 2151:2009 ISO 21360-2:2020 DIN EN IEC 63000:2019 The authorized representative for the compilation of technical documents is Dr. Adrian Wirth, Pfeiffer Vacuum GmbH, Berliner Straße 43, 35614 Asslar, Germany. Signature: Pfeiffer Vacuum GmbH Berliner Straße 43 35614 Asslar Germany (Daniel Sälzer) -
Page 71: Declaration Of Conformity
ISO 21360-2: 2012 EN IEC 63000:2018 The manufacturer's authorized representative in the United Kingdom and the authorized agent for compiling the technical documentation is Pfeiffer Vacuum Ltd, 16 Plover Close, In- terchange Park, MK169PS Newport Pagnell. Signature: Pfeiffer Vacuum GmbH Berliner Straße 43...
Need help?
Do you have a question about the BA 251 and is the answer not in the manual?
Questions and answers