Table of Contents
Advertisement
Available languages
Available languages
Quick Links
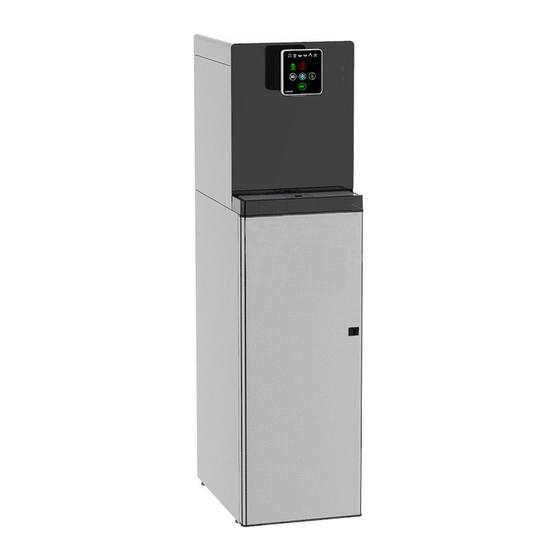
DRINKPAD
Manuel d'installation
Manual
Versions disponibles :
Froide / Tempérée / Chaude / Gazeuse
Froide / Tempérée / Chaude
Froide / Tempérée / Gazeuse
Versions available:
Cold / Ambient / Hot / Sparkling
Cold / Ambient / Hot
Cold / Ambient / Sparkling
Télécharger la notice /
Download manual
ZI Bois de l'Epine - 2 avenue Ambroise Croizat
91130 Ris-Orangis - FRANCE
tel. +33 (0)1 60 79 37 61 | fax. +33 (0)1 60 79 18 26
www.mistralcoolers.com
Advertisement
Table of Contents

Related Manuals for Mistral DRINKPAD


Summary of Contents for Mistral DRINKPAD
- Page 1 DRINKPAD Manuel d’installation Manual Versions disponibles : Froide / Tempérée / Chaude / Gazeuse Froide / Tempérée / Chaude Froide / Tempérée / Gazeuse Versions available: Cold / Ambient / Hot / Sparkling Cold / Ambient / Hot Cold / Ambient / Sparkling Télécharger la notice /...
- Page 2 à la fois. MAINTENANCE Pour garantir le bon fonctionnement et la longévité de la fontaine à eau Mistral, nous préconisons 2 entretiens sanitaires minimum par an. Ces opérations de maintenance doivent être réalisées par un personnel qualifié qui procède au net- toyage externe et interne de la machine afin de la débactériser et la détartrer.
- Page 3 COMMANDES ET FONCTION Les indicateurs de fonctionnement. VOYANT ÉTAT FONCTION SOLUTION Éteint Pas de fuite Fuite détectée Couper l’arrivée d’eau. Voyants N°1 et N°6 (uniquement si l’option est Contrôle général de la machine. clignotants activée) Vérifier que la fontaine est bien alimentée en eau, 1.Eau Allumé...
- Page 4 COMMANDES ET FONCTION Les touches de distribution. Touches Correspondance N° 1 Eau chaude N°2 Eau tempérée N°3 Eau froide N°4 Eau gazeuse N°5 Touche de distribution Se servir en eau Choisissez l’eau que vous souhaitez en appuyant sur la touche correspondante. Pour déclencher la distribution, appuyez ensuite sur la touche Play/Pause.
-
Page 5: Installation
Contactez le service ou l’entreprise en charge de la maintenance pour toutes inter- ventions. Lors de l’installation des fontaines, Mistral préconise de remplacer le flexible d’alimentation par un tube neuf ou de réaliser une désinfection avec un produit bactéricide comme le Sanipure qui réduit les risques de prolifération bactérienne. - Page 6 INSTALLATION VERSIONS ÉTAPES PHOTOS • Installez le bac sur la fontaine en le présentant bien droit. Pous- sez-le jusqu’à ce qu’il soit bien enclenché. Table Top (sans socle) sans évacuation externe • Une fois la fontaine en place, re- tirez le bouchon de la sortie d’éva- cuation du bac récupérateur.
-
Page 7: Installation Du Filtre
INSTALLATION 1. Dévissez à la main le pas de vis de la plaque supérieure situé à l’arrière de la fontaine et, éventuellement, ceux de la plaque latérale (côté droit banc de glace) pour un accès plus facile à la cuve. 2. - Page 8 INSTALLATION 13. Branchez le cordon d’alimentation électrique. 14. Connectez le Watersafe® à l’arrière de la fontaine. RÉGLER LA PÉRIODICITÉ DU FILTRE (Optionnel) Vous pouvez régler la périodicité du filtre à 3, 6 ou 12 mois. Ce réglage se fait sur le dipswitch prévu à cet effet sur la carte électronique principale (Figure 7).
- Page 9 INSTALLATION Figure 8 ATTENTION si le chauffe-eau n’est pas en position «O», la résistance chauffera à blanc et risque de se casser. • Sélectionnez «Eau froide» et appuyez sur le bouton de distribution jusqu’à ce que l’eau coule. • Sélectionnez ensuite «Eau chaude» et appuyez sur le bouton de distribution jusqu’à ce que de l’eau tempé- rée coule.
-
Page 10: Maintenance
MAINTENANCE La maintenance doit être effectuée par une personne qualifiée. 1. Changement du filtre • Le réglage usine de la fontaine implique un changement de filtre tous les 6 mois. • Avant d’installer le filtre et après chaque remplacement, prévoir le rinçage du nouveau filtre. NE PAS PURGER le filtre via les distributions sous peine d’endommager les élec- trovannes. - Page 11 MAINTENANCE • Connectez le doseur à la place du filtre. • Mettez la dose adéquate de Sanipure dans le doseur Filtropure® : 40mL pour une Drinkpad gazeuse - 13mL pour la version non-gazeuse. • Branchez la fontaine. • Ouvrez l’arrivée d’eau et faites circuler l’eau dans les tuyaux.
- Page 12 MAINTENANCE CONTRÔLE DES PANNES Le compresseur ne démarre pas Absence de courant Vérifier la tension Le thermostat est en position arrêt, ou réglé au minimum Régler la position du thermostat Le thermostat est défectueux Remplacer le thermostat Le relais de démarrage est défectueux Remplacer Le condensateur de démarrage est défectueux Remplacer...
- Page 13 SERVICING To ensure the longevity of the Mistral’s cooler, we recommend a minimum of 2 servicings per year. Those maintenance operations have to be made by a qualified technician who realizes the outside and inside cleaning of the machine to sani- tize and discale it.
-
Page 14: Operating Indicators
USER GUIDE Operating indicators INDICATOR STATE FUNCTION SOLUTION No leaks Turn off water supply. General device inspection. Indicator N°1 & 6 Leak flashing (only if option activated) Check that the water cooler is well connected to 1.Water water supply, That water pressure is set at 3 bars Lack of water +/- 0,5 bars. -
Page 15: Water Distribution
USER GUIDE Distribution buttons Keys Link N° 1 Hot water N°2 Ambient water N°3 Cold water N°4 Sparkling water N°5 Distribution button (Play/ Pause) Water distribution First choose the water you want by pushing on the corresponding button, from 1 to 4 (see below chart). To start dispensing water, press the Play/Pause button. -
Page 16: Before Starting Installation
Contact the service or company in charge of maintenance for any interventions. During water coolers installation, Mistral recommend to replace the supply hose by a new one or to disinfect the device with an antibacterial product like Sanipure which reduces the risks of bacterial proliferation. - Page 17 INSTALLATION VERSIONS ÉTAPES PHOTOS • Install the tray on the cooler by presenting it upright. Push it until it clicks into place. Table Top (without base) without external draining • Once the fountain is placed, re- move the cap from the drain outlet of the drip tray.
-
Page 18: Filter Installation
INSTALLATION 1. Manually unscrew the screw threads on the top plate at the back of the device and, eventually, the ones from the side plate (on the right side of the ice bank) for easier access to the tank. 2. Remove the cap of water tank (Figure 3). Figure 3 3. - Page 19 INSTALLATION SET THE PERIODICITY OF THE FILTER (Optional) You can set the periodicity of the filter on 3, 6 or 12 months. This adjustment is done on the corresponding dipswitch on the main circuit board (Figure 7). These dipswitchs have 2 switchs to lower or lift, to set the delay within which the filter will be signalled as used. 1.
- Page 20 INSTALLATION ATTENTION : if the water heater is not on the «O» position, the element will heat up blank and may break. • Select «Cold water» and press on the dispensing button until water ran. • Then, select «Hot water» and press on the dispensing button until ambient water ran out. The water heater is now filled.
-
Page 21: Filter Replacement
MAINTENANCE Maintenance operations must only be done by a qualified person. 1. Filter replacement • Replace the filter according to the chosen recurrence. The factory setting implies a replacement every 6 months. • Before installing the new filter and after every replacement, rinse the new filter. DO NOT DRAIN the filter through the distributions. -
Page 22: General Checking
MAINTENANCE • Put the corresponding Sanipure quantity in the Filtropure® measuring cap : 40mL for sparkling version and 13mL for non sparkling version. Connect the water cooler. • Open water inlet and let water circulates in the pipes. • Leave on for 5 minutes then drain the pipes of cold and ambient water circuits to eliminate all trace of pro- duct. -
Page 23: Fault Checking
MAINTENANCE FAULT CHECKING Compressor does not start No current Check the voltage The thermostat is in off position, or set to low Adjust the position of the thermostat The thermostat is defective Replace the thermostat The starting relay is faulty Replace The starter capacitor is defective Replace... - Page 24 RECOMMANDATIONS LIRE ATTENTIVEMENT TOUTES LES INSTRUCTIONS AVANT INSTALLATION. ATTENTION : ne pas endommager le circuit réfrigérant. Le réfrigérant utilisé est le R600A (environ 45g). Ce gaz est hautement inflammable. Pendant le transport et l’installation de la machine, n’endommagez aucune partie du circuit de réfri- gération.
- Page 25 VUE ÉCLATÉE EXPLODED VIEW Zone d’ouverture / Opening area Interupteur EC / Hot water switch Alimentation / Power Eau / Water Vue de dos / Back view Arrière plan de travail / Zone d’ouverture / Back of the worktop Opening area Passage alim.
- Page 26 NOTES...
- Page 27 NOTES...
- Page 28 Mistral’s Reseller Connectez-vous sur votre extranet Revendeur et retrouvez toutes les informations techniques de l’ensemble des fontaines : Connect you to Mistral reseller area and find all technical informations about coolers: http://www.mistralcoolers.com/fr/portail-distributeur/ Mistral Constructeur - Toute reproduction est interdite - Document non contractuel...
Need help?
Do you have a question about the DRINKPAD and is the answer not in the manual?
Questions and answers