Charge Amps Dawn Installation Manual
Hide thumbs
Also See for Dawn:
- Installation manual (52 pages) ,
- Quick manual (44 pages) ,
- Manual (28 pages)
Table of Contents
Advertisement
Quick Links
Advertisement
Table of Contents

Related Manuals for Charge Amps Dawn


Summary of Contents for Charge Amps Dawn
- Page 1 Charge Amps Dawn Installation English Manual chargeamps.com...
-
Page 2: Table Of Contents
English Table of content Safety Technical data Product Overview Package contents Charge Amps Installation Kit Before installation Recommended tools Materials provided by installer Mounting requirements Electric requirements 4.4.1 Short circuit safety - internal MCB installation 4.4.2 Short circuit safety - external MCB installation 4.4.3... - Page 3 English Configuration Create a Charge Amps Partner Account Configure via Charge Amps Installer App Configure via Installation Wizard Cloud connectivity Dismounting...
- Page 4 Neglecting to follow and carry out the directions, instructions and safety precautions in this Installation Manual implies that any warranty provisions will be cancelled and that Charge Amps AB can reject any and all claims for compensation in connection with any injuries/damage or incidents – direct or indirect –...
-
Page 5: Safety
English Safety WARNING: Read all instructions before installation! • The product must only be installed by a qualified electrician in accordance with the Installation Manual. • Make sure to switch the power off at the main switch before installation or service. •... -
Page 6: Technical Data
English 2 Technical data Charging mode Mode 3 EV power supply identifier Metering MID certified active electrical energy meter Socket Type 2, 22 kW Rated voltage (U 230/400 V Rated insulation voltage (U 250/400 V Rated impulse withstand voltage 4 kV Rated frequency (f 50 Hz Rated current (I... - Page 7 English Operating temperature -35°C to +45°C Altitude 0 m to 2000 m IP code IP44 IK code IK10 Mechanical resistance High Dimensions (W x D x H) 250 x 145 x 380 mm Weight 3.5 kg Characteristics of power supply and AC EV supply equipment connected output to AC supply network, permanently...
- Page 8 English Wi-Fi Type: 802.11 b/g/n Range: 2400 – 2500 MHz Max output: 17.5/14/12.5 dBm@802.11 b/g/n Cellular networks communication Type: LTE-M, eMTC* Supported LTE-M bands: B2, B3, B4, B8, B12, and B20. Range: 699 – 960 / 1710 – 2155 MHz Max output: 35 dBm@GSM, 28 dBm@ SIM card: built-in *Support for additional cellular standards will be available through OTA updates in...
-
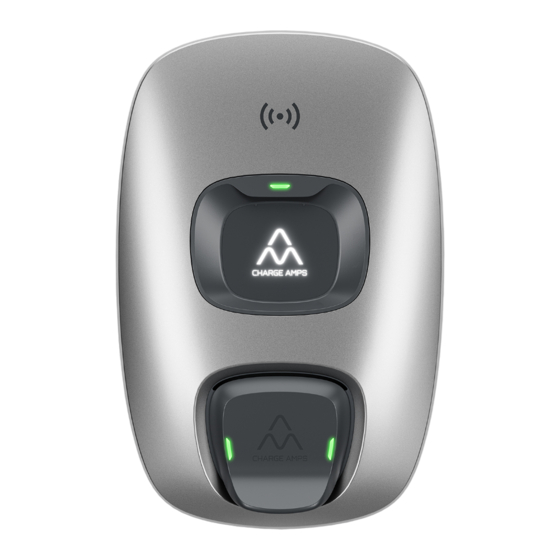
Page 9: Product Overview
English 3 Product Overview Back plate EV socket MID display Socket lights RFID reader EV socket lid RFID light Front cover lock screw Front cover... -
Page 10: Package Contents
English 3.1 Package contents Front cover Charging unit Back plate... - Page 11 English Accessories: 1x Connection 2x M32 2x M32 Insert 4x Plugs block Plugs Only 2x Cable 2x M12 4x Mounting 10x M4 gland Plugs screws screws Additional contents: • 1 x RFID tag • Quick Guide User • Welcome letter...
-
Page 12: Charge Amps Installation Kit
English 3.2 Charge Amps Installation Kit In installations where the MCB is placed inside of Charge Amps Dawn, a specific terminal block and MCB must be used. The terminal block and MCB can be purchased as a set in the Charge Amps Installation Kit, or bought separately. -
Page 13: Before Installation
• 4 x M5 x 30 mm or longer flat head stainless screws type A2 or A4 with associated washers type A2 or A4 with a maximum outer diameter of 20 mm and plugs (if required) suitable for mounting of Charge Amps Dawn • Installation cable, according to the charging capability of the product. -
Page 14: Mounting Requirements
English 4.3 Mounting requirements • If possible, do not mount the Charge Amps Dawn in direct sunlight. • Make sure the wall can support a weight of 3.5 kg and the tractive force from the inserted cabling. • Do not install Charge Amps Dawn in confined spaces. -
Page 15: Electric Requirements
• Charge Amps Dawn must be earthed through permanent electrical installation. • Only insert the electrical cable through the specified cable entry. • If installing one Charge Amps Dawn, follow instructions for Single installation. Single installation • If daisy chaining several Charge Amps Dawn, follow instructions for Daisy chain installaion. -
Page 16: Short Circuit Safety - Internal Mcb Installation
English 4.4.1 Short circuit safety - internal MCB installation When an MCB is installed internally, inside of Charge Amps Dawn, an MCB with following specifications is required: • ABB: S203-C32 Article nr: 2CDS253001R0324 This MCB can be purchased as a part included in the Charge Amps Installation Kit (described in chapter 3.2), or bought... -
Page 17: Internet Access
-65 dBm • Small adjustments of the location may have significant effect on the signal. • If you can’t find a good location for Charge Amps Dawn, you might need to use a Wi-Fi extender to extend the range. -
Page 18: Lte Connection
• Give the network a pre-test with a LTE Network analyzer app, to measure the LTE signal strength. Sufficient network strength should be better than -108 dBm. • If you can’t find a good location for Charge Amps Dawn, you might need to use Wi-Fi with a fixed Internet access line. -
Page 19: Installation
N.B. Make sure to place front cover and charging unit in a place where they will not be damaged. 1. Unpack Charge Amps Dawn. Make sure that Charge Amps Dawn is in good condition and that all cables are properly seated. 2. Remove the charging unit. Secure from dropping the charger... - Page 20 3 mm. No other part of the surface should be in contact with the charger. The surface must also cover the area within the rim on the back side of the Charge Amps Dawn. 4. Mark the mounting holes on the wall. [mm] Not to scale.
-
Page 21: Connection
English 5.2 Connection WARNING! Make sure that the power is turned off at the main switch and that the feed cable is isolated! 5.2.1 Cable connection N.B. There are three options for cable entry, via the bottom, top or back side. Only insert the electrical cable through the specified cable entries. -
Page 22: Bottom Cable Entry
English Single phase connection*: TN/TT *It is also possible to daisy chain single-phase installations. 5.2.2 Bottom cable entry Important! Make sure to cover non used cable entries with suitable plugs found in the Accessories kit. - Page 23 English 1. Insert and connect the cables. N.B: Make sure the cables are straight after the cable gland to avoid strain on the cable glands and plastic parts. Single installation Daisy chain installation...
-
Page 24: Top Cable Entry
English 5.2.3 Top cable entry 1. Drill hole(s) according to the markings on the top using a step drill (LAN cable*: ∅12 mm. Power cable: ∅32 mm). * Some models only... - Page 25 English 2. Insert and connect the cables. N.B: Make sure the cables are straight after the cable gland to avoid strain on the cable glands and plastic parts. Single installation Daisy chain installation...
- Page 26 English Important! Make sure to cover non used cable entries with suitable plugs found in the Accessories kit.
-
Page 27: Back Side Cable Entry
English 5.2.4 Back side cable entry 1. Make appropriate sized holes in the membrane using a suitable tool. Ø 7mm Ø 12mm Ø 16mm Ø 21mm... - Page 28 English 2. Insert and connect the cables. Single installation Daisy chain installation...
- Page 29 English Important! Make sure to cover non used cable entries with suitable plugs found in the Accessories kit.
-
Page 30: Reassemble
English 5.3 Reassemble 1. Insert the charger unit back on to the back plate and secure in place by tightening the 8 screws. 2. IMPORTANT: Remove the peel off label located on the front cover and save for configuration. - Page 31 English 3. Insert the front cover bottom flange and rotate the cover in place. Secure in place by tightening the front cover lock screw using Torx 25. N.B. The front cover lock screw should not be removed. Use a max. torque of 2 Nm when tightening the screw 4.
-
Page 32: Configuration
N.B: Always register in Charge Amps Partner Portal to configure Charge Amps Dawn. There’s two ways to configure Charge Amps Dawn, via the Charge Amps Installer App or via the Installation Wizard in Charge Amps Cloud. Before starting the configuration, make sure to create a Partner Account in Charge Amps Partner Portal. -
Page 33: Configure Via Charge Amps Installer App
1. Open the app and press the button for configuration on the front page 2. Select the Charge Amps Dawn you wish to configure and enter the PIN code. (The PIN code can be found on the peel off label on the front of Charge Amps Dawn). -
Page 34: Configure Via Installation Wizard
To use the Installation Wizard in Charge Amps Cloud, Charge Amps Dawn must be connected to the internet and Charge Amps Cloud. By default, Charge Amps Dawn will use LTE to connect to the mobile network and automatically connect to Charge Amps Cloud. -
Page 35: Cloud Connectivity
English 6.4 Cloud connectivity Charge Amps Installer App and Charge Amps Cloud are available for Charge Amps Dawn connected to Charge Amps as the cloud provider. Charge Amps Installer App Please download Charge Amps Installer App, available in App store and in Google Play. -
Page 36: Dismounting
The power supply to the charger must be isolated before dismounting starts. 1. Turn the power off at the main switch. 2. Use this installation manual and follow the steps in reverse to dismount Charge Amps Dawn in the correct order. - Page 37 Charge Amps AB (publ) Frösundaleden 2B, 8th floor SE–169 75 Solna, Sweden Charge Amps UK Ltd 4th Floor, 3 More London Riverside London SE1 2AQ, United Kingdom Doc. Nr: 130985 © Copyright Charge Amps AB. Rev: 01 All rights reserved...
Need help?
Do you have a question about the Dawn and is the answer not in the manual?
Questions and answers