Charge Amps Dawn User Manual
Hide thumbs
Also See for Dawn:
- Installation manual (52 pages) ,
- Quick manual (44 pages) ,
- Manual (28 pages)
Advertisement
Quick Links
Advertisement

Related Manuals for Charge Amps Dawn


Summary of Contents for Charge Amps Dawn
- Page 1 Charge Amps Dawn User Manual English chargeamps.com...
- Page 2 Neglecting to follow and carry out the directions, instructions and safety precautions in this User Manual implies that any warranty provisions will be cancelled and that Charge Amps AB can reject any and all claims for compensation in connection with any injuries/damage or incidents – direct or indirect –...
- Page 3 English Safety WARNING: Read all instructions before installation • Improper use may create a risk of personal injury. • The product must only be installed by a qualified electrician in accordance with the installation manual. • National usage requirements and restrictions apply. •...
-
Page 4: Technical Data
English 2 Technical data Charging mode Mode 3 EV power supply identifier Metering MID certified active electrical energy meter Socket Type 2, 22 kW Rated voltage (Un) 230/400 V Rated insulation voltage (Ui) 250/400 V Rated impulse withstand voltage 4 kV (Uimp) Rated frequency (fn) 50 Hz... - Page 5 English Wi-Fi Type: 802.11 b/g/n Range: 2400 – 2500 MHz Max output: 17.5/14/12.5 dBm@802.11 b/g/n Cellular networks communication Type: LTE-M, eMTC* Supported LTE-M bands: B2, B3, B4, B8, B12, and B20. Range: 699 – 960 / 1710 – 2155 MHz Max output: 35 dBm@GSM, 28 dBm@ SIM card: built-in *Support for additional cellular standards will be available through OTA updates in later releases.
-
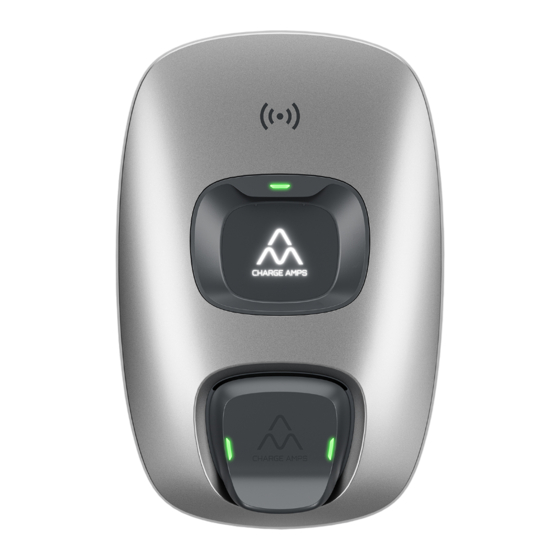
Page 6: Product Overview
English 3 Product Overview MID display RFID reader RFID light EV socket Socket lights... - Page 7 English 3.1 Package contents Front Cover Charging Unit Back Plate...
- Page 8 English Accessories: 1x Connection 2x M32 2x M32 Insert 4x Plugs block Plugs Only 2x Cable 2x M12 4x Mounting 10x M4 gland Plugs screws screws Additional contents: • 1 x RFID tag • Quick Guide User • Welcome letter...
- Page 9 4 Use 4.1 Add RFID tag N.B. Make sure your installer has given you the access to Charge Amps Admin Portal to be able to manage RFID tags. Add RFID tag using the Charge Amps cloud service: https://my.charge.space/admin 4.2 Start and stop charging without RFID identification 1.
- Page 10 English 3. Stop charging by disconnecting the EV connector from the car and disconnect the EV plug from the EV socket. 4.4 Cable lock During charging the cable lock is automatically activated.
- Page 11 English 4.5 Cloud connectivity Charge Amps Cloud and Charge Amps App are available for Charge Amps Dawn connected to Charge Amps as the cloud provider. Charge Amps App Please download Charge Amps App for full control, adjusting settings and enabling smart charging and scheduling.
- Page 12 English 4.6 MID display Overview of the total energy (kWh) imported using the Charge Amps Dawn. Impulses per kWh MID serial number Legal software version and CRC Non-legal software version and CRC...
- Page 13 English 4.7 Reset the MCB If the MCB is installed internally of Charge Amps Dawn and the MCB is tripped, reset the MCB by following the steps below. Recommended tools: • A Torx 25 to unscrew the front cover 1. Using a Torx 25, untighten the lock screw by turning it counterclockwise until the front cover slightly releases from the bottom.
- Page 14 English 3. Remove the rubber cap.
- Page 15 English 4. Turn the switch to an upright position using a screwdriver.
- Page 16 English 5. Put the rubber cap back in place. 6. Reassemble Charge Amps Dawn by inserting the front cover bottom flange and rotate the cover in place. Secure in place by tightening the front cover lock screw using Torx 25.
- Page 17 English 4.8 Detect earth fault and test the The built-in RCD function of Charge Amps Dawn needs to be tested twice a year. An earth fault is indicated by a steady red light on the socket lights and the RFID lights. Test and reset the built-in RCD function by following the steps below.
- Page 18 English 3. Connect the electric vehicle to Charge Amps Dawn using the charging cable. 4. If RFID authentication is enabled, briefly hold the RFID tag in front of the RFID reader to initiate a charging session. 5. When the charging session has started, hold your finger on the test button marked ”T”...
- Page 19 8. A steady green light will show on the socket lights which indicates the RCD has been reset. 9. Reassemble Charge Amps Dawn by inserting the front cover bottom flange and rotate the cover in place. Secure in place by tightening the front cover lock screw using Torx 25.
- Page 20 English 4.9 LED indications 4.9.1 General Status Socket light RFID light Ready for charging Green light Green light Charging Blue pulsating light No light Charging complete Yellow light No light 4.9.2 RFID tag verification Status Socket light RFID light Waiting for RFID tag White short pulsating verification light...
-
Page 21: Maintenance
English 5 Maintenance WARNING! Never spray water or any other liquid directly on the product. • Visually check that the EV connector is free from damage. • The outside of the product must be regularly wiped with a clean, dry cloth to remove dirt and dust. •... - Page 22 Charge Amps AB (publ) Frösundaleden 2B, 8th floor SE–169 75 Solna, Sweden Charge Amps UK Ltd 4th Floor, 3 More London Riverside London SE1 2AQ, United Kingdom Doc. Nr: 130986 © Copyright Charge Amps AB. Rev: 01 All rights reserved...
Need help?
Do you have a question about the Dawn and is the answer not in the manual?
Questions and answers