Charge Amps Aura Installation Manual
Hide thumbs
Also See for Aura:
- Quick manual (45 pages) ,
- Installation manual (41 pages) ,
- Quick manual / user manual (24 pages)
Table of Contents
Advertisement
Quick Links
Advertisement
Table of Contents

Subscribe to Our Youtube Channel
Related Manuals for Charge Amps Aura


Summary of Contents for Charge Amps Aura
- Page 1 Charge Amps Aura Installation manual...
-
Page 2: Table Of Contents
Cabling ..................... 9 Mounting ....................9 Connection....................10 How to use Aura ................... 11 Product support and servicing for Aura ..........14 Warranty terms ..................15 Installing Aura....................15 Install and mount Aura as follows: ............15 Configuring electrical parameters for Aura ..........20 Product data .................... -
Page 3: Aura/Aura Lte
Sockets: 2 x 22 kW type 2 Dimensions (W x D x H): 367 x 159 x 405 mm Weight: 10 kg © 2021 Charge Amps AB Address: Contact: Org. No. 556897-7192 Installation manual for Charge Amps AB +46 (0)8 55 11 2000... -
Page 4: Specification Of Aura Version 101010-Lte
SIM card: Standard SIM For the professional installer This installation manual is intended for qualified Aura installers and describes how to install the product safely and properly. Installation may only be carried out by a qualified installer who follows: Basic safety precautions for safe and correct installation. -
Page 5: Safety Precautions
CAUTION! – Indicates a potentially dangerous situation that could lead to minor or moderate injury. NOTE! – Indicates that you must follow the instructions to avoid damaging the product or other equipment. © 2021 Charge Amps AB Address: Contact: Org. No. 556897-7192... -
Page 6: About Aura
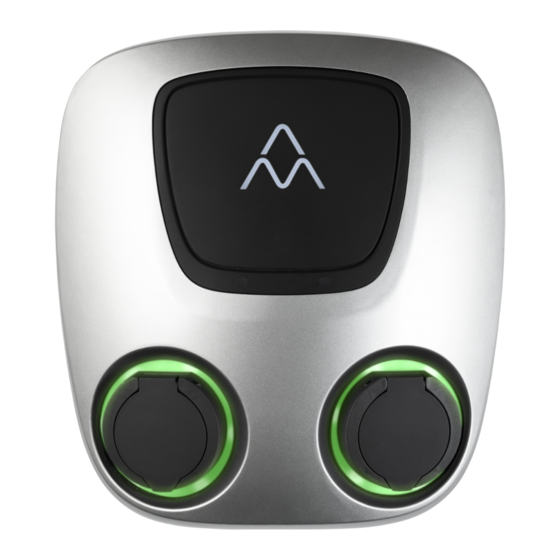
Aura is a product developed for public charging environments. With its two charging sockets (2 x 22 kW), Aura is suitable for all conceivable charging points, from large car parks to residential areas and office properties. -
Page 7: Model Overview
5. Lock cylinder: unlocked for installation. 6. RFID antenna: RFID tag reader. Cable slide: data and power cable in/out. Supplied with cable fittings and plugs for ports that are not used. © 2021 Charge Amps AB Address: Contact: Org. No. 556897-7192... -
Page 8: Contents Of The Package
Make sure that the right conditions and materials are in place before installation. The installation must be done in accordance with the instructions in this installation manual as well as basic safety precautions. © 2021 Charge Amps AB Address: Contact: Org. -
Page 9: Tools
Sealant (if necessary) if the wall for mounting is uneven and exposed to an • outdoor climate. Computer or mobile phone if Aura needs to be configured and (where • applicable) connected to a cloud service. Contact the supplier for more information. - Page 10 If possible, do not mount Aura in direct sunlight. The charging current is decreased if the temperature inside the charging station goes up, and can even be switched off completely if Aura gets too hot. This is a safety feature to ensure a long service life. See the Aura technical specifications for operating temperatures.
-
Page 11: Connection
WiFi access point with good coverage available for connection • Network cable, Cat5 or better, must be available. It is possible to connect up to four Aura in series. Use a router or an Aura4G as an access point. 4G (LTE) Option •... - Page 12 (see item 4 in the model overview). The charging socket is equipped with a cover that you need to open in order to connect to Aura. When the LED ring around the socket is illuminated in blue, this indicates that charging has started.
- Page 13 2. Start charging by briefly holding the RFID tag just below the Charge Amps logo. When the car is charging the socket light is blue. When car charging is complete the socket light turns yellow. 3. Disconnect the charging cable from the car and from the charging station.
-
Page 14: Product Support And Servicing For Aura
3. If you cannot find the answer to your question in the manual or FAQ, email Charge Amps support: support@ charge-amps.com If you need a service, please contact the reseller from whom you purchased your Aura. © 2021 Charge Amps AB... -
Page 15: Warranty Terms
Make sure that the feed cable is isolated and switch off the power at the main switch. Unpack Aura from the box. Check that the product is in good condition and that all cables are properly seated. Mark the mounting holes on the wall. Also use a laser or spirit level. For a suitable height, see “Mounting”... - Page 16 Electrical cabling in/out Data cabling in/out Mount Aura on the wall: Use the key supplied to unlock the cylinder lock underneath Aura. Rotate up and suspend the front. Align Aura on the wall according to the specified hole pattern. Make sure that the mounting has fixed Aura in place.
- Page 17 Connecting the electrics: Pull the power cable through the cable slide approx. 80 mm. Use a cable stripper to strip approx. 20 mm off the end of the conductors. Connect the conductors (L1–L3, N and PE) to the terminals. © 2021 Charge Amps AB Address: Contact: Org.
- Page 18 Note that if the power is to be routed onwards, connect the cable to be routed onwards to the other input on the terminals. 8. If you are installing Aura in an IT network, connect phase cables L1 and L3, and use 1–3 terminal blocks, which are included in the kit, as illustrated below.
- Page 19 When the incoming cabling is installed, make sure that it does not arch over the dotted red line as illustrated below. Connecting Aura: If a fixed cable is used, connect the ethernet cable to the RJ45 port on the control card.
-
Page 20: Configuring Electrical Parameters For Aura
It is now possible to charge your vehicle. Configuring electrical parameters for Aura After Aura has been installed electrically and on the network, it is time for it to be configured. The aim of configuration is to connect the unit to Charge Amps’ portal and cloud solution. - Page 21 On the mobile, go to Settings > WiFi 3. Find the AURA_****** network, where ****** are the last six characters of the serial number. © 2021 Charge Amps AB Address: Contact: Org. No. 556897-7192 Installation manual for Charge Amps AB...
- Page 22 Select the network called AURA_******A (last characters of the product’s serial number). 4. When you are asked for the network key, enter the PIN code. © 2021 Charge Amps AB Address: Contact: Org. No. 556897-7192 Installation manual for Charge Amps AB...
- Page 23 Enter the password, which you will find on the configuration sheet supplied in the box, and connect. © 2021 Charge Amps AB Address: Contact: Org. No. 556897-7192 Installation manual for Charge Amps AB +46 (0)8 55 11 2000 Registered office: Solna Charge Amps Aura Frösundaleden 2B...
- Page 24 6. You should now see a field with the SSID (name of the WiFi network) and the password. Note that the field is case-sensitive. Click the WiFi network that Aura should connect to from the list and enter its password.
- Page 25 7. Wait for connection. (The mobile’s own 3G/4G may disrupt this. In that case, switch off mobile data). 8. Enter the details of your wireless network and click update. © 2021 Charge Amps AB Address: Contact: Org. No. 556897-7192 Installation manual for...
- Page 26 Connected to means that Aura is now connected. You can now go to my.charge.space and sign up Aura to access all the functions in the cloud solution. © 2021 Charge Amps AB Address: Contact: Org. No. 556897-7192 Installation manual for...
-
Page 27: Product Data
Rating: IP 55 and IK 10 • Operating temperature: -25°C to +40°C • Lock: Cylinder lock with two accompanying keys. • © 2021 Charge Amps AB Address: Contact: Org. No. 556897-7192 Installation manual for Charge Amps AB +46 (0)8 55 11 2000... -
Page 28: Charging Information
If you chose single phase installation, the test function on the RCDs will not work. In order to operate the RCDs, you need to apply an external earth fault to them. © 2021 Charge Amps AB Address: Contact: Org. No. 556897-7192... -
Page 29: Product Recycling
Charge Amps AB reserves all rights to this document, as well as the information and illustrations therein. It is strictly forbidden to – in whole or in part – copy, adapt or translate the information without prior written permission from Charge Amps AB.
Need help?
Do you have a question about the Aura and is the answer not in the manual?
Questions and answers