Table of Contents
Advertisement
Quick Links
DLP
®
LightCrafter™ Display 4710 EVM User's Guide
...........................................................................................................................
Topic
1
2
3
4
5
6
7
8
DLPU034C - June 2015 - Revised November 2016
Submit Documentation Feedback
........................................................................................................
..............................................................................................
........................................................................................................
..........................................................................................
..........................................................................................................
..........................................................................................
Copyright © 2015-2016, Texas Instruments Incorporated
DLPU034C - June 2015 - Revised November 2016
..........................................................
.........................................................
DLP
®
LightCrafter™ Display 4710 EVM User's Guide
User's Guide
Page
2
3
4
5
5
6
7
8
1
Advertisement
Table of Contents

Summary of Contents for Texas Instruments DLP LightCrafter Display 4710
-
Page 1: Table Of Contents
Light Engine ..................Quick-Start Procedure ............Connectors, Headers, and Switch Description ......................EVM Setup ..................Applicable Documents DLPU034C – June 2015 – Revised November 2016 ® LightCrafter™ Display 4710 EVM User’s Guide Submit Documentation Feedback Copyright © 2015–2016, Texas Instruments Incorporated... -
Page 2: Introduction
Introduction This user’s guide presents an overview of the DLP LightCrafter Display 4710 evaluation module (EVM) and a general description of the main features and functions. It explains the first steps to get started and shows a detailed description of the onboard LEDs and the main connectors. It gives the user a successful start with their first DLP LightCrafter Display 4710 EVM. -
Page 3: Safety Instructions
May be harmful to the eye. CAUTION Observe handling precautions. Electrostatic sensitive devices. DLPU034C – June 2015 – Revised November 2016 ® LightCrafter™ Display 4710 EVM User’s Guide Submit Documentation Feedback Copyright © 2015–2016, Texas Instruments Incorporated... -
Page 4: What Is In The Lightcrafter Display 4710 Evm
(HDMI, USB, and others). Figure 2. DLP LightCrafter Display EVM Block Diagram ® LightCrafter™ Display 4710 EVM User’s Guide DLPU034C – June 2015 – Revised November 2016 Submit Documentation Feedback Copyright © 2015–2016, Texas Instruments Incorporated... -
Page 5: Light Engine
Focus range inch Quick-Start Procedure This quick-start assumes default conditions as shipped. 1. Power up the DLP LightCrafter Display 4710 EVM by applying an external DC power supply (12-V DC, 6.67 A) to the J_PWR connector. External power supply requirements: •... -
Page 6: Connectors, Headers, And Switch Description
Connectors, Headers, and Switch Description www.ti.com 7. The DLP LightCrafter has 12 indicator LEDs (see Table Table 2. LEDs on the DLP LightCrafter Display 4710 EVM INDICATOR DESCRIPTION D_PROJON On when projector is turned via switch D_12ON 12-V power applied On when HDMI cable plugged in and external video detected. -
Page 7: Evm Setup
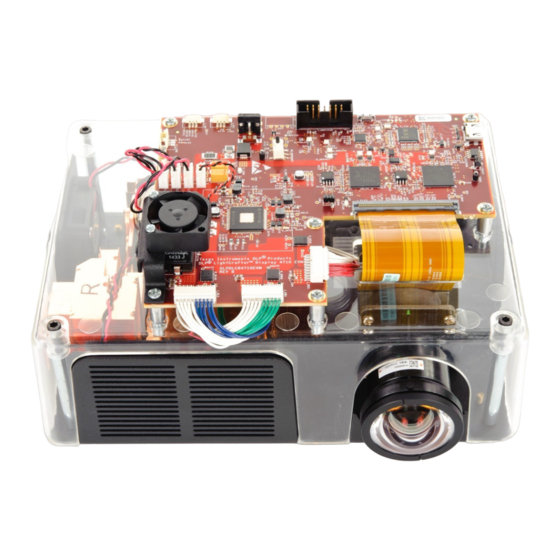
Figure 4. DLP LightCrafter Display 4710 Board The DLP LightCrafter Display 4710 board has three LED connectors for red, blue, and green, and one connector for the flex cable to the 0.47-inch 1080p DMD. The connectors for each LED are named on the board as well as on the light engine. -
Page 8: Applicable Documents
NOTE: Make sure that everything is setup correctly before continuing. Verify that the flex cable is connected correctly to the LightCrafter Display 4710 board. Applicable Documents The following documents are applicable to the DLP LightCrafter Display 4710 EVM and are available at www.ti.com. •... - Page 9 Changes from Original (June 2015) to A Revision ......................Page ....................• Updated EVM block diagram in Figure 2 ......................• Added Throw Ratio in Table 1 DLPU034C – June 2015 – Revised November 2016 Revision History Submit Documentation Feedback Copyright © 2015–2016, Texas Instruments Incorporated...
- Page 10 IMPORTANT NOTICE Texas Instruments Incorporated and its subsidiaries (TI) reserve the right to make corrections, enhancements, improvements and other changes to its semiconductor products and services per JESD46, latest issue, and to discontinue any product or service per JESD48, latest issue.


Need help?
Do you have a question about the DLP LightCrafter Display 4710 and is the answer not in the manual?
Questions and answers