Sign In
Upload
Download
Table of Contents
Contents
Add to my manuals
Delete from my manuals
Share
URL of this page:
HTML Link:
Bookmark this page
Add
Manual will be automatically added to "My Manuals"
Print this page
×
Bookmark added
×
Added to my manuals
Manuals
Brands
GRAUPNER Manuals
Remote Control
MC-32EX
Manual
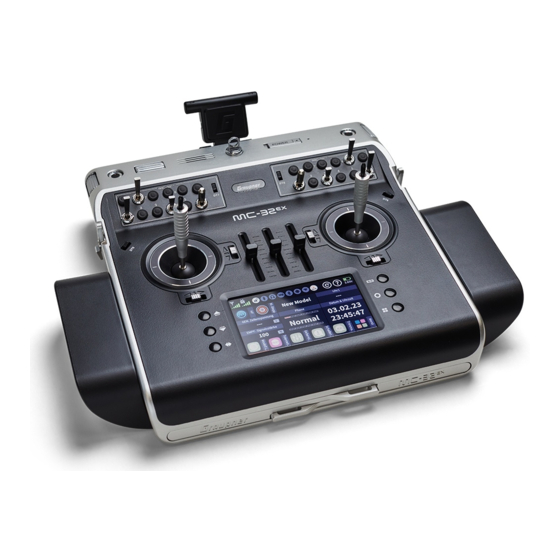
GRAUPNER MC-32EX Manual
32 channel 2.4 ghz radio control transmitter
Hide thumbs
1
Table Of Contents
2
3
4
5
6
7
8
9
10
11
12
13
14
15
16
17
18
19
20
21
22
23
24
25
26
27
28
29
30
31
32
33
page
of
33
Go
/
33
Contents
Table of Contents
Bookmarks
Table of Contents
Table of Contents
Introduction
Service Center
Intended Use
Target Group
Package Content
Technical Data
Symbol Description
Safety Notes
For Your Safety When Handling the Transmitter
For Your Safety When Handling Batteries
Transmitter Description
Front Side of the Transmitter
Back Side of the Transmitter
Open the Transmitter
Removing the Transmitter Battery
Insert and Connect the Transmitter Battery
Switching the Control Sticks
Closing the Transmitter
Connections and Fixtures
Smartphone Holder and Transmitter Strap
Bracket for Transmitter Strap
Connection Panel under the Left Upper Flap with Graupner-Logo on Front
DSC-Connection
DATA-Connection
COM/TRG-Connection
AUDIO-Connection
Connection Panel under the Right Upper Flap with the
Logo on Front
USB C-Connection
Sticks
Inserting the Battery
Charge the Battery
Low Voltage Warning
Battery Operating Time
Antenna Alignment
Transmitter Commissioning
Turn on the Transmitter
Initial Setup of the Transmitter
Turn off the Transmitter
Operation and Menu Functions
Buttons to the Left of the Display
Buttons to the Right of the Display
Press any of These Six Keys
Symbols of the Main Display
Operation of the Display
Change the Current Control Mode
Change Control Mode Preset
Screen Lock
Screenshot-Funktion
Create Model
Define Model Type
Model Specific Settings
Rename Model
Delete Model
Model Selection
Bind Receiver
Bind Group
Bind Multiple Recipients
Adjust Channel Order
Delete Binding
Range Test
Output Swap
Stick Set
Control Set
Set Transmitter and Mixer Characteristics
Phase Set
Servo View
Wlan & Gps
Wlan
Bluetooth® & COM-Port
Telemetry
Rx Selection
Tele. Speed
RF Status Display
Setting & Data View
Function of the Cross-Shaped Keypad
Import and Export of Model Data
Exchange of Model Data
Firmware Update
WLAN Update
Forced Update
Force Boot into „Mass Storage" Mode
En - Simplified Declaration of Conformity
Manufacturer
Notes on Environmental Protection
Maintenance and Care
Warranty Conditions
Advertisement
Quick Links
Download this manual
Manual
32 channel 2.4 GHz radio control transmitter
No. 33040
Table of
Contents
Previous
Page
Next
Page
1
2
3
4
5
Advertisement
Table of Contents
Need help?
Do you have a question about the MC-32EX and is the answer not in the manual?
Ask a question
Questions and answers
Related Manuals for GRAUPNER MC-32EX
Remote Control GRAUPNER mc-16 Programming Manual
(104 pages)
Remote Control GRAUPNER Rotaryselect mc-16 Programming Handbook
Rotaryselect rc (10 pages)
Remote Control GRAUPNER MC-16 Operating Instructions Manual
32 channel remote set in 2.4 ghz-hott technology (49 pages)
Remote Control GRAUPNER mc-18 Programming Manual
Profi-ulta soft (56 pages)
Remote Control GRAUPNER 33124 Manual
(296 pages)
Remote Control GRAUPNER mc-26 Programming Manual
16 channel hott 2,4 ghz transmitter (81 pages)
Remote Control GRAUPNER MC-19 Manual
(8 pages)
Remote Control GRAUPNER MC-20 HoTT Programming Manual
(324 pages)
Remote Control GRAUPNER mx-24s Programming Manual
3d-cylinder-rotary programming system (216 pages)
Remote Control GRAUPNER mx-20 Hott Programming Manual
33124.mx-20 hott.1.en (296 pages)
Remote Control GRAUPNER mx-16 HOTT Programming Manual
(200 pages)
Remote Control GRAUPNER mx-16 ifs Programming Manual
(132 pages)
Remote Control GRAUPNER MX-16S Programming Manual
(116 pages)
Remote Control GRAUPNER mz-24 Pro Programming Manual
12 channel hott 2,4 ghz transmitter (241 pages)
Remote Control GRAUPNER mz-24 Pro Programming Manual
12 channel hott 2,4 ghz transmitter (240 pages)
Remote Control GRAUPNER HoTT mz-8P Manual
4 channel 2,4 ghz transmitter (24 pages)
This manual is also suitable for:
33040
Table of Contents
Print
Rename the bookmark
Delete bookmark?
Delete from my manuals?
Login
Sign In
OR
Sign in with Facebook
Sign in with Google
Upload manual
Upload from disk
Upload from URL


Need help?
Do you have a question about the MC-32EX and is the answer not in the manual?
Questions and answers