Table of Contents
Advertisement
Quick Links
Advertisement
Table of Contents

Related Manuals for Canon LBP-1260


Summary of Contents for Canon LBP-1260
- Page 1 LBP-1260 SERVICE MANUAL Canon...
- Page 2 PREFACE This Service Manual contains bask information required for after-sales service of the LBP- 1260 laser beam printer (hereinafter referred to as the “printer”). This information is vital to the service technician in maintaining the high print quality and performance of the printer. The cassette paper feeder and envelope feeder are prepared for the printer as optional equipment, which contents are also described in this manual.
-
Page 3: Table Of Contents
CONTENTS CHAPTER 1 GENERAL DESCRIPTION IV. PART3 OF TIIB PRINTER ..FEATURES ...., . . , . . , . . , . . l - l 1-12 SPECIFICATIONS . - Page 4 A. Laser/Scanner Unit ... B. Video Controller PCB..3-19 ELECTROSTATIC IMAGING/ C. DC Controller PCB..... DEVELOPING/CLEANING D. pick-up Motor Driver . 3-21 SYSTEM ......... 3-12 E. Sensor PCB ......3-21 3-22 A. EP-E Cartridge....3-12 B. Transfer Charging Roller ..3-13 G.
- Page 5 B. Incomplete Paper Feed..6-46 VIII. VARIABLE RESISTORS. LEDS. VII. LOCATION OF ELECTRICAL PARTS/FUNCTION....Stitches......A. DC Controller PCB ... . . 6-68 B. Sensors and Solenoids..6-60 B.
- Page 6 CHAPTER 1 FEATURES......IV. PARTS OF THE PRINTER..l-8 SPECIFICATIONS....l-2 V. O P E R A T I O N ....f... .
- Page 7 This non-tmpact (low-noise) printer uses electrophotographic. electronic, and laser technology. 2. High-speed printer The same size as LBP-1260. it is a high-speed printer realizing a printing speed 1.5 times as fast [about 12.9 pages of Letter size paper a minute].
- Page 8 Desktop page printer Printing method laser scanning system Laser Semiconductor laser Scanning system Rotating six-faced prism mirror (S&mnlng mirror) Scanning pitch 600 dots/Inch 600 raster lines/inch Photosensitive medium Charging Roller charging Exposure Laser scanning Single-component dry toner Development Toner projection development Toner supply Included in replaceable EP-E cartrIdge mhhe cartridge can be used to print about 6.000 pages ofA4/Letter-size paper.
- Page 9 Print DaDeI Plain paper. labels, OHP film. envelopes Paper size of multi Plain paper from 182 mm X 257 mm to 216 mm X 356 mm (Canon- purpose tray approved paper. 60 g/m’ lo 128 g/m’). and above type mentioned above Paper size of cassette Plain paper of A4, Legal.
-
Page 10: Specifications
CHAPTER 1 D. Video controller control Standard: Enhanced PCL (PCL 5e) language Emulation: Optional PostSctiptm Memory [RAM] 2MB (Expandable to 32 Megabytes in total with optional RAM SIMM) Memory (ROM) 2 or 4MB (Expandable to 32 Megabytes in total with optional ROM SIMM) See Table l-1 and I-2. - Page 11 Symbol P i t c h Point Stroke S i z e W e i g h t 1000 Roman-8 Fixed Medium Uptight Portrait Scalable 1003 R o m a n - 8 ProportIonal Bold Portrait 1004 1005 1006 CG Times 1007 CG Times 1008...
- Page 12 Font Symbol Stroke spacing Weight Roman-8 Fixed Medium Landscape Fixed Medium Upright Portrait Medium Upright Portrait Fixed 1050 Line Printer PC-850 1 6 . 6 7 8 . 5 Medium Updght Portrait 105 1 Line Printer LEGAL Fixed 1 6 . 6 7 8 . 5 Medium Upright Portrait Line Printer...
- Page 13 Laser/Scanner Unit A. Iiandllng The laser/scanner unit emits invisible laser beam. Never disassemble the unit; the reflected beam. although invisible, can possibly damage your eyes. The unit cannot be adjusted in the field. The following label is attached to the cover of the unit:...
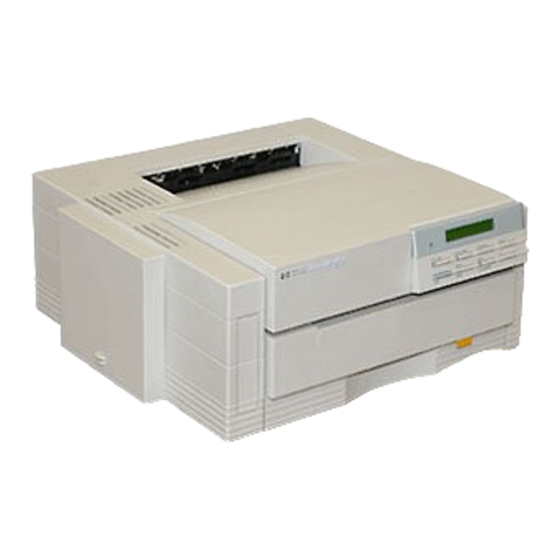
- Page 14 1: upper cover 2: Face-down tray 3: Right cover 4: Control panel 6: Cassette 9: Delivery cover 13: Cleaning brush 14: Paper access door...
- Page 15 2. Paper feeder 1: Paper feeder 2: Cassette 1500 sheets can be stored) 1: Envelope side guide 2: Extension tray 3: weight Figure 1-7...
- Page 16 B. Cross Sectional View 9: Oblique rollers 2: Laser/scanner unit 3: EP-E cartridge 11: Developing cylinder 4: Control panel 12: Transfer charging roller 5: Multi-purpose tray 13: Photosensitive drum 6: Cassette 14: Primary charging roller 7: Multi-purpose tray pick-up roller 15: Upper fixing roller 16: Lower fbdng roller...
- Page 17 2. Envelope feeder 1: Feed roller 2: Oblique roller 3: Separation roller pressure spring 4: Separation guide 5: Separation rollers 6: Pick-up rollers l-11...
- Page 18 CHAPTER 1 You use the operator panel to perform basic printer operations, make printer configuration changes your software application cannot control, identify available typefaces, and check the status of the printer. READY ALARM DATA ONLINE FORM FEED RESET The operator panel consists of the message/menu display window, eight indicator lights, and seven menu and operation keys.
- Page 19 2. Indicator Lights The indicator lights provide status information about the printer. The lights have different meanings depending on whether they are on. off. or flashing. Figure l-11 Indicator Mode Description The printer is ready to print. R E A D Y O n An error or attendance message appears in the display.
- Page 20 The paper input source indicators are: ENVELOPE FEEDER STANDARD CASSETTE LOWER CASSEXTE (PAPER FEEDER UNIT) MULTI-PURPOSE TRAY Mode Description Indicator light The optional Envelope Feeder is the input source. Envelope The optional Envelope Feeder is selected, but does not Feeder Flashing contain envelopes.
- Page 21 3. Operation Keys the operation keys to control the basic functions of the printer. You use LINE key use the ON LINE key to switch the printer between on-llne and off-line. The printer must be on-line to receive information from your computer. To use any of the other keys on the operator panel, the printer must be off-line.
- Page 22 You use the CONTINUE key to allow the pdnter to resume printing after it is placed off-line by an operational condition. Most operational conditions are ldentlfled by a message, such as PRINT OVERRUN. Before you continue printing. you need to press CONTINUE to clear the message and set the printer back on-line.
- Page 23 -SELECT key SELECT key to save a selection in the printer’s permanent memory. An asterisk (*) You use the appears next to the selection in the menu display window indicating it is the current default selection. This default selection remains In effect even when you turn off orreset the printer. If you press SELECT when buffered or temporary data is present, the system only marks the displays the RESET TO SAVE message.
- Page 24 CHAPTER 1 B. Operator Panel Menus You can accew the following menus through the operator panel: PCL PRINT MENU Depending on the options installed in your printer, other menus may display. 1. Accemsing and Selecting Menu Iteme Follow these steps to access the menus and make selections: 1.
- Page 25 CHAPTER 1 Selections 2. Confirming Your Menu There are two ways you can review the selections you made through the operator panel: You can scroll through the menu items to check all selections marked tith an asterisk. You can print a Printer Setting Page. The printed output lists all settings that are in effect. See the Printing the Printer Setting Page section for more information.
- Page 26 You can select a pitch if the font indicated by FNT SOURCE and FNT NUMBER is a scalable typeface with fIxed spacing. The LBP-1260 adjusts the height (point size) of the characters according to the pitch you select. SIZE 12.00...
- Page 27 Print (Press Factory MENU) Description (Press A or V default TRAY Selects how the printer will load paper: Loads paper from any paper input source. The printer loads from the standard cassette first: if this cassette is empty, it loads from the lower cassette [if the Paper Feeder Unit is installed) or the multi-purpose tray.
- Page 28 Pressing CONTINUE when the multi-purpose tray is empty override the manual feed request. Selects the symbol set. The LBP-1260 provides 31 symbol sets you can choose.A symbol set is a unique grouping of all the available characters in a font.
- Page 29 Options controls certain The PCL CONFIG MENU configuration settings for your LBP- 1260. To access the PCL CONFIG MENU options, press and hold the MENU key. To scroll through the options, press the MENU key again. The resolution and page protection options can be modified by PCL commands through the print stream.
- Page 30 option [Press Factory default Description (Press A or V MENU] OFF or PG PROT Reserves additional memory for the page imaging process. This allows the printer to create the complete page Image in memory before paper starts through the printer, which ensures the entire page is printed.
- Page 31 l Comnlunicationa The I/O option allows you to set up the communication parameters for the serial interface [if you are using it). If you set I/O to AUTO or SERIAL, you see the following menu options: (Press Factory MENU) default Description (Press A or V Determines the rate at which information is transferred between BAUD...
- Page 32 E. Printing the Self Tests includes three self tests that allow you to confirm the printer’s settings and check This printer printer operation. The three self tests are: Test Settings Page, and Page, Printer PCL Font List. Follow these steps to print the Test Page: Press the ON LINE key to set the printer off-line.
- Page 33 CHAPTER 1 l intlng Follow these steps to pxlnt the Printer Settings Page: Press the ON LINE key to set the printer off-line. Press the SELECT key. The printer displays the SELF TEST message followed by the PRINTING TEST message. When the page is complete, press ON LINE to set the printer back on-line.
- Page 34 CHAPTER 1 rinting the PCL Font Liat Follow these steps to print the Font List: Press the ON LINE key to set the printer off-line. Press and hold the TEST/FONT key (for approximately five seconds). The printer displays the FONT PRINTOUT message. When the Font List is complete, press ON LINE to set the printer on-line.
- Page 35 l-29...
-
Page 37: Basic Operation
CHAPTER 2 This chapter describes the printer functions, the relationships between mechanisms and circuits, and the timing of operations. Mechanical linkages are indicated by black and of control signals by solid arrows and the flow of white lines groups of signals by outline arrows active-high signal is indicated by “H”... - Page 38 A. Functions functions can be divided into five groyps: the system interface; the overall control Printer system, the image-formation system. the laser/scanner unit. and the paper pick-up/feed system. To external device (computer, etc.) SYSTEM INTERFACE Multi-purpose tray Paper feeder (optional) PAPER PICK-UP/FEED j I L._._._.___._._._._.-__~_____! SYSTEM...
-
Page 39: Outline Of The Electrical System
CHAPTER 2 of the B. Outline Electrical System The operations of this printer are controlled by the microprocessor located on the DC controller PCB. When the power is turned on and the printer goes into standby, the microprocessor outputs signals to drive the laser diode, motors, and solenoids in response to print commands and image data from the external device. - Page 40 C. DC Controller Input Signals DC controller PCB Delivery paper PSNS detects paper or when the delivery cover is open. connector PCB The voltage drops as the fixing roller Thermistor FSRTH temperature rises. > Pick-up motor driver PCB when paper is detected. cassette paper ‘2 RESS when paper is detected.
-
Page 41: Dc Controller Input
DC Controller Input/Output Si@mln (l/2) controller PCB L a s e r / s c a n n e r u n i t Laser diode -5 I_ the NDATA signal. The laser swi(ches ON when the /ENEiL Laser driver - 2 :_ The analog signal is output to adjust the intensity of the laser beam. - Page 42 DC Controller Input/Output Si@mls [2/2) DC controller PCB Power supply FSRD power to the fixing roller heater. Output the thermistor voltage value. FLOCK1 - ‘L” when the exhaust fan operates Exhaust fan , JfiOi-1 J201-1 OUTPUT SERIAL LINE INPUT SERIAL LINE 1 -A4 ’...
-
Page 43: Basic Sequence Of Operations
E. Basic Sequence of Operations feed) consecutive prints on A4 paper (Cassette Figure 2-6 Table 2-l Remark WAIT From power-ON until the fixing To warm up the tilng roller to roller temperature reaches 175°C put the printer in the standby printer checks the car- period) See page l-3 for warm-up time. -
Page 44: Outline
specified value to stabilize the intensity of the laser beam. [Control of laser beam intensity: APC control) The modulated laser beam is formed by Outline a collimator lens and a cylindrical lens into a parallel beam that strikes the scanning mirror, which is rotating at constant speed. -
Page 45: Scanning Exposure
Exposure raster lines/inch]. Successive 43 pm (600 The simplest example of exposure of the horizontal scans are therefore separated by this interval. to imagine that both the drum and beam are stationary. In this case the laser beam Photosensitive illuminates a single point on the drum. Photosensitive drum Video signal... - Page 46 cause it switch the laser signal (/LON) dlode ON when the /LON signal is ‘7’. Beam detect signal Figure 2-11...
-
Page 47: Laser Control Circuit
CHAPTER 2 control circuit DC controller Laser driver Laser driver IC 2-12 This circuit switches the laser diode (LD] The CPU adjusts the value of the ON and OFF at a constant intensity In APCOUT signal by changing the APCOR response to the /VDO signal from the video signal for coarse adjustment, and the controller. - Page 48 CHAPTER 2 2. Control of laser beam intensity (APC The CPU then changes the APCOS control) signal (fine adjustment), compares the The CPU performs automatic power control input value of the APCIN signal with the target value, and optimizes the diode emit constant light.
- Page 49 control Laser diode emission is controlled by VIDEO signal (/VDO). which is sent from the video controller and processes the paper size data. The paper size data is input to the CPU from the cassette size sensing switches for cassette feed and by the paper size command from the video controller for multi-purpose tray feed.
-
Page 50: Scanner Drive
speed. D. Scanner Drive The scanner driver drives the scanner 1. outline motor when it is receiving the SCANNER MOTOR DRIVE signal (/SCNON) from the unit DC controller. 2. Scanner motor rotation control Figure Z- 15 shows the scanner motor control circuit. - Page 51 When the scanner motor turns and reaches the prescribed speed, the CPU sets the SCANNER MOTOR READY signal The CPU notifies a scanner error to the video controller in the following cases: a. When the /SCNRDY signal does not go motor starting rotation.
-
Page 52: Outline
The primary charging roller uniformly applies a negative charge to the surface of the photosensitive drum. To form the latent image on the photosensitive drum, outline the laser beam modulated by the /VDO The image formation system is the main part of the printer, and it consists of the surface. - Page 53 the primary charging roller prior to generation of a new latent image. The cartridge has a toner sensor that detects whether there Is enough toner or whether a cartridge is installed. If the level of toner in the cartridge becomes lower than the prescribed level.
- Page 54 B. Printing Recess The major part of the image formation system is contained in the cartridge, as shown in Figure Cartridge Primary charging roller Developing cylinder Photosensitive Transfer charging roller Figure 2-17 Electrostatic latent image formation The cartridge used by the printer has a stage seamless photosensitive drum with the Step 1...
- Page 55 1. Electrostatic latent image formation The primary charging roller consists of conductive rubber. In addition to DC bias, This stage has two steps, which together AC bias is applied to the primary charging produce a pattern of electrical charges on roller to keep the potentlal on the drum the photosensitive drum.
- Page 56 negatively charged toner particles on the 2. Developing stage Development places particles of toner onto developing cylinder. When these areas approach the cylinder, the potential the areas of the drum that have been cleared of charge by the laser beam. This difference projects the toner particles onto them.
- Page 57 CHAPTER 2 3. Tralwfer stage charged toner on the transfer charging In the transfer stage, the toner image is roller to the drum. The transfer charging transferred from the drum surface to the roller is thus cleaned. paper. step 6 separation step 4 Tranrfer roller Transfer...
- Page 58 4. Fixing stage In the transfer stage, not all the toner Is toner image transferred to the paper in transferred to the paper. Some remains on the transfer stage is held only by the photosensitive drum. This residual toner is cleaned off In the drum cleaning adhesion, so even a light touch will smear stage so that the next print image will be the image.
- Page 59 CHAPTER 2 Reference: Toner projection development Actually, both unexposed and exposed areas of the drum surface have a negative potential, but to simpli@ the explanation, the drum potential is shown as positive when it is h&her (less negative) than the developing cylinder potential, and negative when it is lower (more negative) than the developing cylinder potential.
-
Page 60: High-Voltage Power Supply
C. High-Voltage Power Supply 1. Outline In response to an instruction from the microprocessor (CPU) on the DC controller PCB, the high-voltage power supply applies a voltage comprising the DC voltage and the AC voltage to the primary charging roller and developing cylinder and applies the positive or negative DC voltage to the transfer charging roller. - Page 61 the serial line, a developing DC bias is paper. applied to the developing cylinder. After completion of printing, a between- When the VERTICAL SYNC signal page and a negative biases are applied again to clean the transfer charging controller, the DEVELOPING BIAS AC roller.
- Page 62 Note: The transfer high voltage is switched according to the printing sequence. as shown below. applied to the transfer charging roller to clean Lt.) bias (A positive voltage is applied to the transfer charging roller to transfer toner Print bias from the surface of the drum to the paper.) (A weak positive charge is applied to the transfer charging roller to prevent...
- Page 63 CHAPTER 2 This page intentionally left blank...
- Page 64 motor is running, the pick-up roller turns and feeds a sheet of paper into the printer. A. Outline The paper stops at the,resist paper sensor The presence of paper on the multi- purpose tray is sensed by photointerrupter VERTICAL SYNC signal after the paper reaches the sensor, and the leading edge of cassette is sensed by photointerrupter the toner image on the photosensitive...
- Page 65 CHAPTER 2 The pick-up and delivery units have Detection Paper Size photointerrupters (PS602. PS201) to detect Loading the cassette in the printer feeder paper. If the print does not reach or clear actuates specific switches. From the each sensor within a preset time, the microprocessor on the DC controller 3).
- Page 66 CHAZ’TER 2 C. Cassette Feed . Paper path from multi-purpose tray Each pick-up roller and the oblique rollers of the pick-up unit are driven by the plck- up motor lM2). When the video controller sends the /PRNT signal to the printer, the pick-up motor starts rotating.
-
Page 67: Main Motor
CHAPTER 2 Fixing and Delivery Unit ROLLER SURFACE TEMPERATURE signal 1. outline upper/lower rollers of the fixing unit According to the voltage of the FSRTH and the delivery rollers are driven by the signal, the microprocessor (CPU) on the DC main motor (Ml). - Page 68 to 180°C. Table 2-4 5. It is 185°C from paper pick-up start until the /VSYNC signal is received, and then it is switched to 190°C or 195°C. 6. It is switched to 180°C after c o n t i n u o u s printing of 25 envelopes on normal tempera- ture control.
- Page 69 When the power Is switched ON, the CPU 2. Fixing unit error detection The CPU assumes a ilxing unit error m the reads the voltage of pin 62 (AN16). If the voltage is higher than the speciffed value, controller: the CPU assumes a fbdng unit error before power-ON and cuts the current to the a.
- Page 70 CHAPTER 2 3. Fixing roller heater start sequence of operations from power-on The sequence to standby is as follows: The CPU turns the fixing roller heater ON a preset time after power-ON (after CPU initialization). The CPU assumes a fixing unit error when the upper fixing roller does not reach 175°C (190°C for initial warm-up) within 200 seconds after the fixing...
-
Page 71: Paper Jam Detection
E. Paper Jam Detection To detect the presence of paper and whether or not the paper has been fed correctly, the following paper sensors are provided: . Resist paper sensor (PS602) . Delivery paper sensor (PS20 1) The microprocessor (CPU) determines if a paper Jam has occurred by checking whether paper is present at the sensor within the amount of time specified in the memory. - Page 72 CHAPTER 2 3. Delivery unit delay jam The microprocessor detects a delivery unit delay jam if the paper does not reach the delivery paper sensor (PS201) within the required time after the VEFXICAL SYNC signal WSYNC) is received. [Unit: Seconds) PRINT VERTICAL SYNC signal (/VSYNC) _ Jam check...
-
Page 73: System Interface
CHAPTER2 Video controller controller The printer has a connector for an 8-bit parallel (Centronics) interface and RS232C Data can be input to the video controller via the parallel or serial connector. Data is input a page at a time and edited into the format defined by the printing environment set using the control panel or the external device. - Page 74 B. Operation When the power is switched ON, the printer enters the WAIT state. When the printer is ready for operation, the READY s i g n a l (/RDY) is sent from the DC controller to notify the video controller that the printer is ready.
-
Page 75: Outline
2. Functions blocks C. Video Controller PCB a. CPU 1. outline The Controller PCB receives print data via The CPU is an Intel 80960KB the serial or parallel ports. The controller embedded 32.bit processor with a 512 processes and converts the print data into byte on-chip instruction cache. - Page 76 b. Banding Coprocessor Serial Controller The banding coprocessor is an Intel The NS 1655OA Serial Controller is used 82961KD printer coprocessor that as the interface to the Host serial integrates a graphics accelerator and compression processor necessary for serves as the connector for this complex page description language interface.
- Page 77 CHAPTER 2 PCMCIA Interface Connectors The PCMCIA Interface (connector J6) is following is a summary of the use for supported by dedicated logic. This each connector: Generic Array Logic device [GAL) generates the control signals and Connector & effects data transfers over the The PCMCIA interface.
-
Page 78: Control Panel
D. Control Panel Displays the printer operating status 1. outline on the LEDs. This control panel contains 8 LEDs, Selects the printing environment, one LCD (liquid-crystal display], 7 o p e r a t i n g m o d e , fitility, and paper switches, and one buzzer on the control Sounds the buzzer if a switch input is... -
Page 79: Self-Test
CHAPTER 2 E. Self-test t h e R E A D Y i n d i c a t o r , ONLINE When the power is switched ON, the indicator, and the paper pick-up mode indicator light, and “00 READY AUTO’ printer executes the self-diagnosis program for the video controller to check the video appears on the Status indication... -
Page 80: 8Tatus/Error Message
F. Status/Error Message following pages list the contents of and corrective actions of status and error messages which are shown on the Status indication display while the printer is operating. Figure 2-47 shows how messages appear on the Status indication display. Status indication display Status indication display (serviceman call) Message fkld... - Page 81 CHAPTER 2 messages Status status message shows printer operating state when the printer is operating normally. display Description Ready state R E A D Y in each operating mode. This Is the default message. The Job in which an error occurred is JOB REJECT being sktpped.
- Page 82 2. Warning messages When a warning message is displayed, the operator should take the appropriate action, but does not need to stop the printer operation. Status indication display Measure TONER LOW The toner level IS low. Get a new toner c&ridge. FEEDER EMPTY The upper or lower cassette is empty in Put print paper in the...
- Page 83 Status indication display TONER LOW The toner level is low. Take the cartridge out, shake It as Instructed in Section III of Chapter 4, reinstall it. and print. If this message is displayed again. replace the cartridge, then press the ON LINE key. LOAD A4 Load the cassette containg Paper cassette replacement request...
- Page 84 Status indication display Description Upper cassette lnstallatlon request Load the upper cassette. or NO UPPER CASS. Paper cannot be fed from the lower cassette because the upper cassette is source. not loaded. Display Comment 1 command. This command sends the message from the external device to the printer.
- Page 85 4. Error messages and correct printing is not guaranteed, an error message is If an error occurs displayed. When key is pressed [error skip). printing may be possible In some cases, but correct the ON LINE data again. If an error occurs and this message Is displayed, the printer stops printing and goes off line.
- Page 86 CHAPTER 2 Status Indication display Description umber MEMORY FULL Take one of the following Download overflow The pattern data memory overflowed because there was too much pattern data (downloaded data) for forming external device. The user-defined characters (character font) overflow pattern data Is sent from the external device to the invalid.
- Page 87 Description Message Line errclr Perform the followlng Data from the external device was not procedure until the error is corrected. interface (RS232C) was used. Reference resume data reception. pages before the page where the error the interface cable between the external device and the he optimum conditions.
- Page 89 IdentItled easily. If this call occurs, turn the power OFF and ON again. If the call occurs again. report the code number, detailed number, and detail of the error occurrence to Canon Inc. via the servtce departments of Canon sales companies. a. Printer engine serviceman call...
- Page 90 CHAPTER2 b. Controller serviceman call Indication display Description Turn the power OFF and ON Internal ROM checksum error The contents of the ROM on the video replace the video controller controller are Incorrect. Internal RAM error Turn the power OFF and ON Data cannot be correctly read from or written to the DRAhl located on the replace the video controller...
- Page 91 CHAPTER 2 Measure the power and OK SERVICE Extended ROM checksum error Turn again: If the error cannot br Font data In the extended ROM SIMM destroyed. corrected, replace the extended ROM SIMM. Extended RAM 1 error Turn the power OFF and ON SERVICE Data cannot be correctly read from or again.
- Page 92 Status lndlcation display Description Message Command status timeout Turn the power OFF and ON The DC controller PCB does not send a again. If the error cannot bc status to the video controller PCB within corrected. replace the video the prescribed time after the DC controller PCB or DC controller PCB receives a command.
-
Page 93: Outline
Outline The AC line voltage is supplied to the low-voltage power supply &-cult in the power supply by turning the power switch (SW10 11 ON. The low-voltage power supply circuit generates +24 VDC and +5 VDC. The ~24 VDC 1s supplied to the main motor, scanner motor, and exhaust fan to drive them, and to the high- voltage power supply PCB. - Page 94 CHAPTER 2 of tie Electrical System The DC controller regulates the envelope feeder driver, outputting pick-up commands (1st Start and 2nd Start) at the appropdate Uming to the envelope feeder driver via the serial line. The envelope feeder driver runs the motor according to the commands. Figure 2-49 shows the flow of signals between the feeder and the printer.
- Page 95 B. Pick-up/Feed System forward for about 1.8 second, pauses for envelope feeder pick-up motor (M4) is 0 . 1 s e c o n d s , t h e n r u n s t h e m o t o r a stepping motor that rotates forward or backward for about 2.3 seconds.
- Page 96 Power- ON The upper separation roller is driven via a torque limiter by the motor, which imparts a turning moment in the direction of Upper separation roller rotation of the pick-up and lower separation rollers (in the direction of the white arrow in Figure 2-52.
- Page 97 C. Paper Jam Detection Paper jam during pick-up or feeding from the envelope feeder Is detected in the same way as for a printer paper jam detection. See page 2-34 for details. 2 - 60...
-
Page 98: Outline Of The Electrical System
CHAPTER 2 of the Electrical System The DC controller controls the paper feeder driver, outputting paper pick-up commands (1st Start and 2nd Start) at the appropriate timing to the paper feeder driver via the serial line. The paper feeder driver drives the solenoid and motor according to these commands. Figure 2- 53 shows the flow of signals between the feeder and the pxlnter. -
Page 99: Pick-Up/Feed System
C. Paper Jam Detection B. Pick-up/Feed System The paper feeder pick-up motor [M3] is a Paper jam during pick-up or feeding from stepping motor that rotates forward or the paper feeder is detected in the same backward and is controlled by the paper way as for printer paper jam detectlon. -
Page 100: Paper Transport System
CHAPTER MECHANICAL SYSTEM chapter describes mechanical operation as well as disassembly and reassembly procedures of This the printer. Note the following precautions during disassembly or reassembly. When you remove the EP-E cartridge, cover the cartridge with a cloth or put it In a dark place to prevent light from affecting the drum inside the cartridge. - Page 101 Right cover Open the printer. Remove the screw. then move the right and Ppnels cover in holding the rear side of the cover. and remove it. cover Figure 3-2 inside the printer, or inspecting When cleaning or repaIr@ it, remove the appropriate covers and/or panels as described below.
- Page 102 4) Release the hook holding the upper 2. uppe1coverudt 1) Remove the right cover. cover with a flat-blade screwdriver and 2) Open the delivery cover. remove the upper cover unit. Delivery cover Figure 3-3 Figure 3-6 3) Remove the three screws.
- Page 103 3. Left COW% Remove the cassette. Remove the right cover, and then the 2) Remove the right cover. and then the upper cover unit. upper cover unit. Remove the left cover. 3) Release the left cover hook holding the Remove the control panel unit. left side plate, then open the left cover to the front and remove it.
- Page 104 CHAPTER 3 Press both ends of the front cover and remove the front cover. Remove the right cover. and then the upper cover unit. Perform step 1 to 5 on page 3-18, and remove the video controller unit. Remove the DC controller cover. Disconnect the connector.
- Page 105 CHAPTER 3 c. Control Panel unit 2. Disassembly and reassembly 1) Remove the two screws, and then the 1. Removing the control panel unit control Danel. from the printer Remove the upper cover unit. Figure 3-13 Remove the two screws, and then the connector cover.
- Page 106 CHAPTER 3 Removing the main motor Perform steps 1 and page A. Drive Unit 5 on and remove the video controller unit. 1. Removing the drive unit Disconnect the connector, remove the 1) Perform steps 1 and 2 on page 3-14, four screws, and remove the main and remove the fbdng unit.
-
Page 107: Paper Pick-Up Unit
two connectors, and pull the paper pick-up unit forward and out. Paper Pick-up Unit Removing tie paper pick-up unit Remove the cassette. Remove the inner cover. Remove the upper cover unit. Remove the left cover. Remove the control panel unit. Remove the multi-purpose tray. - Page 108 CHAPTER 3 Regist Paper Sensor and Cassette left end of the regist sensor holder and Paper Sensor 1) Remove the cassette pick-up roller. push the projection. Then, take off two claws on the right connector. side. and slide off the regist sensor holder unit to the left.
-
Page 109: Cassette Pick-Up Roller
Cassette Pick-up Roller Multi-purpose Tray pick-up Roller Removing the cassette pick-up roller Removing the multi-purpose tray Remove the cassette. Open the multi-purpose tray. Stand the printer on its right side. Remove the inner cover. Pull out the cassette pick-up roller by Push the sub-pad, hold the knob of the its knob. -
Page 110: Separation Pad
CHAPTER 3 Separation Pad E. Paper Delivery Unit Removing the separation pad 1. Removing the paper delivery unit Open the multi-purpose tray. 1) Remove the upper cover unit. Remove the inner cover. 2) Remove the left cover. Remove the multi-purpose tray pick-up 3) Remove the leaf spring. - Page 111 When removing the cable from the Note: laser PCB. support the PCB with your hand. The PCB can be Laser/scanner broken easily it flexed. The laser/scanner unit sweeps a laser 3) Remove the four screws, and then the beam across the photosensitive drum. It is laser/scanner unit.
-
Page 112: Ep-E Cartridge
A. EP-E 1. Configuration The EP-E cartridge combtnes a photosensitlve drum, primary charging roller, developing unit, and drum cleaning unit in a single housing. During printing the drum rotates and an invisible electrostatic latent image is formed on its surface and then developed into a visible image by toner. -
Page 113: Transfer Charging Roller
Cleaning the photosensitive drum B. Transfer Charging Roller Open the printer and remove the 1) Open the printer. cartridge. 2) Hook the left side of the transfer Open the protective shield. charging roller shaft with the supplied Liberally sprinkle toner on a piece of green clear&g brush, and remove the flannel or other soft cloth and clean the transfer charging roller. - Page 114 2. Removing the fixing roller 1) Open the delivery cover. 2) Remove the two screws, lift the fking unit slightly. and pull it forward and 1. Configumtion out. The fMng unit fixes the toner image onto the paper. It is configured as shown below. Figure 3-36 Note: When you replaced the tking unit,...
- Page 115 Remove the two screws, and then the Disassembly and reassembly Fixing roller heater Release the six hooks holding the wire Remove the fixing roller heater lead cover to the fixing flat-blade from the connector.. screwdriver. Remove the wire cover. Screw Wire cover Figure 3-39 Figure 3-37...
- Page 116 c. Thermistor Remove the wire cover. 1) Remove the thermoswltch. Remove the two screws. Release the 2) Disconnect the connector and remove hook holding the thermoswitch with a the cable from left t%xing cover. flat-blade screwdriver, and remove the thermoswitch unit. 3) Remove the two springs and open the Figure 3-41 lower separation guide.
- Page 117 4) Remove the screw and then the thermistor. Note for reassembly: make sure When installing the that the sensing surface of the thermistor contacts the surface of the upper fixing roller uniformly. If it does not, check whether the leaf spring is bent. 3-17...
-
Page 118: Video Controller Unit
4) Remove the two screws and then the connecter cover. A. Video Controller Unit Figure 3-47 video controller unit. 3) Disconnect the connector. 3-18... - Page 119 5) Remove the four screws and video B. Video Controller PCB 1) Perform step 1 to 5 on page 3- 18, and controller PCB. remove the video controller unit. Screws Video controller PCB Figure 3-60 Figure 3-49 Note for assembly If an ROM SIMM is installed, the SIMM If you removed the expansion ROM PCB or should be removed.
- Page 120 C. DC Controller P C B Note OP reassembly: When installing the DC controller PCB, put and remove the video controller unit. the bottom of the PCB into the PCB holder, 2) Disconnect the connector from the then align the PCB with the positioning pin. power supply.
- Page 121 E. Sensor FCB Pick-up Motor Driver PCB 1) Remove the pick-up motor driver PCB Perform steps 1 to 8 on page 3-7. and remove the paper pick-up unit. Disconnect the two connectors, remove the two screws, release the !3ve hooks, and remove the pick-up motor driver PCB.
- Page 122 F. Power Supply and remove the video controller unit. 2) Remove the two screws. disconnect the two connectors, remove the rod, and Sensor PCB Figure 3-66...
- Page 123 G. High-voltage Power Supply PCB on its 2) Stand the printer side. 3) Remove the two screw. release the two hooks, and remove the high-voltage case. 4) Release the four hooks holding the high-voltage power supply PCB to the high-voltage case.
- Page 124 Lift the top of the cover, remove the two dowels, then remove the left cover. 1. Removing covers a. Right cover 1) Lift the top of the cover. remove the two dowels, then remove the right cover. Left cover Figure 3-61 cover 2) Remove the four screws.
- Page 125 2. Removing the envelope feeder pick- 3. Removing the envelope feeder drive up motor 1) Remove the right, left, and bottom covers. 2) Disconnect the two connectors and remove the screw. Connectors Figure 3-63 3) Remove the two screws, and then the pick-up motor.
- Page 126 4. Removing the envelope feeder pick- 5. Removing the lower separation up roller roller, upper separation roller, and 1) Remove the tight, left. and bottom covers. torque limiter 1) Remove the right. left, and bottom covers. 2) Remove the two E-rings and two bushings.
- Page 127 4) Remove the separation roller shaft from the guide. Remove the upper separation roller and torque limiter from the shaft. Guide Figure 3-70 Notes: 1: Remove the separation guide and the upper cover as a unit. If the separation guide must be removed separately, adjust the position of the guide after reinstallation.
- Page 128 4) Remove the two screws, and then remove drive unit. the drive Removing front cover. Claws Figure 3-72 2) Remove the screw. release the two claws. and open the PCB cover. Screw Figure 3-73 3) Disconnect the two connectors and remove the cable tie.
- Page 129 2. Removing the paper feeder pick-up Removing the paper feeder driver motor 1) Remove the drive unit. Remove the screw, release the two 2) Remove the four screws. the E-ring. the claws, and open the PCB cover. (See gear, and remove the plate. Disconnect the three connectors and remove the cable tie.
- Page 130 A list of parts of the LBP-1260 and the LBP-860 that are not interchangeable. Shown are parts of the LBP- 1260 installed in the LBP-860. and parts of the LBP-860 installed in the LBP- 1260. Because the shape of the parts is identical, lnstall correctly by comparing and confirming based on the below comparison method (parts number, parts label, color of the cable, etc.)
-
Page 131: Choosinga Location
CHAPTER INSTALLATION This printer was carefully adjusted and strictly tnspected before being packed. This makes a suitable location. install the printer according to the proper procedures, then fully check the printer before it is used. The requires a thorough understanding of the printer. LOCATION .. - Page 132 places: In the sun If the printer must go somewhere sunny, Make sure the requirements below are met the wlndows must have curtains keep to when installing the printer. The service engineer should inspect the place the Near magnets or equipment that produces printer will go before delivery.
- Page 133 CHAPTER 4 If the boxed printer is brought into the warm from a cold storeroom or delivery truck, condense- tion will form on the printer surfaces. This will cause various problems. such as print defects. To prevent this from happening, make sure you leave the printer in its box to gradually warm up to room temperature before unpacking It.
- Page 134 2. Unpacking and installing the cartri~e Check Remarks Take the cartridge out of Its bag. Hold the cartridge as shown in See Figure 4-2. Fig. 4-2 (page 4-5) and slowly rock it 45” each way, five or six times. to distribute the toner evenly. surface.
- Page 135 Unsealed Cartri.dges Each cartridge contains a photosensitive drum coated with an organic photocon- A cartridge is affected by its storage exposed to strong light. The cartridge also conditions even if it is sealed in its box, so contains toner. This makes cartridges its life depends on how it is used or stored.
- Page 136 Before installing a new cartridge In the printer (or if blank spots appear on prints during use. because of uneven toner and slowly rock it 45” each way about the Figure 4-2. Thls will distrlbute the toner evenly. Then install the cartridge may result in toner leaking from the developing unit or cleaning unit.
- Page 137 6) Do not turn a cartridge upside down or stand it on end. Always lay it down with its label up. If the photosensitive drum gets Note: exposed to normal light of about 1500 lux for about 5 minutes, store the cartridge in a dark place to recover.
-
Page 138: Parts
CHAPTER SERVICING LISTS OFTOOL ....PERIODIC REPLACEMENT LIST OF LUBRICANTS, PARTS ........CLBANERS ......II. EXPECTED LIVBS OF SERVICE CHECEPOZ10TS ..6-S CUSTOMER ......SCHEDULE...... - Page 140 None The following is a table of consumables which, over the warranty period of the printer, are expected to need replacement once or more because of deterioration or damage. The expected expressed life of the consumable parts are in terms of the number of prints processed: replace when them they prove to be faulty.
- Page 141 A. Standard Tools The standard tools required for servicing the printer are listed below. Table S-2 Tool No. Remarks Tool name Jumper wire CK-0057 0.02 mm to 0.3 mm Thickness gauge Compression spring scale For checking cassette spring strength (O-600 g) Phillips screwdriver CK-0101...
- Page 142 B. Special Tools In addition to the standard tools, the following special tools are required for servicing the Ranks Note: A: Each service technician should carry one with him B: A group of the service technicians should share one. C: Each workshop should keep one.
- Page 143 Table 5-4 Components Remarks 1 Alcohol: ethyl Cleaning: plastic, Purchase locally (pure or rubber, external parts . Flammable: keep away denatured) or from flame isopropyl (pure 2 MEK (methyl Cleaning: 011 and toner Purchase locally ethyl ketone) stains Highly flammable: keep away from flame 3 Libricating Petroleum mineral 011...
- Page 144 CHAPTER 5 Cartridge Point Remarks clean the drum with solvents. Fixing unit Point Remarks Ketone type Clean the guide. Separation guide Wipe it softly when removing toner. Ketone type Transfer guide Point Tool/solvent Remarks guide Point Tool/solvent Remarks Static charge Cleaning brush Clean.
- Page 145 The customer should do the following maintenance to maximize printer performance. Table S-6 Customer maintenance soft dry cloth.
- Page 146 CHAPTER TROUBLESHOOTING INTRODUCTION .,..+....6- 1 0. SXRLANATION SPECIAL TOOL ..... . . 6-4 ADJUSTMENT .
- Page 147 4. Other points During winter. if the printer is brought into a warm room from a cold one (for instance, A. Initial Check a warehousel. condensation will occur 1. Operating environment inside the printer, causing various Check that: problems. a. The line voltage does not vary more than 10% from the voltage shown on For e-pie: the rating plate.
-
Page 148: Basic Procedure
Procedure B. Basic If an image defect or a malfunction occurs, perform the initial check, then follow the basic procedure below. section V on troubleshooting. 2. If an image defect occurs, determine the type of image defect from the list of image defect samples on page 6-14, and correct the defect. -
Page 149: How To Use The Troubleshoot Tables
CHAPTER 6 C. How to use the Troubleshooting Tables The troubleshooting tables In this section have been created from general flowcharts. The way of using these tables is described below. based on the following examples. AC Power Example: No Result Possible cause Step Check... -
Page 150: Printer Driver Tester
A. Printer Driver Tester Figure 6-2 TEST PRINT Permits the printer to print the pattern Figure 1. outline The printer driver tester allows the printer the test pattern to be prlnted: Selects to operate without being connected to an black image, vertical lines, horizontal lines, interface to determine whether the printer or a white image. - Page 151 which continues even when the (LED) PAPER SIZE tester is disconnected. Indicates the paper size of the cassette in the paper pick-up unit specified by the This mode continues until the PAPER FEED METHOD SELECT switch. printer is turned OFF. Table 6-I LASER POWER CHECK Do not set the...
- Page 152 CHAPTER 6 Table 6-2 Connector contact No. Procedure. Set the printer power switch to OFF. Attach the tester connector to the connector (5135) for the paper feeder or the connector Set the printer power switch to ON. When the printer goes into stand-by, operate the tester to perform the check. If your body Is electrically charged when you operate the printer driver tester, printer Note: misoperation or malfunction may occur.
- Page 153 This page intentionally left blank 6 - 7...
- Page 154 B. Mechanical Adjustment 1. Checking the nip width of the lower fixing roller The tlxing unit does not allow adjustment A. lmpee Adjustment of the pressure (nlp width). If the nip width If an image problem occurs, follow the is set incorrectly, a fixing problem may procedure below to perform a test pdnt.
- Page 155 2. Installing the separation guide (Adjusting the gap between the separation gulde and the lower separation roller) Under normal conditions, remove the separation guide along with the upper cover. If you removed just the separation guide or replaced a bent separation guide, adjust the gap as follows.
- Page 156 C. Electrical Adjustment 1. Leading edge registration adjustment adjusted at the factory. Therefore. it does not require adjustment in the field during installation. However, when the DC controller PCB is replaced, the leading edge registration must be readjusted by using the following procedure.
- Page 157 CHAPTER 6 J215 J214 J213 TB201 6-11...
- Page 158 The laser beam is invisible. When a problem In the laser output occurs, use the laser diagnosis flowchart to determine whether the malfunction was caused with the laser/scanner unit or the DC controller PCB. Notes for the flowchart a. Printer driver tester +--t+ Driver tester b.
- Page 159 is ready, set the LASER POWER CHECK switch of the driver tester to “ON”. Set the meter range to 20 VDC. Contact the Set the meter range to 20 VDC. Contact the test leads against the following connector pins on the DC controller PCB: connector pins on the DC controller PCB: DC controller DC controller...
-
Page 160: Defects
CHAPTER 6 A. Examples of Ima@ Defects l-l Light i-3 Completely l-4 All black blank l-6 Dirt on back of l-7 Vertical black l-6 Irregular and vertically in streaks smudged vertical line bands l-9 Irregular and smudged l-l 0 Blank spots l-l 1 Solid vertical horizontal bands... - Page 161 CHAPTER 6 B. Troubleshooting Image Defects Check Result Procedure Does the print quality improve when Adjust the image density the image density is adjusted? using the external device. Does the print quality improve when Replace the cartridge. the EP-E cartridge Is replaced? Open the printer while a print Is being If the toner image is very made.
- Page 162 CHAPTER 6 Check Result Procedure Perform a test print. About five seconds YES Check whether the high- power supply after the maln motor starts, does the voltage between 5213.9 (X02) and good contact with the (Developing developing bias contact of bias) PCB become about 0.76 VDC? the cartridge.
- Page 163 Check Result Procedure Possible cause Step Does the print quallty Improve when Adjust the image density the image density is adjusted? from the external device. High-voltage Clean the printer drum grounding Clean the contacts so they contact contact and cartridge contact, then make proper contact.
- Page 164 I - 3 Completely blank Possible cause Step Check Result Procedure DC controller 1 Replace the DC controller About one second after the main motor starts, does the voltage between PCB. on the DC controller PCB change from about 5 VDC to 0 V? High-voltage Perform a test print.
- Page 165 Check Result Procedure Possible cause Step YES Replace the cartrIdge. EP-E cartridge I Does the print quality improve when the cartridge is replaced? High-voltage Perform a test print. About one second Replace the h&b-voltage the maln motor starts, does the power supply PCB.
- Page 166 CHAPTER 6 I - 5 Possible cause 1 Step 1 Check Result / Procedure Static charge 1 Clean the static charge. eliminator eliminator. Is the static charge eliminator Ground the static charge eliminator properly. Transfer Is the transfer charging roller dirty? Clean the roller.
- Page 167 Result / Procedure Possible cause Step Check Open the upper cover while printing is performed. and open the protective shield of the cartridge. Are vertical black streaks on the drum? I - 8 Irregular and smudged vertical bands Possible cause Step Check Result Procedure...
- Page 168 I - 9 Irregular and smudged horizontal bands Possible-cause 1 Step 1 Check Result) Do the bands appear at regular...
- Page 169 CHAPTER 6 Procedure Check Result Is the recommended paper being used? Perform a test print on recommended paper. If the problem disappears. advise the customer to only use the recommended paper. Replace the paper. Instruct the customer to wrap and store the paper to prevent it from becomlng damp.
- Page 170 Check Result Procedure Lack of toner Is there one or more straight vertical Take out the cartridge, rock white streaks of uniform width? It as shown in Section III of Chapter 4 to distribute the toner evenly. then put it EP-E cartridge Open the protective shield of the Replace the cartridge.
- Page 171 I - 12 Faulty registration Check Number of Is the multi-purpose tray or the sheets cassette overloaded? Print paper If the problem disappears, Is the recommended paper being used7 paper. Paper pick-up 3 Is paper dust adhering to the paper roller Leading edge 4 Does the registration improve when...
- Page 172 CHAPTER 6 I- 13 Poor fixing Possible cause step Check Result Procedure Transfer Is the transfer charging roller dirty’? Clean the roller. If it is not possible to clean. replace it. Thermistor Obtain ten test prints. Is the last YES Replace the thermistor. image lighter than the first? Does poor tkdng cccur In a vertical Check whether the upper...
- Page 173 CHAPTER 6 I - 15 Missing BD signal Possible cau.se Step Check Result Procedure Connector Attach the connectors. DC controller PCB making good contact? Is connector J731 on the BD PCB Attach the connector. making good contact? Check by using the laser malfunction diagnosis flowchart in Section III C of DC controller Is the laser/scanner unit faulNz...
- Page 174 When performing any of the corrective actions described below, exercise the following precautions: pins. first check the connector for When measuring voltages designated connector faulty contacts. Remove ROM SIMM, RAM SIMM, and font card from the printer. replace the video controller PCB. remove the EEPROM from the old PCB When you and mount it on the new PCB.
- Page 175 DC Power M - 2 ) No Possible cause Step Check Result Procedure Does the problem improve when the detection power switch is turned OFF, then back current detection clrcult of circuit the power supply activates. AC power Remove the power supply and plug the Check by following the stepa power cord into it.
- Page 176 M - 5 Control panel LEDs do not light. Step Check Result Procedure Control panel 1 Does the problem improve when you Replace the control panel. replace the control panel? Video Replace the video controller controller PCB Control panel switch malfunction M - 6 Check Result...
- Page 177 Step Check Result Procedure Is the dellvery cover open? Securely close the cover. Proceed to step 3. Do you have a printer driver tester 7 Proceed to step 5. Connect the printer driver tester to Check whether the regist the printer. Is the REGIST SENSOR paper sensor arm is damaged.
- Page 178 CHAPTER 6 “11 PAPER OUT” appears even though paper is loaded in M - 8 the selected paper source. Has the multi-purp sensing switch is LED of the te multi-purpose tray, does the MP TRAY LED of the tester light? printer.
-
Page 179: Pick-Up Motor Driver Pcb
CHAPTER 6 “12 PRINTER OPEN” appears even though the printer is closed. Possible cause Step Check Procedure upper CoYer Replace the upper cover. DC controller 2 Is the voltage between connector Replace the DC controller PCB. on the pick-up motor driver PCB zero Pick-up motor Replace the pick-up motor when the upper cover is closed? -
Page 180: Sensor Pcb
CHAPTER 6 Possible cause Steu Check Result Procedure EP-E cartridge 1 Shake the cartridge following the The toner IS insufnclent. instructions, and load it in to the Prepare a new cartridge. printer. Does the message disappear? Clean the high-voltage Is the toner sensor contact oi- the power supply developing bias contact of the high-voltage contacts dirty’? - Page 181 Procedure Check Are the connectors (J601.J603,J135. Reconnect the connectors. DC controller PCB and connector 5852 on the paper feeder driver PCB making Replace the pick-up motor Pick-up motor 2 Does the problem improve when the paper feeder is replaced? persists after replacing the DC controller PCB.
- Page 182 CHAPTER 6 M- 15 No Paper Pick-up from Upper Cassette Possible cause Step Check Result Procedure Place some paper in the upper Replace the video controller controller cassette and perform a test print by PCB. using the printer driver tester. Is the paper picked up from the cassette? Place some paper in the upper Check by following the...
- Page 183 No Paper Pick-up from Multi-purpose Tray M- 16 Check Result Procedure Possible cause Step Replace the video controller Video Place some paper on the multi-purpose controller tray and perform a test print by using PCB. Place some paper on the multi-purpose Check by following the stepa Pick-up In M-12, uFaulty Pick-up...
- Page 184 Possible cause Step Check Result Procedure Video Place some paper in the lower cassette Replace the video controller and perform a test print by using the PCB. picked up from the cassette? Replace the pick-up motor Does the problem disappear when the driver PCB.
- Page 185 CHAPTER 6 M - 19 Poor Output from High-voltage Power Supply Possible cause Step Check Result Procedure High-voltage Is any terminal of the high-voltage Clean the terminals of the connector dlrtv or carbonized? contact. Does the problem improve when the Replace the high-voltage power supply high-voltage power supply PCB is...
-
Page 186: Malfunctions
Possible cause Step Check Result Procedure connecter Are connector 5210 on the DC Reattach the connectors. controller PCB and connectors 5741 and 5743 on the connector PCB making good contact? Broken Remove the t%dng unit and measure Check the wiring from thermistor the resistance between connectors connector 5213 on the DC... - Page 187 Step Check Procedure Reconnect the connector. Is connector 5208 on the DC controller PCB makine coed contact? Power supply Check whether +24 VDC is Does the voltage between connectors present between connectors the DC controller PCB become about 24 VDC? controller PCB.
-
Page 188: Print Paper Jams
CHAPTER 6 Jams Paper passes through two major sections in the printer: (1) the pick-up section and (21 the fixing and delivery section. The following explains how to troubleshoot jams in each of these sections. Figure Pick-up section Fixing and delivery section... - Page 189 CHAPTER 6 T - l Pick-up section Possible cause Step Check Result Procedure Advise the user to only use Is the recommended paper being the recommended paper. used? Replace the paper. Advise Is the paper curled or wrinkled? the customer on how to store the paper.
- Page 190 CHAPTER 6 Possible cause Step Check Procedure Result Advise the user to only use Are the proper envelopes being used In the recommended the envelope feeder 7 Number of Are there too many envelopes In the Advise the user not to load envelopes envelope feeder 7 number of envelopes.
-
Page 191: Incomplete Paper Feed
B. Incomplete Paper Feed T - 1 1 Sheets stuck together Check Result Procedure Advise the user to only use Paper Envelope being used’? the recommended paper. Dose the problem occur in the multl- purpose tray7 sequent steu. cassette Is the paper positioned correctly under Check whether the hold- the hold-down tabs? down tabs are bent. - Page 192 Possible cause Step Check Result Procedure Print paper Is the recommended paper being used? Advise the user to only use Envelope the recommended paper. the paper or envelope curld or Replace the paper or deformed? envelope. Advise the user on on proper storage method.
- Page 193 This page intentionally left blank 6 - 4 7...
- Page 194 Switches...
- Page 195 CHAPTER 6 Table 6-5 Symbol Symbol Power switch SW601 Detects when door is open and cuts off the +24VES output Test print switch SW602 Upper cassette size-sensing switch 1 SW603 Upper cassette size-sensing switch 2 SW604 Upper cassette size-sensing switch 3 SW605 SW651 SW652...
-
Page 196: Sensors And Solenoids
B. Sensore and Sotenoids 6 - 50... - Page 197 Table 6-6 Symbol Delivery paper sensor cassette paper sensor Multi-purpose tray paper end sensor Multi-purpose tray paper senscw Paper feeder paper sensor (paper feeder) Envelope feeder paper sensor (envelope feeder) Solenoid Cassette pick-up roller clutch solenoid Multi-purpose tray pick-up roller clutch solenoid Paper feeder pick-up roller clutch solenoid [paper SL651 feeder)
-
Page 198: Motors And Others
Motors Figure 6-13... - Page 199 Table 6-7 Symbol Motor Drives the paper pick-up rollers Drives the paper feeder pick-up rollers (paper feeder) Drives the envelope feeder pick-up rollers (envelope feeder) Drives the scanning mirror Fan motor Exhaust fan Heats the upper fbdng roller Detects the upper &dng roller surface temperature Thermistor...
-
Page 200: Pc Boards
D. PC Boards Figure 6-14... - Page 201 Table 6-8 DC controller PCB Controls the printing sequence High-voltage power supply PCB Applies high voltage to the primary and transfer charging rollers and the developing cylinder Pick-up driver PCB Relays signals between the sensors, solenoids. motors. 4 Sensor PCB and pick-up motor driver PCB 5 Video controller PCB Processes I/O between the printer and the external...
-
Page 202: Connectors
E. Connectors... -
Page 204: Dc Controller Pcb
CHAPTER 6 Variable resistors, LED indicators, test pins, jumpers, and switches that are utilized of when servicing are listed below. Any variable resistors. test pins, etc.. not listed below are for factory use only: they require special tools and measuring instruments, and must be set with high precision. Do not touch them when servicing. - Page 205 B. High-voltage Power Supply PCB TB401 TB402 TB403 TB404 TB405 Table 6- 10 Function For factory use...
-
Page 206: Pick-Up Motor Driver Pcb
C. Pick-up Motor Driver PCB Table 6- 11 SW601 1 II SW603 0 SW604 0 SW605 [7 Figure 6-19 D. Paper Feeder Driver PCB Table 6-12 q sEzo Cassette size sensing switch Figure 6-20... - Page 207 GENERAL TtMMG 4 LIST OF SIGlULS . . VI. SERSORCTRGUIT..t.s..A-10 DIAGRAM . ..*..*..*...* A-6 A-12...
- Page 208 Timing chart for two consecutive prints on A4 paper (Upper Caseette feed) GENERAL TIMING CHART Power switch ON (Unit: Seconds) LSTR Operation WAIT PRINT...
- Page 209 II. LIST OF SIGNALS Abbreviation APCIN AUTOMATIC POWER CONTROL INPUT signal [amlo@ AUTOMATIC POWER CONTROL OUTPUT signal (analog) BEAM DETECTION (HorlmntaJ sync pulse) signal BD INPUT signal COMMAND BUSY signal CONTROLLER CLOCK signal COMMAND signal CONTROLLER POWER READY signal DOOR OPEN DETECT s&ml VIDEO DATA ENABLE signal FAND EXHAUST FAN DRIVE sIgnal...
- Page 210 VIDEO si@ml VERTICAL. SYNC REQUEZT signal A - 4...
- Page 211 Paper feeder (optlonal) Fixing unit Envelope feeder (optional) Line input Pick-up motor driver DC controller Video controller unit Laser/scanner Cassette paper sensor Regist paper sensor Pick-up motor Cassette MP pick-! Delivery paper sensor pick-up roller clut roller clutch solenoic solenoid A - S...
- Page 212 DC CONTROLLER controller A - 6...
- Page 213 DC controller - 2/2...
-
Page 214: Pick-Up Motor Driver
V. PICK-UP MOTOR DRIVER Pick-up motor driver - 112 PAPER FEEDER ENVELOPE FEEDER SW602 ENVO 2... - Page 215 Pick-up motor driver - 2/2 SENSOR PCB...
-
Page 217: Paper Feeder Driver
VII. PAPER FEEDER DRIVER A- 11... -
Page 218: Envelopb Feeder Drlver
VIII. ENVELOPE FEEDER DRIVER J932 J932 J932 J932 n A - 1 2...
Need help?
Do you have a question about the LBP-1260 and is the answer not in the manual?
Questions and answers