
Related Manuals for Perfect Aire 3PAMSH18-MZO2


Summary of Contents for Perfect Aire 3PAMSH18-MZO2
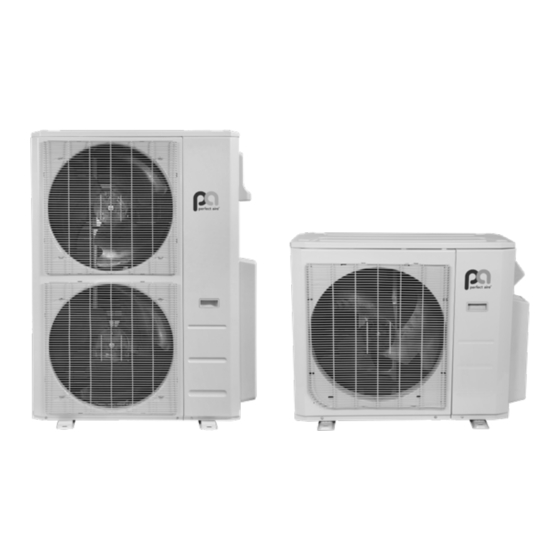
- Page 1 OWNER’S MANUAL MULTI-ZONE OUTDOOR CONDENSER MODELS: 3PAMSH18-MZO2, 3PAMSH27-MZO3, 3PAMSH36-MZO4, 3PAMSH48-MZO5, 3PAMS18-HH-MZO2, 3PAMS27-HH-MZO3, 3PAMS36-HH-MZO4, 3PAMS48-HH-MZO5...
-
Page 2: Table Of Contents
TABLE OF CONTENTS TABLE OF CONTENTS (Continued) INSTALLATION MANUAL SAFETY PRECAUTIONS ........................4 CONTINUED WIRING ..............................28 OWNER’S MANUAL OUTDOOR UNIT WIRING ................................29 UNIT PARTS AND MAJOR FUNCTIONS ..................8 CHOOSE THE RIGHT CABLE SIZE ............................29 UNIT PARTS ....................................8 WIRING FIGURE ...................................30 (A) WALL-MOUNTED TYPE ......................................8 ONE-TWO MODELS: ........................................ -
Page 3: Safety Precautions
SAFETY PRECAUTIONS SAFETY PRECAUTIONS (Continued) Read Safety Precautions Before Operation and Installation CAUTION ELECTRICAL WARNINGS Incorrect installation due to ignoring instructions can cause serious damage or injury. • Turn off the air conditioner and disconnect • Only use the specified power cord. If the power The seriousness of potential damage or injuries is classified as either a WARNING or CAUTION. - Page 4 SAFETY PRECAUTIONS SAFETY PRECAUTIONS (Continued) (Continued) PRODUCT INSTALLATION WARNINGS AMOUNT OF AMOUNT OF INSTALLATION MINIMUM ROOM INSTALLATION MINIMUM ROOM REFRIGERANT TO REFRIGERANT TO HEIGHT (M) AREA (M²) HEIGHT (M) AREA (M²) BE CHARGED (KG) BE CHARGED (KG) Installation must be performed by an Do not turn on the power until all work has authorized dealer or specialist.
-
Page 5: Outdoor Unit Wiring
UNIT PARTS AND MAJOR FUNCTIONS UNIT PARTS AND MAJOR FUNCTIONS (Continued) (B) DUCT / CEILING TYPE (C) FLOOR AND STANDING TYPE (CONSOLE) (D) COMPACT FOUR-WAY CASSETTE TYPE UNIT PARTS (A) WALL-MOUNTED TYPE Indoor unit Panel frame Rear air Indoor unit intake grille Drain pump Indoor unit... -
Page 6: Operating Temperature
UNIT PARTS AND MAJOR FUNCTIONS UNIT PARTS AND MAJOR FUNCTIONS (Continued) (Continued) Defrosting FEATURES NOTE: Room relative humidity less than 80%. If the air conditioner operates in excess of this figure, the surface • Frost may be generated on the outdoor unit PROTECTION OF THE AIR CONDITIONER of the air conditioner may attract condensation. -
Page 7: Energy Saving Tips
UNIT PARTS AND MAJOR FUNCTIONS MANUAL OPERATIONS AND MAINTENANCE (Continued) The air conditioner turns to FAN ONLY mode ENERGY SAVING TIPS OPERATION MODE SELECTION OPTIMAL OPERATION from COOL or HEAT mode. • DO NOT set the unit to excessive temperature To achieve optimal performance, please note the While two or more indoor units are simultaneously When the indoor temperature reaches the set... -
Page 8: Troubleshooting
TROUBLESHOOTING TROUBLESHOOTING (Continued) SAFETY PRECAUTIONS Issue Possible Causes If ANY of the following conditions occurs, turn off your unit immediately! A low hissing sound may occur during operation. This is normal and is caused • The power cord is damaged or abnormally warm by refrigerant gas flowing through both the indoor and outdoor units. -
Page 9: Troubleshooting
TROUBLESHOOTING ACCESSORIES (Continued) The air conditioning system comes with the following accessories. Use all of the installation parts and Problem Possible Causes Solution accessories to install the air conditioner. Improper installation may result in water leakage, electrical shock and fire, or cause the equipment to fail. The items are not included with the air conditioner must Power failure Wait for the power to be restored be purchased separately. -
Page 10: Installation Summary
INSTALLATION SUMMARY INSTALLATION SUMMARY (Continued) INSTALLATION ORDER BEST INSTALLATION PRACTICES • A SURGE PROTECTOR IS HIGHLY RECOMMENDED TO PREVENT DAMAGE TO THE EQUIPMENT DUE TO ELECTRICAL FAILURE • VERIFY THE WALL IS PLUMB. AN UNPLUMB WALL WILL CAUSE BLOWER WHEEL TO BE UNBALANCED •... -
Page 11: Installation Diagram
INSTALLATION DIAGRAM SPECIFICATIONS Number of units that can be used together Connected units 1-5 units Mounting screw ST3.9 × 25-C-H Air-break Compressor stop/start frequency Stop time 3 min or more Installation plate Switch Clip anchor Voltage fluctuation within ±10% of rated voltage Air-break Switch Power source voltage Voltage drop during start... -
Page 12: Outdoor Unit Installation
OUTDOOR UNIT INSTALLATION OUTDOOR UNIT INSTALLATION (Continued) Install the unit by following local codes and DO NOT install unit in the following locations: STEP 2: INSTALL DRAIN JOINT STEP 3: ANCHOR OUTDOOR UNIT regulations , there may be differ slightly between ;... -
Page 13: Refrigerant Piping Connection
OUTDOOR UNIT INSTALLATION REFRIGERANT PIPING CONNECTION (Continued) When connecting refrigerant piping, do not let NOTES ON DRILLING HOLE IN WALL STEP 2: REMOVE BURRS OUTDOOR UNIT MOUNTING substances or gases other than the specified DIMENSIONS (in) DIMENSIONS (in) You must drill a hole in the wall for the refrigerant Burrs can affect the air-tight seal of refrigerant refrigerant enter the unit. -
Page 14: Step 4: Connect Pipes
REFRIGERANT PIPING CONNECTION REFRIGERANT PIPING CONNECTION (Continued) (Continued) Turn the handle of the flaring tool clockwise Align the center of the two pipes that you will Thread this pipeline through the wall and NOTE ON MINIMUM BEND RADIUS until the pipe is fully flared. Flare the pipe in connect. - Page 15 WIRING WIRING (Continued) OUTDOOR UNIT WIRING BEFORE PERFORMING ANY To avoid getting an electric shock, never Remove the electric cover of the outdoor unit. touch the electrical components soon after ELECTRICAL WORK, READ If there is no cover on the outdoor unit, take the power supply has been turned off.
- Page 16 WIRING WIRING (Continued) (Continued) WIRING FIGURE NOTE: Refer to the following figures if end- L(A) N(A) S(A) L(B) N(B) S(B) N L( 1) users wish to perform their own wiring. Run the CAUTION S(2) S(A) N(A) L(A) main power cord through the lower line-outlet Connect the connective cables to the terminals, of the cord clamp.
- Page 17 WIRING WIRING (Continued) (Continued) ONE-THREE MODELS: Model Q Model Q To indoor To indoor Model A Model E Model A unit A unit B Model E Model U Model U L(A) N(A) S(A) L(B) N(B) S(B) Model R Model R Model B Model B Model F...
- Page 18 WIRING WIRING (Continued) (Continued) ONE-FOUR MODELS: 1(A) 2(A) 3(A) 1(B) 2(B) 3(B) 1(C) 2(C) 3(C) 1(D) 2(D) 3(D) TO A TO B TO C TO D Model G Model G Model D Model D Model A Model A Model I Model I L1(A) L2(A) S(A) L1(B) L2(B) S(B) L1(C) L2(C) S(C) L1(D)L 2(D) S(D)
- Page 19 WIRING WIRING (Continued) (Continued) ONE-FIVE MODELS: Model K Mode K Model D Model D Model H Model H 1(L) 2(N) 3(S) 1(L) 2(N) 3(S) 1(L) 2(N) 3(S) 1(L) 2(N) 3(S) 1(L) 2(N) 3(S) Model A Model A 1(A) 2(A) 3(A) 1(B) 2(B) 3(B) 1(C) 2(C) 3(C) 1(D) 2(D) 3(D) 1(E) 2(E) 3(E) 1(A) 2(A) 3(A) 1(B) 2(B) 3(B)
- Page 20 WIRING AIR EVACUATION (Continued) WIRING FIGURE PREPARATIONS AND PRECAUTIONS Close the manifold gauge’s Low Pressure CAUTION Air and foreign matter in the refrigerant circuit valve and turn o the vacuum pump. can cause abnormal rises in pressure, which can After confirmation of the above conditions, follow Wait for 5 minutes, then check that there has damage the air conditioner, reduce its efficiency, these guidelines when performing wiring:...
- Page 21 AIR EVACUATION AIR EVACUATION (Continued) (Continued) GAS LEAK CHECK NOTE ON ADDING REFRIGERANT SAFETY AND LEAKAGE CHECK Perform the electrical safety check after CAUTION ELECTRICAL SAFETY CHECK completing installation. Cover the following areas:. Perform the electrical safety check after • Refrigerant charging must be performed after wiring, vacuuming, and the leak testing.
- Page 22 TEST RUN FUNCTION OF AUTOMATIC WIRING/PIPING CORRECTION BEFORE TEST RUN TEST RUN INSTRUCTIONS AUTOMATIC WIRING / HOW TO ACTIVATE THIS FUNCTION PIPING CORRECTION FUNCTION A test run must be performed after the entire Open both the liquid and gas stop valves. Check that outside temperature is above 5°C.
- Page 23 5401 Dansher Road Countryside, IL 60525 844-4PA-AIRE 844-472-2473 support@perfectaire.us 877-997-2473 supportcanada@perfectaire.us CANADA SUPPORT www.perfectaire.us Printed in China 1221_M870...
Need help?
Do you have a question about the 3PAMSH18-MZO2 and is the answer not in the manual?
Questions and answers