
Related Manuals for Perfect Aire 3PAMSHH09-UVW


Summary of Contents for Perfect Aire 3PAMSHH09-UVW
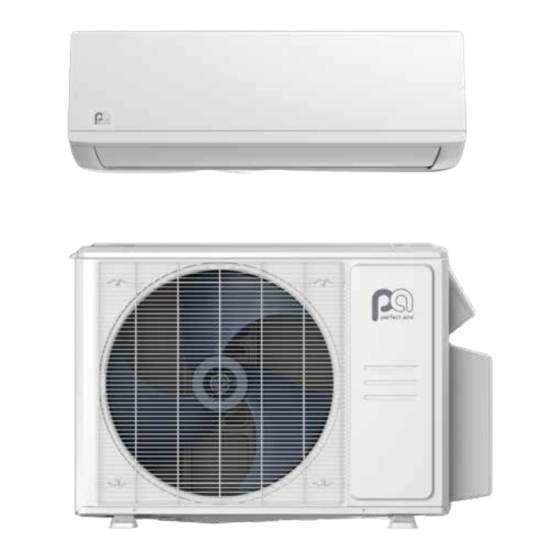
- Page 1 OWNER’S MANUAL HYPER HEAT MINI-SPLIT SYSTEM MODELS: 3PAMSHH09-UVW, 3PAMSHH09-SZO, 3PAMSHH12-UVW, 3PAMSHH12-SZO, 3PAMSHH18-UVW, 3PAMSHH18-SZO, 3PAMSHH24-UVW, 3PAMSHH24-SZO...
-
Page 2: Table Of Contents
TABLE OF CONTENTS SAFETY PRECAUTIONS ........................5 OWNER’S MANUAL UNIT SPECIFICATIONS AND FEATURES ..................8 Indoor unit display ..................................8 Operating temperature ................................9 Other Features .....................................10 Setting Angle of Airflow ................................11 Manual Operation (without remote) ..............................11 CARE AND MAINTENANCE ......................12 Cleaning Your Indoor Unit ................................12 Cleaning Your Air Filter ................................12 Air Filter Reminders ..................................13... -
Page 3: Safety Precautions
SAFETY & PRECAUTIONS TABLE OF CONTENTS SAFETY PRECAUTIONS (Continued) INSTALLATION MANUAL CONTINUED Read Safety Precautions Before Operation and Installation Incorrect installation due to ignoring instructions can cause serious damage or injury. REFRIGERANT PIPING CONNECTION ..................30 The seriousness of potential damage or injuries is classified as either a WARNING or CAUTION. Note on Pipe Length ..................................30 Connection Instructions –... - Page 4 SAFETY & PRECAUTIONS SAFETY PRECAUTIONS SAFETY PRECAUTIONS (Continued) (Continued) CAUTION ELECTRICAL WARNINGS PRODUCT INSTALLATION WARNINGS • Turn off the air conditioner and disconnect • Only use the specified power cord. If the power Installation must be performed by an Do not turn on the power until all work has the power if you are not going to use it for a cord is damaged, it must be replaced by the authorized dealer or specialist.
-
Page 5: Unit Specifications And Features
SAFETY & PRECAUTIONS UNIT SPECIFICATIONS AND FEATURES UNIT SPECIFICATIONS AND FEATURES (Continued) INDOOR UNIT DISPLAY OPERATING TEMPERATURE When your air conditioner is used outside of the following temperature ranges, certain safety protection features may activate and cause the unit to disable. NOTE: Different models have different front panels and display windows. -
Page 6: Other Features
SAFETY & PRECAUTIONS UNIT SPECIFICATIONS AND FEATURES UNIT SPECIFICATIONS AND FEATURES (Continued) (Continued) A guide on using the infrared remote is not included in this literature package. Not all the functions are SETTING ANGLE OF AIRFLOW available for the air conditioner, please check the indoor display and remote control of the unit you purchased. Press the MANUAL CONTROL button again Setting vertical angle of airflow to activate FORCED COOLING mode. -
Page 7: Care And Maintenance
SAFETY & PRECAUTIONS CARE AND MAINTENANCE CARE AND MAINTENANCE (Continued) CLEANING YOUR INDOOR UNIT MAINTENANCE – CAUTION Dry it in a cool, dry place, and refrain from LONG PERIODS OF NON-USE • Before changing the filter or cleaning, turn off exposing it to direct sunlight. -
Page 8: Troubleshooting
SAFETY & PRECAUTIONS TROUBLESHOOTING TROUBLESHOOTING (Continued) SAFETY PRECAUTIONS Issue Possible Causes If ANY of the following conditions occurs, turn off your unit immediately! The outdoor unit The unit will make different sounds based on its current operating mode. makes noises •... -
Page 9: Accessories
SAFETY & PRECAUTIONS TROUBLESHOOTING ACCESSORIES (Continued) The air conditioning system comes with the following accessories. Use all of the installation parts and Problem Possible Causes Solution accessories to install the air conditioner. Improper installation may result in water leakage, electrical shock and fire, or cause the equipment to fail. -
Page 10: Unit Parts
SAFETY & PRECAUTIONS INSTALLATION SUMMARY - INDOOR UNIT UNIT PARTS NOTE: The installation must be performed in accordance with the requirement of local and national standards. The installation may be slightly different in different areas. Wall Mounting Plate Functional Filter Refrigerant Piping (on back of main filter - some units) -
Page 11: Indoor Unit Installation
Make connect the indoor and outdoor units. The label on the product box to make sure that the 3PAMSHH09-UVW /3PAMSHH12-UVW on the product box to make sure that the model default position for all piping is the right side... -
Page 12: Step 5: Connect Drain Hose
SAFETY & PRECAUTIONS INDOOR UNIT INSTALLATION INDOOR UNIT INSTALLATION (Continued) (Continued) STEP 6: CONNECT SIGNAL AND POWER CABLES If there is a serious safety issue with the If existing connective piping is already NOTE ON DRAIN HOSE PLACEMENT: power supply, stop work immediately. Explain The signal cable enables communication between embedded in the wall, proceed directly to Make sure to arrange the drain hose according... -
Page 13: Step 7: Wrap Piping And Cables
SAFETY & PRECAUTIONS INDOOR UNIT INSTALLATION INDOOR UNIT INSTALLATION (Continued) (Continued) If refrigerant piping is already embedded in STEP 7: WRAP PIPING AND CABLES STEP 8: MOUNT INDOOR UNIT the wall, do the following: Back view Before passing the piping, drain hose, and the If you installed new connective piping to the (For some units only) outdoor unit, do the following:... -
Page 14: Outdoor Unit Installation
SAFETY & PRECAUTIONS OUTDOOR UNIT INSTALLATION OUTDOOR UNIT INSTALLATION (Continued) Install the unit by following local codes and DO NOT install unit in the following locations: STEP 2: INSTALL DRAIN JOINT STEP 3: ANCHOR OUTDOOR UNIT regulations , there may be differ slightly between ;... -
Page 15: Step 4: Connect Signal And Power Cables
SAFETY & PRECAUTIONS OUTDOOR UNIT INSTALLATION OUTDOOR UNIT INSTALLATION (Continued) (Continued) WARNING Outdoor Unit Dimensions (in) Mounting Dimensions NOTE: If the cable clamp looks like the following, ALL WIRING WORK MUST BE PERFORMED please select the appropriate through-hole Distance A (in) Distance B (in) STRICTLY IN ACCORDANCE WITH THE WIRING according to the diameter of the wire. -
Page 16: Refrigerant Piping Connection
SAFETY & PRECAUTIONS REFRIGERANT PIPING CONNECTION REFRIGERANT PIPING CONNECTION (Continued) When connecting refrigerant piping, do not let substances or gases other than the specified refrigerant STEP 2: REMOVE BURRS PIPING EXTENSION BEYOND FLARE FORM enter the unit. The presence of other gases or substances will lower the unit’s capacity, and can cause Outer Diameter of A (in) Burrs can affect the air-tight seal of refrigerant... -
Page 17: Instructions For Connecting Piping To Outdoor Unit
SAFETY & PRECAUTIONS REFRIGERANT PIPING CONNECTION AIR EVACUATION (Continued) PREPARATIONS AND PRECAUTIONS Tighten the flare nut as tightly as possible Close the Low Pressure side of the manifold by hand. Air and foreign matter in the refrigerant circuit gauge, and turn off the vacuum pump. can cause abnormal rises in pressure, which can Using a spanner, grip the nut on the Wait for 5 minutes, then check that there has... -
Page 18: Note On Adding Refrigerant
SAFETY & PRECAUTIONS AIR EVACUATION ELECTRICAL AND GAS LEAK CHECKS (Continued) NOTE ON ADDING REFRIGERANT BEFORE TEST RUN WARNING – RISK OF ELECTRIC SHOCK Some systems require additional charging depending on pipe lengths. The standard pipe length varies Only perform test run after you have completed according to local regulations. -
Page 19: Test Run
SAFETY & PRECAUTIONS TEST RUN PACKING AND UNPACKING THE UNIT TEST RUN INSTRUCTIONS DOUBLE-CHECK PIPE CONNECTIONS INSTRUCTIONS FOR PACKING AND UNPACKING THE UNIT: You should perform the Test Run for at least During operation, the pressure of the refrigerant Indoor unit: Indoor unit: 30 minutes. - Page 20 5401 Dansher Road Countryside, IL 60525 844-4PA-AIRE 844-472-2473 support@perfectaire.us 877-997-2473 supportcanada@perfectaire.us CANADA SUPPORT www.perfectaire.us Printed in China 1121_M863...
Need help?
Do you have a question about the 3PAMSHH09-UVW and is the answer not in the manual?
Questions and answers