
Related Manuals for LEYBOLD RUVAC RA Series


Summary of Contents for LEYBOLD RUVAC RA Series
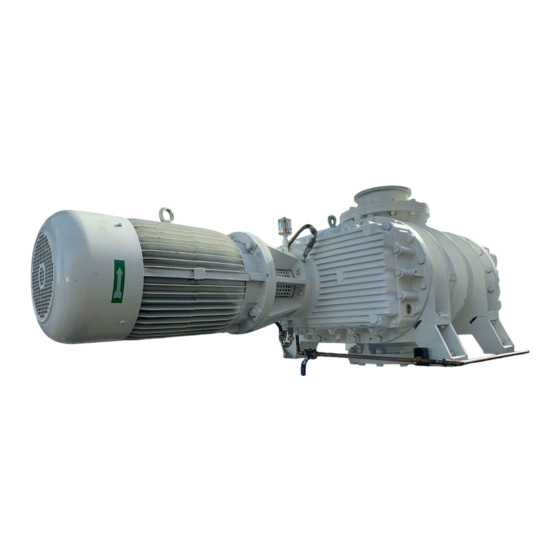
- Page 1 LEYBOLD VACUUM Vacuum Solutions Application Support Service GA 03.201/5.02 RUVAC RA Roots Pumps RA 3001, 5001, 7001, 9001, 13000 Cat. No. 119 50, 119 53, 119 60, 119 63, Custom Operating Instructions...
-
Page 2: Table Of Contents
Leybold Service ..... .21 Used oils from vacuum pumps that have been contami- nated by other substances must be labelled, stored and Troubleshooting . -
Page 3: Description
Description Key to Fig. 1 1 Intake flange 2 Pumping chamber 3 Casing 4 Impeller 5 Discharge flange Fig. 1 Schematic cross-section of a Roots pump Fig. 2 Functional diagram of a Roots pump (vertical flow) (vertical flow) 1 Description 1.1 Design and Function The principle of operation is explained in Fig. - Page 4 Description Key to Fig. 3 1 Pair of gearwheels 2 Intake flange 3 Driven impeller shaft 4 Impeller seals 5 Bearing 6 Splash disc 7 Shaft seals 8 Bushing 9 Drive shaft 10 Impellers Fig. 3 Longitudinal section of a RUVAC RA 3001 (without motor, other models are similar) In practice, the maximum attainable pressure differential is significant only in the rough vacuum range (p >...
-
Page 5: Supplied Equipment
Description 1.1.2 Design 1.2 Supplied Equipment RUVAC Roots pumps can pump gas in the vertical or The RUVAC RA pumps are supplied as standard for a horizontal direction. The direction required must be sta- vertical pumping direction. If a horizontal pumping direc- ted when ordering the pump. - Page 6 Description 2110* DN 300 DIN 2532 RUVAC RA 13 000 * Breite = 1000 Type Ød Ød1 2532 RA 3001 1101 1570 RA 5001 1013 1136 1610 RA 7001 1143 1266 1740 RA 9001 1467 1594 2220 Fig. 4 Dimensional drawing, on the right RUVAC RA 13 000 (Maßangaben in mm) SV 630 SV 630...
-
Page 7: Technical Data
Description 1.3 Technical Data 50 Hz operation, SI units, "Euro versions" RUVAC RA 3001 5001 7001 9001 13000 Nominal pumping speed 3900 5550 7470 9720 13000 · h Maximum pumping speed 3300 5000 6800 8800 12000 · h - at pumping speed for the backing pump of ·... -
Page 8: Accessories
Description 1.4 Accessories ......Cat. No. Diaphragm pressure switch SM 42 0.5 to 6 mbar ......164 05 5 to 50 mbar . -
Page 9: Transportation And Storage
Transportation and Storage 2 Transportation and Storage Roots pumps are heavy machines (> 70 kg) made of cast iron and thus should only be lifted using suitable lif- ting equipment. Caution Before transporting the pump always drain out the oil from the bearing chambers (see Section 5.2). -
Page 10: Installation And Connection
Installation and Connection 3 Installation and Connection 3.1 Installation 3.2 Electrical Connections Install RUVAC RA pumps on a flat, perfectly horizontal Warning Disconnect the mains before doing work on surface . If the pump is not level, lubricant may enter the the wiring. - Page 11 Installation and Connection to circuit breaker high voltage low voltage Connection of the PTC resistors Fig. 8 Electrical connection Fig. 7 Attachment screw with spacer Key to Fig. 9 1 Pressure switch 2 Centering and clamping ring 3 Bend 4 Centering and clamping ring 5 Adapter Fig.
-
Page 12: Connection Of The Flanges
Installation and Connection The pressure switches SM 42 or PS 114/115 are set to Caution Don't place any stress on the pump casing a fixed threshold in our factory. Please specify the swit- when installing the intake and discharge ching threshold for the pressure switch when ordering. lines. -
Page 13: Operation
Operation Key to Fig. 10 1 Intake flange 2 Terminal box 3 Discharge flange Fig. 10 Connection components (wide arrows = pumping direction) 4 Operation ∆p 4.1 Start-up = ——— Check the pump motor's direction of rotation (see Sec- = Cut-in pressure tion 3.2). -
Page 14: Operation
Operation Key to Fig. 11 1 Oil level glass of the front bearing chamber 2 Oil level glass of the bearing chamber on the side of the motor 3 Oiler (Oil level check and oil reservoir for the shaft seals) Fig. -
Page 15: Shutdown And Storage
Operation Key to Fig. 12 1 Shaft 2 Impeller seals 3 Barrier gas bore 4 Branch leading to the other impeller seals 5 Valve 6 Pressure gauge 7 Flow controller Fig. 12 Schematic diagram for the barrier gas facility 4.3 Shutdown and Storage 4.4 Option: RUVAC RA with Barrier Gas Facility Close the valve between the Roots pump and the vacu-... -
Page 16: Maintenance
Maintenance 5 Maintenance 5.1 Safety Information We would like to point out that LEYBOLD offers training courses on the maintenance, repair, and troubleshooting of RUVAC pumps. Further details are available on The safety information given in the following applies to all request. - Page 17 Maintenance Key to Fig 13 1 Oil fill plugs 2 Oiler (oil check and oil reservoir for the shaft seals) 3 Oil level glasses 4 Oil drain plugs Fig. 13 Oil change Check the oil level in both bearing chambers while the pump is at standstill.
-
Page 18: Cleaning The Fan Cowl And The Cooling Fins
Maintenance 5.3 Cleaning the Fan Cowl 5.4 Cleaning the Pumping and the Cooling Fins Chamber Warning Warning Observe all safety information provided in Observe all safety information provided in Section 5.1. Section 5.1. The slits in the fan cowl as well as the fins on the motor and on the pump may be contaminated depending on Under dirty operating conditions, contaminants may be humidity conditions and the degree of contamination in... -
Page 19: Exchanging The Shaft Seals
Maintenance 5.5 Exchanging the Shaft Required Special Tools: Puller for the bushing: Seals Span 250 mm, span depth 200 mm. Shaft seal driver according to Fig. 16. Warning Observe all safety information provided in Place an oil trough under the shaft seal housing. Section 5.1. - Page 20 Maintenance Key to Fig. 15 1 Spacing ring 2 O-ring 3 Bushing 4 Securing ring 5 Shaft seal 6 Shaft seal housing 7 Shaft seal 8 Key 9 Coupling half on the side of the pump 10 Coupling cage 11 Coupling element 12 Motor with coupling half 13 Arrow indicating the direction of rotation Fig.
-
Page 21: Leybold Service
Maintenance 5.6 Leybold Service If a pump is returned to LEYBOLD, indicate whether the pump free of substances damaging to health or whether it is contaminated. If it is contaminated also indicate the nature of the hazard. For this you must use a form which has been prepared by us which we will provide upon request. -
Page 22: Troubleshooting
- distortion of the pump. Install and connect the pump without strains. Bearing or gearing is damaged. Leybold Service, switch off the pump immediately. Impellers strike the casing. Leybold Service, switch off the pump immediately. Rotor runs out of true. -
Page 23: Declaration Of Conformity
EEC Declaration of Conformity We - LEYBOLD Vacuum GmbH - herewith declare that The products conform to the following directives: the products defined below meet the basic requirements • EEC Directive on Machinery (89/392/EWG) regarding safety and health of the relevant EEC direc-... - Page 24 GA 03.201/5.02 - 10/97...
- Page 25 Declaration of Contamination of Vacuum Equipment and Components The repair and/or service of vacuum equipment and components will only be carried out if a correctly completed declaration has been submitted. Non-completion will result in delay. The manufacturer could refuse to accept any equipment without a declara- tion.
- Page 26 LEYBOLD VAKUUM GmbH Bonner Strasse 498 (Bayenthal) D-50968 Cologne Tel.: + 49 (221) 347-0 Fax: + 49 (221) 347-1250 http://www.leyboldvac.de e-mail:documentation@leyboldvac.de GA 03.201/5.02 - 10/97...
Need help?
Do you have a question about the RUVAC RA Series and is the answer not in the manual?
Questions and answers