Table of Contents
Advertisement
Quick Links
Advertisement
Table of Contents

Subscribe to Our Youtube Channel
Related Manuals for Optoma DLP ZH507+


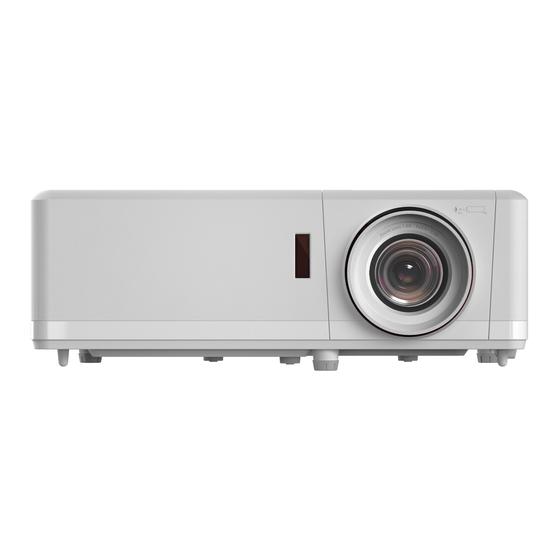
Summary of Contents for Optoma DLP ZH507+
- Page 1 Projector ® User manual...
-
Page 2: Table Of Contents
TABLE OF CONTENTS SAFETY ....................4 Important Safety Instruction....................... 4 Laser Radiation Safety Information ................... 5 Cleaning the Lens........................6 3D Safety Information ........................ 6 Copyright ........................... 7 Disclaimer ..........................7 Trademark Recognition ......................7 FCC ............................7 Declaration of Conformity for EU countries ................8 WEEE ............................ - Page 3 Compatible resolutions ......................67 Image size and projection distance ..................73 Projector dimensions and ceiling mount installation ..............74 IR remote codes ........................75 Troubleshooting ........................76 Warning indicators ........................78 Specifications ........................... 79 Optoma global offices ....................... 80 English...
-
Page 4: Safety
‡ Do not attempt to service the unit yourself. Opening or removing covers may expose you to dangerous voltages or other hazards. Please call Optoma before you send the unit for repair. ‡ See projector enclosure for safety related markings. -
Page 5: Laser Radiation Safety Information
‡ When switching the projector off, please ensure the cooling cycle has been completed before disconnecting power. Allow 90 seconds for the projector to cool down. ‡ Turn off and unplug the power plug from the AC outlet before cleaning the product. ‡... -
Page 6: Cleaning The Lens
‡ When turning on the projector, make sure no one within projection range is looking at the lens. ‡ Keep any items (magnifying glass etc.) out of the light path of the projector. The light path being projected from the lens is extensive, therefore any kind of abnormal objects that can redirect light coming out of the lens, can cause an unpredictable outcome such as a fire or injury to the eyes. -
Page 7: Copyright
above symptoms, immediately discontinue use of this device and do not resume using it for at least thirty minutes after the symptoms have subsided. ‡ Watching 3D projection while sitting too close to the screen for an extended period of time may damage your eyesight. -
Page 8: Declaration Of Conformity For Eu Countries
Notice: Shielded cables All connections to other computing devices must be made using shielded cables to maintain compliance with FCC regulations. Caution Changes or modifications not expressly approved by the manufacturer could void the user's authority, which is granted by the Federal Communications Commission, to operate this projector. Operation Conditions This device complies with Part 15 of the FCC Rules. -
Page 9: Introduction
INTRODUCTION Thank you for purchasing an Optoma laser projector. For full list of features please visit the product page on our website, where you will also find additional information and documentation such as FAQs. Package Overview Carefully unpack and verify that you have the items listed below under standard accessories. Some of the items under optional accessories may not be available depending on the model, specification and your region of purchase. -
Page 10: Product Overview
INTRODUCTION Product Overview Note: ‡ Do not block projector intake and exhaust vents. ‡ When operating the projector in an enclosed space, allow at least 30 cm clearance around the intake and exhaust vents. Item Item IR Receivers Ventilation (outlet) Keypad Kensington™... -
Page 11: Connections
INTRODUCTION Connections Item Item HDMI 2 Connector Kensington Lock Port Micro USB Connector 12V Out Connector HDMI 1 Connector MIC In Connector USB Power Out (5V 1.5A) Audio Out Connector Connector Video Connector VGA Out Connector VGA In Connector RS-232 Connector USB Ports Audio In 1 Connector (WiFi Dongle (5V/0.9A)/... -
Page 12: Keypad
INTRODUCTION Keypad Item Item Lamp LED Temp LED Power and Power LED Re-Sync Menu Four Directional Select Keys Keystone Correction Source Enter 10. Information English... -
Page 13: Remote Control
INTRODUCTION Remote control Enter Item Item Power On / Off Source Home Return Four Directional Select Keys Enter Mute 10. Display Mode Volume - 11. APP menu Menu 12. Volume + Note: ‡ Some keys may have no function for models that do not support these features. ‡... -
Page 14: Setup And Installation
SETUP AND INSTALLATION Installing the projector Your projector is designed to be installed in one of four possible positions. Your room layout or personal preference will dictate which installation location you select. Take into consideration the size and position of your screen, the location of a suitable power outlet, as well as the location and distance between the projector and the rest of your equipment. - Page 15 SETUP AND INSTALLATION Projector installation notice ‡ 360° free orientation operation ‡ Allow at least 30 cm clearance around the exhaust vent. Minimum 100mm Minimum 300mm Minimum 300mm (3.94 inches) (11.81 inches) (11.81 inches) Minimum 100mm (3.94 inches) Minimum 100mm Minimum 100mm (3.94 inches) (3.94 inches)
-
Page 16: Connecting Sources To The Projector
SETUP AND INSTALLATION Connecting sources to the projector Item Item HDMI Cable 10. 12V DC Jack HDMI Dongle 11. Audio Out Cable USB Power Cable 12. Microphone Cable Video Cable 13. VGA Out Cable Audio In Cable 14. RS232 Cable VGA In Cable 15. -
Page 17: Adjusting The Projector Image
SETUP AND INSTALLATION Adjusting the projector image Image height The projector is equipped with elevator feet for adjusting the image height. Locate the adjustable foot you wish to adjust on the underside of the projector. Rotate the adjustable foot clockwise or counterclockwise to raise or lower the projector. Tilt-Adjustment Feet Tilt-Adjustment Ring Zoom, lens shift, and focus... -
Page 18: Remote Setup
SETUP AND INSTALLATION Remote setup Installing / replacing the battery Use a coin to turn the battery cover counterclockwise until the cover opens. Install new battery into the compartment. Remove the old battery and install new one (CR2032). Ensure that the side with a “+” is facing up. Put the cover back. - Page 19 SETUP AND INSTALLATION Effective range Infrared (IR) remote control sensor is located on the top and front sides of the projector. Ensure to hold the remote control at an angle within 30° (horizontally) or 20° (vertically) perpendicular to the projector’s IR remote control sensor to function correctly.
-
Page 20: Initial Setup
SETUP AND INSTALLATION Initial setup The first time the projector is turned on, you will be prompted to do the initial setup including selecting the projection orientation, preferred language, configuring network settings, and more. Once the Setup Complete! screen appears, the projector is ready to use. [Projection orientation setup] [Select your language] [Focus adjustment]... - Page 21 SETUP AND INSTALLATION [Set the date and time] [Review & accept Optoma’s Terms & Conditions and policies] [Optoma Management Suite] English...
-
Page 22: Using The Projector
USING THE PROJECTOR Powering on / off the projector Enter Powering on Securely connect the power lead and signal/source cable. When connected, the Power LED will turn red. Turn on the projector by pressing the button on the projector keypad or remote control. A start up screen will display in approximately 10 seconds and the Power LED will begin flashing blue. -
Page 23: Selecting An Input Source
USING THE PROJECTOR Selecting an input source Turn on the connected source that you want to display on the screen, such as computer, notebook, video player, etc. The projector will automatically detect the source. If multiple sources are connected, press the button on the projector keypad or the remote control to select the desired input. -
Page 24: Home Screen Overview
USING THE PROJECTOR Home screen overview The Home screen is displayed every time you start the projector. It contains system date and time, system status, icons to access OSD menu, projector settings menu, apps, input sources, and more. To navigate the Home screen, simply use the buttons on the remote control. You can return to the Home screen at any time by pressing “... -
Page 25: Projector Settings Menu (Osd)
USING THE PROJECTOR Projector settings menu (OSD) Press “ ” on the remote control or on the Home screen, select the OSD menu “ ” to review projector information or manage various settings related to the image, display, 3D, audio, and setup. General menu navigation Sub Menu Settings... -
Page 26: Osd Menu Tree
USING THE PROJECTOR OSD Menu tree Note: The OSD menu tree items and features are subject to models and region. Optoma reserves the right to add or remove items to improve product performance without notice. Main Sub Menu Sub Menu 2... - Page 27 USING THE PROJECTOR Main Sub Menu Sub Menu 2 Sub Menu 3 Sub Menu 4 Values Menu BrilliantColor 1 ~ 10 Warm Standard Color Temperature Cool Cold Red [Default] Green Blue Color Cyan Yellow Magenta Color Matching White(*) Hue / R(*) -50 ~ 50 [Default: 0] Saturation / G(*) -50 ~ 50 [Default: 0]...
- Page 28 USING THE PROJECTOR Main Sub Menu Sub Menu 2 Sub Menu 3 Sub Menu 4 Values Menu -5 ~ 5 (depends on signal) H. Position [Default: 0] Signal -5 ~ 5 (depends on signal) V. Position [Default: 0] DynamicBlack Eco. Constant Power Image Settings (Power = 100%/ 95%/ 90%/ 85%/...
- Page 29 USING THE PROJECTOR Main Sub Menu Sub Menu 2 Sub Menu 3 Sub Menu 4 Values Menu Cancel [Default] Geometric Display Reset Correction Off [Default] Mute Volume 0 ~ 10 [Default: 5] Audio 1 Audio 2 HDMI1 Default [Default] Audio 1 Audio 2 Audio HDMI2...
- Page 30 USING THE PROJECTOR Main Sub Menu Sub Menu 2 Sub Menu 3 Sub Menu 4 Values Menu [Default] HDMI Link [Default] Inclusive of TV HDMI Link Mutual [Default] Settings Power On Link PJ → Device Device → PJ [Default] Power Off Link Green Grid Magenta Grid Test Pattern...
- Page 31 USING THE PROJECTOR Main Sub Menu Sub Menu 2 Sub Menu 3 Sub Menu 4 Values Menu Closed Captioning Off [Default] Top left Top right Menu Location Center [Default] Bottom left Menu Settings Bottom right Menu Timer 5sec 10sec [Default] Off [Default] Auto Source HDMI1...
- Page 32 USING THE PROJECTOR Main Sub Menu Sub Menu 2 Sub Menu 3 Sub Menu 4 Values Menu None Blue [Default] Background Options Color Green Gray Setup Logo Cancel [Default] Reset OSD Reset Cancel [Default] Reset to Default Regulatory Serial Number Source Resolution 00x00...
-
Page 33: Display Menu
USING THE PROJECTOR Display menu Image settings menu Display Mode There are several predefined display modes that you can choose from to suit your viewing preference. Each mode has been fine-tuned by our expert colour team to ensure superior colour performance for wide range of content. ‡... - Page 34 USING THE PROJECTOR ‡ Film: Choose this mode for improved detail and image sharpness. ‡ Detail: The signal comes from OETF conversion to achieve the best color matching. Brightness Adjust the brightness of the image. Contrast The contrast controls the degree of difference between the lightest and darkest parts of the picture. Sharpness Adjust the sharpness of the image.
- Page 35 USING THE PROJECTOR ‡ Color Space (HDMI input only): select an appropriate color matrix type from the following: Auto, RGB(0-255), RGB(16-235), and YUV. ‡ White Level: Allow user to adjust White Level when inputting Video signals. Note: White level can only be adjusted for Video/S-Video input sources. ‡...
-
Page 36: Enhanced Gaming Menu
USING THE PROJECTOR Enhanced gaming menu Enhanced Gaming Enable this feature to reduce response times (input latency) during gaming to 8.2ms (1080p@120Hz). All geometry settings (example: Keystone, Four Corners) will be disabled when Enhanced Gaming Mode is enabled. See additional information below. Note: ‡... -
Page 37: 3D Menu
USING THE PROJECTOR 3D menu Note: ‡ This projector is a 3D ready projector with DLP-Link 3D solution. ‡ Please make sure your 3D glasses are use for DLP-Link 3D before enjoy your video. ‡ This projector supports frame sequential (page-flip) 3D via HDMI1/HDMI2/VGA ports. ‡... -
Page 38: Aspect Ratio Menu
USING THE PROJECTOR Aspect ratio menu Aspect Ratio Select the aspect ratio of the displayed image between the following options: ‡ 4:3: This format is for 4:3 input sources. ‡ 16:9: This format is for 16:9 input sources, like HDTV and DVD enhanced for Wide screen TV. ‡... -
Page 39: Edge Mask Menu
USING THE PROJECTOR Edge mask menu Edge Mask Use this function to remove the video encoding noise on the edge of video source. Digital zoom menu Digital Zoom Use to reduce or magnify an image on the projection screen. Digital Zoom is not the same as optical zoom and an result in degradation of image quality. -
Page 40: Audio Menu
USING THE PROJECTOR Audio menu Mute menu Mute Use this option to temporarily turn off the sound. ‡ On: Choose “On” to turn mute on. Off: Choose “Off” to turn mute off. ‡ Note: “Mute” function affects both internal and external speaker volume. Volume menu Volume Adjust the volume level. -
Page 41: Setup Menu
USING THE PROJECTOR Setup menu Projection menu Projection Select the preferred projection between front, rear, ceiling-top, and rear-top. Power settings menu Direct Power On Choose “On” to activate Direct Power mode. The projector will automatically power on when AC power is supplied, without pressing the “Power”... -
Page 42: Security Menu
USING THE PROJECTOR Security menu Security Enable this function to prompt for a password before using the projector. ‡ On: Choose “On” to use security verification when the turning on the projector. ‡ Off: Choose “Off” to be able to switch on the projector without password verification. Note: The default password is 1234. -
Page 43: Test Pattern Menu
USING THE PROJECTOR Test pattern menu Test Pattern Select the test pattern from green grid, magenta grid, white grid, white, or disable this function (off). Projector ID menu Projector ID ID definition can be set up by menu (range 0-99), and allow user control an individual projector by using RS232 command. -
Page 44: Reset Osd Menu
USING THE PROJECTOR High Altitude When “On” is selected, the fans will spin faster. This feature is useful in high altitude areas where the air is thin. Display Mode Lock Choose “On” or “Off” to lock or unlock adjusting display mode settings. Keypad Lock When the keypad lock function is “On”, the Keypad will be locked. -
Page 45: Info Menu
USING THE PROJECTOR Info menu View the projector information as listed below: ‡ Regulatory ‡ Serial Number ‡ Source ‡ Resolution ‡ Refresh Rate ‡ Display Mode ‡ Power Mode (Standby) ‡ Light Source Hours ‡ Network Status ‡ IP Address ‡... -
Page 46: System Settings Menu
USING THE PROJECTOR System settings menu On the Home screen, select the system settings menu “ ” to configure various system settings. General menu navigation Sub Menu Main Menu When the system settings menu is displayed, use the up and down navigation buttons to select any item in the main menu. - Page 47 USING THE PROJECTOR System settings menu tree Level 1 Level 2 Level 3 Level 4 Value Wallpaper Optoma style… Shortcut1 Shortcut2 Personalize Shortcut3 Home Shortcuts Shortcut4 Shortcut5 Shortcut6 Optoma Management Suite File Manager Apps Optoma Marketplace Creative Cast Pro Lightning...
- Page 48 USING THE PROJECTOR Personalize menu Home Shortcuts Review Home screen shortcuts of all opened apps in each input source. The items cannot repeat except for “Automatic” option which means the system will remember up to six latest apps that have been opened and then will replace app shortcuts so that the latest app will be the first app in the apps list while other apps in the list are shifted by one position.
- Page 49 USING THE PROJECTOR System menu Apps Select the desired pre-installed app that you want to launch. Keyboard Configure the keyboard settings. ‡ Current keyboard: Indicate the current virtual keyboard used by the system. ‡ Manage keyboards: Turn on/off the input method app. If the app is turned on, the opened input method app will be displayed in the “Current keyboard”...
- Page 50 Review legal documents including “Terms and Conditions of Use”, “Privacy Policy”, and “Cookies Policy”. Note: You can review legal documents online as well. Please refer to the following web addresses: ‡ Terms and Conditions of Use: https://www.optoma.com/terms-conditions/ . ‡ Cookies Policy: https://www.optoma.com/cookies-policy/ . ‡...
- Page 51 USING THE PROJECTOR Control menu Wireless Configure wireless network settings. ‡ Wi-Fi: Set the Wi-Fi option to “ON” to enable wireless network feature. ‡ Available Network SSID: Select your desired wireless access point and enter or configure the necessary connection parameters (if required), for example password, proxy settings, and IP address. For information, you can review the signal strength.
- Page 52 USING THE PROJECTOR LAN/RJ45 function For simplicity and ease of operation, the projector provides diverse networking and remote management features. The LAN / RJ45 uses network function to help remotely manage: Power On / Off, brightness, and contrast settings. You can also view the projector status information, such as: Video- Source, Sound-Mute, etc. Projector (Ethernet) Wired LAN terminal functionalities...
- Page 53 USING THE PROJECTOR Ethernet (Projector settings) Power on the projector. Connect an RJ45 cable to RJ45 ports on the projector and the PC (laptop). Follow the on-screen instructions to configure the network settings. (Projector Home Screen > Settings > Control > Ethernet > IP Settings > Static) Note: After the network configuration is complete, the Status will show “Connected”.
- Page 54 USING THE PROJECTOR PC settings Connect an RJ45 cable to RJ45 ports on the projector and the PC (laptop). On the PC (Laptop), select Start > Control Panel > Network Connections. Right-click on the Local Area Connection, and select Property. In the Properties window, select the General tab, and select Internet Protocol (TCP / IP).
- Page 55 USING THE PROJECTOR Click “Properties”. Type in the IP address and Subnet mask, then press “OK”. Open a web browser, for example Microsoft Edge or Google Chrome. In the Address bar, input the projector’s IP address: 192.168.1.128 : 8088. Press “Enter”. The projector is setup for remote management.
- Page 56 USING THE PROJECTOR Login and configuration for network control Login to the projector from the web browser (e.g., 192.168.1.128 : 8088 and press “Enter”). - Username: admin - Password: admin Note: Password should be changed when logging in for the first time. Click General.
- Page 57 Click Network Setup and turn on the function button you would like to work. Note: Crestron Port: 41794 PJ-Link Port: 4352 Port: 9131 Telnet Port: 23 Webpage control Port: 8088 Optoma Web Server Port: 8080 Creative Cast App Port: 80 Extron Port: 2023 English...
- Page 58 USING THE PROJECTOR Crestron On the Projector “Control” settings or via Browser LAN Control webpage, switch the Crestron function to ON. English...
- Page 59 USING THE PROJECTOR Switch to “Crestron Certificate Upload” page to upload the certificate. Select the desired Crestron’s function and configure the necessary settings. English...
-
Page 60: Selecting An Input Source
USING THE PROJECTOR Selecting an input source You can select any input source directly on the Home screen using an input shortcut. Note: You can personalize shortcut settings in “System Settings menu Personalize Home Shortcuts”. You can also modify the shortcut order on the Home screen. If the desired input source is not visible on the Home screen, select “... -
Page 61: Selecting An App
USING THE PROJECTOR Selecting an app You can select any app directly on the Home screen using an app shortcut. Note: You can personalize shortcut settings in “System Settings menu Personalize Home Shortcuts”. If the desired app is not visible on the Home screen, select “ ”... - Page 62 USING THE PROJECTOR Creative Cast To get the App, you can do either of the following: ‡ if you are using a mobile device, scan the QR code on the screen. ‡ if you are using a computer, simply go to the link. Then install the Creative Cast app on your computer or mobile device.
- Page 63 USING THE PROJECTOR Optoma Marketplace With the Optoma Marketplace app, you can search and install any App. File Manager With the File Manager app, you can manage the files stored in the internal storage, external storage, and cloud storage. English...
- Page 64 USING THE PROJECTOR Optoma Management Suite (OMS) Follow the on-screen instructions to set up and use it. English...
-
Page 65: Supported Multimedia Formats
USING THE PROJECTOR Supported multimedia formats If you want to play multimedia files, connect a USB storage with multimedia content to the projector. Then open the multimedia player app and select the desired files to play. The projector supports the following multimedia formats: Audio Format Decoder Supported Format... -
Page 66: Viewing The Status Bar
USING THE PROJECTOR Viewing the status bar By default, the Status Bar on the Home screen contains icons indicating connection status regarding wired network, USB, and wireless network. You can select any of the icons to open the associated menu. Selecting wired or wireless status icon results in opening the network configuration menu, while selecting the USB status icon results in opening the browser and displaying the content of the connected USB device. -
Page 67: Additional Information
ADDITIONAL INFORMATION Compatible resolutions NTSC NTSC M/J, 3.58MHz, 4.43MHz PAL B/D/G/H/I/M/N, 4.43MHz SECAM SECAM B/D/G/K/K1/L, 4.25/4.4 MHz SDTV 480i/p, 576i/p HDTV 720p(50/60Hz), 1080i(50/60Hz), 1080P(50/60Hz) Video Timing Signal Resolution Refresh Rate(Hz) Notes TV(NTSC) 720 X 480 For Composite Video /S-video TV(PAL,SECAM) 720 X 576 SDTV(480I) 720 X 480... - Page 68 ADDITIONAL INFORMATION ‡ Support NVIDIA 3DTV Play if there is no patent fee from Optoma. ‡ 1080i@25Hz and 720p@50Hz will run in 100Hz; 1080p@24Hz will run in 144Hz; other 3D timing will run in 120Hz. Computer Compatibility VESA standards Computer Signal (Analog RGB Compatible)
- Page 69 ADDITIONAL INFORMATION Signal Resolution Refresh Rate(Hz) Notes WUXGA 1920 X1200(*1) 60/50(*4) Mac 60 Note: ‡ (*1)1920 x 1200 @60Hz only support RB(reduced blanking). ‡ (*2) Support 3D timing for 3D Ready projector (STD) and True 3D projector (Optional). ‡ (*3) New ERA & Data projector must have this timing WSVGA, Proscene and Home is nice to have. ‡...
- Page 70 ADDITIONAL INFORMATION B1/Video Mode Resolution V [Hz] 1280x720p 16:9 60.0 1920x1080i 16:9 60.0 720(1440)x480i 4:3 60.0 720(1440)x480i 16:9 60.0 1920x1080p 16:9 60.0 720x576p 4:3 50.0 720x576p 16:9 50.0 1280x720p 16:9 50.0 1920x1080i 16:9 50.0 720(1440)x576i 4:3 50.0 720(1440)x576i 16:9 50.0 1920x1080p 16:9 50.0 1920x1080p 16:9...
- Page 71 ADDITIONAL INFORMATION B0/Standard Timing (1080P) Resolution V [Hz] H [Hz] Aspect Ratio 1280x720 60.0 16:09 1280x800 60.0 16:10 1280x1024 60.0 5:04 640x480 120.0 4:03 800x600 120.0 4:03 1024x768 120.0 4:03 1280x800 120.0 16:10 1920x1200 60.00 16:10 B0/Detail Timing (1080P) Resolution V [Hz] H [Hz] 1920x1080...
- Page 72 ADDITIONAL INFORMATION B1/Detail Timing Resolution V [Hz] 1366 x 768 60.00 Analog B0/Established Timing Resolution V [Hz] H [Hz] 720x400 70.0 31.5 640x480 60.0 31.5 640x480 66.6(67) 34.9 640x480 72.0 37.9 640x480 75.0 37.5 800x600 56.0 35.1 800x600 60.0 37.9 800x600 72.0 48.1...
-
Page 73: Image Size And Projection Distance
ADDITIONAL INFORMATION Image size and projection distance Screen Size (W x H) Projection Distance ( D ) Diagonal Offset (Hd) Offset (Hd) Length Size (inch) (feet) of (16:9) (inch) (inch) Width Height Width Height Wide Tele Wide Tele Screen max. max. -
Page 74: Projector Dimensions And Ceiling Mount Installation
Projector dimensions and ceiling mount installation To prevent damage to your projector, please use an appropriate Optoma ceiling mount. If you wish to use a third party ceiling mount kit, please ensure the screws used to attach a mount to the projector meet the following specifications: ‡... -
Page 75: Ir Remote Codes
ADDITIONAL INFORMATION IR remote codes Enter MTX. Format Data0 Data1 Data2 Data3 Description Power Refer to the “Powering on / off the projector” on / off on page 22. Source Press to select an input signal. Home Press to return to the Home screen. Press to launch the on-screen display Menu... -
Page 76: Troubleshooting
ADDITIONAL INFORMATION Troubleshooting If you experience a problem with your projector, please refer to the following information. If a problem persists, please contact your local reseller or service center. Image problems No image appears on-screen ‡ Ensure all the cables and power connections are correctly and securely connected as described in the "Installation"... - Page 77 ADDITIONAL INFORMATION Other problems The projector stops responding to all controls ‡ If possible, turn off the projector, then unplug the power cord and wait at least 20 seconds before reconnecting power. Remote control problems If the remote control does not work ‡...
-
Page 78: Warning Indicators
ADDITIONAL INFORMATION Warning indicators When the warning indicators (see below) light up or flash, the projector will automatically shutdown: ‡ “Lamp” LED indicator is lit red and if “Power” indicator flashes red. ‡ “Temp” LED indicator is lit red and if “Power” indicator flashes red. This indicates the projector has overheated. -
Page 79: Specifications
ADDITIONAL INFORMATION Specifications Item Description Texas Instrument DMD, 12 degree 0.65”/1080p DMD X1, S600 (Packing typing), Technology Darkchip (DC) 3 Native Resolution 1920x1080 ‡ Throw ratio: 1.4~2.24 ‡ F-stop: 2.5~3.26 Lens ‡ Focal length: 20.911~32.62 mm ‡ Zoom range: 1.6x Offset 100%~116% ±5% Image size... -
Page 80: Optoma Global Offices
ADDITIONAL INFORMATION Optoma global offices For service or support, please contact your local office. Japan 47697 Westinghouse Drive, 888-289-6786 https://www.optoma.com/jp/ Fremont, CA 94539, USA 510-897-8601 www.optomausa.com services@optoma.com Taiwan https://www.optoma.com/tw/ Canada 47697 Westinghouse Drive, 888-289-6786 China Fremont, CA 94539, USA 510-897-8601 www.optomausa.com... - Page 81 www.optoma.com...
Need help?
Do you have a question about the DLP ZH507+ and is the answer not in the manual?
Questions and answers