Optoma Projector User Manual
Hide thumbs
Also See for Projector:
- User manual (89 pages) ,
- Instructions manual (62 pages) ,
- Quick start card (2 pages)
Table of Contents
Advertisement
Quick Links
Table of Contents ............................1
Usage Notice ...................................2
Safety Information ...............................2
Precautions .........................................3
Eye Safety Warnings ..........................6
Introduction ......................................7
Package Overview ..............................7
Product Overview ...............................8
Main Unit .............................................. 8
Control Panel ....................................... 9
Input/Output Connections .................. 10
Remote Control .................................. 11
Installation .....................................13
Connecting the Projector ..................13
Connect to Computer/Notebook ........ 13
Connect to Video Sources ................. 14
Connect to 3D Video Devices ...........15
Using the 3D glasses ........................17
Powering On/Off the Projector ..........18
Powering On the Projector ................. 18
Powering Off the Projector ................. 19
Warning Indicator ............................... 20
Adjusting the Projected Image ..........21
Adjusting the Projector's Height ........ 21
Adjusting the Projector's Focus ......... 22
Adjusting Projection Image Size ........ 22
User Controls ................................24
Control Panel ..................................... 24
Remote Control .................................. 25
On-screen Display Menus ................29
How to operate .................................. 29
Menu Tree .......................................... 30
IMAGE ............................................... 32
IMAGE | Advanced ............................ 34
DISPLAY ............................................ 38
DISPLAY | 3D ................................... 40
Table of Contents
SETUP ............................................... 41
SETUP | Audio Settings ..................... 43
SETUP | Security ............................... 44
SETUP | Advanced ............................ 45
OPTIONS ........................................... 46
OPTIONS | Lamp Settings ................. 48
OPTIONS | Advanced ........................ 49
Appendices ....................................50
Troubleshooting ................................50
Image Problems ................................. 50
Other Problems .................................. 52
Remote Control Problems ................. 52
LED Lighting Messages ..................... 53
On Screen Messages ........................ 54
Replacing the Lamp ..........................55
Compatibility Modes .........................57
Function List .....................................59
RS232 Pin Assignments .................... 59
RS232 Protocol Function List ............ 60
Ceiling Mount Installation ..................64
Optoma Global Offices .....................65
Regulation & Safety Notices .............67
FCC Notice ........................................ 67
countries ............................................ 68
Trademarks .......................................69
1
English
Advertisement
Chapters
Table of Contents

Related Manuals for Optoma Projector


Summary of Contents for Optoma Projector
-
Page 1: Table Of Contents
RS232 Protocol Function List .... 60 Powering On the Projector ....18 Ceiling Mount Installation ....64 Powering Off the Projector ....19 Optoma Global Offices .....65 Warning Indicator ....... 20 Regulation & Safety Notices .....67 Adjusting the Projected Image ..21 FCC Notice ........ -
Page 2: Usage Notice
Do not attempt to service the unit yourself. Opening or removing covers may expose you to dangerous voltages or other hazards. Please call Optoma before you send the unit for repair. 7. Do not let objects or liquids enter the projector. They may touch danger- ous voltage points and short out parts that could result in fire or electric shock. -
Page 3: Precautions
Usage Notice Precautions Please follow all warnings, precautions and mainte- nance as recommended in this user’s guide. ▀■ Do not look into the projector’s lens when the Warning- lamp is on. The bright light may hurt your eyes. When the lamp ™... - Page 4 Usage Notice Turn off and unplug the power plug from the AC outlet before ™ cleaning the product. Use a soft dry cloth with mild detergent to clean the display hous- ™ ing. Disconnect the power plug from AC outlet if the product is not be- ™...
- Page 5 Usage Notice tions, those who are sleep deprived or under the influence of alcohol should avoid utilizing the unit’s 3D functionality. If you experience any of the following symptoms, stop viewing 3D ™ pictures immediately and consult a medical specialist: (1) altered vision;...
-
Page 6: Eye Safety Warnings
Usage Notice Eye Safety Warnings ▀■ Avoid staring/facing directly into the projector beam at all times. Keep your back to the beam as much as possible. ▀■ When projector is used in a classroom, adequately supervise students when they are asked to point out something on the screen. -
Page 7: Introduction
Introduction Package Overview Unpack and inspect the box contents to ensure all parts listed below are in the box. If something is missing, please contact Optoma customer service. Power Cord 1.8m Projector with lens cap Due to different ™ 2 × AAA Batteries... -
Page 8: Product Overview
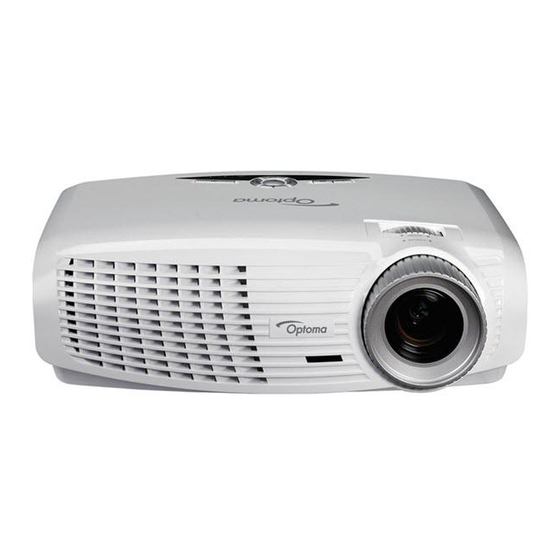
Introduction Product Overview Main Unit The interface is ™ subject to model’s specifications. Do not block ™ projector in/out air vents. Ventilation (outlet) Lens Ventilation (inlet) Tilt-Adjustment Feet Focus Ring Security Bar Zoom Ring Input / Output IR Receivers Connections Control Panel Power Socket English... -
Page 9: Control Panel
Introduction Control Panel AV Mute Menu Source Enter Re-Sync Power Keystone Correction Four Directional Select Keys On/Standby LED Lamp LED Temp LED IR Receiver English... -
Page 10: Input/Output Connections
Power Socket specifications. VGA2-In/YPbPr Connector VGA dongle is ™ (PC Analog Signal/Component Video Input/HDTV/YPbPr) a optional ac- cessory. Please RS-232 Connector (9-pin) contact with Audio2 Input for Video (3.5mm mini jack) Optoma service Kensington Lock Port for details. Security Bar English... -
Page 11: Remote Control
Introduction Remote Control Type A The remote is ™ subject to model’s specifications. Power On Power Off 16:9 Native Gamma 3D format Vol+/- Enter Re-Sync VGA1 Source Video Source HDMI2 Source VGA2 Source HDMI1 Source Menu Four Directional Select Keys Source Lamp Mode Contrast... - Page 12 Installation Type B LED Indicator Power On/Off Source The remote is ™ Mouse Left Click subject to model’s Enter specifications. Four Directional Select Keys / Mouse control Switch (turn on/off mouse function) Re-Sync Mouse Right Click Display Mode Page Up Volume +/- Menu Zoom...
-
Page 13: Installation
Installation Connecting the Projector Connect to Computer/Notebook 3D Glasses MOLEX molex AUDIO1-IN VIDEO VGA1-IN/YPbPr/ VGA-OUT 3D SYNC (VGA 1/2) Due to the ™ MOUSE/ SERVICE RS-232C VGA2-IN/YPbPr AUDIO HDMI 1 HDMI 2 difference in AUDIO2-IN (VIDEO) applications for each country, some regions may have different accessories. -
Page 14: Connect To Video Sources
Installation Connect to Video Sources DVD Player, Set-top Box, HDTV receiver Audio Output 3D Glasses Due to the ™ difference in ap- plications for each country, some AUDIO1-IN 3D SYNC VIDEO VGA1-IN/YPbPr/ VGA-OUT (VGA 1/2) regions may have different acces- MOUSE/ SERVICE VGA2-IN/YPbPr... -
Page 15: Connect To 3D Video Devices
Installation Connect to 3D Video Devices Once you have connected your devices together with HDMI cables, as shown in the diagram, you are ready to begin. Power ON your 3D video source and your 3D projector. The 3D video ™ source device must be powered ®... - Page 16 Installation 3D Broadcast 3D Blu-ray™ Disc 3D Console Games SKY+HD, cable/satellite 3D Blu-ray™ Player PlayStation ® 3D Glasses Full 3D 1080p DLP Projector ® English...
-
Page 17: Using The 3D Glasses
Installation Using the 3D glasses To turn ON 3D glasses: Press the “Power” button and the LED will flash For more detailed ™ one time indicating the glasses are ready to use 3D mode. information, Verify that 3D content is being sent to the projector and signal is compat- please refer to 3D glasses user’s ible with projector specifications. -
Page 18: Powering On/Off The Projector
Installation Powering On/Off the Projector Powering On the Projector 1. Remove the lens cap. 2. Securely connect the power cord and signal cable. When connected, the ON/STANDBY LED will turn Amber. 3. Turn on the lamp by pressing “ ” button either on the top of the projector or on the remote. -
Page 19: Powering Off The Projector
Installation Powering Off the Projector 1. Press the “ ” button on the remote control or on the control panel to turn off the projector. The following message will be displayed on the screen. Power Off? Press Power again Press the “ ” button again to confirm otherwise the message will disappear after 15 seconds. -
Page 20: Warning Indicator
Installation Warning Indicator When the warning indicators (see below) come on, the projector will automatically shutdown: Contact the nearest ™ “LAMP” LED indicator is lit red and if “On/Standby” indicator ™ service center if the flashes amber. projector displays “TEMP” LED indicator is lit red and if “On/Standby” these symptoms. -
Page 21: Adjusting The Projected Image
Installation Adjusting the Projected Image Adjusting the Projector’s Height The projector is equipped with elevator feet for adjusting the image height. 1. Locate the adjustable foot you wish to modify on the underside of the projector. 2. Rotate the adjustable ring clockwise to raise the projector or counter clockwise to lower it. -
Page 22: Adjusting The Projector's Focus
Installation Adjusting the Projector’s Zoom / Focus You may turn the zoom ring to zoom in or out. To focus the im- age, rotate the focus ring until the image is clear. The projector will focus at distances from 4.92 to 32.80 feet ... - Page 23 Installation Screen Size W x H Projection Distance (D) Diagonal length Offset (Hd) (inch) size of (inch) (feet) 16:9 Screen Width Height Width Height wide tele wide tele (feet) 37.6 0.83 0.47 32.8 18.4 4.92 0.07 0.25 40.0 0.89 0.50 35.0 19.6 4.36...
-
Page 24: User Controls
User Controls Control Panel & Remote Control Control Panel Using the Control Panel Refer to the “Power On/Off the Projector” section on POWER pages 18-19. Automatically synchronize the projector to the input RE-SYNC source. Enter Confirm your item selection. SOURCE Press “SOURCE”... -
Page 25: Remote Control
User Controls Remote Control Using the Remote Control Type A Power On Refer to the “Power On” section on page 18. Refer to the “Power On/Off the Projector” Power Off section on page 19. Increase/Decrease the luminance of the im- Lamp Mode age. -
Page 26: Using The Remote Control
User Controls Using the Remote Control Enter Type A Confirm your item selection. Source Press “Source” to select an input signal. Automatically synchronizes the projector Re-sync to the input source. Display or exit the on-screen display Menu menus for projector. Press “HDMI1”... - Page 27 User Controls Remote Control Using the Remote Control Type B/C Refer to the “Power On/Off the Projector” Power section on pages 18-19. L Button Mouse left click. R Button Mouse right click. Page + Use this button to page up. Page - Use this button to page down.
- Page 28 User Controls Using the Remote Control Press “HDMI2” to choose source from HDMI2 Type B/C HDMI 2 connector. Press “Freeze” to pause the screen image. Freeze Press this button again to unlock. Momentarily turns off/on the audio and AV mute video.
-
Page 29: On-Screen Display Menus
User Controls On-screen Display Menus The Projector has multilingual On-screen Display menus that allow you to make image adjustments and change a variety of settings. The projector will automatically detect the source. How to operate 1. To open the OSD menu, press “Menu” on the Remote Control or Control Panel. -
Page 30: Menu Tree
User Controls Menu Tree Main Menu Sub Menu Settings Image Display Mode Cinema / Reference / Photo / Bright / 3D / User / Brightness -50~50 Contrast -50~50 Sharpness 1~15 Color -50~50 Tint -50~50 Advanced Noise Reduction 0~10 Gamma Film / Video / Graphics / Standard BrilliantColor™... - Page 31 User Controls Main Menu Sub Menu Settings Setup Audio Settings Internal Speaker On / Off Mute On / Off On / Off Volume 0~10 Treble 0~10 Bass 0~10 Audio Input Default / Audio1 / Audio2 Security Security On / Off Security Timer Month / Day / Hour Change Password...
-
Page 32: Image
User Controls IMAGE IMAGE Display Mode Photo Brightness Contrast Sharpness Color Tint Advanced Display Mode There are many factory presets optimized for various types of images. Cinema: For home theater. Bright: Maximum brightness from PC input. Photo: Optimized for displaying photographic images. Reference: This mode is intended to reproduce, as close as possible, the image the way the movie director intended. - Page 33 User Controls Color Adjust a video image from black and white to fully saturated color. Press the ◄ to decrease the color saturation in the image. Press the ► to increase the color saturation in the image. Tint Adjust the color balance of red and green. Press the ◄...
-
Page 34: Image | Advanced
User Controls IMAGE Advanced IMAGE | Advanced Noise Reduction Gamma Film BrilliantColor™ Dynamic Black Color Temp. Medium Color Settings Noise Reduction The Noise Reduction reduces the amount of visible noise inter- laced signals. The range is from “0” to “10”. (0: Off) Gamma This allows you to set up gamma curve type. -
Page 35: Color Settings Red / Green / Blue
User Controls Color Settings Press ► into the next menu and then use ▲ or ▼ or ◄ or ►to select item. Color Settings Cyan Green Magenta Blue Yellow White Reset Exit Red/Green/Blue/Cyan/Magenta/Yellow : Use ◄ or ► to select Hue, Saturation and Gain Colors. -
Page 36: Image | Advanced | Signal (Vga)
User Controls IMAGE Advanced : Signal IMAGE | Advanced Automatic | Signal (VGA) Phase Frequency H. Position V. Position Exit “Signal” is only ™ supported in Ana- Automatic log VGA (RGB) Automatically configures the signal (the Frequency and Phase signal. items are grayed out). -
Page 37: Image | Advanced | Signal (Video)
User Controls IMAGE Advanced : Signal IMAGE | Advanced White Level | Signal (Video) Black Level Saturation Exit “Signal” is not ™ supported when White Level the source is Allow user adjust White Level when inputting Video signals. HDMI. Black Level Allow user adjust Black Level when inputting Video signals. -
Page 38: Display
User Controls DISPLAY Format DISPLAY Edge Mask Zoom Image Shift V Keystone Exit Format Use this function to choose your desired aspect ratio. 4:3: This format is for 4x3 input sources. 16:9: This format is for 16x9 input sources, like HDTV and DVD enhanced for Widescreen TV. -
Page 39: Image Shift
User Controls 16:9 Screen 480i/p 576i/p 1080i/p 720p 1440 x 1080 center 16:9 1920 x 1080 center Each I/O has differ- ™ ent setting of “Edge 1920 x 1440 center, then get the central 1920 x 1080 Mask”. image to display “Edge Mask”... -
Page 40: Display | 3D
User Controls DISPLAY DISPLAY | 3D 3D Mode DLP - Link 3D -> 2D 3D Format AUTO 3D Sync. Invert Exit 3D Mode DLP-Link: Select “DLP-Link” to use optimized settings for DLP Link 3D Glasses. (refer to page 17). VESA 3D: Select “VESA 3D” to use optimized setting for VESA “3D sync. -
Page 41: Setup
User Controls SETUP SETUP Language English Projection Menu Location Audio Settings Security Projector ID Language Choose the multilingual OSD menu. Press ► into the sub menu and then use the ▲ or ▼ or ◄ or ► key to select your preferred language. - Page 42 User Controls Menu Location Choose the menu location on the display screen. Projector ID ID definition can be set up by menu (range 0-99), and allow user control an individual projector by RS232. Refer to pages 60-63 for the complete list of RS232 commands. English...
-
Page 43: Setup | Audio Settings
User Controls SETUP Audio Settings SETUP | Internal Speaker Audio Settings Mute Volume Treble Bass Audio Input Default Exit Internal Speaker Choose the “On” or “Off” to turn on or off the internal speaker. “Mute” function ™ Mute affects both internal Choose the “On”... -
Page 44: Setup | Security
User Controls SETUP Security SETUP | Security Security Security Timer Change Password Exit Security On: Choose “On” to use security verification when the turning on the projector. Off: Choose “Off” to be able to switch on the projector without password verification. Security Timer Can be select the time (Month/Day/Hour) function to set the number of hours the projector can be used. -
Page 45: Setup | Advanced
User Controls SETUP Advanced SETUP | Logo Default Advanced Logo Capture Closed Captioning Wireless Exit Logo Use this function to set the desired startup screen. If changes are made they will take effect the next time the projector is powered “For a successful ™... -
Page 46: Options
User Controls OPTIONS OPTIONS Input Source Source Lock High Altitude Information Hide Keypad Lock Test Pattern None IR Function Input Source Use this option to enable / disable input sources. Press ► to enter the sub menu and select which sources you require. Press “Enter” to finalize the selection. - Page 47 User Controls Background Color Use this feature to display a “Black”, “Red”, “Blue”, “Green” or “White”, screen when no signal is available. Reset Current: Choose “Yes” to return the display parameters on this menu to the factory default settings. All: Choose “Yes” to return the display parameters on all menus to the factory default settings.
-
Page 48: Options | Lamp Settings
User Controls OPTIONS Lamp Settings OPTIONS | Lamp Hours Lamp Settings Lamp Reminder Lamp Mode Bright Lamp Reset Exit Lamp Hours Display the projection time. Lamp Reminder Choose this function to show or to hide the warning message When ambient when the changing lamp message is displayed. -
Page 49: Options | Advanced
User Controls OPTIONS Advanced OPTIONS | Direct Power On Advanced Auto Power Off (min) Sleep Timer (min) Power Mode (Standby) Active Exit Direct Power On Choose “On” to activate Direct Power mode. The projector will automatically power on when AC power is supplied, without pressing the “... -
Page 50: Appendices
Appendices Troubleshooting If you experience a problem with your projector, please refer to the following information. If a problem persists, please contact your local reseller or service center. Image Problems No image appears on-screen Ensure all the cables and power connections are correctly and securely connected as described in the “Installation”... - Page 51 Appendices Image has slanted sides: If possible, reposition the projector so that it is centered on the screen and below the bottom of the screen. Use “Display-->V Keystone” from the OSD to make an adjust- ment. Image is reversed Select “Setup-->Projection” from the OSD and adjust the pro- jection direction.
-
Page 52: Other Problems
Appendices Other Problems The projector stops responding to all controls If possible, turn off the projector, then unplug the power cord and wait at least 20 seconds before reconnecting power. Lamp burns out or makes a popping sound When the lamp reaches its end of life, it will burn out and may make a loud popping sound. -
Page 53: Led Lighting Messages
Appendices LED Lighting Messages ON/STANDBY Message Temp-LED Lamp-LED (Green/Amber) (Red) (Red) Standby State Amber (Input power cord) Flashing Power on (Warming) Green Lamp lighting Green Flashing Power off (Cooling) Green Flashing Error (Over Temp.) Amber Steady light ™ Flashing Error (Fan fail) Flashing No light ... -
Page 54: On Screen Messages
Appendices On Screen Messages Power off: ™ Power Off? Press Power again Lamp warning: ™ Lamp Warning Lamp life exceeded. Temperature warning: ™ Warning! TEMPERATURE TOO HIGH Please: 1. Make sure air in and outlets are not blocked. 2. Make sure the environment temperature is under 45 degree C. If the problem persists in spite of the above. -
Page 55: Replacing The Lamp
Appendices Replacing the Lamp The projector automatically detects the lamp life. When the lamp life is nearing the end of use, you will receive a warning message. Lamp Warning Lamp life exceeded. When you see this message, please contact your local reseller or service center to change the lamp as soon as possible. -
Page 56: Lamp Replacement Procedure
Appendices The screws on the ™ lamp cover and the lamp cannot be removed. The projector cannot ™ be turned on if the lamp cover has not been placed back on the projector. Do not touch the glass ™ area of the lamp. Hand oil can cause the lamp to shatter. -
Page 57: Compatibility Modes
Appendices Compatibility Modes Computer/Video/HDMI/Mac Compatibility ™ Refresh Rate Signal Resolution Video Analog HDMI (Hz) NTSC 720 x 480 PAL/SECAM 720 x 576 640 x 480 640 x 480 640 x 480 72.8 640 x 480 800 x 600 56.3 800 x 600 60.3 (*2) SVGA... -
Page 58: D Input Video Compatibility
Appendices Refresh Rate Signal Resolution Video Analog HDMI (Hz) SDTV (576i) 768 x 576 SDTV (576p) 768 x 576 SDTV (480i) 640 x 480 SDTV (480p) 640 x 480 3D Input Video Compatibility ™ Input Timing 1280 x 720p @ 50Hz Top-and-Bottom 1280 x 720p @ 60Hz Top-and-Bottom... -
Page 59: Rs232 Commands And Protocol Function List
Appendices RS232 Commands and Protocol Function List RS232 Pin Assignments Spec. Pin no. (from projector side) English... -
Page 60: Rs232 Protocol Function List
Baud Rate : 9600 XX=00 is for all projectors Data Bits: 8 Parity: None There is a <CR> ™ Optoma HD25/HD25LV Command Table. Stop Bits: 1 after all ASCII com- --------------------------------------------------------------------------------------------------------------------------------------------------------------------------------------------------------------------------- mands. Flow Control : None Baud Rate : 9600 Note : There is a <CR>... - Page 61 Appendices --------------------------------------------------------------------------------------------------------------------------------------------------------------------------------------------------------------------------- ~XX200 n 7E 30 30 32 30 30 20 a 0D White Level n = -50 (a=2D 35 30) ~ 50 (a=35 30) ~XX201 n 7E 30 30 32 30 31 20 a 0D Black Level n = -50 (a=2D 35 30) ~ 50 (a=35 30) ~XX202 n 7E 30 30 32 30 32 20 a 0D Saturation...
- Page 62 Appendices --------------------------------------------------------------------------------------------------------------------------------------------------------------------------------------------------------------------------- ~XX95 n 7E 30 30 39 35 20 a 0D Treble n = 0 (a=30) ~ 10 (a=31 30) ~XX96 n 7E 30 30 39 36 20 a 0D Bass n = 0 (a=30) ~ 10 (a=31 30) ~XX89 0 7E 30 30 38 39 20 30 0D Audio Input...
- Page 63 Appendices --------------------------------------------------------------------------------------------------------------------------------------------------------------------------------------------------------------------------- READ from projector ---------------------------------------------------------------------------------------------------------------------------------------------------------------------------------------------------------------------------- 232 ASCII Code HEX Code Function Projector Return Description --------------------------------------------------------------------------------------------------------------------------------------------------------------------------------------------------------------------------- ~XX121 1 7E 30 30 31 32 31 20 31 0D Input Source Commands n : n: 0/1/2/3/4/5 = None/VGA1/VGA2/Video/HDMI1/HDMI2 ~XX122 1 7E 30 30 31 32 32 20 31 0D Software Version OKdddd dddd: FW version...
-
Page 64: Ceiling Mount Installation
Appendices Ceiling Mount Installation To prevent damage to your projector, please use the Optoma ceiling mount. If you wish to use a third party ceiling mount kit, please ensure the screws used to attach a mount to the projector meet the fol-... -
Page 65: Optoma Global Offices
Appendices Optoma Global Offices For service or support please contact your local office. 3178 Laurelview Ct. 888-289-6786 Fremont, CA 94538, USA 510-897-8601 www.optomausa.com services@optoma.com Canada 2420 Meadowpine Blvd., Suite #105 888-289-6786 Mississauga, ON, L5N 6S2, Canada 510-897-8601 www.optoma.ca services@optoma.com Latin America 3178 Laurelview Ct. - Page 66 Appendices Deutschland Wiesenstrasse 21 W +49 (0) 211 506 6670 D40549 Düsseldorf, +49 (0) 211 506 66799 Germany info@optoma.de Scandinavia Lerpeveien 25 +47 32 98 89 90 3040 Drammen +47 32 98 89 99 Norway info@optoma.no PO.BOX 9515 3038 Drammen...
-
Page 67: Regulation & Safety Notices
Appendices Regulation & Safety Notices This appendix lists the general notices of your projector. FCC Notice This device has been tested and found to comply with the limits for a Class B digital device pursuant to Part 15 of the FCC rules. These limits are designed to provide reasonable protection against harmful interference in a residential installation. -
Page 68: Declaration Of Conformity For Eu Countries
Appendices Declaration of Conformity for EU countries EMC Directive 2004/108/EC (including amendments) Low Voltage Directive 2006/95/EC R & TTE Directive 1999/5/EC (if product has RF function) Disposal instructions Do not throw this electronic device into the trash when discarding. To minimize pollution and ensure utmost protection of the global environment, please recycle it. -
Page 69: Trademarks
Appendices Trademarks • DLP is trademarks of Texas Instruments. • IBM is a trademark or registered trademark of International Business Machines Corporation. • Macintosh, Mac OS X, iMac, and PowerBook are trade- marks of Apple Inc., registered in the U.S. and other countries.
Need help?
Do you have a question about the Projector and is the answer not in the manual?
Questions and answers
The projector turns off automatically at 9:45 each night in the movie theatre at our assisted living facility. How can this be fixed. We miss the last few minutes of longer movies.
To disable the automatic shutdown feature on the Optoma projector:
1. Press the "Menu" button on the remote control.
2. Navigate to the gear icon (Settings).
3. Enter "Power Settings."
4. Find the "Auto Power Off" option.
5. Adjust the timer using the slider, or set it to a high value to prevent shutdown at 9:45 PM.
This will delay or disable automatic shutdown.
This answer is automatically generated