Advertisement
Quick Links
Advertisement

Related Manuals for Body Solid GLP2500


Summary of Contents for Body Solid GLP2500
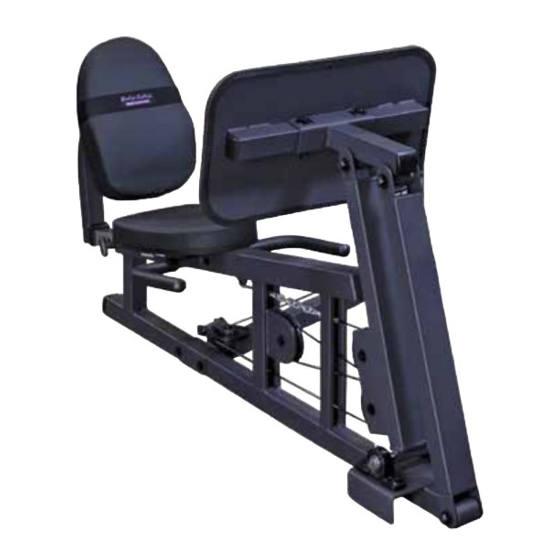
- Page 1 GLP2500 Assembly Instructions / Owner’s Manual...
-
Page 2: Before You Begin
Before You Begin Thank you for purchasing the Body-Solid GLP2500 Leg Press Attachment. This Leg Press is part of the Body-Solid line of quality strength training machines, which let you target specific muscle groups to achieve better muscle tone and overall body conditioning. - Page 3 Preparations Assembly of the GLP2500 takes professional installers about 1/2 hour to complete. If this is the first time you have assembled this type of equipment, plan on significantly more time. Professional installers are recommended. However, if you acquire the appropriate tools, obtain assistance, and follow the assembly steps sequentially, the process will take time, but is fairly easy.
-
Page 4: Important Safety Instructions
• Assemble and operate the GLP2500 Leg Press on a • Do not remove any safety labels from the machine. solid, level surface. Locate the unit a few feet from the walls or furniture to provide easy access. -
Page 5: Warning, Safety & Maintenance
• Periodically inspect all nuts and bolts. Tighten if of the GLP2500 Leg Press. Body-Solid uses the highest needed. If bolts seem to loosen periodically, use quality materials available, but wear is inevitable. - Page 6 GLP2500 Parts List Part # Description Gym Connector Base Frame Back Pad Frame Inside Pivot Outside Pivot Plate Connector Foot Plate Hand Grip Flat Plate Pillow Block Bearing Seat Pad Back Pad Leg Press Connector Pulley Holder Pulley Base Pulley Holder Pivot...
- Page 7 GLP2500 Parts Diagram Gym Connector Base Frame Back Pad Frame Inside Pivot Outside Pivot Plate Connector Foot Plate Hand Grip Flat Plate Pillow Block Bearing Seat Pad Back Pad Leg Press Connector Pulley Holder Pulley Base Pulley Holder Pivot...
- Page 8 GLP2500 Hardware List Part # Description M12 Nylon Locking Nut (16) M10 Nylon Locking Nut 1/2” Nylon Locking Nut 3/8” Jam Nut (10) M12 Flat Washer (32) M10 Flat Washer 5/16” Spring Washer 5/16” Flat Washer M12 Flat Washer 1/2” Washer...
- Page 9 GLP2500 Hardware Diagram ( Shown in actual size ) 2 M10 x 45 Hex Head Bolt (3) 1 M12 x 80 Hex Head Bolt (2) 4 M10 x 75 Hex Head Bolt (5) 3 M10 x 50 Hex Head Bolt (2)
- Page 10 GLP2500 Hardware Diagram ( Shown in actual size ) 7 5/16” x 1” Hex Head Bolt (4) 18 M12 Flat Washer (10) 8 5/16” x 3 1/4” Hex Head Bolt (2) 19 M10 Flat Washer (32) 9 M10 x 65 Hex Head Bolt (2) 20 5/16”...
- Page 11 GLP2500 Hardware Diagram 31(1) 32(4) 33(1) 34(1) 35(1) 36(2) 38(5) 37(1) Leg Press Cable Stamped Eye End Chain End 11 11...
- Page 12 NOTE: You can only attach the GLP2500 Leg Press to the right of your EXM2500 Home Gym. To figure out the right side of the EXM2500 Home Gym just sit on the Seated Press or it is the opposite side of the Weight Stack.
- Page 13 STEP Base Frame Flat Plate Gym Connector Leg Press Connector Flat Plate Your existing EXM2500 Home Gym Above shows Step 1 assembled and complete. 13 13...
- Page 14 STEP Be careful to assemble all components in the sequence they are presented. NOTE: Finger tighten all hardware in this step. Do Not wrench tighten until the end of the step. Some hardware may be pre-installed. Connect the first Pillow Block Bearing K to the front of Base Frame B using: (2) 12 M12 x 45 hex head bolt (2) 22...
- Page 15 STEP Plate Connector Outside Pivot Inside Pivot Base Frame Pillow Block Bearing Your existing EXM2500 Home Gym Above shows Step 2 assembled and complete.
- Page 16 STEP Be careful to assemble all components in the sequence they are presented. NOTE: Finger tighten all hardware in this step. Do Not wrench tighten until the end of the step. Attach Frame Cover 35 and insert End Cap 32 to Back Pad Frame C as shown. Insert Nylon Bushing 34 into Base Frame B.
- Page 17 STEP Back Pad Frame Base Frame Pulley Holder Leg Press Connector Gym Connector Pulley Holder Pivot Pulley Base Your existing EXM2500 Home Gym Above shows Step 3 assembled and complete.
- Page 18 STEP Be careful to assemble all components in the sequence they are presented. NOTE: Finger tighten all hardware in this step. Do Not wrench tighten until the end of the step. Insert one Round End Cap 36 into each Hand Grip H. Connect both Hand Grip H to Base Frame B using: (2) 5 M10 x 80 hex head bolt...
- Page 19 STEP Foot Plate Hand Grip Plate Connector Base Frame Hand Grip Your existing EXM2500 Home Gym Above shows Step 4 assembled and complete.
- Page 20 STEP Be careful to assemble all components in the sequence they are presented. Wrap Seat Band 49 around Back Pad M as shown. Slid the seat band down until it is below the top set of openings for the bolts that will attach Back Pad M to Back Pad Frame C in the next step.
- Page 21 STEP Back Pad Back Pad Frame Seat Pad Base Frame Your existing EXM2500 Home Gym Above shows Step 5 assembled and complete.
- Page 22 STEP Be careful to assemble all components in the sequence they are presented. NOTE: Finger tighten all hardware in this step. Do Not wrench tighten until the cable is installed. All five of the pulleys are the same, they are part number 38 the 4 ¼” Pulleys. Install Pulley 1 into the top opening in Inside Pivot D as shown using: (1) 3 M10 x 50 hex head bolt...
- Page 23 STEP NOTE: Leave all hardware in this step finger tight. Do Not wrench tighten until the cable is installed. Inside Pivot Base Frame Pulley Holder Pivot Pulley 5 Pulley 4 Pulley 2 Pulley Holder Pulley 1 Pulley 3 Your existing EXM2500 Home Gym Above shows Step 6 assembled and complete.
- Page 24 STEP Be careful to assemble all components in the sequence they are presented. NOTE: Remove finger tightened pulleys as needed. Do Not wrench tighten until the cable is installed. Leg Press Cable Stamped Eye End Chain End 3835 mm 12’ 7” Base Frame Attach the Chain End of the Leg Press Cable 37 to Base Frame B (under Seat...
- Page 25 STEP Be careful to assemble all components in the sequence they are presented. NOTE: Remove finger tightened pulleys as needed. Do Not wrench tighten until the cable is installed. Leg Press Cable Stamped Eye End Chain End 3835 mm 12’ 7” Hanging pulley on your existing EXM2500 Home Gym...
- Page 26 STEP Be careful to assemble all components in the sequence they are presented. Hanging pulley on your existing EXM2500 Home Gym GLP2500CHAIN Snap Link (Carabiner) Leg Press Cable Pulley 5 Leg Press Connector Gym Connector Make sure that Leg Press Connector N and Gym Connector A are connected at their shortest length, it should be around 34 inches or 862mm.
- Page 27 Body-Solid, Inc. Service Department 1900 S. Des Plaines Ave. Forest Park, IL 60130 USA Toll Free:1-800-556-3113 Phone:1-708-427-3555 E-mail: service@bodysolid.com www.bodysolid.com...
Need help?
Do you have a question about the GLP2500 and is the answer not in the manual?
Questions and answers