Table of Contents
Advertisement
Quick Links
Help Guide
Multi Channel AV Receiver
STR-AZ7000ES/STR-AZ5000ES/STR-AZ3000ES
Use this Help Guide when you have any questions on how to use the receiver.
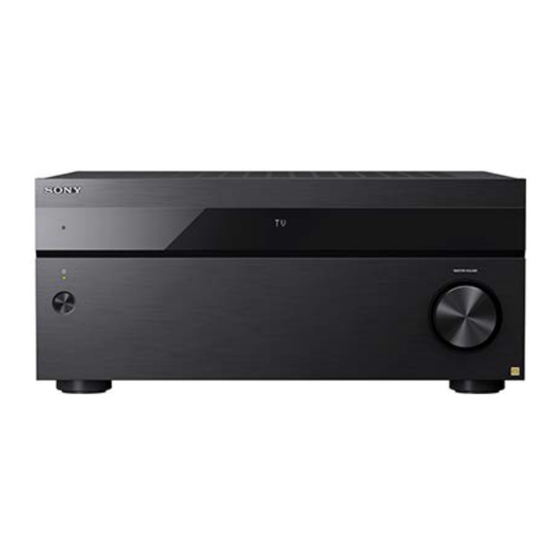
In this Help Guide, the STR-AZ7000ES is used for illustrative purposes unless otherwise noted.
By updating your software to the latest version, you can take advantage of the newest functions.
Parts and Controls
Receiver
Front panel (with the front cover attached)
Front panel (without the front cover attached)
Indicators on the display panel
Rear panel (STR-AZ7000ES)
Rear panel (STR-AZ5000ES)
Rear panel (STR-AZ3000ES)
Remote control
Remote control
Remote control buttons that can be operated for each zone
Preparation
About input/output of video signals
Supported audio/video formats
Playable types of audio files
Digital audio formats supported by the receiver
Video formats supported by the receiver
Notes on connections
Notes on connecting cables
About HDMI connections
1. Installing speakers
Speaker installation example
Speaker configuration and speaker pattern settings
Installing 9.1.4-channel speaker system using front wide speakers (for STR-AZ7000ES)
Installing 7.1.6-channel speaker system (for STR-AZ7000ES)
Installing 5.1.5.3-channel speaker system (360RA Reference configuration) (for STR-AZ7000ES)
Installing 7.1.4-channel speaker system (for STR-AZ7000ES/STR-AZ5000ES)
Installing 7.1.2-channel speaker system with two center speakers (for STR-AZ7000ES/STR-AZ5000ES)
Installing 7.1.2-channel speaker system using front Dolby Atmos enabled speakers
Installing 7.1.2-channel speaker system
Installing 7.1-channel speaker system
Installing 5.1.4-channel speaker system using top front and top rear speakers
Installing 5.1.2-channel speaker system using top middle speakers
Installing 7.1-channel speaker system with Zone 2 connection
Installing 5.1.2-channel speaker system with bi-amplifier connection
2. Connecting speakers
How to connect speaker cables
1
Advertisement
Table of Contents

Related Manuals for Sony STR-AZ7000ES


Summary of Contents for Sony STR-AZ7000ES
- Page 1 Use this Help Guide when you have any questions on how to use the receiver. In this Help Guide, the STR-AZ7000ES is used for illustrative purposes unless otherwise noted. By updating your software to the latest version, you can take advantage of the newest functions.
- Page 2 Using the active subwoofers Connecting 9.1.4-channel speaker system using front wide speakers (for STR-AZ7000ES) Connecting 7.1.6-channel speaker system (for STR-AZ7000ES) Connecting 5.1.5.3-channel speaker system (360RA Reference configuration) (for STR-AZ7000ES) Connecting 7.1.4-channel speaker system (for STR-AZ7000ES/STR-AZ5000ES) Connecting 7.1.2-channel speaker system with two center speakers (for STR-AZ7000ES/STR-AZ5000ES) Connecting 7.1.2-channel speaker system using front Dolby Atmos enabled speakers...
- Page 3 Setting up a wireless LAN connection (for wireless LAN connections only) Preparing a wireless LAN antenna (for wireless LAN connections only) Setting up a wireless LAN connection Setting up a wireless network connection Using Sony | Music Center Playing music with the TIDAL app Playing Music from Other Streaming Services...
-
Page 4: Adjusting Settings
Enjoying sound in Zone 2 Enjoying sound in two rooms (Main zone and Zone 3) using another amplifier Connecting another amplifier in Zone 3 Setting up the Zone 3 (Zone3 Settings) Enjoying sound using another amplifier in Zone 3 Enjoying sound effects Enjoying 360 spatial sound (360 Spatial Sound Mapping) Using sound fields (Sound Field) Selecting a sound field (Sound Field) -
Page 5: Network Settings
Selecting the playback quality of the wireless speaker (Wireless Playback Quality) Checking the software version of the wireless speakers (Software Version) Outputting the center speaker part of the sound from the TV speakers (TV Center Speaker Mode) Lifting up the sound of the center speaker (Center Speaker Lift Up) Enjoying more natural sound with speakers installed in the ceiling (In-Ceiling Speaker Mode) Manual Speaker Settings Outputting a test tone from each speaker (Test Tone) -
Page 6: Troubleshooting
Install Settings Turning on control mode for maintenance (External Control) Switching on/off the 12V trigger output (Trigger1/Trigger2/Trigger3) (for STR-AZ7000ES/STR-AZ5000ES) Switching on/off the 12V trigger output (Trigger) (for STR-AZ3000ES) Displaying a test screen (Test Picture for HDMI OUT A/Test Picture for HDMI OUT B) -
Page 7: Usb Devices
The receiver is turned off automatically. Cannot find an available input when connecting several digital devices. The receiver does not turn on even when the TV is turned on. The receiver turns off when the TV is turned off. The receiver does not turn off even when the TV is turned off. Image No image appears on the TV screen. - Page 8 The sound skips or fluctuates, or the connection is lost. The sound of your BLUETOOTH device cannot be heard. Severe humming or noise. Cannot control the receiver using a Sony | Music Center. “BRAVIA” Sync (Control for HDMI) The Control for HDMI function does not work.
- Page 9 Receives signals from remote control. MASTER VOLUME Turns to adjust the volume level. Related Topic Front panel (without the front cover attached) Indicators on the display panel Turning on the receiver Selecting the front speakers 5-037-021-11(1) Copyright 2022 Sony Corporation...
- Page 10 Help Guide Multi Channel AV Receiver STR-AZ7000ES/STR-AZ5000ES/STR-AZ3000ES Front panel (without the front cover attached) PING Displays the IP address and MAC address on the display panel. Input buttons Select the device you want to play. When you press any of the input buttons, the receiver turns on.
- Page 11 Activates the In-Ceiling Speaker Mode. SOUND FIELD (2CH/MULTI, MOVIE, MUSIC) Selects the sound field you want. HDMI IN 7 (VIDEO) jack (for STR-AZ7000ES/STR-AZ5000ES only) Connect an HDMI device. For supported video signals, see “Connecting devices with HDMI jacks.” 360SSM Activates or deactivates the [360 Spatial Sound Mapping] function.
-
Page 12: Indicators On The Display Panel
Indicators on the display panel Playback channel indicator Indicates the speaker that is designated to output sound. Shows how the receiver down-mixes or up-mixes the source sound, based on the speaker settings. FWL (for STR-AZ7000ES only) Front Wide Left FWR (for STR-AZ7000ES only) -
Page 13: Input Indicator
The receiver recognizes devices connected via an HDMI IN jack. COAX Digital signals are input through the COAXIAL jack. Digital signals are input through the OPTICAL jack. eARC TV input is selected, and eARC or ARC signals are detected. 5-037-021-11(1) Copyright 2022 Sony Corporation... - Page 14 Help Guide Multi Channel AV Receiver STR-AZ7000ES/STR-AZ5000ES/STR-AZ3000ES Rear panel (STR-AZ7000ES) FM ANTENNA terminal HDMI IN/OUT jacks Connect HDMI devices. For supported video signals, see “Connecting devices with HDMI jacks.” Wireless LAN antenna DIGITAL OPTICAL IN jacks COAXIAL IN (SA-CD/CD) jack TRIGGER OUT jacks Connect to interlock on/off of the power supply of other 12V TRIGGER compliant equipment, or the amplifier/receiver of Zone 2 or Zone 3.
- Page 15 5-037-021-11(1) Copyright 2022 Sony Corporation...
- Page 16 Help Guide Multi Channel AV Receiver STR-AZ7000ES/STR-AZ5000ES/STR-AZ3000ES Rear panel (STR-AZ5000ES) FM ANTENNA terminal HDMI IN/OUT jacks Connect HDMI devices. For supported video signals, see “Connecting devices with HDMI jacks.” Wireless LAN antenna DIGITAL OPTICAL IN jacks COAXIAL IN (SA-CD/CD) jack TRIGGER OUT jacks Connect to interlock on/off of the power supply of other 12V TRIGGER compliant equipment, or the amplifier/receiver of Zone 2 or Zone 3.
- Page 17 5-037-021-11(1) Copyright 2022 Sony Corporation...
- Page 18 Connecting a TV compatible with the eARC or ARC function using an HDMI jack Connecting a TV incompatible with the eARC and ARC functions using an HDMI jack Connecting a TV with jacks other than HDMI jacks 5-037-021-11(1) Copyright 2022 Sony Corporation...
-
Page 19: Remote Control
Help Guide Multi Channel AV Receiver STR-AZ7000ES/STR-AZ5000ES/STR-AZ3000ES Remote control Use the supplied remote control to operate this receiver. (power) ( ZONE 2 , ZONE 3 , MAIN ) Turns the receiver in the main zone, Zone 2 or Zone 3 on or sets it to standby mode. - Page 20 (volume) + buttons have tactile dots. Use the tactile dots as reference when operating the receiver. Note The above explanations are intended to serve as examples. Depending on the model of your connected device, some functions explained in this section may not work with the supplied remote control. 5-037-021-11(1) Copyright 2022 Sony Corporation...
- Page 21 Not Operable SETTINGS Operable Not Operable Not Operable TEST Operable Not Operable Not Operable AUTO CAL. Operable Not Operable Not Operable * You can operate the menu on the TV screen in the main zone. 5-037-021-11(1) Copyright 2022 Sony Corporation...
- Page 22 When you connect the TV to the VIDEO OUT MONITOR jack, the home menu of this receiver is not displayed on the TV screen. To operate this receiver using the menu on the TV screen, connect the TV to the HDMI OUT A or HDMI OUT B (ZONE 2) jacks. 5-037-021-11(1) Copyright 2022 Sony Corporation...
- Page 23 The receiver does not play coded files such as DRM. The receiver cannot recognize a file/folder depending on the name/metadata. Some USB devices may not work with this receiver. The receiver can recognize Mass Storage Class (MSC) devices. 5-037-021-11(1) Copyright 2022 Sony Corporation...
- Page 24 IMAX® is decoded if DTS audio signal format is DTS 5.1 without IMAX® Enhanced content and IMAX Mode is set to Auto. IMAX® is decoded if DTS audio signal contains IMAX® Enhanced content and IMAX Mode is set to Auto. 5-037-021-11(1) Copyright 2022 Sony Corporation...
- Page 25 Help Guide Multi Channel AV Receiver STR-AZ7000ES/STR-AZ5000ES/STR-AZ3000ES Video formats supported by the receiver This receiver supports the following video formats. 8K 60/50/30/25/24 Hz 4K 120/100/60/50/30/25/24 Hz 1080p 120/100/60/50/30/24 Hz 1080i 60/50 Hz 720p 60/50/30/24 Hz 576p 50 Hz 480p 60 Hz The details of the video formats are as follows.
- Page 26 In the case of the following signals, OPTIONS does not work. In addition, the on-screen display (OSD) is not displayed. Signal with a resolution of 4096 x 2160p 3D signals of the side-by-side or top-and-bottom split method VRR signals and compressed video signals 5-037-021-11(1) Copyright 2022 Sony Corporation...
- Page 27 If you want to connect several digital devices, but cannot find an unused input In this case, reassign the input jacks. Related Topic About HDMI connections Using other HDMI or digital audio input jacks (Input Assign) Setting HDMI signal formats (HDMI Signal Format) 5-037-021-11(1) Copyright 2022 Sony Corporation...
- Page 28 Multi Channel AV Receiver STR-AZ7000ES/STR-AZ5000ES/STR-AZ3000ES About HDMI connections High-Definition Multimedia Interface (HDMI) is an interface that transmits video and audio signals in digital format. Connecting devices made by Sony that are “BRAVIA” Sync- compatible makes operations simpler. HDMI features Video All HDMI jacks support ITU-R BT.2020 wide color spaces, 3D, Deep Color (Deep Colour) and HDR (High Dynamic Range) contents pass-through.
- Page 29 STR-AZ7000ES/STR-AZ5000ES/STR-AZ3000ES Speaker installation example Up to 13 speakers (STR-AZ7000ES), 11 speakers (STR-AZ5000ES) or 9 speakers (STR-AZ3000ES) and 2 subwoofers can be connected to the receiver. Install the speakers and subwoofers according to your preferred speaker system. For details, see “Speaker patterns and terminals to be connected (for STR-AZ7000ES),”...
- Page 30 Zone 3 right speaker 3” CNT2 Center speaker For STR-AZ7000ES and STR-AZ5000ES only. Produces vocal sounds from center channel. Subwoofer Produces LFE (low frequency effect) channel sounds and reinforces bass parts of other channels. Front wide left speaker For STR-AZ7000ES only. Produces sounds from front wide left channel.
- Page 31 For STR-AZ3000ES/STR-AZ5000ES, you can only set [Surround Back Speaker Assign] if the speaker pattern is set to a setting that does not have surround back speakers. For STR-AZ7000ES, you can only set [Surround Back Speaker Assign] if the speaker pattern is set to a setting that does not have surround back speakers and to a setting other than [5.0.5.3(360RA Ref.)] or [5.1.5.3(360RA Ref.)].
- Page 32 Multi Channel AV Receiver STR-AZ7000ES/STR-AZ5000ES/STR-AZ3000ES Installing 9.1.4-channel speaker system using front wide speakers (for STR-AZ7000ES) This speaker installation is configured by adding top front and top rear overhead speakers, and front wide floor speakers to 7.1-channel speaker system. Angle at which each speaker is placed from the line connecting the listening position and the center speaker (0 degrees) Front speakers: 30°...
- Page 33 Multi Channel AV Receiver STR-AZ7000ES/STR-AZ5000ES/STR-AZ3000ES Installing 7.1.6-channel speaker system (for STR-AZ7000ES) This speaker installation is configured by adding top front, top middle and top rear overhead speakers to 7.1-channel speaker system. Angle at which each speaker is placed from the line connecting the listening position and the center speaker (0 degrees) Front speakers: 30°...
- Page 34 Multi Channel AV Receiver STR-AZ7000ES/STR-AZ5000ES/STR-AZ3000ES Installing 5.1.5.3-channel speaker system (360RA Reference configuration) (for STR-AZ7000ES) This speaker installation is configured by adding top front and top rear overhead speakers, and bottom front floor speakers to 5.1-channel speaker system. Angle at which each speaker is placed from the line connecting the listening position and the center speaker (0 degrees) Front speakers: 30°...
- Page 35 Multi Channel AV Receiver STR-AZ7000ES/STR-AZ5000ES/STR-AZ3000ES Installing 7.1.4-channel speaker system (for STR-AZ7000ES/STR-AZ5000ES) This speaker installation is configured by adding top front and top rear overhead speakers to 7.1-channel speaker system. Angle at which each speaker is placed from the line connecting the listening position and the center speaker (0 degrees) Front speakers: 30°...
- Page 36 Multi Channel AV Receiver STR-AZ7000ES/STR-AZ5000ES/STR-AZ3000ES Installing 7.1.2-channel speaker system with two center speakers (for STR-AZ7000ES/STR-AZ5000ES) This speaker installation is configured by adding top middle overhead speakers and the additional center speaker (CNT2) to 7.1-channel speaker system. Angle at which each speaker is placed from the line connecting the listening position and the center speaker (0 degrees) Front speakers: 30°...
- Page 37 Angles between the surround speakers and surround back speakers: Same angle Hint As the subwoofer does not emit highly directional signals, you can place it wherever you want. Related Topic Speaker installation example Connecting 7.1.2-channel speaker system using front Dolby Atmos enabled speakers 5-037-021-11(1) Copyright 2022 Sony Corporation...
- Page 38 Vertical angle at which each speaker is placed from a line drawn straight ahead from the height of the listener's ears (0 degrees) Front high speakers: 30° - 45° Hint As the subwoofer does not emit highly directional signals, you can place it wherever you want. Related Topic Speaker installation example Connecting 7.1.2-channel speaker system 5-037-021-11(1) Copyright 2022 Sony Corporation...
- Page 39 Angles between the surround speakers and surround back speakers: Same angle Hint As the subwoofer does not emit highly directional signals, you can place it wherever you want. Related Topic Speaker installation example Connecting 7.1-channel speaker system 5-037-021-11(1) Copyright 2022 Sony Corporation...
- Page 40 Top rear speakers: 120° - 150° Hint As the subwoofer does not emit highly directional signals, you can place it wherever you want. Related Topic Speaker installation example Connecting 5.1.4-channel speaker system using top front and top rear speakers 5-037-021-11(1) Copyright 2022 Sony Corporation...
- Page 41 Top middle speakers: 60° - 100° Hint As the subwoofer does not emit highly directional signals, you can place it wherever you want. Related Topic Speaker installation example Connecting 5.1.2-channel speaker system using top middle speakers 5-037-021-11(1) Copyright 2022 Sony Corporation...
- Page 42 Angles between the surround speakers and surround back speakers: Same angle Hint As the subwoofer does not emit highly directional signals, you can place it wherever you want. Related Topic Speaker installation example Connecting 7.1-channel speaker system with Zone 2 connection 5-037-021-11(1) Copyright 2022 Sony Corporation...
- Page 43 Top middle speakers: 65° - 100° Hint As the subwoofer does not emit highly directional signals, you can place it wherever you want. Related Topic Speaker installation example Connecting 5.1.2-channel speaker system with bi-amplifier connection 5-037-021-11(1) Copyright 2022 Sony Corporation...
-
Page 44: How To Connect Speaker Cables
Be sure not remove too much of the speaker cable sleeves, so as to prevent the wires of the speaker cables from touching each other. Connect speaker cables properly with the polarities (+/–) matched between the receiver and the speakers. Improper connection may result in fatal damage to the receiver. 5-037-021-11(1) Copyright 2022 Sony Corporation... - Page 45 Up to two active subwoofers can be connected to the receiver. 5-037-021-11(1) Copyright 2022 Sony Corporation...
- Page 46 Multi Channel AV Receiver STR-AZ7000ES/STR-AZ5000ES/STR-AZ3000ES Connecting 9.1.4-channel speaker system using front wide speakers (for STR-AZ7000ES) Connect each speaker to the SPEAKERS terminals on the rear of the receiver. Before connecting cables, be sure to disconnect the AC power cord (mains lead).
- Page 47 Help Guide Multi Channel AV Receiver STR-AZ7000ES/STR-AZ5000ES/STR-AZ3000ES Connecting 7.1.6-channel speaker system (for STR-AZ7000ES) Connect each speaker to the SPEAKERS terminals on the rear of the receiver. Before connecting cables, be sure to disconnect the AC power cord (mains lead). For details on how to connect speaker cables to the receiver, see “How to connect speaker...
- Page 48 Multi Channel AV Receiver STR-AZ7000ES/STR-AZ5000ES/STR-AZ3000ES Connecting 5.1.5.3-channel speaker system (360RA Reference configuration) (for STR-AZ7000ES) Connect each speaker to the SPEAKERS terminals on the rear of the receiver. Before connecting cables, be sure to disconnect the AC power cord (mains lead).
- Page 49 Help Guide Multi Channel AV Receiver STR-AZ7000ES/STR-AZ5000ES/STR-AZ3000ES Connecting 7.1.4-channel speaker system (for STR-AZ7000ES/STR-AZ5000ES) Connect each speaker to the SPEAKERS terminals on the rear of the receiver. Before connecting cables, be sure to disconnect the AC power cord (mains lead). For details on how to connect speaker cables to the receiver, see “How to connect speaker...
- Page 50 Help Guide Multi Channel AV Receiver STR-AZ7000ES/STR-AZ5000ES/STR-AZ3000ES Connecting 7.1.2-channel speaker system with two center speakers (for STR-AZ7000ES/STR-AZ5000ES) For STR-AZ7000ES Connect each speaker to the SPEAKERS terminals on the rear of the receiver. Before connecting cables, be sure to disconnect the AC power cord (mains lead).
- Page 51 Connect speaker cables properly with the polarities (+/–) matched between the speaker cables and the SPEAKERS terminals. Related Topic Speaker installation example Installing 7.1.2-channel speaker system with two center speakers (for STR-AZ7000ES/STR-AZ5000ES) Selecting the speaker pattern (Speaker Pattern) Notes on connecting cables...
- Page 52 Connect speaker cables properly with the polarities (+/–) matched between the speaker cables and the SPEAKERS terminals. Related Topic Speaker installation example Installing 7.1.2-channel speaker system using front Dolby Atmos enabled speakers Selecting the speaker pattern (Speaker Pattern) Notes on connecting cables How to connect speaker cables 5-037-021-11(1) Copyright 2022 Sony Corporation...
- Page 53 Connect speaker cables properly with the polarities (+/–) matched between the speaker cables and the SPEAKERS terminals. Related Topic Speaker installation example Installing 7.1.2-channel speaker system Selecting the speaker pattern (Speaker Pattern) Notes on connecting cables How to connect speaker cables 5-037-021-11(1) Copyright 2022 Sony Corporation...
- Page 54 Connect speaker cables properly with the polarities (+/–) matched between the speaker cables and the SPEAKERS terminals. Related Topic Speaker installation example Installing 7.1-channel speaker system Selecting the speaker pattern (Speaker Pattern) Assigning the surround back speaker terminals (Surround Back Speaker Assign) Notes on connecting cables How to connect speaker cables 5-037-021-11(1) Copyright 2022 Sony Corporation...
- Page 55 STR-AZ7000ES/STR-AZ5000ES/STR-AZ3000ES Connecting 5.1.4-channel speaker system using top front and top rear speakers For STR-AZ7000ES/STR-AZ5000ES Connect each speaker to the SPEAKERS terminals on the rear of the receiver. Before connecting cables, be sure to disconnect the AC power cord (mains lead).
- Page 56 Connect speaker cables properly with the polarities (+/–) matched between the speaker cables and the SPEAKERS terminals. Related Topic Speaker installation example Installing 5.1.4-channel speaker system using top front and top rear speakers Selecting the speaker pattern (Speaker Pattern) Notes on connecting cables How to connect speaker cables 5-037-021-11(1) Copyright 2022 Sony Corporation...
- Page 57 Connect speaker cables properly with the polarities (+/–) matched between the speaker cables and the SPEAKERS terminals. Related Topic Speaker installation example Installing 5.1.2-channel speaker system using top middle speakers Selecting the speaker pattern (Speaker Pattern) Notes on connecting cables How to connect speaker cables 5-037-021-11(1) Copyright 2022 Sony Corporation...
- Page 58 Installing 7.1-channel speaker system with Zone 2 connection Selecting the speaker pattern (Speaker Pattern) Assigning the surround back speaker terminals (Surround Back Speaker Assign) Enjoying sound using another amplifier in Zone 3 Notes on connecting cables How to connect speaker cables 5-037-021-11(1) Copyright 2022 Sony Corporation...
- Page 59 Connect left and right surround speakers to the SURROUND terminals, center speaker to the CENTER 1 terminal (STR-AZ7000ES/STR-AZ5000ES) or CENTER terminal (STR- AZ3000ES), left and right top middle speakers to the HEIGHT 1 terminals (STR-AZ7000ES/STR-AZ5000ES) or HEIGHT 1 (ZONE 2) terminals (STR-AZ3000ES) and subwoofer to...
- Page 60 Speaker installation example Installing 5.1.2-channel speaker system with bi-amplifier connection Selecting the speaker pattern (Speaker Pattern) Assigning the surround back speaker terminals (Surround Back Speaker Assign) Notes on connecting cables How to connect speaker cables 5-037-021-11(1) Copyright 2022 Sony Corporation...
- Page 61 Multi Channel AV Receiver STR-AZ7000ES/STR-AZ5000ES/STR-AZ3000ES Speaker patterns and terminals to be connected (for STR-AZ7000ES) When you connect speakers to the receiver, refer to the following table. You can use the following table to confirm the speaker patterns supported by the receiver as well as the speaker terminals to which the speakers of each speaker pattern are to be connected.
- Page 62 SPEAKERS SPEAKERS terminals Front B terminals SPEAKERS SPEAKERS SPEAKERS SPEAKERS SPEAKERS HEIGHT 3 PRE OUT speaker SURROUND Zone 2 Speaker pattern terminals terminals terminals terminals terminals (FRONT jacks CENTER connection/Bi- BACK connection FRONT A CENTER 1 SURROUND HEIGHT 1 HEIGHT 2 WIDE/ZONE SUBWOOFER OUT jack...
- Page 63 SPEAKERS SPEAKERS terminals Front B terminals SPEAKERS SPEAKERS SPEAKERS SPEAKERS SPEAKERS HEIGHT 3 PRE OUT speaker SURROUND Zone 2 Speaker pattern terminals terminals terminals terminals terminals (FRONT jacks CENTER connection/Bi- BACK connection FRONT A CENTER 1 SURROUND HEIGHT 1 HEIGHT 2 WIDE/ZONE SUBWOOFER OUT jack...
- Page 64 SPEAKERS SPEAKERS terminals Front B terminals SPEAKERS SPEAKERS SPEAKERS SPEAKERS SPEAKERS HEIGHT 3 PRE OUT speaker SURROUND Zone 2 Speaker pattern terminals terminals terminals terminals terminals (FRONT jacks CENTER connection/Bi- BACK connection FRONT A CENTER 1 SURROUND HEIGHT 1 HEIGHT 2 WIDE/ZONE SUBWOOFER OUT jack...
- Page 65 SPEAKERS SPEAKERS terminals Front B terminals SPEAKERS SPEAKERS SPEAKERS SPEAKERS SPEAKERS HEIGHT 3 PRE OUT speaker SURROUND Zone 2 Speaker pattern terminals terminals terminals terminals terminals (FRONT jacks CENTER connection/Bi- BACK connection FRONT A CENTER 1 SURROUND HEIGHT 1 HEIGHT 2 WIDE/ZONE SUBWOOFER OUT jack...
- Page 66 SPEAKERS SPEAKERS terminals Front B terminals SPEAKERS SPEAKERS SPEAKERS SPEAKERS SPEAKERS HEIGHT 3 PRE OUT speaker SURROUND Zone 2 Speaker pattern terminals terminals terminals terminals terminals (FRONT jacks CENTER connection/Bi- BACK connection FRONT A CENTER 1 SURROUND HEIGHT 1 HEIGHT 2 WIDE/ZONE SUBWOOFER OUT jack...
- Page 67 SPEAKERS SPEAKERS terminals Front B terminals SPEAKERS SPEAKERS SPEAKERS SPEAKERS SPEAKERS HEIGHT 3 PRE OUT speaker SURROUND Zone 2 Speaker pattern terminals terminals terminals terminals terminals (FRONT jacks CENTER connection/Bi- BACK connection FRONT A CENTER 1 SURROUND HEIGHT 1 HEIGHT 2 WIDE/ZONE SUBWOOFER OUT jack...
- Page 68 SPEAKERS SPEAKERS terminals Front B terminals SPEAKERS SPEAKERS SPEAKERS SPEAKERS SPEAKERS HEIGHT 3 PRE OUT speaker SURROUND Zone 2 Speaker pattern terminals terminals terminals terminals terminals (FRONT jacks CENTER connection/Bi- BACK connection FRONT A CENTER 1 SURROUND HEIGHT 1 HEIGHT 2 WIDE/ZONE SUBWOOFER OUT jack...
- Page 69 SPEAKERS SPEAKERS terminals Front B terminals SPEAKERS SPEAKERS SPEAKERS SPEAKERS SPEAKERS HEIGHT 3 PRE OUT speaker SURROUND Zone 2 Speaker pattern terminals terminals terminals terminals terminals (FRONT jacks CENTER connection/Bi- BACK connection FRONT A CENTER 1 SURROUND HEIGHT 1 HEIGHT 2 WIDE/ZONE SUBWOOFER OUT jack...
- Page 70 SPEAKERS SPEAKERS terminals Front B terminals SPEAKERS SPEAKERS SPEAKERS SPEAKERS SPEAKERS HEIGHT 3 PRE OUT speaker SURROUND Zone 2 Speaker pattern terminals terminals terminals terminals terminals (FRONT jacks CENTER connection/Bi- BACK connection FRONT A CENTER 1 SURROUND HEIGHT 1 HEIGHT 2 WIDE/ZONE SUBWOOFER OUT jack...
- Page 71 SPEAKERS SPEAKERS terminals Front B terminals SPEAKERS SPEAKERS SPEAKERS SPEAKERS SPEAKERS HEIGHT 3 PRE OUT speaker SURROUND Zone 2 Speaker pattern terminals terminals terminals terminals terminals (FRONT jacks CENTER connection/Bi- BACK connection FRONT A CENTER 1 SURROUND HEIGHT 1 HEIGHT 2 WIDE/ZONE SUBWOOFER OUT jack...
- Page 72 SPEAKERS SPEAKERS terminals Front B terminals SPEAKERS SPEAKERS SPEAKERS SPEAKERS SPEAKERS HEIGHT 3 PRE OUT speaker SURROUND Zone 2 Speaker pattern terminals terminals terminals terminals terminals (FRONT jacks CENTER connection/Bi- BACK connection FRONT A CENTER 1 SURROUND HEIGHT 1 HEIGHT 2 WIDE/ZONE SUBWOOFER OUT jack...
- Page 73 SPEAKERS SPEAKERS terminals Front B terminals SPEAKERS SPEAKERS SPEAKERS SPEAKERS SPEAKERS HEIGHT 3 PRE OUT speaker SURROUND Zone 2 Speaker pattern terminals terminals terminals terminals terminals (FRONT jacks CENTER connection/Bi- BACK connection FRONT A CENTER 1 SURROUND HEIGHT 1 HEIGHT 2 WIDE/ZONE SUBWOOFER OUT jack...
- Page 74 SPEAKERS SPEAKERS terminals Front B terminals SPEAKERS SPEAKERS SPEAKERS SPEAKERS SPEAKERS HEIGHT 3 PRE OUT speaker SURROUND Zone 2 Speaker pattern terminals terminals terminals terminals terminals (FRONT jacks CENTER connection/Bi- BACK connection FRONT A CENTER 1 SURROUND HEIGHT 1 HEIGHT 2 WIDE/ZONE SUBWOOFER OUT jack...
- Page 75 SPEAKERS SPEAKERS terminals Front B terminals SPEAKERS SPEAKERS SPEAKERS SPEAKERS SPEAKERS HEIGHT 3 PRE OUT speaker SURROUND Zone 2 Speaker pattern terminals terminals terminals terminals terminals (FRONT jacks CENTER connection/Bi- BACK connection FRONT A CENTER 1 SURROUND HEIGHT 1 HEIGHT 2 WIDE/ZONE SUBWOOFER OUT jack...
- Page 76 SPEAKERS SPEAKERS terminals Front B terminals SPEAKERS SPEAKERS SPEAKERS SPEAKERS SPEAKERS HEIGHT 3 PRE OUT speaker SURROUND Zone 2 Speaker pattern terminals terminals terminals terminals terminals (FRONT jacks CENTER connection/Bi- BACK connection FRONT A CENTER 1 SURROUND HEIGHT 1 HEIGHT 2 WIDE/ZONE SUBWOOFER OUT jack...
- Page 77 SPEAKERS SPEAKERS terminals Front B terminals SPEAKERS SPEAKERS SPEAKERS SPEAKERS SPEAKERS HEIGHT 3 PRE OUT speaker SURROUND Zone 2 Speaker pattern terminals terminals terminals terminals terminals (FRONT jacks CENTER connection/Bi- BACK connection FRONT A CENTER 1 SURROUND HEIGHT 1 HEIGHT 2 WIDE/ZONE SUBWOOFER OUT jack...
- Page 78 SPEAKERS SPEAKERS terminals Front B terminals SPEAKERS SPEAKERS SPEAKERS SPEAKERS SPEAKERS HEIGHT 3 PRE OUT speaker SURROUND Zone 2 Speaker pattern terminals terminals terminals terminals terminals (FRONT jacks CENTER connection/Bi- BACK connection FRONT A CENTER 1 SURROUND HEIGHT 1 HEIGHT 2 WIDE/ZONE SUBWOOFER OUT jack...
- Page 79 If you are connecting speakers to SURROUND BACK (FRONT B/BI-AMP/ZONE 2) terminals for Zone 2, front B speaker or bi-amplifier connection, set [Manual Speaker Settings] - [Surround Back Speaker Assign] to [Zone2], [Front B] or [BI-AMP] in the [Speaker Settings] menu and use the PRE OUT HEIGHT 2 jacks for height speakers. 5-037-021-11(1) Copyright 2022 Sony Corporation...
- Page 80 Help Guide Multi Channel AV Receiver STR-AZ7000ES/STR-AZ5000ES/STR-AZ3000ES Speaker patterns and terminals to be connected (for STR-AZ5000ES) When you connect speakers to the receiver, refer to the following table. You can use the following table to confirm the speaker patterns supported by the receiver as well as the speaker terminals to which the speakers of each speaker pattern are to be connected.
- Page 81 SPEAKERS SPEAKERS Front B terminals terminals SPEAKERS SPEAKERS SPEAKERS SPEAKERS PRE OUT speaker SURROUND HEIGHT 2 Zone 2 Speaker pattern terminals terminals terminals terminals jacks CENTER connection/Bi- BACK ZONE connection FRONT A CENTER 1 SURROUND HEIGHT 1 SUBWOOFER OUT jack amplifier (FRONT B/BI- 2/CENTER...
- Page 82 SPEAKERS SPEAKERS Front B terminals terminals SPEAKERS SPEAKERS SPEAKERS SPEAKERS PRE OUT speaker SURROUND HEIGHT 2 Zone 2 Speaker pattern terminals terminals terminals terminals jacks CENTER connection/Bi- BACK ZONE connection FRONT A CENTER 1 SURROUND HEIGHT 1 SUBWOOFER OUT jack amplifier (FRONT B/BI- 2/CENTER...
- Page 83 SPEAKERS SPEAKERS Front B terminals terminals SPEAKERS SPEAKERS SPEAKERS SPEAKERS PRE OUT speaker SURROUND HEIGHT 2 Zone 2 Speaker pattern terminals terminals terminals terminals jacks CENTER connection/Bi- BACK ZONE connection FRONT A CENTER 1 SURROUND HEIGHT 1 SUBWOOFER OUT jack amplifier (FRONT B/BI- 2/CENTER...
- Page 84 SPEAKERS SPEAKERS Front B terminals terminals SPEAKERS SPEAKERS SPEAKERS SPEAKERS PRE OUT speaker SURROUND HEIGHT 2 Zone 2 Speaker pattern terminals terminals terminals terminals jacks CENTER connection/Bi- BACK ZONE connection FRONT A CENTER 1 SURROUND HEIGHT 1 SUBWOOFER OUT jack amplifier (FRONT B/BI- 2/CENTER...
- Page 85 SPEAKERS SPEAKERS Front B terminals terminals SPEAKERS SPEAKERS SPEAKERS SPEAKERS PRE OUT speaker SURROUND HEIGHT 2 Zone 2 Speaker pattern terminals terminals terminals terminals jacks CENTER connection/Bi- BACK ZONE connection FRONT A CENTER 1 SURROUND HEIGHT 1 SUBWOOFER OUT jack amplifier (FRONT B/BI- 2/CENTER...
- Page 86 SPEAKERS SPEAKERS Front B terminals terminals SPEAKERS SPEAKERS SPEAKERS SPEAKERS PRE OUT speaker SURROUND HEIGHT 2 Zone 2 Speaker pattern terminals terminals terminals terminals jacks CENTER connection/Bi- BACK ZONE connection FRONT A CENTER 1 SURROUND HEIGHT 1 SUBWOOFER OUT jack amplifier (FRONT B/BI- 2/CENTER...
- Page 87 If you are connecting speakers to SURROUND BACK (FRONT B/BI-AMP/ZONE 2) terminals for Zone 2, front B speaker or bi-amplifier connection, set [Manual Speaker Settings] - [Surround Back Speaker Assign] to [Zone2], [Front B] or [BI-AMP] in the [Speaker Settings] menu and use the PRE OUT HEIGHT 2 jacks for height speakers. 5-037-021-11(1) Copyright 2022 Sony Corporation...
- Page 88 Help Guide Multi Channel AV Receiver STR-AZ7000ES/STR-AZ5000ES/STR-AZ3000ES Speaker patterns and terminals to be connected (for STR-AZ3000ES) When you connect speakers to the receiver, refer to the following table. You can use the following table to confirm the speaker patterns supported by the receiver as well as the speaker terminals to which the speakers of each speaker pattern are to be connected.
- Page 89 SPEAKERS terminals SPEAKERS Front B speaker SPEAKERS SPEAKERS SPEAKERS S-CENTER Speaker SURROUND terminals PRE OUT jacks Zone 2 connection/Bi- terminals terminals terminals pattern BACK (HEIGHT HEIGHT 1 SUBWOOFER connection amplifier FRONT A CENTER SURROUND terminal 2/FRONT B/BI- (ZONE 2) connection AMP/ZONE 2) Connected 3.1.2(FD)
- Page 90 SPEAKERS terminals SPEAKERS Front B speaker SPEAKERS SPEAKERS SPEAKERS S-CENTER Speaker SURROUND terminals PRE OUT jacks Zone 2 connection/Bi- terminals terminals terminals pattern BACK (HEIGHT HEIGHT 1 SUBWOOFER connection amplifier FRONT A CENTER SURROUND terminal 2/FRONT B/BI- (ZONE 2) connection AMP/ZONE 2) Connected (TR) Connected...
- Page 91 SPEAKERS terminals SPEAKERS Front B speaker SPEAKERS SPEAKERS SPEAKERS S-CENTER Speaker SURROUND terminals PRE OUT jacks Zone 2 connection/Bi- terminals terminals terminals pattern BACK (HEIGHT HEIGHT 1 SUBWOOFER connection amplifier FRONT A CENTER SURROUND terminal 2/FRONT B/BI- (ZONE 2) connection AMP/ZONE 2) output only Connected...
- Page 92 If you are connecting speakers to SURROUND BACK (HEIGHT 2/FRONT B/BI-AMP/ZONE 2) terminals for Zone 2, front B speaker or bi-amplifier connection, set [Manual Speaker Settings] - [Surround Back Speaker Assign] to [Zone2], [Front B] or [BI-AMP] in the [Speaker Settings] menu and use the PRE OUT HEIGHT 2 jacks for height speakers. 5-037-021-11(1) Copyright 2022 Sony Corporation...
- Page 93 When you connect the wireless rear speaker/subwoofer to the receiver for the first time, follow the steps below. Once the Sony wireless rear speaker/subwoofer turns on, it will automatically connect to the receiver. Select [Setup] - [Speaker Settings] from the home menu.
- Page 94 When you connect a TV compatible with the eARC or ARC function, turn on the eARC or ARC function and connect the eARC/ARC-compatible HDMI input jack of your TV to HDMI OUT A jack of the receiver. 5-037-021-11(1) Copyright 2022 Sony Corporation...
- Page 95 Controlling HDMI devices (Control for HDMI) Enjoying content of a connected device without turning on the receiver (Standby Through) Setting the HDMI audio signal output of connected devices (Audio Out) Setting HDMI signal formats (HDMI Signal Format) 5-037-021-11(1) Copyright 2022 Sony Corporation...
- Page 96 Help Guide Multi Channel AV Receiver STR-AZ7000ES/STR-AZ5000ES/STR-AZ3000ES Connecting a TV incompatible with the eARC and ARC functions using an HDMI jack Connect a TV to the HDMI OUT A jack. When you connect the receiver to a TV using the HDMI cable ( ), the receiver can output audio and video signals to the TV.
- Page 97 Optical digital cable (not supplied) HDMI cable (not supplied) Audio cable (not supplied) Note Be sure to use a Premium High Speed HDMI Cable with Ethernet, which supports bandwidths up to 18 Gbps. For video signals that require a high bandwidth such as 8K, 4K/120p, etc., be sure to use an Ultra High Speed HDMI Cable that supports bandwidths up to 48 Gbps.
- Page 98 About input/output of video signals Notes on connecting cables 5-037-021-11(1) Copyright 2022 Sony Corporation...
- Page 99 Help Guide Multi Channel AV Receiver STR-AZ7000ES/STR-AZ5000ES/STR-AZ3000ES Connecting a TV with jacks other than HDMI jacks Connect a TV to the VIDEO OUT MONITOR jack. In addition to connecting with the video cable ( ), it is necessary to connect with an optical digital audio cable ( ) or audio cable ( Be sure to disconnect the AC power cord (mains lead) before connecting cables.
- Page 100 When connecting a TV to the receiver via the TV AUDIO IN jacks of the receiver, set the sound output jack of the TV to “Fixed” if it can be switched between “Fixed” or “Variable.” Related Topic Notes on TV connection About input/output of video signals Notes on connecting cables 5-037-021-11(1) Copyright 2022 Sony Corporation...
- Page 101 Enjoying content of a connected device without turning on the receiver (Standby Through) Setting the HDMI audio signal output of connected devices (Audio Out) Selecting the method to use the HDMI OUT B (ZONE 2) jack (HDMI OUT B Mode) Setting HDMI signal formats (HDMI Signal Format) 5-037-021-11(1) Copyright 2022 Sony Corporation...
- Page 102 If you want to play the signal via the optical digital audio cable or audio cable even if the TV is eARC-compatible or ARC-compatible, see “Setting TV audio output (when not using the eARC/ARC function).” 5-037-021-11(1) Copyright 2022 Sony Corporation...
- Page 103 Set [Input Mode] according to how you connect the TV. For details on the setting, see “Switching between digital and analog audio (Input Mode).” Note Be sure to minimize the volume of the TV or activate the muting function of the TV. 5-037-021-11(1) Copyright 2022 Sony Corporation...
- Page 104 Hint Some Sony TVs have an S-CENTER SPEAKER IN jack. For details, see the operating instructions of your TV. If you connect your TV to the S-CENTER OUT jack of the receiver, press HOME, select [Setup] – [Speaker Settings] – [TV/Screen Center Settings] – [TV Center Speaker Mode] and then set to [Use TV as Center].
- Page 105 Multi Channel AV Receiver STR-AZ7000ES/STR-AZ5000ES/STR-AZ3000ES Connecting devices with HDMI jacks Before connecting cables, be sure to disconnect the AC power cord (mains lead). Connect to a supported HDMI terminal for the video signal of your device. Rear (for STR-AZ7000ES/STR-AZ5000ES) Rear (for STR-AZ3000ES)
- Page 106 Front (for STR-AZ7000ES/STR-AZ5000ES only) HDMI cable (not supplied)
- Page 107 HDMI jack of your TV is not compatible with the 8K video format.” Related Topic About input/output of video signals Notes on connecting cables About HDMI connections Changing the name for each input (Name) Connecting devices with jacks other than HDMI jacks 5-037-021-11(1) Copyright 2022 Sony Corporation...
- Page 108 Connect the AV device to the HDMI input jack that supports 8K video format on the TV with an HDMI cable (not supplied). Enable the eARC/ARC function on the TV. The receiver HDMI input jack that supports 8K video input HDMI cable (not supplied) Audio device 5-037-021-11(1) Copyright 2022 Sony Corporation...
- Page 109 Help Guide Multi Channel AV Receiver STR-AZ7000ES/STR-AZ5000ES/STR-AZ3000ES Connecting devices with jacks other than HDMI jacks Connect each device to the video jack and audio jack on the rear panel of the receiver. Before connecting cables, be sure to disconnect the AC power cord.
- Page 110 When connecting devices with video cables and audio cables...
- Page 111 Audio cable (not supplied) Video cable (not supplied) Optical digital cable (not supplied) Coaxial digital cable (not supplied) Hint...
- Page 112 The image quality depends on the connecting jack. We recommend that you connect your devices via an HDMI connection if they have HDMI jacks. Related Topic About input/output of video signals Notes on connecting cables Using other HDMI or digital audio input jacks (Input Assign) Changing the name for each input (Name) 5-037-021-11(1) Copyright 2022 Sony Corporation...
-
Page 113: Connecting A Usb Device
(USB) port. USB device Note The receiver cannot play iPhone, iPad, or iPod touch via USB connection. Related Topic Enjoying music stored on a USB device USB specifications and compatible USB devices Notes on USB devices 5-037-021-11(1) Copyright 2022 Sony Corporation... -
Page 114: Connecting The Antennas (Aerials)
FM wire antenna (aerial) (supplied) Note Be sure to fully extend the FM wire antenna (aerial). After connecting the FM wire antenna (aerial), keep it as horizontal as possible. Related Topic Listening to FM radio 5-037-021-11(1) Copyright 2022 Sony Corporation... - Page 115 Some flat-type LAN cables are easily affected by noise. We recommend using a Category 7 cable. Related Topic Notes on connecting cables Setting up a wired LAN connection Assigning a name to the receiver (Device Name Setting) 5-037-021-11(1) Copyright 2022 Sony Corporation...
- Page 116 Modem Internet Note Audio playback on a server may occasionally be interrupted if you use a wireless connection. Related Topic Setting up a wireless LAN connection Assigning a name to the receiver (Device Name Setting) 5-037-021-11(1) Copyright 2022 Sony Corporation...
-
Page 117: Inserting Batteries Into The Remote Control
If you do not intend to use the remote control for an extended period of time, remove the batteries to avoid possible damage from battery leakage and corrosion. When the receiver no longer responds to the remote control, replace both of the batteries with new ones. 5-037-021-11(1) Copyright 2022 Sony Corporation... - Page 118 Insert the mic stand pillar all the way into the mic stand bottom. Mic stand pillar Mic stand bottom Insert the mic stand top all the way into the mic stand pillar. Mic stand top Mic stand pillar 5-037-021-11(1) Copyright 2022 Sony Corporation...
- Page 119 Fully insert the plug of the calibration microphone into the CALIBRATION MIC jack. If the calibration microphone is not firmly connected, it may not be possible to measure correctly. Install the calibration microphone horizontally so that L (left) and R (right) are at the same height. Related Topic Assembling the calibration mic stand 5-037-021-11(1) Copyright 2022 Sony Corporation...
-
Page 120: Turning On The Receiver
You cannot turn on the receiver until the [PLEASE WAIT] display disappears. Turn on the TV, and then switch the input of the TV to which the receiver is connected. Press (power) to turn on the receiver. 5-037-021-11(1) Copyright 2022 Sony Corporation... - Page 121 Magnets are attached to both the front panel and front cover. Do not place cards with magnetic stripes, such as bank cards or ID passes, near the receiver. These cards may become unusable due to the effects of the magnets on the receiver. 5-037-021-11(1) Copyright 2022 Sony Corporation...
- Page 122 The D.C.A.C. IX (Digital Cinema Auto Calibration) is designed to achieve proper sound balance for your room. However, you can adjust the speaker levels manually according to your preference using [Manual Speaker Settings] - [Test Tone] in the [Speaker Settings] menu. Related Topic Outputting a test tone from each speaker (Test Tone) 5-037-021-11(1) Copyright 2022 Sony Corporation...
- Page 123 Depending on the characteristics of the subwoofer you are using, the setup distance value may be different from the actual position. Related Topic Connecting the calibration microphone Selecting the speaker pattern (Speaker Pattern) Assigning the surround back speaker terminals (Surround Back Speaker Assign) 5-037-021-11(1) Copyright 2022 Sony Corporation...
-
Page 124: Auto Calibration Operation
Press the input buttons on the remote control or on the receiver. Press HOME, AMP MENU, HDMI OUT or (muting) on the remote control. Press SPEAKERS on the receiver. Change the volume level. Related Topic Connecting the calibration microphone 5-037-021-11(1) Copyright 2022 Sony Corporation... -
Page 125: Selecting The Front Speakers
[SPEAKERS OFF] appears on the display panel. No audio signals are output from any speaker terminals, or the PRE OUT jacks. To select [SP B] or [SP AB], set the assignment for the SPEAKERS SURROUND BACK terminals to [Front B] by using [Manual Speaker Settings] - [Surround Back Speaker Assign] in the [Speaker Settings] menu. 5-037-021-11(1) Copyright 2022 Sony Corporation... - Page 126 Hint The measurement results may vary depending on the position of the subwoofer. However, continuing to use the receiver with that value does not cause problems. Related Topic List of messages after Auto Calibration measurements 5-037-021-11(1) Copyright 2022 Sony Corporation...
- Page 127 You can enjoy various content such as video and audio from AV devices by connecting to the receiver. This receiver has HDMI jacks that support HDCP 2.3, so you can also enjoy 4K/8K content of satellite broadcast or streaming services. Playing AV devices 5-037-021-11(1) Copyright 2022 Sony Corporation...
- Page 128 When [OPTIONS] appears in the lower left portion of the TV screen, you can display the options menu by pressing OPTIONS and select a related function. To return to the previous screen, press BACK. To exit the menu, press HOME to display the home menu, then press HOME again. 5-037-021-11(1) Copyright 2022 Sony Corporation...
-
Page 129: Viewing Information On The Display Panel
During BLUETOOTH TX mode: BLUETOOTH device name - Sound field currently applied - Volume level - Input you are selecting Hint To set this function to [Off], press AMP MENU and ENTER on the receiver at the same time. Related Topic Indicators on the display panel 5-037-021-11(1) Copyright 2022 Sony Corporation... - Page 130 Turn the knob quickly. Press and hold one of the buttons. To make fine adjustments Turn the knob slowly. Press one of the buttons and release it immediately. Related Topic Selecting a sound field (Sound Field) 5-037-021-11(1) Copyright 2022 Sony Corporation...
- Page 131 998 files/folders in a single layer Audio content with DRM (Digital Rights Management) copyright protection cannot be played on this receiver. Related Topic Connecting a USB device USB specifications and compatible USB devices 5-037-021-11(1) Copyright 2022 Sony Corporation...
- Page 132 When formatting a USB device, be sure to format using the model itself or the dedicated formatting software for that model. When connecting a USB device to the receiver, be sure to connect after the display “Creating Library” or “Creating Database” on the USB device has disappeared. 5-037-021-11(1) Copyright 2022 Sony Corporation...
- Page 133 If a folder that has no files is selected, [There is no playable file.] appears. When playing a very long track or a track with a large file size, some operations may cause delays in playback. 5-037-021-11(1) Copyright 2022 Sony Corporation...
-
Page 134: Listening To Fm Radio
Preset Name Input (When highlighted in the preset list) Switching [FM Mode] Related Topic Connecting the antennas (aerials) Tuning to a station directly (Direct Tuning) Naming preset stations (Preset Name Input) The FM reception is poor. 5-037-021-11(1) Copyright 2022 Sony Corporation... -
Page 135: Presetting Fm Radio Stations (Preset Memory)
Listening to the preset station On the FM screen, press (right) to move the highlight to the preset list and select the station you want to listen to. Related Topic Naming preset stations (Preset Name Input) 5-037-021-11(1) Copyright 2022 Sony Corporation... - Page 136 The name you entered is registered. Canceling naming input Press BACK before Step 6. Note Some letters that can be displayed on the TV screen cannot be displayed on the display panel. Related Topic Presetting FM radio stations (Preset Memory) 5-037-021-11(1) Copyright 2022 Sony Corporation...
-
Page 137: Press (Enter)
Make sure you have entered the right frequency. If not, repeat steps 3 and 4. If you still cannot tune to a station, the frequency may not be in use in your area. Hint The tuning scale for direct tuning is 100 kHz. 5-037-021-11(1) Copyright 2022 Sony Corporation... - Page 138 You can enjoy the sound of an AV device connected to the receiver with BLUETOOTH headphones or BLUETOOTH speakers. If the sound is interrupted, move the BLUETOOTH receiver closer to this receiver. Listening with BLUETOOTH headphones/speakers (Pairing operation) For details about the compatible BLUETOOTH version and profiles of this receiver, see “Compatible BLUETOOTH version and profiles.” 5-037-021-11(1) Copyright 2022 Sony Corporation...
- Page 139 In the BLUETOOTH wireless connection, audio data and signals for operation are transmitted and received for processing between the BLUETOOTH device and this receiver. As a result, the response to the operation may be delayed, or there may be a delay before the start of playback unlike the case of playback on the BLUETOOTH device itself. 5-037-021-11(1) Copyright 2022 Sony Corporation...
- Page 140 For details, refer to the operating instructions of your BLUETOOTH device. A list of detected devices may appear on the BLUETOOTH device display depending on the type of BLUETOOTH device. This receiver is displayed as [STR-AZ7000ES XXXXXX]/[STR-AZ5000ES XXXXXX]/[STR-AZ3000ES XXXXXX] (*).
- Page 141 These operations may not work with certain BLUETOOTH devices. Also, the actual operation may differ depending on the BLUETOOTH device you are using. The BLUETOOTH TX/RX on the remote control does not work when the BLUETOOTH function is already activated or when [Bluetooth Mode] is set to [Off]. 5-037-021-11(1) Copyright 2022 Sony Corporation...
- Page 142 If the BLUETOOTH device in step 3 is the most recently connected device, you can connect it to this receiver automatically by simply pressing BLUETOOTH RX/TX on the remote control. In this case, you do not need to perform step 4. Related Topic Selecting the BLUETOOTH mode (Bluetooth Mode) Checking the BLUETOOTH device list (Device List) 5-037-021-11(1) Copyright 2022 Sony Corporation...
- Page 143 If you are not sure whether an in-wall access point can be used as a router, check with your apartment manager or Internet service provider, etc. LAN port on the wall LAN cable Router Wireless LAN 5-037-021-11(1) Copyright 2022 Sony Corporation...
- Page 144 Some flat-type LAN cables are easily affected by noise. We recommend using a Category 7 cable. Related Topic Notes on connecting cables Setting up a wired LAN connection Assigning a name to the receiver (Device Name Setting) 5-037-021-11(1) Copyright 2022 Sony Corporation...
- Page 145 When the receiver is successfully connected to the network, [NETWORK] lights up on the display panel of the receiver. Hint See [Network Connection Status] in the [Network Settings] menu when checking the network settings. Related Topic Connecting a LAN cable (for wired LAN connections only) 5-037-021-11(1) Copyright 2022 Sony Corporation...
- Page 146 Modem Internet Note Audio playback on a server may occasionally be interrupted if you use a wireless connection. Related Topic Setting up a wireless LAN connection Assigning a name to the receiver (Device Name Setting) 5-037-021-11(1) Copyright 2022 Sony Corporation...
- Page 147 If the connection to the network has failed, select [Advanced Settings], and then follow the on-screen instructions to set the network name (SSID), wireless LAN router security method, and IP address. Hint See [Network Connection Status] in the [Network Settings] menu when checking the network settings. Related Topic Preparing a wireless LAN antenna (for wireless LAN connections only) 5-037-021-11(1) Copyright 2022 Sony Corporation...
- Page 148 Setting up a wireless network connection Using Sony | Music Center The Sony | Music Center app allows you to connect the receiver to the same network with your mobile device. For details, see the Help in the Sony | Music Center app or visit the following URL.
- Page 149 2-channel audio or 360 Reality Audio compatible music, [360RAcast] appears. Note With Sony | Music Center, you can check the streaming services that provide 360 Reality Audio compatible music. On Sony | Music Center, select the receiver and then select [Settings] - [About 360 Reality Audio] - [Next].
- Page 150 This receiver is compatible with a Google Assistant-enabled device with Chromecast built-in so you can control your music with your voice. Simply link the receiver to the Google Home app on your mobile device. For details, refer to the Google Home app. 5-037-021-11(1) Copyright 2022 Sony Corporation...
- Page 151 Depending on the streaming service, you need to subscribe to the premium plan to play 360 Reality Audio compatible music. Note With Sony | Music Center, check 360 Reality Audio delivery streaming services supported by the receiver. On Sony | Music Center, select the receiver and then select [Settings] - [About 360 Reality Audio] - [Next].
-
Page 152: Using Spotify
If [Network/Bluetooth Standby] is set to [On], you can play music quickly even when the receiver is in standby mode. An image such as an album cover appears in the playback screen if the played content supports the feature. 5-037-021-11(1) Copyright 2022 Sony Corporation... -
Page 153: Using Sony | Music Center
Operate by following the Sony | Music Center screen. Note Use Sony | Music Center of the latest version. If you cannot connect the receiver and a BLUETOOTH device via the BLUETOOTH function, uninstall Sony | Music Center and try to connect via the BLUETOOTH function again. - Page 154 If you add the receiver to the Home app on the iOS device, you can stream music to the receiver by talking to Siri. Note Since the receiver does not have a microphone, you cannot talk to the receiver to operate it. Not all features of Siri are available on the receiver. 5-037-021-11(1) Copyright 2022 Sony Corporation...
-
Page 155: Listening To Music On Your Pc Via A Home Network
Listen to music on a PC by using Sony | Music Center. You can play music files stored on the PC by operating Sony | Music Center that is installed to a mobile device such as a smartphone or tablet. For details of Sony | Music Center, refer to the following URL. - Page 156 The receiver does not play coded files such as DRM and Lossless. The receiver can recognize the following files or folders stored in the home network server: up to folders in the 19th layer up to 999 files/folders in a single layer 5-037-021-11(1) Copyright 2022 Sony Corporation...
- Page 157 The input source is switched to the one as selected in step 3 and the audio content of the Sonos device is played back at the set volume level and in the selected zone. For information on the operation of Sonos devices and the Sonos App, please visit the Sonos website. 5-037-021-11(1) Copyright 2022 Sony Corporation...
- Page 158 Help Guide Multi Channel AV Receiver STR-AZ7000ES/STR-AZ5000ES/STR-AZ3000ES What you can do with multi-zone features Enjoying sound in two locations via an analog connection - Zone 2 You can enjoy sound at the same time in another room by connecting the speakers that are located in another room to the SPEAKERS HEIGHT 1 (ZONE 2) (*) or SPEAKERS SURROUND BACK terminals.
- Page 159 Enjoying sound using another amplifier in Zone 3 Connecting another amplifier in Zone 2 Selecting the method to use the HDMI OUT B (ZONE 2) jack (HDMI OUT B Mode) Enjoying video and sound on the amplifier and TV in Zone 2 5-037-021-11(1) Copyright 2022 Sony Corporation...
- Page 160 Source signal from the HDMI IN 5 (VIDEO) jack (for STR-AZ3000ES) (*1) VIDEO Source signal from the HDMI IN 7 (VIDEO) jack (for STR-AZ7000ES/STR-AZ5000ES) on the front panel (*1) Source signal from the HDMI IN 5 (AUX) jack (for STR-AZ7000ES/STR-AZ5000ES) (*1)
- Page 161 Source signal from the HDMI IN 5 (VIDEO) jack (for STR-AZ3000ES) VIDEO(*2) Source signal from the HDMI IN 7 (VIDEO) jack (for STR-AZ7000ES/STR-AZ5000ES) on the front panel Source signal from the HDMI IN 5 (AUX) jack (for STR-AZ7000ES/STR-AZ5000ES) Source signal from the DIGITAL OPTICAL IN 1 (AUX) jack (*1)
- Page 162 When [FM TUNER] is selected at the same time in the main zone and Zone 3, the item most recently selected will be set. Related Topic Selecting the method to use the HDMI OUT B (ZONE 2) jack (HDMI OUT B Mode) 5-037-021-11(1) Copyright 2022 Sony Corporation...
- Page 163 Help Guide Multi Channel AV Receiver STR-AZ7000ES/STR-AZ5000ES/STR-AZ3000ES Connecting another amplifier in Zone 2 You can enjoy image and sound from a device connected to the receiver in a zone other than the main zone. For example, you can watch a DVD in the main zone and listen to a CD in Zone 2.
- Page 164 Related Topic Notes on connecting cables Selecting the method to use the HDMI OUT B (ZONE 2) jack (HDMI OUT B Mode) Setting the Zone 2 HDMI audio output of connected devices (Zone2 Audio Out) 5-037-021-11(1) Copyright 2022 Sony Corporation...
- Page 165 Turn on the TV and the receiver in the main zone. Select [Setup] - [Zone Settings] from the home menu. Select [Zone2 Settings]. Follow the instructions on the TV screen to make connections and settings. Select [Confirm changes]. 5-037-021-11(1) Copyright 2022 Sony Corporation...
- Page 166 “Available input sources for each zone.” Hint A dedicated App for this model Sony | Music Center enables easier zone operation such as changing the settings or switching the zone inputs from your smartphone or tablet. Related Topic Connecting another amplifier in Zone 2...
- Page 167 Installing 7.1-channel speaker system with Zone 2 connection Selecting the speaker pattern (Speaker Pattern) Assigning the surround back speaker terminals (Surround Back Speaker Assign) Enjoying sound using another amplifier in Zone 3 Notes on connecting cables How to connect speaker cables 5-037-021-11(1) Copyright 2022 Sony Corporation...
- Page 168 Turn on the TV and the receiver in the main zone. Select [Setup] - [Zone Settings] from the home menu. Select [Zone2 Settings]. Follow the instructions on the TV screen to make connections and settings. Select [Confirm changes]. 5-037-021-11(1) Copyright 2022 Sony Corporation...
- Page 169 (power) on the remote control to turn off the Zone 2 power. To exit Zone 2 operation Select [Zone Controls] - [Zone2] - [Power] from the home menu, then select [Off]. Available inputs and functional restrictions in Zone 2 “Available input sources for each zone.” 5-037-021-11(1) Copyright 2022 Sony Corporation...
- Page 170 Only devices connected to the analog audio input jacks and the built-in tuner (FM) can output signals to Zone 3. No signals are output from devices connected to only the digital input jacks. Related Topic Notes on connecting cables 5-037-021-11(1) Copyright 2022 Sony Corporation...
- Page 171 Turn on the TV and the receiver in the main zone. Select [Setup] - [Zone Settings] from the home menu. Select [Zone3 Settings]. Follow the instructions on the TV screen to make connections and settings. Select [Confirm changes]. 5-037-021-11(1) Copyright 2022 Sony Corporation...
- Page 172 “Available input sources for each zone.” Hint A dedicated App Sony | Music Center enables easier zone operation such as changing the settings or switching the zone inputs from your smartphone or tablet. Related Topic Connecting 7.1-channel speaker system with Zone 2 connection...
- Page 173 You can also press 360SSM on the remote control to activate or deactivate the [360 Spatial Sound Mapping] function. You can also select [360 Spatial Sound Mapping] from the [Audio Settings] in the [Setup] menu. Related Topic Resetting sound fields to the default settings 5-037-021-11(1) Copyright 2022 Sony Corporation...
- Page 174 Select [Sound Effects] - [Sound Field] from the home menu. Select the sound field you want. Sony recommends selecting a sound field labeled [MOVIE] for movies and a sound field labeled [MUSIC] for music. For details on each sound field, see “Selectable sound fields and their...
- Page 175 7.1-channel surround system. The sound level of surround and surround back speakers are adjusted automatically for optimum balance. Atmos is decoded as Dolby TrueHD or Dolby Digital Plus when a sound field other than [Multi Stereo], [A.F.D.], [A.F.D. Movie] or [Dolby Mode] is selected. 5-037-021-11(1) Copyright 2022 Sony Corporation...
- Page 176 Audio Enhancer ○ ○ ○ ○ ○ ○ ENHANCER Note When no sound is heard, check that all the speakers are securely connected to the correct speaker terminals and the correct speaker pattern is selected. 5-037-021-11(1) Copyright 2022 Sony Corporation...
-
Page 177: Resetting Sound Fields To The Default Settings
Be sure to use the buttons on the receiver to perform this operation. Hold down MUSIC and press (power) on the receiver. [S.F. INITIALIZED!] appears on the display panel and all sound fields are reset to their default setting. 5-037-021-11(1) Copyright 2022 Sony Corporation... - Page 178 Depending on the audio format, the receiver may play signals at a lower sampling frequency than the original sampling frequency of the input signals. Hint You can also select [Equalizer] in [Setup] - [Speaker Settings] - [Manual Speaker Settings] from the home menu. 5-037-021-11(1) Copyright 2022 Sony Corporation...
- Page 179 You can also switch the function on/off by pressing IN-CEILING SP on the receiver. To obtain optimal effects in the listening environment, set [Manual Speaker Settings] - [Height] - [Ceiling] from [Speaker Settings] menu and perform Auto Calibration. 5-037-021-11(1) Copyright 2022 Sony Corporation...
-
Page 180: Enjoying High-Fidelity Sound (Pure Direct)
Hint You can also use PURE DIRECT on the remote control or the receiver to turn the [Pure Direct] function on or off. You can also select [Pure Direct] from [Audio Settings] in [Setup] menu. 5-037-021-11(1) Copyright 2022 Sony Corporation... - Page 181 When you select [TV] for the input source, press AMP MENU on the remote control to set this function using the menu on the display panel. Related Topic Operating the receiver with the menu on the display panel 5-037-021-11(1) Copyright 2022 Sony Corporation...
- Page 182 The Control for HDMI function is a function that enables operation of devices connected with an HDMI (High-Definition Multimedia Interface) cable by interlocking them. Although this function works for devices compatible with the Control for HDMI function, it may not work if connecting devices other than those manufactured by Sony.
- Page 183 Operating the receiver by interlocking with a TV compatible with the “BRAVIA” Sync function “BRAVIA” Sync is an extended function developed by Sony based on the Control for HDMI function. By connecting “BRAVIA” Sync-compatible devices such as a TV or a Blu-ray Disc player using an HDMI cable, you can control the devices by interlocking them with each other.
- Page 184 When [HDMI OUT B Mode] is set to [Zone2], the HDMI signals are output to the Zone 2 even if [HDMI OFF] is selected. Hint You can also use HDMI OUT on the receiver to switch the TV. Related Topic Selecting the method to use the HDMI OUT B (ZONE 2) jack (HDMI OUT B Mode) 5-037-021-11(1) Copyright 2022 Sony Corporation...
-
Page 185: Switching Between Digital And Analog Audio (Input Mode)
Coaxial: Specifies input of digital audio signals to the DIGITAL COAXIAL IN (SA-CD/CD) jack. Analog: Specifies input of analog audio signals to the AUDIO IN (L/R) jacks. Note Depending on the input, [Optical], [Coaxial] or [Analog] may not be displayed. 5-037-021-11(1) Copyright 2022 Sony Corporation... - Page 186 (right) repeatedly to select [HDMI] or [OPTICAL/COAXIAL]. Press (up) / (down) repeatedly to select the jack you want to assign. Assignable HDMI jacks (for STR-AZ7000ES/STR-AZ5000ES) IN 1: GAME (*1), MEDIA BOX, BD/DVD, SAT/CATV, VIDEO, AUX, TV, SA-CD/CD IN 2: GAME, MEDIA BOX (*1), BD/DVD, SAT/CATV, VIDEO, AUX, TV, SA-CD/CD...
- Page 187 For example, by saving the settings in the [1: Movie] preset as follows, you can switch the settings of the receiver all at one time without switching each setting for [Input], [Sound Field], and [Calibration Type] individually. Input: BD/DVD Sound Field: Dolby Mode Calibration Type: No change Related Topic Saving the settings to a preset 5-037-021-11(1) Copyright 2022 Sony Corporation...
- Page 188 You can overwrite [1: Movie] with the present settings by holding down CUSTOM1 for 3 seconds in the same way as you do when you select [Import] from the menu. Related Topic Recalling the settings saved to the scene Items for which you can save settings and the default values for each item Available input sources for each zone 5-037-021-11(1) Copyright 2022 Sony Corporation...
- Page 189 Select a preset you want. Hint You can recall the setting(s) saved for [1: Movie] directly by pressing CUSTOM1 on the remote control. Related Topic Items for which you can save settings and the default values for each item 5-037-021-11(1) Copyright 2022 Sony Corporation...
- Page 190 Top Center Treble (*3): – Top Rear Bass (*3): – Top Rear Treble (*3): – Bottom Front Bass (*3): – Bottom Front Treble (*3): – Bottom Center Bass (*3): – Bottom Center Treble (*3): – for STR-AZ3000ES for STR-AZ7000ES/STR-AZ5000ES for STR-AZ7000ES...
- Page 191 Related Topic Saving the settings to a preset 5-037-021-11(1) Copyright 2022 Sony Corporation...
- Page 192 Set [Power] of [Zone2] or [Zone3] in the [Zone Controls] menu to [Off]. Related Topic Controlling HDMI devices (Control for HDMI) Enjoying content of a connected device without turning on the receiver (Standby Through) Enjoying sound using another amplifier in Zone 3 5-037-021-11(1) Copyright 2022 Sony Corporation...
-
Page 193: Setting Up The Receiver Using The [Easy Setup]
(right) to select an item, and then press (enter). Related Topic About Auto Calibration Before you perform Auto Calibration Auto Calibration operation Selecting the front speakers Checking Auto Calibration results Setting up a network (Internet Settings) 5-037-021-11(1) Copyright 2022 Sony Corporation... - Page 194 Select the input name you want to change in [Name]. An on-screen keyboard appears on the TV screen. Press (up)/ (down)/ (left)/ (right) and (enter) to select characters one by one to enter the name. Select [Enter]. The name you entered is registered. 5-037-021-11(1) Copyright 2022 Sony Corporation...
- Page 195 Trigger1/Trigger2/Trigger3 (for STR-AZ7000ES/STR-AZ5000ES) Trigger (for STR-AZ3000ES) You can select input options for use of the 12V Trigger function. Related Topic Changing the name for each input (Name) Using other HDMI or digital audio input jacks (Input Assign) 5-037-021-11(1) Copyright 2022 Sony Corporation...
- Page 196 Coaxial: Specifies input of digital audio signals to the DIGITAL COAXIAL IN (SA-CD/CD) jack. Analog: Specifies input of analog audio signals to the AUDIO IN (L/R) jacks. Note Depending on the input, [Optical], [Coaxial] or [Analog] may not be displayed. 5-037-021-11(1) Copyright 2022 Sony Corporation...
- Page 197 (right) repeatedly to select [HDMI] or [OPTICAL/COAXIAL]. Press (up) / (down) repeatedly to select the jack you want to assign. Assignable HDMI jacks (for STR-AZ7000ES/STR-AZ5000ES) IN 1: GAME (*1), MEDIA BOX, BD/DVD, SAT/CATV, VIDEO, AUX, TV, SA-CD/CD IN 2: GAME, MEDIA BOX (*1), BD/DVD, SAT/CATV, VIDEO, AUX, TV, SA-CD/CD...
- Page 198 You can turn on or off the low-pass filter for the subwoofer output. The low-pass filter works when PCM signals are input via an HDMI connection. You can set the function for each input to which an HDMI input jack is assigned independently. Turn the function on if you connect a subwoofer without the crossover frequency function. 5-037-021-11(1) Copyright 2022 Sony Corporation...
-
Page 199: Subwoofer Level
+10 dB: Adjusts the level by +10 dB with respect to the input signal. 0 dB: Does not adjust the level with respect to the input signal. Preset Gain Level You can preset the gain level for each input. 5-037-021-11(1) Copyright 2022 Sony Corporation... - Page 200 [Speaker Settings], the changes are reflected in the current speaker configuration ([Preset1] or [Preset2]) and saved. Select [Setup] - [Speaker Settings] from the home menu. Select [Speaker Configuration Selection]. Select the speaker configuration you want. Preset1 Preset2 5-037-021-11(1) Copyright 2022 Sony Corporation...
- Page 201 You can check the information saved in the preset selected in [Speaker Configuration Selection]. Select [Setup] - [Speaker Settings] from the home menu. Select [Speaker Configuration Information]. Select the speaker configuration you want to check. Preset1 Preset2 5-037-021-11(1) Copyright 2022 Sony Corporation...
- Page 202 Press the input buttons on the remote control or on the receiver. Press (muting). Press SPEAKERS on the receiver. Connect your BLUETOOTH headphones/speakers. Press HDMI OUT. Press AMP MENU. Press HOME, WATCH, or LISTEN. Press BACK. Change the volume level. 5-037-021-11(1) Copyright 2022 Sony Corporation...
- Page 203 [Direct] is being used and an analog input is selected. [Auto Calibration] has not been performed. The receiver may play signals at a lower sampling frequency than the actual sampling frequency of the input signals, depending on the audio format. 5-037-021-11(1) Copyright 2022 Sony Corporation...
- Page 204 Select the setting you want. Full Flat: Makes the measurement of frequency from each speaker flat. Engineer: Sets to “the Sony listening room standard” frequency characteristics. Front Reference: Adjusts the characteristics of all of the speakers to match the characteristics of the front speaker.
- Page 205 STR-AZ7000ES/STR-AZ5000ES/STR-AZ3000ES Selecting a wireless speaker connection mode (Link mode) This receiver supports connection with an optional Sony wireless rear speaker/subwoofer. You can set the connection method for the wireless rear speaker/subwoofer. Select [Setup] - [Speaker Settings] from the home menu.
- Page 206 When you connect the Sony wireless rear speaker/subwoofer to the receiver for the first time, follow the steps below. Once connected, the Sony wireless rear speaker/subwoofer will be automatically connected to the receiver the next time you turn on the power.
- Page 207 Checking the connection status of wireless speakers (Check wireless connection) You can check the connection status of the wireless rear speaker/subwoofer. Select [Setup] - [Speaker Settings] from the home menu. Select [Wireless Speaker Settings]. Select [Check wireless connection]. 5-037-021-11(1) Copyright 2022 Sony Corporation...
- Page 208 Off: The frequency band is fixed to avoid interference during wireless connection. If sound dropping occurs while [On] is selected, it may be improved by selecting [Off]. Hint If you want to optimize the frequency immediately, switch this function to [Off], and then [On]. 5-037-021-11(1) Copyright 2022 Sony Corporation...
- Page 209 Selecting the playback quality of the wireless speaker (Wireless Playback Quality) You can select the playback quality of the wireless speaker. Select [Setup] - [Speaker Settings] from the home menu. Select [Wireless Speaker Settings]. Select [Wireless Playback Quality]. Select [Sound Quality] or [Connection]. 5-037-021-11(1) Copyright 2022 Sony Corporation...
- Page 210 Checking the software version of the wireless speakers (Software Version) You can check the software version of the wireless speakers. Select [Setup] - [Speaker Settings] from the home menu. Select [Wireless Speaker Settings]. Select [Software Version]. 5-037-021-11(1) Copyright 2022 Sony Corporation...
- Page 211 Select [TV/Screen Center Settings]. Select [TV Center Speaker Mode]. Select [On]. Note This function does not work in the following cases: [Speaker Pattern] is set to a setting without center speaker. [Bluetooth Mode] is set to [Transmitter]. 5-037-021-11(1) Copyright 2022 Sony Corporation...
- Page 212 [Height/Overhead Speakers] is set to other than [FH] (Front High Speaker) in [Speaker Pattern] setting. The [2ch Stereo] or [Multi Stereo] sound field is being used. [In-Ceiling Speaker Mode] is set to [Front & Center] or [Front]. 5-037-021-11(1) Copyright 2022 Sony Corporation...
- Page 213 You can also switch the function on/off by pressing IN-CEILING SP on the receiver. To obtain optimal effects in the listening environment, set [Manual Speaker Settings] - [Height] - [Ceiling] from [Speaker Settings] menu and perform Auto Calibration. 5-037-021-11(1) Copyright 2022 Sony Corporation...
- Page 214 You can set a test tone by pressing the TEST button on the remote control. In this case, you can only use the display panel for the operation. To adjust the level of all speakers at the same time, press (volume) +/–. You can also use MASTER VOLUME on the receiver. The adjusted value is shown on the TV screen during adjustment. 5-037-021-11(1) Copyright 2022 Sony Corporation...
- Page 215 Surround Back (R), Height1 (L), Height1 (R), Height2 (L), Height2 (R), Height3 (L) (*4), Height3 (R) (*4), Subwoofer for STR-AZ7000ES/STR-AZ5000ES for STR-AZ3000ES [TV Center] is displayed when the configuration including TV Center (S-Center) is selected in the [Speaker Pattern] setting. for STR-AZ7000ES Adjust the level. 5-037-021-11(1) Copyright 2022 Sony Corporation...
- Page 216 Depending on the audio format, the receiver may play signals at a lower sampling frequency than the original sampling frequency of the input signals. Hint You can also select [Equalizer] in [Setup] - [Speaker Settings] - [Manual Speaker Settings] from the home menu. 5-037-021-11(1) Copyright 2022 Sony Corporation...
- Page 217 Height1 (L), Height1 (R), Height2 (L), Height2 (R), Height3 (L) (*3), Height3 (R) (*3), Subwoofer for STR-AZ3000ES for STR-AZ7000ES/STR-AZ5000ES for STR-AZ7000ES Adjust the distance. Note Some parameters may not be available depending on the speaker pattern setting. When [Bluetooth Mode] is set to [Transmitter], this function cannot be set. 5-037-021-11(1) Copyright 2022 Sony Corporation...
- Page 218 Height1 (L), Height1 (R), Height2 (L), Height2 (R), Height3 (L) (*3), Height3 (R) (*3) for STR-AZ3000ES for STR-AZ7000ES/STR-AZ5000ES for STR-AZ7000ES Adjust the distance. Note Some parameters may not be available depending on the speaker pattern setting. When [Bluetooth Mode] is set to [Transmitter], this function cannot be set. 5-037-021-11(1) Copyright 2022 Sony Corporation...
- Page 219 Back (L), Surround Back (R), Height1 (L), Height1 (R), Height2 (L), Height2 (R), Height3 (L) (*3), Height3 (R) (*3), Subwoofer for STR-AZ3000ES for STR-AZ7000ES/STR-AZ5000ES for STR-AZ7000ES Adjust the height. Note When [Bluetooth Mode] is set to [Transmitter], this function cannot be set. 5-037-021-11(1) Copyright 2022 Sony Corporation...
- Page 220 The surround back speakers will be set to the same setting as that of the surround speakers. When the front speakers are set to [Small], the center, front wide (for STR-AZ7000ES), surround, height1, height2 and height3 (for STR-AZ7000ES) speakers are also automatically set to [Small].
- Page 221 Select the speaker for which you want to adjust the crossover frequency on the screen. Set the crossover frequency of the selected speaker. Note The surround back speakers will be set to the same setting as that of the surround speakers. 5-037-021-11(1) Copyright 2022 Sony Corporation...
- Page 222 [Speaker Pattern] is set to a setting including the surround speaker or surround back speaker. The subwoofer is set in [Speaker Pattern]. [Bluetooth Mode] is set to other than [Transmitter]. Related Topic Selecting the speaker pattern (Speaker Pattern) 5-037-021-11(1) Copyright 2022 Sony Corporation...
- Page 223 [Bluetooth Mode] is set to other than [Transmitter]. Related Topic Connecting 5.1.2-channel speaker system with bi-amplifier connection Connecting 7.1-channel speaker system with Zone 2 connection Selecting the speaker pattern (Speaker Pattern) Selecting the front speakers 5-037-021-11(1) Copyright 2022 Sony Corporation...
- Page 224 SPEAKERS HEIGHT 1 (ZONE 2) terminals (for STR-AZ3000ES) SPEAKERS HEIGHT 2 (ZONE 2/CENTER 2 (R ONLY)) terminals (for STR-AZ5000ES) SPEAKERS HEIGHT 3 (FRONT WIDE/ZONE 2/CENTER 2 (R ONLY)) terminals (for STR-AZ7000ES) Select [Setup] - [Speaker Settings] from the home menu.
- Page 225 TV screen. Select the height/overhead speaker appropriate to your speaker configuration under [Height/Overhead Speakers] by referring to the speaker installation example displayed on the TV screen. Select [Save]. Related Topic Speaker configuration and speaker pattern settings 5-037-021-11(1) Copyright 2022 Sony Corporation...
- Page 226 Select the speaker you want from the list on the right side of the screen The position of the speaker and the corresponding terminals on the receiver to which the speaker should be connected are shown on the screen. 5-037-021-11(1) Copyright 2022 Sony Corporation...
- Page 227 If you are not sure of the impedances of the speakers, refer to the operating instructions supplied with your speakers. (This information is often on the back of the speaker.) When you connect speakers all with a nominal impedance of 8 ohms or higher, set this function to [8 Ω]. When connecting other types of speakers, set it to [4 Ω]. 5-037-021-11(1) Copyright 2022 Sony Corporation...
- Page 228 Select [Setup] - [Speaker Settings] from the home menu. Select [Manual Speaker Settings]. Select [Distance Unit]. Select the setting you want. meter: The distance is displayed in meters. feet: The distance is displayed in feet. 5-037-021-11(1) Copyright 2022 Sony Corporation...
- Page 229 “Setting up a wired LAN connection” or “Setting up a wireless LAN connection.” Hint See [Network Connection Status] in [Network Settings] menu when checking the network settings. Related Topic Checking the network information (Network Connection Status) 5-037-021-11(1) Copyright 2022 Sony Corporation...
- Page 230 Help Guide Multi Channel AV Receiver STR-AZ7000ES/STR-AZ5000ES/STR-AZ3000ES Checking the network information (Network Connection Status) You can check the various settings on the network. Select [Setup] - [Network Settings] from the home menu. Select [Network Connection Status]. 5-037-021-11(1) Copyright 2022 Sony Corporation...
- Page 231 When [HDMI OUT B Mode] is set to [Zone2], the HDMI OUT B (ZONE 2) jack does not support [4K/8K Upscaling]. This function does not work when the input signal is a compressed video signal, VRR signal or Dolby Vision signal. 5-037-021-11(1) Copyright 2022 Sony Corporation...
- Page 232 (power) indicator on the front panel lights up in amber if [Control for HDMI] is set to [On]. This function is enabled only when [HDMI OUT B Mode] is set to [Main]. Related Topic Operating the receiver by interlocking with a TV (Control for HDMI function) 5-037-021-11(1) Copyright 2022 Sony Corporation...
- Page 233 This setting is valid when [HDMI OUT B Mode] is set to [Main] and [Control for HDMI] is set to [On]. The connected device may not turn off depending on the status of the device. System Power Off function may work with devices other than those manufactured by Sony, but operation is not guaranteed. 5-037-021-11(1) Copyright 2022 Sony Corporation...
- Page 234 Auto: The receiver outputs HDMI signals to the TV from the HDMI OUT A jack when the TV is turned on while the receiver is in the standby mode. Sony recommends this setting if you are using a “BRAVIA” Sync-compatible TV manufactured by Sony. This setting saves power in the standby mode compared to the [On] setting.
- Page 235 Depending on your TV, eARC setting items may be available. If you set [Audio Return Channel] to [eARC] on the receiver, also check the settings on the TV. For details, refer to the instruction manual of the TV. Related Topic Setting TV audio output (when using the eARC/ARC function) Digital audio formats supported by the receiver 5-037-021-11(1) Copyright 2022 Sony Corporation...
- Page 236 TV, even when playing back multi-channel source. When you connect the receiver to a video device (projector, etc.), sound may not be output from the receiver. In this case, select [AMP]. 5-037-021-11(1) Copyright 2022 Sony Corporation...
- Page 237 You cannot remedy the time gap between video output on the TV connected to the HDMI OUT B (ZONE 2) jack and audio output from the speaker connected to the SPEAKERS SURROUND BACK/HEIGHT terminals using the [A/V Sync] function. Related Topic Selecting the method to use the HDMI OUT B (ZONE 2) jack (HDMI OUT B Mode) 5-037-021-11(1) Copyright 2022 Sony Corporation...
- Page 238 Auto: Automatically sets the level adjustment to 0 dB or +10 dB, depending on the audio stream. +10 dB: Adjusts the level by +10 dB with respect to the input signal. 0 dB: Does not adjust the level with respect to the input signal. 5-037-021-11(1) Copyright 2022 Sony Corporation...
- Page 239 When [HDMI OUT B Mode] in [HDMI Settings] is set to [Zone2], the video signals that can be played are limited depending on the input as follows: HDMI IN 1, 2, 3 and 4 jacks: up to 4K/60p 4:4:4 HDMI IN 5, 6 jacks and HDMI IN 7 jack (STR-AZ7000ES/STR-AZ5000ES only): up to 4K/60p 4:2:0 5-037-021-11(1) Copyright 2022 Sony Corporation...
- Page 240 You can display information about the monitor connected to the HDMI OUT A and HDMI OUT B (ZONE 2) jacks of the receiver. Select [Setup] - [HDMI Settings] from the home menu. Select [Monitor Information]. 5-037-021-11(1) Copyright 2022 Sony Corporation...
- Page 241 This function is enabled only when [HDMI OUT B Mode] is set to [Main]. If you select [Off], it takes more time for images to appear after switching the input. However, the sound quality is improved because the receiver receives signals only from the selected HDMI input jack. 5-037-021-11(1) Copyright 2022 Sony Corporation...
- Page 242 If your TV has similar menu for high bandwidth video format, check the setting on the TV menu when you select [Enhanced format] or [Enhanced format (4K120, 8K)] on this receiver. For details on the setting of the TV menu, refer to the operating instructions of the TV. Related Topic About HDMI connections 5-037-021-11(1) Copyright 2022 Sony Corporation...
- Page 243 When the input of the receiver is TV, you can output the video from the device connected to the HDMI IN jack of the receiver to the TV. Set this function when using the dual screen display function of the TV Select [Setup] - [HDMI Settings] from the home menu. Select [Video output for PIP/PBP-displayed TV]. Select [On]. 5-037-021-11(1) Copyright 2022 Sony Corporation...
- Page 244 You can also press 360SSM on the remote control to activate or deactivate the [360 Spatial Sound Mapping] function. You can also select [360 Spatial Sound Mapping] from the [Audio Settings] in the [Setup] menu. Related Topic Resetting sound fields to the default settings 5-037-021-11(1) Copyright 2022 Sony Corporation...
- Page 245 [Direct] is being used and an analog input is selected. [In-Ceiling Speaker Mode] is set to [Front & Center] or [Front]. [DSD Native] is set to [On] and DSD signals are being played back. Perform Auto Calibration before using the [SpeakerRelocation / PhantomSurroundBack] function. 5-037-021-11(1) Copyright 2022 Sony Corporation...
- Page 246 [Bluetooth Mode] is set to [Transmitter]. When [DSD Native] is set to [On] and DSD signals are being played back, the settings of [Equalizer] and [Subwoofer Low Pass Filter], etc., are invalid, and the sound field does not work. 5-037-021-11(1) Copyright 2022 Sony Corporation...
- Page 247 Hint You can also use PURE DIRECT on the remote control or the receiver to turn the [Pure Direct] function on or off. You can also select [Pure Direct] from [Audio Settings] in [Setup] menu. 5-037-021-11(1) Copyright 2022 Sony Corporation...
- Page 248 On: Always activates the low-pass filter with a cutoff frequency of 120 Hz. Off: Does not activate the low-pass filter. Note This function does not work when [Direct] is being used and an analog input is selected. 5-037-021-11(1) Copyright 2022 Sony Corporation...
- Page 249 0 ms – 300 ms: You can adjust the delay from 0 ms to 300 ms in 10 ms intervals. Note The receiver may play signals at a lower sampling frequency than the actual sampling frequency of the input signals, depending on the audio format. 5-037-021-11(1) Copyright 2022 Sony Corporation...
- Page 250 Sub: Sound in the sub language will be output. Main/Sub : Sound in the main language will be output through the front left speaker and sound in the sub language will be output through the front right speaker simultaneously. 5-037-021-11(1) Copyright 2022 Sony Corporation...
- Page 251 Auto︓This function is automatically enabled if there is additional information that recommends the use of this function in the source. Note [Audio DRC] is effective only when playing Dolby Digital, Dolby Digital Plus and Dolby TrueHD. For Dolby TrueHD, this function is effective only when the disk contains DRC information. 5-037-021-11(1) Copyright 2022 Sony Corporation...
- Page 252 Auto: Upmix is performed according to the surround environment. Note This function does not work in the following cases: [Bluetooth Mode] is set to [Transmitter]. The sound field is set to [2ch Stereo], [Direct] or [Headphone (2ch)]. 5-037-021-11(1) Copyright 2022 Sony Corporation...
- Page 253 This function does not work in the following cases: [Bluetooth Mode] is set to [Transmitter]. The sound field is set to [2ch Stereo], [Direct] or [Headphone (2ch)]. A height/overhead speaker is connected, or a wireless speaker with built-in enabled speaker is connected. 5-037-021-11(1) Copyright 2022 Sony Corporation...
- Page 254 This function only works when a DTS stream is input. Select [Setup] - [Audio Settings] from the home menu. Select [IMAX Mode]. Select the setting you want. Auto: IMAX effect is automatically added when you play IMAX Enhanced content. 5-037-021-11(1) Copyright 2022 Sony Corporation...
- Page 255 IMAX content. When this setting is set to [Off], the bass that IMAX content has is output. Note The setting value for surround speakers is applied to surround back speakers. 5-037-021-11(1) Copyright 2022 Sony Corporation...
- Page 256 Turn on the TV and the receiver in the main zone. Select [Setup] - [Zone Settings] from the home menu. Select [Zone2 Settings]. Follow the instructions on the TV screen to make connections and settings. Select [Confirm changes]. 5-037-021-11(1) Copyright 2022 Sony Corporation...
- Page 257 Turn on the TV and the receiver in the main zone. Select [Setup] - [Zone Settings] from the home menu. Select [Zone3 Settings]. Follow the instructions on the TV screen to make connections and settings. Select [Confirm changes]. 5-037-021-11(1) Copyright 2022 Sony Corporation...
- Page 258 Presetting the volume in the main zone (Main Preset Volume) You can set the volume level to be used when the receiver is turned on. Select [Setup] - [Zone Settings] from the home menu. Select [Main Preset Volume]. Adjust the volume level. 5-037-021-11(1) Copyright 2022 Sony Corporation...
- Page 259 Limiting the volume for the main zone (Main Max Volume) You can limit the maximum volume level output to the main zone. Select [Setup] - [Zone Settings] from the home menu. Select [Main Max Volume]. Adjust the volume level. 5-037-021-11(1) Copyright 2022 Sony Corporation...
- Page 260 Select [Zone2 Preset Volume] or [Zone3 Preset Volume]. Adjust the volume level. Related Topic Enjoying video and sound on the amplifier and TV in Zone 2 Enjoying sound in Zone 2 Enjoying sound using another amplifier in Zone 3 5-037-021-11(1) Copyright 2022 Sony Corporation...
- Page 261 You can limit the maximum volume level output to Zone 2 and/or Zone 3. Select [Setup] - [Zone Settings] from the home menu. Select [Zone2 Max Volume] or [Zone3 Max Volume]. Adjust the volume level. 5-037-021-11(1) Copyright 2022 Sony Corporation...
- Page 262 Fixed: Select to adjust the volume on the amplifier in Zone 2 or Zone 3. The volume level of the receiver output in Zone 2 or Zone 3 on the receiver will be fixed. Note When [Variable] is set, the volume level is turned down by default. Turn up the volume while listening to the sound after completing setup. 5-037-021-11(1) Copyright 2022 Sony Corporation...
- Page 263 You can also switch between BLUETOOTH RX (Receiver) mode and BLUETOOTH TX (Transmitter) mode by pressing BLUETOOTH RX/TX on the remote control. Depending on the BLUETOOTH receiver, you can adjust the volume of the BLUETOOTH receiver from this receiver when [Transmitter] is selected. 5-037-021-11(1) Copyright 2022 Sony Corporation...
- Page 264 You can check a list of the paired and detected BLUETOOTH receivers such as headphones when [Bluetooth Mode] is set to [Transmitter]. You can perform pairing with detected devices from the list. Select [Setup] - [Bluetooth Settings] from the home menu. Select [Device List]. Hint Select [Scan] to refresh the list. Related Topic Selecting the BLUETOOTH mode (Bluetooth Mode) 5-037-021-11(1) Copyright 2022 Sony Corporation...
- Page 265 Priority on Stable Connection: Gives priority to BLUETOOTH connection. Select this setting if the sound is easily interrupted. Note This setting cannot be selected in the following cases: [Bluetooth Mode] is set to [Off]. A BLUETOOTH device is connected. 5-037-021-11(1) Copyright 2022 Sony Corporation...
- Page 266 Hint LDAC is an audio compression technology that enables transmission via BLUETOOTH of high-resolution audio sources, developed by Sony. Unlike the existing compression technology for BLUETOOTH such as SBC, it processes high-resolution audio sources without down-converting them to low frequencies and low bit numbers (*1). In addition, by applying extremely efficient coding and optimizing packet distribution, it is possible to transmit data volume that is about three times that of conventional technology (*2), realizing unprecedented high-quality BLUETOOTH wireless transmission.
-
Page 267: Selecting The Language (Language)
When the Control for HDMI function on both the receiver and the TV (BRAVIA TV) is turned on, the on-screen display language of the receiver is changed simultaneously when you change the language for the on-screen display of the TV. 5-037-021-11(1) Copyright 2022 Sony Corporation... - Page 268 You can turn on or off the information display which appears on the TV screen when the volume level or sound field, etc., of the receiver is changed. Select [Setup] - [System Settings] from the home menu. Select [Auto Display]. Select the setting you want. 5-037-021-11(1) Copyright 2022 Sony Corporation...
- Page 269 Off: You can save power in standby mode. It may take time for sound to be output from the optional subwoofer or rear speakers after turning the receiver on in this mode. Note If you agree to use the Chromecast built-in function, [Network/Bluetooth Standby] automatically switches to [On]. If you set [RF Channel] to [On], [Network/Bluetooth Standby] automatically switches to [On]. 5-037-021-11(1) Copyright 2022 Sony Corporation...
- Page 270 This function does not work in the following cases: [FM TUNER] is selected as the input. The software of the receiver is being updated. BLUETOOTH receiver (headphones/speakers) are connected. [DSD Native] is set to [On] and DSD signals are being played back. 5-037-021-11(1) Copyright 2022 Sony Corporation...
- Page 271 You can set the volume display on the TV screen and display panel. Select [Setup] - [System Settings] from the home menu. Select [Volume Display]. Select the setting you want. Relative: Indicates the volume in dB. Absolute: Indicates the number of steps. 5-037-021-11(1) Copyright 2022 Sony Corporation...
- Page 272 Switching the brightness of the display panel (Dimmer) You can switch the brightness of the display panel. Select [Setup] - [System Settings] from the home menu. Select [Dimmer]. Select the setting you want. Bright Dark 5-037-021-11(1) Copyright 2022 Sony Corporation...
- Page 273 Select [Device Name Setting]. An on-screen keyboard appears on the TV screen. Press (up)/ (down)/ (left)/ (right) and (enter) to select characters one by one to enter the name. Select [Enter]. The name you entered is registered. 5-037-021-11(1) Copyright 2022 Sony Corporation...
- Page 274 Checking the software version and MAC address of the receiver (System Information) You can display the software version information and MAC address of the receiver. Select [Setup] - [System Settings] from the home menu. Select [System Information]. 5-037-021-11(1) Copyright 2022 Sony Corporation...
- Page 275 Multi Channel AV Receiver STR-AZ7000ES/STR-AZ5000ES/STR-AZ3000ES Checking software license information (Software License Information) You can check the software license information. Select [Setup] - [System Settings] from the home menu. Select [Software License Information]. Follow the on-screen instructions. 5-037-021-11(1) Copyright 2022 Sony Corporation...
- Page 276 Select [Setup] - [System Settings] from the home menu. Select [FM Tuner Settings]. Select [FM Mode]. Select the setting you want. Stereo: The FM station is received in stereo. Monaural: The FM station is received in monaural. 5-037-021-11(1) Copyright 2022 Sony Corporation...
- Page 277 You can preset the gain level of the FM tuner. Select [Setup] - [System Settings] from the home menu. Select [FM Tuner Settings]. Select [Preset Gain Level]. Press (up)/ (down) to adjust the gain level. 5-037-021-11(1) Copyright 2022 Sony Corporation...
- Page 278 The name you entered is registered. Canceling naming input Press BACK before Step 6. Note Some letters that can be displayed on the TV screen cannot be displayed on the display panel. Related Topic Presetting FM radio stations (Preset Memory) 5-037-021-11(1) Copyright 2022 Sony Corporation...
- Page 279 Turning on control mode for maintenance (External Control) You can set whether or not to control the receiver from external devices. Select [Setup] - [Install Settings] from the home menu. Select [External Control]. Select the setting you want. 5-037-021-11(1) Copyright 2022 Sony Corporation...
- Page 280 Multi Channel AV Receiver STR-AZ7000ES/STR-AZ5000ES/STR-AZ3000ES Switching on/off the 12V trigger output (Trigger1/Trigger2/Trigger3) (for STR-AZ7000ES/STR-AZ5000ES) If you connect a device equipped with trigger input jacks, you can turn on the device or set it to standby simultaneously with the receiver. The receiver outputs electrical signals with a maximum of 12 V/80 mA from the TRIGGER OUT jacks.
- Page 281 If you set 12V trigger output as unavailable for all of [HDMI OUT A], [HDMI OUT B] and [HDMI OUT OFF], the HDMI OUT settings will have no affect on 12V trigger outputs. Settings for [HDMI OUT A], [HDMI OUT B] and [HDMI OUT OFF] are available only when they work in sync with the power in the main zone. 5-037-021-11(1) Copyright 2022 Sony Corporation...
- Page 282 You can also display a test screen with 480p/60 Hz for HDMI OUT A and HDMI OUT B (ZONE 2) jacks by pressing TEST on the remote control. HDMI audio signals are not output while the test screen is displayed. 5-037-021-11(1) Copyright 2022 Sony Corporation...
- Page 283 You can lock the receiver settings to prevent setting values from being accidentally erased. Select [Setup] - [Install Settings] from the home menu. Select [Settings Lock]. Select [On]. Hint To set this function to [Off], press PING, AMP MENU and (enter) on the receiver at the same time. 5-037-021-11(1) Copyright 2022 Sony Corporation...
- Page 284 You can save or load the setup data of the receiver using a USB flash drive. This function is useful when applying similar settings to other receivers. Select [Setup] - [Install Settings] from the home menu. Select [Save/Load]. Insert a USB flash drive into the (USB) port on the receiver. Select [Save] or [Load]. Follow the instructions on the TV screen. 5-037-021-11(1) Copyright 2022 Sony Corporation...
- Page 285 Do not turn the receiver off or disconnect the AC power cord (mains lead) and the LAN cable until the download and update processes are completed. Doing so may cause a malfunction. When you use Sony wireless rear speakers/subwoofer (not supplied), turn on each speaker and make sure the connection with the receiver is established.
-
Page 286: Reverting To The Factory Default Settings
It takes a few minutes for the memory to be cleared completely. Do not turn the receiver off until [RESET] appears on the display panel. By resetting, the link with the wireless subwoofer and rear speakers (not supplied) may be lost. In this case, reconnect them by referring to their operating instructions. 5-037-021-11(1) Copyright 2022 Sony Corporation... - Page 287 Some parameters and settings may appear dimmed on the display panel. This means that they are either unavailable or fixed and unchangeable. Related Topic Menu list (on the display panel) Indicators on the display panel 5-037-021-11(1) Copyright 2022 Sony Corporation...
- Page 288 Help Guide Multi Channel AV Receiver STR-AZ7000ES/STR-AZ5000ES/STR-AZ3000ES Menu list (on the display panel) The following options are available in each menu. 0. Easy Setup [0. EASY SETUP] Auto Calibration [0.1. AUTO CALIBRATION] Internet Settings [0.2. INTERNET SETUP] 1. Input Settings [1. INPUT SETTINGS] GAME [1.1.
- Page 289 XXX 0.00 m to XXX 10.00 m (XXX 0’0” to 32’9”) (0.01 m (1 inch) interval) XXX represents a speaker (HEIGHT1 L, HEIGHT1 R, HEIGHT2 R, HEIGHT3 R (*4), HEIGHT3 L (*4), HEIGHT2 L, TOP FRONT L (*7), TOP CENTER (*7), TOP FRONT R (*7), TOP REAR R (*7), TOP REAR L (*7)).
- Page 290 Subwoofer Level [4.8. SUBWOOFER LEVEL] AUTO, +10dB, 0dB HDMI OUT B Mode [4.9. HDMI OUTB MODE] MAIN, ZONE2 Monitor Information [4.10. MONITOR INFORMATION (ON SCREEN MENU ONLY)] (*1) Fast View [4.11. FAST VIEW] AUTO, OFF HDMI Signal Format [4.12. HDMI SIGNAL FORMAT] [4.12.1.
- Page 291 Zone3 Preset Volume [6.8. ZONE3 PRESET VOLUME] OFF, -oo dB to +10.0 dB (*10) OFF, MIN to MAX (*11) Zone3 Max Volume [6.9. ZONE3 MAX VOLUME] -40.0 dB to +23.0 dB (*10) 13 to MAX (*11) Zone3 Line Out [6.10. ZONE3 LINE OUT] VARIABLE, FIXED 7.
- Page 292 When the speaker pattern that does not include the surround back speaker or height speaker is set When [Bluetooth Mode] is set to other than [Transmitter] When [Setup] - [System Settings] - [Volume Display] is set to [Relative]. When [Setup] - [System Settings] - [Volume Display] is set to [Absolute]. 5-037-021-11(1) Copyright 2022 Sony Corporation...
- Page 293 The PING feature is useful for checking your IP address quickly. Open a web browser on your computer or mobile device on the same network with the receiver, and then access the receiver with an IP address. http://[receiver’s IP address]/ 5-037-021-11(1) Copyright 2022 Sony Corporation...
- Page 294 Search for the cause and solution of the issue by referring to this Help Guide. The troubleshooting method is listed in “Troubleshooting.” Search for the cause and solution of the issue on the Sony support site. Sony support site provides latest support information and Frequently Asked Questions.
- Page 295 After checking the above items and fixing any problems, plug in the AC power cord (mains lead) and turn on the receiver. If the problem persists, consult your nearest Sony dealer.
- Page 296 While USB Update is performed, insert a USB flash drive on which the package file for updating the receiver is saved, and then turn the receiver off and turn it on again. While Network Update is performed, press (power). If the problem persists, insert a USB flash drive on which the package file for updating the receiver is saved, and then press (power) again. 5-037-021-11(1) Copyright 2022 Sony Corporation...
- Page 297 Multi Channel AV Receiver STR-AZ7000ES/STR-AZ5000ES/STR-AZ3000ES [Overload has been detected.] appears on the TV screen. An over-current from the (USB) port was detected. Disconnect the USB device as prompted in the warning message and close the message. 5-037-021-11(1) Copyright 2022 Sony Corporation...
- Page 298 Measurement finished, but the center speaker (*) positional relationship may be unsuitable. Check the speaker position referring to “Installing speakers” in the Help Guide. The speaker name in this warning message depends on the detected symptom. 5-037-021-11(1) Copyright 2022 Sony Corporation...
- Page 299 If [Auto Standby] is set to [On], set it to [Off]. [PROTECTOR] or [THERMAL] was activated. Related Topic Setting the receiver to switch to standby mode automatically (Auto Standby) [PROTECTOR] or [THERMAL] appears on the display panel. 5-037-021-11(1) Copyright 2022 Sony Corporation...
- Page 300 Cannot find an available input when connecting several digital devices. You can reassign the COAXIAL/OPTICAL digital audio input jacks to other inputs. “Using other HDMI or digital audio input jacks (Input Assign).” Related Topic Using other HDMI or digital audio input jacks (Input Assign) 5-037-021-11(1) Copyright 2022 Sony Corporation...
- Page 301 Check the speaker settings of the TV. The receiver power syncs with the speaker settings of the TV. For details, refer to the operating instructions of the TV. If sound was output from the speakers of the TV last time, the receiver does not turn on even when the TV is turned on. 5-037-021-11(1) Copyright 2022 Sony Corporation...
- Page 302 Check [Standby Linked to TV] in the [HDMI Settings] menu. When the function is set to [On], the receiver automatically turns off interlocked with the TV-power off operation, regardless of the input of the receiver. 5-037-021-11(1) Copyright 2022 Sony Corporation...
- Page 303 For details, refer to the operating instructions of your TV. Set [Setup] - [HDMI Settings] - [Control for HDMI] to [On]. The TV must support the Control for HDMI function. For details, refer to the operating instructions of your TV. 5-037-021-11(1) Copyright 2022 Sony Corporation...
- Page 304 Digital video signals input to the HDMI IN jacks of this receiver are output only from the HDMI OUT A or HDMI OUT B (ZONE 2) jack. Analog video signals input to the VIDEO IN jacks are output only from the VIDEO OUT MONITOR jack. For details, see “About input/output of video signals.” Related Topic Notes on connecting cables About HDMI connections 5-037-021-11(1) Copyright 2022 Sony Corporation...
- Page 305 Disconnect the HDMI cable from the receiver and TV and then reconnect the cable. Supported video signals vary depending on the HDMI IN jack. For details on the supported video signals, see “Connecting devices with HDMI jacks.” Related Topic Notes on connecting cables About HDMI connections 5-037-021-11(1) Copyright 2022 Sony Corporation...
- Page 306 One-Touch Play operation, or turn on the receiver to select the HDMI device from which you want to enjoy content. Make sure [Standby Through] is set to [Auto] or [On] in the [HDMI Settings] menu. Related Topic Enjoying content of a connected device without turning on the receiver (Standby Through) 5-037-021-11(1) Copyright 2022 Sony Corporation...
- Page 307 The home menu will not appear when the TV's video input is connected to the VIDEO OUT MONITOR jack of the receiver and the video input is selected on the TV. Connect the TV and the receiver with an HDMI cable, and select the HDMI input on the TV. 5-037-021-11(1) Copyright 2022 Sony Corporation...
- Page 308 Depending on the receiver setting, some video equipment may not output HDR content in HDR mode due to lack of signal bandwidth, even if both TV and video equipment support HDR. In this case, set [HDMI Signal Format] of the selected input to [Enhanced format] or [Enhanced format (4K120, 8K)] in the [HDMI Settings] menu. 5-037-021-11(1) Copyright 2022 Sony Corporation...
- Page 309 The indicator on the display panel turns off. Press AMP MENU to select [Dimmer], and then adjust the brightness of the display panel. Related Topic Enjoying high-fidelity sound (Pure Direct) Switching the brightness of the display panel (Dimmer) 5-037-021-11(1) Copyright 2022 Sony Corporation...
- Page 310 Turn on the receiver, then select the input to which the playing device is connected. If connected to other devices than those manufactured by Sony that support the Control for HDMI function, set [Control for HDMI] to [On] in the [HDMI Settings] menu.
- Page 311 Check [Control for HDMI] in the [HDMI Settings] menu. If [Control for HDMI] is set to [On], the on-screen display language of the receiver may be changed simultaneously when you change the language for the on-screen display of the TV. Select the language on the receiver again to return to the previous setting. 5-037-021-11(1) Copyright 2022 Sony Corporation...
- Page 312 Set [DSD Native] in [Audio Settings] to [Off]. If the speaker assigned as a signal source is not installed, playback is not available during DSD Native playback because content will be played on the target speaker. Also, Zone output is not available because downmix process does not work. 5-037-021-11(1) Copyright 2022 Sony Corporation...
- Page 313 Make sure that the connecting cables are not near a transformer or motor. Move your audio device away from the TV. The plugs and jacks are dirty. Wipe them with a cloth slightly moistened with alcohol. 5-037-021-11(1) Copyright 2022 Sony Corporation...
- Page 314 [Test Tone] in the [Speaker Settings] menu. Check that the subwoofer is connected correctly and securely. Make sure you have turned on your subwoofer. Depending on the selected sound field, sound may not be available from the subwoofer. 5-037-021-11(1) Copyright 2022 Sony Corporation...
- Page 315 Make sure the [Manual Speaker Settings] - [Wireless Speaker Assign] in the [Speaker Settings] menu is completed. After selecting a speaker pattern for wireless speakers from the [Manual Speaker Settings] - [Speaker Pattern] in the [Speaker Settings] menu, set the speaker configuration you wish to use in the [Wireless Speaker Assign]. 5-037-021-11(1) Copyright 2022 Sony Corporation...
- Page 316 Install the speaker system and the wireless speaker at a distance of 1.5 m (5 ft) or more from a wireless LAN router, etc. It may be improved by changing the direction or the antenna’s angle of the wireless LAN router. 5-037-021-11(1) Copyright 2022 Sony Corporation...
- Page 317 Help Guide Multi Channel AV Receiver STR-AZ7000ES/STR-AZ5000ES/STR-AZ3000ES The sound is interrupted. Sound may be interrupted when the sampling frequency, number of channels or audio format of audio output signals from the playback device is switched. 5-037-021-11(1) Copyright 2022 Sony Corporation...
- Page 318 If you connect the receiver to a TV that is incompatible with both the eARC and ARC functions, set [Audio Return Channel] to [Off] in the [HDMI Settings] menu, and connect the TV to the OPTICAL IN 2 (TV) jack of the receiver with an optical cable. 5-037-021-11(1) Copyright 2022 Sony Corporation...
- Page 319 The sound may not be output through the TV speaker depending on the sound source. When a BLUETOOTH device is connected and [Bluetooth Mode] is set to [Transmitter], or a headphone is connected, the sound will not be output through the TV speaker. 5-037-021-11(1) Copyright 2022 Sony Corporation...
- Page 320 Cannot select the desired input for playback in Zone 2 or Zone 3. There are limits to the inputs that can be played in Zone 2 and Zone 3. For details, see “Available input sources for each zone.” 5-037-021-11(1) Copyright 2022 Sony Corporation...
- Page 321 Sound may not be output from the target speakers depending on the playback signals or the speaker settings. Be sure to select the optimal sound field for the content. For details on relations between sound fields and speaker outputs, see “Relations between sound fields and speaker outputs.” 5-037-021-11(1) Copyright 2022 Sony Corporation...
- Page 322 Change the input of the receiver to the HDMI input connected to the device. Check that the selected digital audio input jack is not assigned to another input. Related Topic Notes on connecting cables Setting the HDMI audio signal output of connected devices (Audio Out) 5-037-021-11(1) Copyright 2022 Sony Corporation...
- Page 323 When using an eARC-compatible TV, select [eARC] for [Audio Return Channel] in the [HDMI Settings] menu and [Auto] for [Input Mode] in the [Input Settings] menu. For Details, see “Enabling the eARC/ARC function (Audio Return Channel)” and “Switching between digital and analog audio (Input Mode).” 5-037-021-11(1) Copyright 2022 Sony Corporation...
- Page 324 The left and right sound is unbalanced or reversed. Check that the speakers and device are connected correctly and securely. Adjust the sound level parameters using the [Manual Speaker Settings] - [Level] in the [Speaker Settings] menu. 5-037-021-11(1) Copyright 2022 Sony Corporation...
- Page 325 Set [Audio Out] to [AMP] in the [HDMI Settings] menu or change the speaker output setting to “Audio System” on the TV. You can only enjoy DTS-HD Master Audio, Dolby TrueHD, DTS:X Master Audio, Dolby Atmos, DSD and Multi Channel Linear PCM with an HDMI connection. 5-037-021-11(1) Copyright 2022 Sony Corporation...
- Page 326 To activate the virtualizer and obtain the surround effect when the speaker pattern is set to [2.0] or [2.1], set [Sound Field] to [A.F.D.], [A.F.D. Movie], [Dolby Mode] or [DTS:X Mode], set [Upmixer] to [Auto], and set [Virtualizer] to other than [Off]. 5-037-021-11(1) Copyright 2022 Sony Corporation...
- Page 327 The speaker cables may not be connected securely. Check that they are connected securely and cannot be disconnected by pulling on them slightly. The speaker cables may have short-circuited. Turn off the receiver, reconnect them correctly, and then turn on the receiver again. 5-037-021-11(1) Copyright 2022 Sony Corporation...
- Page 328 A test tone is output from a different speaker than the speaker displayed on the TV screen. The speaker pattern setup is incorrect. Make sure that the speaker connections and the speaker pattern match correctly. 5-037-021-11(1) Copyright 2022 Sony Corporation...
- Page 329 Turn on the receiver to select the HDMI device from which you want to enjoy content. Make sure [Standby Through] is set to [Auto] or [On] in the [HDMI Settings] menu. Related Topic Enjoying content of a connected device without turning on the receiver (Standby Through) 5-037-021-11(1) Copyright 2022 Sony Corporation...
- Page 330 Make sure the HDMI output setting is set to [HDMI A] or [HDMI A + B]. Switch input of the receiver to [TV]. Related Topic TV sound cannot be heard from the speakers connected to the receiver (eARC/ARC). 5-037-021-11(1) Copyright 2022 Sony Corporation...
- Page 331 Turn on the receiver, then select the input to which the playing device is connected. If connected to other devices than those manufactured by Sony that support the Control for HDMI function, set [Control for HDMI] to [On] in the [HDMI Settings] menu.
- Page 332 If the HDMI audio signal from the connected playback device is output from both the speakers connected to the receiver and the TV speakers, Set [Audio Out] to [AMP] in the [HDMI Settings] menu or change the speaker output setting to “Audio System” on the TV. The sound output will only come from the speakers connected to the receiver. 5-037-021-11(1) Copyright 2022 Sony Corporation...
- Page 333 Adjust the A/V Sync settings on the TV. For details, refer to the operating instructions of the TV. When the sound field is set to [Audio Enhancer], change the sound field to other than [Audio Enhancer]. For details on the sound fields, see “Selectable sound fields and their effects.” 5-037-021-11(1) Copyright 2022 Sony Corporation...
- Page 334 Extend and adjust the position of the FM wire antenna (aerial) to a place where the reception conditions are good. Place the FM wire antenna (aerial) near a window. After connecting the FM wire antenna (aerial), keep it as horizontal as possible. Related Topic The FM stereo reception is poor. Connecting the antennas (aerials) 5-037-021-11(1) Copyright 2022 Sony Corporation...
- Page 335 Help Guide Multi Channel AV Receiver STR-AZ7000ES/STR-AZ5000ES/STR-AZ3000ES The FM stereo reception is poor. Set the FM station receiving mode to the monaural mode. Related Topic The FM reception is poor. 5-037-021-11(1) Copyright 2022 Sony Corporation...
- Page 336 No stations have been preset or the preset stations have been cleared (when tuning by scanning preset stations is used). Preset the stations. Press DISPLAY repeatedly on the receiver so that the frequency appears on the display panel. 5-037-021-11(1) Copyright 2022 Sony Corporation...
- Page 337 The USB device is not recognized. File or folder names are not displayed on this receiver. Playback is not possible. The sound skips. There is noise. The output sound is distorted. Related Topic USB specifications and compatible USB devices 5-037-021-11(1) Copyright 2022 Sony Corporation...
- Page 338 When the music on the USB device is played back, there is noise, skipping, or distorted sound. Turn off the receiver, reconnect the USB device, and then turn on the receiver. Check if the music data itself contains noise, or the sound is distorted. 5-037-021-11(1) Copyright 2022 Sony Corporation...
-
Page 339: A Usb Device Is Not Recognized
Connect a compatible USB device. USB devices are only supported when formatted with the FAT16 or FAT32 file systems. The USB device does not work properly. Refer to the section on how to deal with this problem in the operating instructions of the USB device. 5-037-021-11(1) Copyright 2022 Sony Corporation... -
Page 340: Playback Does Not Start
The receiver can recognize and play up to the following files or folders in USB devices: up to folders in the 11th layer (including the root folder) up to 998 files/folders in a single layer Related Topic USB specifications and compatible USB devices 5-037-021-11(1) Copyright 2022 Sony Corporation... - Page 341 The USB device is being connected upside down. Connect the USB device in the correct orientation. Check the shape of the USB device’s plug. If the shape does not fit the port on the receiver, you will not be able to connect the USB device to the receiver. 5-037-021-11(1) Copyright 2022 Sony Corporation...
- Page 342 Upper case letters (A to Z) Lower case letters (a to z) Numbers (0 to 9) Symbols (’ = < > * + , – . / @ [ \ ] _ `) Other characters may not be displayed correctly. 5-037-021-11(1) Copyright 2022 Sony Corporation...
- Page 343 Playback is possible up to 11 layers (including the root folder). There are more than 998 folders (including the root folder). There are more than 998 files. Files that are encrypted, protected by passwords, etc. cannot be played. 5-037-021-11(1) Copyright 2022 Sony Corporation...
-
Page 344: Cannot Connect To The Network
Check the settings of the wireless LAN router/access point and perform the setup again. For details on the settings of devices, refer to the operating instructions of the devices. Wireless networks are influenced by electromagnetic radiation emitted by microwave ovens and other devices. Move the receiver away from these devices. Related Topic Checking the network information (Network Connection Status) 5-037-021-11(1) Copyright 2022 Sony Corporation... - Page 345 If you have initialized the receiver or performed a system recovery on your server, perform the network settings again. Related Topic Setting up a wireless LAN connection Setting up a wired LAN connection Checking the network information (Network Connection Status) 5-037-021-11(1) Copyright 2022 Sony Corporation...
- Page 346 (enter). The receiver can recognize and play up to the following files or folders stored in the home network server: up to folders in the 19th layer up to 999 files/folders in a single layer 5-037-021-11(1) Copyright 2022 Sony Corporation...
- Page 347 Depending on the network environment, it may not be possible to play tracks with more than one device operating at the same time. Turn off other devices to enable the receiver to play tracks. 5-037-021-11(1) Copyright 2022 Sony Corporation...
- Page 348 Multi Channel AV Receiver STR-AZ7000ES/STR-AZ5000ES/STR-AZ3000ES [There is no playable file.] appears. If there are no folders or files that can be played on the receiver in the selected folder, you cannot expand the folder to display its content. 5-037-021-11(1) Copyright 2022 Sony Corporation...
- Page 349 Help Guide Multi Channel AV Receiver STR-AZ7000ES/STR-AZ5000ES/STR-AZ3000ES Cannot play copyrighted files. Audio content with DRM (Digital Rights Management) copyright protection cannot be played on this receiver. 5-037-021-11(1) Copyright 2022 Sony Corporation...
- Page 350 Help Guide Multi Channel AV Receiver STR-AZ7000ES/STR-AZ5000ES/STR-AZ3000ES Cannot select a previously selected track. The track information may have been changed on the server. Refresh the server list and then reselect the server. 5-037-021-11(1) Copyright 2022 Sony Corporation...
- Page 351 Playing content stored on the server (the receiver is operating as a player) Updating the software Displaying setting screen When using Sony | Music Center, also see “Cannot control the receiver using a Sony | Music Center.” 5-037-021-11(1) Copyright 2022 Sony Corporation...
- Page 352 Multi Channel AV Receiver STR-AZ7000ES/STR-AZ5000ES/STR-AZ3000ES The receiver cannot be turned on by devices on a network. Set [Network/Bluetooth Standby] to [On] if you want to turn the receiver on by operating the devices on a network. 5-037-021-11(1) Copyright 2022 Sony Corporation...
- Page 353 The receiver cannot be found from an iPhone/iPad/iPod touch or iTunes. Make sure the receiver and the iPhone/iPad/iPod touch or computer with iTunes is connected to the same network. Update the software of the receiver and the iPhone/iPad/iPod touch or iTunes to the latest version. 5-037-021-11(1) Copyright 2022 Sony Corporation...
- Page 354 The sound may skip depending on factors such as the network environment. Depending on the audio files, playback may require network speed. If you use a wired LAN connection, check the network hub and/or router. If you use a wireless LAN connection, check the router and/or access point. 5-037-021-11(1) Copyright 2022 Sony Corporation...
- Page 355 If using a wireless LAN connection, make sure that both of the wireless LAN antennas on the receiver are pointing up. Additionally, try changing the positioning of the router and the receiver. Keep the receiver away from microwave ovens. 5-037-021-11(1) Copyright 2022 Sony Corporation...
- Page 356 If your contract with your Internet provider limits Internet connection to one device at a time, this device will not be able to access the Internet when another device is already connected. Consult your carrier or service provider. Related Topic Checking the network information (Network Connection Status) 5-037-021-11(1) Copyright 2022 Sony Corporation...
- Page 357 The sound skips. The bandwidth of your network may be too low. If using wireless LAN connection, move the receiver and the wireless LAN router/access point closer to each other, without any obstructions between them. 5-037-021-11(1) Copyright 2022 Sony Corporation...
-
Page 358: Pairing Cannot Be Done
Pairing may not be possible if there are other BLUETOOTH devices near the receiver. In this case, turn off the other BLUETOOTH devices. Correctly enter the same passkey that was entered on the BLUETOOTH device. Enter “0000” when you are prompted for a passkey during the pairing operation. 5-037-021-11(1) Copyright 2022 Sony Corporation... - Page 359 While connected to a BLUETOOTH device, this receiver cannot be detected from the other BLUETOOTH devices. Erase the pairing registration information of the BLUETOOTH device and perform the pairing operation again. Related Topic Selecting the BLUETOOTH mode (Bluetooth Mode) 5-037-021-11(1) Copyright 2022 Sony Corporation...
- Page 360 If there are obstructions between the receiver and your BLUETOOTH device, remove these or move the receiver and/or device to avoid them. If there is a device that generates electromagnetic radiation, such as a wireless LAN, other BLUETOOTH device, or a microwave oven nearby, move it away. 5-037-021-11(1) Copyright 2022 Sony Corporation...
- Page 361 The sound of your BLUETOOTH device cannot be heard. Turn up the volume on your BLUETOOTH device first, and then adjust the volume using (volume) + on the remote control (or MASTER VOLUME on the receiver). 5-037-021-11(1) Copyright 2022 Sony Corporation...
- Page 362 If there are obstructions between the receiver and your BLUETOOTH device, remove them or move the receiver and/or device avoid them. If there is a device that generates electromagnetic radiation, such as a wireless LAN, other BLUETOOTH device, or a microwave oven nearby, move it away. Turn down the volume of the connected BLUETOOTH device. 5-037-021-11(1) Copyright 2022 Sony Corporation...
- Page 363 Multi Channel AV Receiver STR-AZ7000ES/STR-AZ5000ES/STR-AZ3000ES Cannot control the receiver using a Sony | Music Center. It may take some time for the receiver to connect to the network after it is turned on. Try again later. The smartphone or tablet device may not be connected to the same network as the receiver. Connect to the same network and try again.
- Page 364 Tuner-related devices: up to 4 devices (used one by this receiver) Audio system (receiver, amplifier, headphones, etc.): up to 1 device (used by this receiver) When [HDMI OUT B Mode] is set to [Zone2], the Control for HDMI function does not work. 5-037-021-11(1) Copyright 2022 Sony Corporation...
- Page 365 Switch input of the receiver to [TV]. Related Topic Setting TV audio output (when using the eARC/ARC function) Controlling HDMI devices (Control for HDMI) TV sound cannot be heard from the speakers connected to the receiver. 5-037-021-11(1) Copyright 2022 Sony Corporation...
- Page 366 Point the remote control at the remote control sensor on the receiver. Remove any obstructions between the remote control and the receiver. Replace both of the batteries in the remote control with new ones if they are weak. Related Topic Inserting batteries into the remote control 5-037-021-11(1) Copyright 2022 Sony Corporation...
- Page 367 It takes a few minutes for the memory to be cleared completely. Do not turn the receiver off until [RESET] appears on the display panel. By resetting, the link with the wireless subwoofer and rear speakers (not supplied) may be lost. In this case, reconnect them by referring to their operating instructions. 5-037-021-11(1) Copyright 2022 Sony Corporation...
- Page 368 Be sure to use the buttons on the receiver to perform this operation. Hold down MUSIC and press (power) on the receiver. [S.F. INITIALIZED!] appears on the display panel and all sound fields are reset to their default setting. 5-037-021-11(1) Copyright 2022 Sony Corporation...
-
Page 369: Customer Support Websites
Help Guide Multi Channel AV Receiver STR-AZ7000ES/STR-AZ5000ES/STR-AZ3000ES Customer support websites Refer to the following website for the latest information on the receiver. https://www.sony.com/am/support 5-037-021-11(1) Copyright 2022 Sony Corporation... -
Page 370: Trademarks And Licenses
The LDAC™ name is a trademark of Sony Group Corporation or its affiliates. The Bluetooth® word mark and logos are registered trademarks owned by Bluetooth SIG, Inc. and any use of such marks by Sony Group Corporation and its subsidiaries is under license.
Need help?
Do you have a question about the STR-AZ7000ES and is the answer not in the manual?
Questions and answers