Advertisement
Quick Links
Advertisement

Related Manuals for Align-Pilates H1 Reformer


Summary of Contents for Align-Pilates H1 Reformer
- Page 1 H1 Reformer Assembly Instructions & User Manual V1 H1 October 2016...
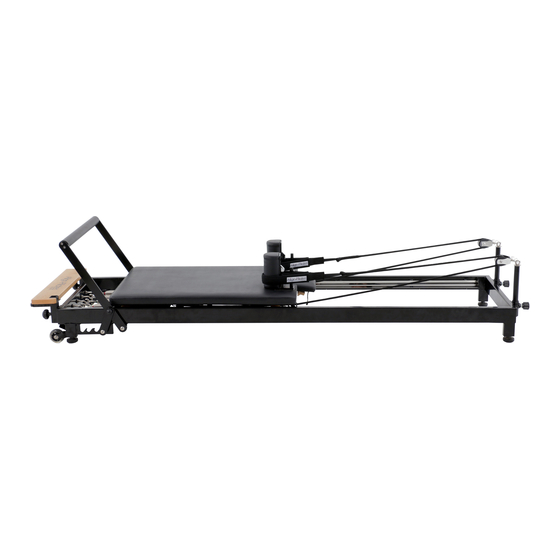
- Page 2 H1 Home Pilates Reformer Thank you for buying an Align-Pilates H1 Home Pilates Refomer. In order to set up your reformer we recommend you watch our YouTube assembly video prior to assembling and using your reformer. On our YouTube channel you will also find a host of useful information on using, servicing and maintaining your reformer, as well as Pilates workouts and detailed breakdowns of individual Pilates exercises.
- Page 3 Translations Français Téléchargez votre document traduit ici, scannez ce code QR Deutsch Laden Sie hier Ihr übersetztes Dokument herunter, scannen Sie diesen QR-Code Español Descarga tu documento traducido aquí, escanea este código QR ת י ִר ב ִע -ה דוק תא קורס ,ןאכ ךלש םגרותמה ךמסמה תא דרוהQR הזה 中国人...
- Page 4 Introduction The H1 reformer was developed to bring the benefits of a Pilates Reformer workout in to your home. Featuring the same springs as our professional reformers, the H1 offers smooth progressive resistance and a range of adjustments to fine tune the machine for your workout.
- Page 5 Take this out, open and lay out the contents (leave the carriage bed in the box for now). Warning: We recommend the H1 reformer is lifted out of its box by two people to minimise the chance of injury due to its weight. Ensure all springs are engaged to ensure the bed does not roll back when lifting.
- Page 6 3. Placing the bed in the frame and final assembly Lower the foot bar to the position closest to the foot board. On the underside of the reformer bed note the position of the fixed hook - see Fig.5. This hook runs beneath the wheel runner when in use and is there to prevent the carriage from tipping - care must be taken to hook it under the runner as the bed is installed into the frame.
- Page 7 Fig.14 9. Standing & Storing your Reformer The H1 reformer has legs to allow it to stand up for space saving storage. Warning: The reformer should only be stood on resilient, level floors in locations where it cannot be accessed by children or risk being knocked over by other activities.
- Page 8 Congratulations! You are now ready to use your H1 Reformer. Now would be a good time to make a note to replace your springs in 2 years or, within 3,000 hours of use, whichever is sooner. We hope that you enjoy using your new H1 reformer! 12.
- Page 9 Exploded diagrams: Note: For larger images of the exploded diagrams and a detailed parts list please download from: https://www.mad-hq.com/align-pilates-resources Carriage Bed: Copyright Align-Pilates Equipment Ltd 2016 Reformer frame: Copyright Align-Pilates Equipment Ltd 2016...
-
Page 10: Warranty Information
Upholstery The upholstery fabric on Align-Pilates equipment will be replaced if it fails to give normal wear for 90 days from the date of deliv- ery. Proof of damage may be required. This warranty does not cover cuts, scratches, burns, stains, soiling, or damages caused by unreasonable use such as wearing jewellery or inappropriate clothing whilst using the equipment.
Need help?
Do you have a question about the H1 Reformer and is the answer not in the manual?
Questions and answers