
Related Manuals for Harken 1111 HL


Summary of Contents for Harken 1111 HL
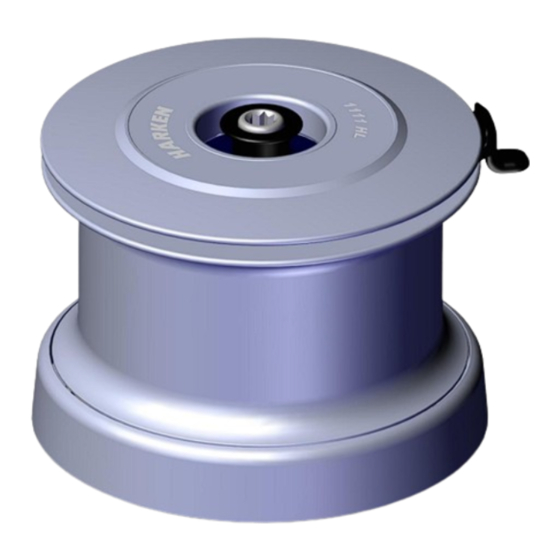
- Page 1 Winch 1111 HL Self-Tailing User and maintenance manual Winch 1111 HL – Mod.A USER AND MAINTENANCE MANUAL...
-
Page 2: Table Of Contents
Cleaning and maintenance ......................24 15.1 Internal maintenance procedure ....................25 15.2 Disassemble procedure – winch 1111 HL – 1st direct gear and 1st reduced gear ..27 15.3 Disassemble procedure – Winch 1111 HL 1R ................ 29 Assembling ............................37 16.1 Marking .............................. -
Page 3: Glossary
- Install and use the winch only as described in the technical information supplied. - Improper use can cause severe harms to users, equipment and the boat. User and maintenance manual Winch 1111 HL – Mod.A... - Page 4 ® - Failure to install the winch will void the warranty of the device itself and the Harken product to which it is connected. - Refer to the warranty on the web site www.harken.com.
-
Page 5: General Advice
For any other usage, contact the Harken Italy Technical Service by e-mail: techservice@harken.it Improper use - This Harken winch must not be used for purposes different from those outlined in “Intended use” chapter, or for purposes not mentioned in this manual or different from those mentioned. -
Page 6: Product Information
Product information Winch 1111 HL is designed with a special care to the regatta’s needs, but it may be effectively employed on cruiser yachts and used to trim and hoist sails. It’s produced in the Self-Tailing version (ST). It’s supplied with 3 speeds or with the reduced first gear. -
Page 7: Product Identification
Winch 1111 HL can be chosen with direct (omitted notation) or reduced first gear (‘1R’ notation). The first gear reduced Winch 1111 HL has higher gear ratio and higher power ratio than the first direct gear Winch. Specify the requested version at the order in the Winch description pointing out the ‘1R’... - Page 8 Version Winch 1111 HL is designed to put a maximum working load (MWL) of 7000Kg. WARNING! Subjecting the winch to loads above the Maximum Working Load can cause the winch to fail or pull off the deck suddenly and unexpectedly during high loads causing severe injury or death.
-
Page 9: Rope Diameter
Harken Italy techservice@harken.it. Tech Service at Handling rotation NOTE! Winch 1111 HL is available in the right-hand version and in the left-hand version. In the right-hand winch, drum rotates clockwise; in the left-hand winch, drum rotates counterclockwise. Left-hand (LH) -
Page 10: Product Composition
Product composition Winch 1111 HL is composed by the following groups: User and maintenance manual Winch 1111 HL – Mod.A... -
Page 11: Winch Outline
2.63 4.76 9.69 17.58 44.67 81.05 reduced speed Winch Gear Gear ratio Power ratio 1.81 9.69 17.58 44.67 81.05 NOTE! The theoretical power ratio is calculated without taking account of friction. User and maintenance manual Winch 1111 HL – Mod.A... -
Page 12: Motorization
The hydraulic vertical versions of the Winch 1111 HL can be equipped by: - hydraulic motor of 80cc displacement - hydraulic motor of 100cc displacement... -
Page 13: Installation
This dangerous fouling can be avoided by ensuring an entry angle for the rope of 8°. NOTE! The correct entry line angle is: 8° CORRECT! User and maintenance manual Winch 1111 HL – Mod.A... - Page 14 Beware of the rope chafing on the base of the winch. INCORRECT! WARNING! Situation to avoid: incorrect entry angle with the rope parallel to the base of the winch. Beware of turns of the rope fouling on the drum. INCORRECT User and maintenance manual Winch 1111 HL – Mod.A...
-
Page 15: Winch Positioning
Once you have decided on the correct placing of the winch on the deck and checked the space available below deck, proceed with the installation procedure steps, making reference to the mounting template. User and maintenance manual Winch 1111 HL – Mod.A... -
Page 16: Installation Procedure
13.2 Installation procedure A. Place the drilling cut-out template over the point chosen for installation. The template in DWG format for Winch 1111 HL is available on request from the Harken Italy Tech Service at techservice@harken.it. Small-scaled mounting template for Winch 1111 HL versions is shown below. - Page 17 After sealing the riser, proceed with the sealing of the winch base as shown above. For the mounting template of the riser, contact Harken at techservice@harken.it User and maintenance manual Winch 1111 HL – Mod.A...
- Page 18 It is mandatory to prevent any direct contact between the aluminum captive frame from other conductive materials such as carbon fiber (deck or hull); in that case a fiberglass lamination is required to avoid any galvanic corrosion. User and maintenance manual Winch 1111 HL – Mod.A...
-
Page 19: Installation With Sensors
13.3 Installation with sensors If required, Winch 1111 HL can be equipped with encoder sensor or with 1 gear recognition sensor. Sensors are installed as cables pass through the slots in correspondence of the drainage passages of the winch base, as shown below:... -
Page 20: Use
After the proper verifies, user can insert rope into the Self-tailing jaws, as described below: Put rope of the final turn on the peeler Insert rope between the jaws of the Self-Tailing NOTE! For right-hand winches, rope must be wrapped around the drum clockwise User and maintenance manual Winch 1111 HL – Mod.A... -
Page 21: Manual Use
- Once 1 speed is engaged, successive speed changes are obtained automatically by reversing the direction of rotation of the winch handle (Figg.4-5). Fig.1 Fig.2 Fig.3 Fig.4 1st speed engaged 2nd speed engaged User and maintenance manual Winch 1111 HL – Mod.A... -
Page 22: Motorized Use
Press the first of the two commands mounted on the deck. • The winch will operate at first speed (very fast but with little power), used to recover a lot of line under little load, as after a tack. User and maintenance manual Winch 1111 HL – Mod.A... - Page 23 The winch will operate at third speed (slow but very powerful). This speed is particularly suitable when the load is very high and little line needs to be recovered, as when trimming. User and maintenance manual Winch 1111 HL – Mod.A...
-
Page 24: Cleaning And Maintenance
Use a soft cloth for all cleaning and polishing operations. Do not use abrasive cloths on any component. WARNING! Do not replace or modify any part of the winch with a part that is not original. User and maintenance manual Winch 1111 HL – Mod.A... -
Page 25: Internal Maintenance Procedure
Rotate or slide the oiled parts to distribute the product in a uniform way. Remember to oil the pawls and not to use grease on them. User and maintenance manual Winch 1111 HL – Mod.A... - Page 26 NOTE! Apply the anti-seize with a brush. ® Light oil (Vaseline oil or McLube One drop This product is used to lubricate balls and plastic roller bearings. WARNING! Do not use Vaseline oil on the pawls User and maintenance manual Winch 1111 HL – Mod.A...
-
Page 27: Disassemble Procedure - Winch 1111 Hl - 1St Direct Gear And 1St Reduced Gear
- N°1 flat-bladed screwdriver (head width: 10-13mm) - Set of allen wrenches: n°2.5; 3; 4; 5; 6; 8 - Hammer with rubber head - Rags 15.2 Disassemble procedure – winch 1111 HL – 1st direct gear and 1st reduced gear Step #2 Step #1... - Page 28 Step #3 Step #4 Allen wrench size: 5 Step #5 Step #6 Allen wrench size: 2.5 For direct speed versions only. User and maintenance manual Winch 1111 HL – Mod.A For reduced versions, go to step #6.1R...
-
Page 29: Disassemble Procedure - Winch 1111 Hl 1R
#5 is common; for the 1 reduced gear winch, step #6 is replaced by the steps #6.1R- #6.8R. Step #6.1R Step #6.2R Allen wrench size: 2.5 Allen wrench size: 4 Step #6.3R Allen wrench size: 5 User and maintenance manual Winch 1111 HL – Mod.A... - Page 30 Lift up the idler support from the drum support Step #6.8R Step #6.7R Lift up the remaining ratchet gear with the needle roller bearings from the drum support After fig.#6.8R, disassembly procedure can restart from step #7. User and maintenance manual Winch 1111 HL – Mod.A...
- Page 31 Step #7 Allen wrench size: 8 Step #8 Step #9 Allen wrench size: 5 User and maintenance manual Winch 1111 HL – Mod.A...
- Page 32 Step #10 Step #11 ® Use TEFGEL under the head of the screws User and maintenance manual Winch 1111 HL – Mod.A...
- Page 33 Step #12 Step #13 Step #14 Step #15 User and maintenance manual Winch 1111 HL – Mod.A...
- Page 34 Step #16 Step #17 Step #18 Step #19 User and maintenance manual Winch 1111 HL – Mod.A...
- Page 35 Step #20 Step #21 User and maintenance manual Winch 1111 HL – Mod.A...
- Page 36 NOTE! After disassembling, inspect gearings, bearings, shafts and pawls for any traces of wear or corrosion. Replace worn or damaged components. Perform maintenance on the parts using the products listed below. User and maintenance manual Winch 1111 HL – Mod.A...
-
Page 37: Assembling
For a left winch (LH): mount the spring with the pin pointing downwards so that it is wound in a clockwise direction starting from the pin. User and maintenance manual Winch 1111 HL – Mod.A... -
Page 38: Marking
16.1 Marking NOTE! For the Self-tailing bolts and for drum support bolts, after screwing pay special attention to mark the screwed bolts with a coloured sign, similar to the following one: User and maintenance manual Winch 1111 HL – Mod.A... -
Page 39: Troubleshooting
The stud screw is not enough screwed ● The winch - twist on the stud screw in order to engages the first increase the pressure of the ball in the speed solar pinion. independently: User and maintenance manual Winch 1111 HL – Mod.A... -
Page 40: Ordering Spare Parts
Ordering spare parts ® ® Spare parts can be requested from Harken as described in the Harken Limited Worldwide Warranty available on the web site http://www.harken.com/ User and maintenance manual Winch 1111 HL – Mod.A... -
Page 41: Contact Us
Manufacturer Harken® Italy S.p.A. Via Marco Biagi, 14 22070 Limido Comasco (CO) Italy Tel.: (+39) 031.3523511 Email: info@harken.it Web: http://www.harken.com/ Tech Service Email: techservice@harken.it Customer Service Tel.: (+39) 031.3523511 Email: highprofileyachtservice@harken.it User and maintenance manual Winch 1111 HL – Mod.A...
Need help?
Do you have a question about the 1111 HL and is the answer not in the manual?
Questions and answers