Crestron TSW-560, TSW-760, TSW-1060 - Touch Screen Quick Start Guide
- Product manual (110 pages) ,
- Supplemental manual (84 pages) ,
- Do manual (2 pages)
Advertisement
Introduction
The Crestron® TSW-560, TSW-760, and TSW-1060 are stylish and versatile wall mount touch screens. The touch screen features onboard voice recognition, web browsing, Smart Graphics® software technology, H.264 streaming video, a built-in camera, a Rava® SIP intercom, and PoE+ (Power over Ethernet+) network power. The touch screen also provides various built-in applications for room scheduling, conferencing, and home control.
NOTE: Voice recognition, the built-in camera, and the Rava SIP intercom are not available on the TSW-560-NC, TSW-760-NC, and TSW-1060-NC models.
The Crestron TSW-560, TSW-760, and TSW-1060 are functionally similar. For simplicity within this guide, the term "touch screen" is used except where noted.
Check the Box
| Item | Qty |
| TSW-560, TSW-760, or TSW-1060* | 1 |
| Latch, Security (P/N 4525305) | 1 |
| TSW-560 Only | |
| Bracket, Preconstruction (P/N 4524592) | 1 |
| Bracket, Universal Mounting (P/N 4525127) | 1 |
| TSW-760 or TSW-1060 Only | |
| Bracket, Mounting (P/N 4525352) | 1 |
| Screw, 6-32 x 3/4 in., Undercut Head, Phillips (P/N 2033247) | 4 |
| Screw, M3 x 16 mm, Flat Head, Phillips (P/N 2013788) | 4 |
| Screw, M3.5 x 25 mm, Flat Head, Phillips (P/N 2023756) | 2 |
* Refer to the TSW-560-B-S, TSW-760-B-S, and TSW-1060-B-S product page at www.crestron.com for a complete list of color and texture variations.
Install the Mounting Bracket
TSW-560
The TSW-560 can be mounted into drywall and other surfaces, or it can be mounted onto a wall stud. When mounted into drywall and other surfaces, the touch screen protrudes 1/2 in. (13 mm) from the mounting surface.
To install the TSW-560 mounting bracket in preconstruction applications, use standard drywall nails or screws (not included) to attach the included TSW-UMB-60-PMK preconstruction mounting bracket to a wall stud.

Use a tie wrap to hold the cable until the TSW-560 is mounted.
NOTE: Allow an air gap of at least 12 in. (305 mm) in the wall cavity above and below the TSW-560 for heat dissipation.
To install the TSW-560 mounting bracket in postconstruction applications:
- Use the TSW-UMB-60-PMK as a cutout template by turning the bracket to face the wall, ensuring it is level, and temporarily tacking it to the wall with finishing nails (not included) through the smaller holes around the cutout opening.
- Trace the cutout opening with an appropriate drywall saw.

- Loosen the two screws on the included TSW-UMB-60 universal mounting bracket.
- Install the TSW-UMB-60, bottom side first, into the opening.

- Push the rear half of the mounting bracket back so that it is seated behind the mounting surface completely.
- Ensure the front of the TSW-UMB-60 is level, and then tighten the two bracket screws to complete the installation.
![]()
To avoid damaging the bracket, do not overtighten the screws.


TSW-760/TSW-1060
The TSW-760 and TSW-1060 install over a standard 2-gang or 3-gang U.S. electrical box, a 2-gang European electrical box, or a 2-gang U.K. electrical box. The touch screen may also be installed into wooden paneling or furniture with a 2-1/5 in. (56 mm) high by 3-3/4 in. (96 mm) wide rectangular cutout. When installed, the touch screen protrudes 1/2 in. (13 mm) from the mounting surface, leaving no visible screws.
NOTES:
- Additional mounting options are possible by using the TSW-UMB-60 universal mounting bracket, the TSW-UMB-60-PMK preconstruction mounting kit, the TSW-UMB-60-BBI back box, or the TSW-760/1060-MSMK multisurface mount kit. For more information, refer to the product pages on the Crestron website.
- Installing the mounting bracket to an electrical box is required only if one of the mounting solutions above is not used. For more information, refer to the mounting solution documentation at www.crestron.com/manuals.
To mount the touch screen into an electrical box, use the appropriate screws (four 6-32 x 3/4 in. screws, four M3 x 16 mm screws, or two M3.5 x 25 mm screws) to attach the mounting bracket to the electrical box as shown in the following illustrations.
NOTE: For U.S.-style installations, use a #2 Phillips screwdriver. For European or U.K.-style installations, use a #1 Phillips screwdriver or its equivalent.
- For U.S.-style installations, use the four 6-32 x 3/4 in. screws.

- For European-style installations, use the four M3 x 16 mm screws.

- For U.K.-style installations (not pictured), use the two M3.5 x 25 mm screws to attach the mounting bracket to the electrical box. Insert the screws through the center openings in the left and right sides of the mounting bracket.


Install the Security Latch (Optional)
The included security latch may be attached to the touch screen so that it cannot be easily removed from the mounting bracket after installation.
To install the security latch, use a small Phillips screwdriver to screw the security latch to the top of the touch screen rear housing before the touch screen is inserted into the mounting bracket.

Connect the Touch Screen
Route all necessary cables through the rear of the electrical box, and then make connections to the touch screen as shown in the illustration below.

Observe the following when connecting the touch screen:
- Use Crestron power supplies for Crestron equipment.
- Power and data connection is provided to the touch screen by a single Ethernet cable. A Crestron PoE (Power over Ethernet) power supply, such as the PWE-4803RU, or a PoE-capable network switch is recommended (both not included).
- The USB port is used to connect compatible Crestron LED accessories to the touch screen.
NOTE: The TSW-760 may use either PoE or PoE+ to supply power to compatible LED accessories over USB; the TSW-1060 must use only PoE+ to supply power to LED accessories over USB. - Apply power after all connections have been made.
Factory Reset Button Location

Install the Touch Screen
Once all connections have been made, push the touch screen gently into the mounting bracket so that the touch screen rear housing is secured within the center opening in the mounting bracket.

If the touch screen is not level after installation, pull it out of the mounting bracket and loosen the screws holding the bracket into place. This procedure allows the mounting bracket to be rotated slightly.
Once the mounting bracket has been repositioned, retighten the screws, reinstall the touch screen into the bracket, and ensure that the touch screen is now level.
Remove the Touch Screen
To remove the touch screen after installation, carefully pull the touch screen away from the wall until it disengages from the mounting bracket.
To remove the touch screen if the security latch has been installed:
- Pull the touch screen away from the wall until the security latch makes contact with the mounting bracket.
- Insert a flat-head screwdriver into the slot on the security latch and rotate the latch into the open position, which retracts the security latch arms.
- With the arms retracted, pull on the touch screen to disengage it from the mounting bracket.


NOTE: There is a small amount of "play" in the bracket mounting, which allows room to insert the screwdriver.
Configure the Device
When power is applied for the first time, the following screen is displayed. The touch screen may take up to two minutes to boot.

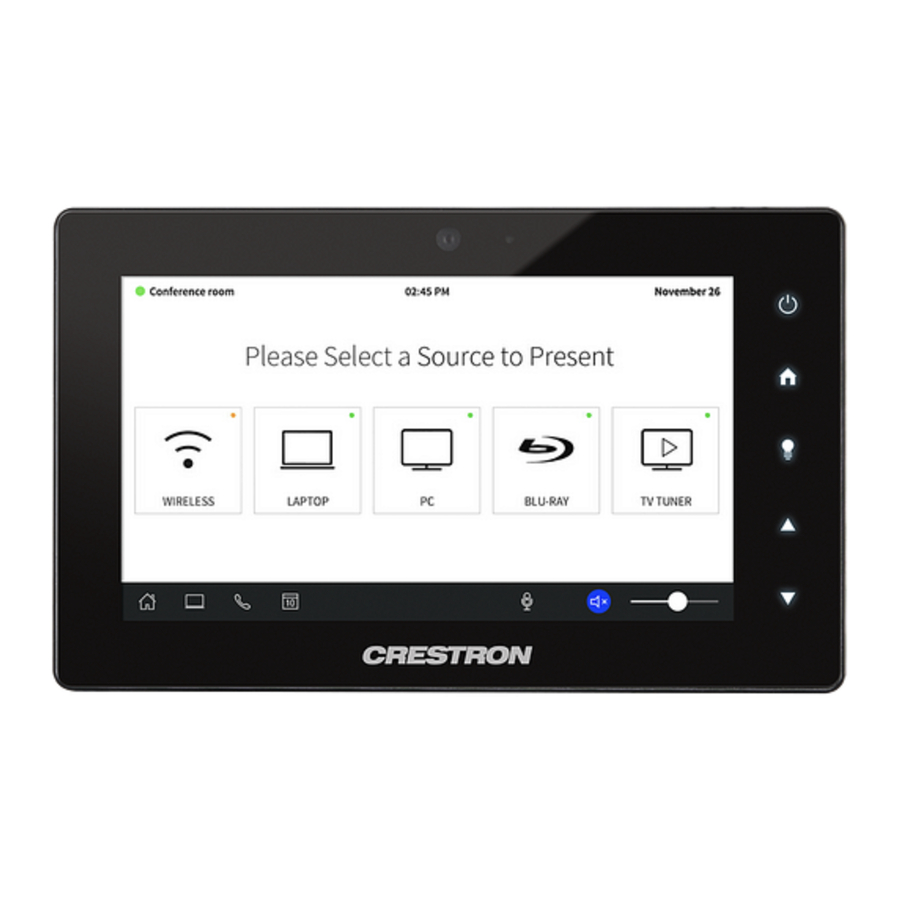
Touch the screen to display the main Setup screen (TSW-1060 shown).

Device settings for the touch screen may be configured using the built-in setup screens or the web configuration interface. For more information on configuring the touch screen, refer to the TSW-560/TSW-760/TSW-1060 Supplemental Guide (Doc. 7927) at www.crestron.com/manuals.
Access the Device Setup Screens
To access the built-in setup screens for configuring device settings, do either of the following:
- Place five fingers on the display and hold for 15 seconds.
- Press the hard keys labeled in the illustration below as 1, 2, 3, and 4 twice, in this sequence, within five seconds.


Use the setup screens to configure various settings for the touch screen, including Ethernet setup, IP table setup, audio setup, display setup, standby timeout, and diagnostics.
Access the Web Configuration Interface
The touch screen also provides a web configuration interface that is used to view and configure various touch screen settings and to select an application. The interface can be accessed using the touch screen IP address or the Crestron XiO Cloud™ service.
Touch Screen IP Address
To access the web configuration interface using the touch screen IP address:
- Ensure that the touch screen is connected to the network.
- Use the Device Discovery tool in Crestron Toolbox™ software to discover the touch screen and its IP address on the network.
- Enter the touch screen IP address into a web browser.
Crestron XiO Cloud Service
The Crestron XiO Cloud service allows supported Crestron devices across an enterprise to be managed and configured from one central and secure location in the cloud. Supported devices are configured to connect to the service. Use of the service requires a registered Crestron XiO Cloud account.
NOTE: The device may be disconnected from the service by navigating to the Cloud Services tab in Crestron Toolbox software (Functions > Device Info > Cloud Services). For details, refer to the Crestron Toolbox help file.
To access the web configuration interface using the Crestron XiO Cloud service:
- Record the MAC address and serial number that are labeled on the shipping box or rear panel of the device. The MAC address and serial number are required to add the device to the service.
- Do either of the following:
- For existing accounts, access the Crestron XiO Cloud service at https://portal.crestron.io.
- For new accounts, register for a Crestron XiO Cloud account at www.crestron.com/xio-cloud-registration.
- Claim the device to the service as described in the Crestron XiO Cloud User Guide (Doc. 8214) at www.crestron.com/manuals.
- Select the device from the cloud interface to view its settings.
Set the Time Zone
The time zone must be set on the touch screen if it will not be paired with a control system IP table.
To set the time zone:
- Access the web configuration interface using either the touch screen IP address or the Crestron XiO Cloud service.
- Navigate to Settings > Configure Date/Time.
- Select the time zone where the touch screen will be used from the Time Zone drop-down menu.
- Click Save Changes on the top right of the screen.
Select an Application
The touch screen ships with a selection of built-in applications. An application may be selected from the splash screen that displays after power is applied to the touch screen for the first time.
NOTE: Applications can be selected and configured from the device setup screens or from the web configuration interface at any time. For more information on configuring applications, refer to the TSW-560/TSW-760/TSW-1060 Supplemental Guide (Doc. 7927).
To select a touch screen application:
- Tap the Touch Here to Enable a Specific Application bar on the bottom of the splash screen. Refer to the first image in the "Configure the Device" section.
- Select the desired touch screen application from the Choose Application Below menu that is displayed.

- Click Confirm. The touch screen reboots to display the user interface for the selected application.

NOTE: If a custom user project will be used in place of an application, tap User Project. Custom projects can be uploaded using the web configuration interface or Crestron Toolbox software.
Additional Information
Scan or click the QR code for detailed product information.
TSW-560-B-S

TSW-760-B-S

TSW-1060-B-S


Documents / Resources
References
![www.crestron.com]() Control Systems for Home Automation, Campus & Building Control by Crestron Electronics [Crestron Electronics, Inc.]
Control Systems for Home Automation, Campus & Building Control by Crestron Electronics [Crestron Electronics, Inc.]![www.crestron.com]() Search Results [Crestron Electronics, Inc.]
Search Results [Crestron Electronics, Inc.]![portal.crestron.io]() Redirecting
Redirecting![www.crestron.com]() Login [Crestron Electronics, Inc.]
Login [Crestron Electronics, Inc.]

Download manual
Here you can download full pdf version of manual, it may contain additional safety instructions, warranty information, FCC rules, etc.
Download Crestron TSW-560, TSW-760, TSW-1060 - Touch Screen Quick Start Guide
Advertisement


Need help?
Do you have a question about the TSW-560 and is the answer not in the manual?
Questions and answers